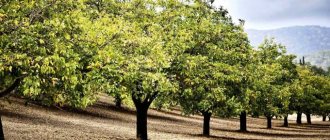
Throughout the history of mankind, there was a tree next to it, which man used to build housing and for its decoration. It has a unique texture, the pattern of which does not tire the eye. When the boards are placed horizontally, their lines make the room visually wider, and when placed vertically, they make the room taller. However, natural wood cladding may not always be an affordable option for a family's budget. As in other similar cases, imitation became a way out of the difficulty. Decorative plaster imitating wood indoors and also on the facade of a house can imitate wooden cladding of a large area or individual decorative panels. This is done in different ways.
Types and applications
Using decorative plaster, you can achieve various effects related to texture:
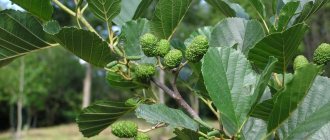
- tree bark,
- surfaces eaten away by woodworms,
- boards laid closely
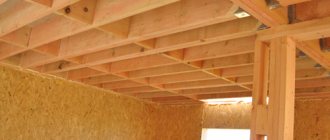
- wooden panels,
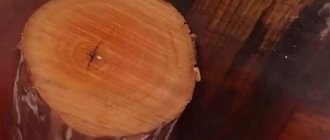
- cross cut.
Textured wood-look plaster requires compositions that do not contain fibers or large inclusions. These are mostly smooth mixtures. Decorative plaster is made from mixtures with fine filler, looking like tree bark. The exception was structural bark beetle plaster with granules from 2 mm.
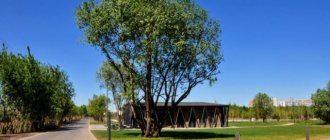
Wood-like plaster finishing is used in interiors in the form of wooden panels in the hallway, corridor or in other rooms. Such coverings look great on loggias and balconies, in the decoration of facades or small architectural forms (gazebos, walls, etc.), fences and even paths. Surfaces that imitate bark or wood cuts look advantageous in various interior styles.
Before working on the wall, practice on sheets of plasterboard, fiberboard or plywood.
The imitation wood made by professionals is very close in texture to natural wood. In fact, decorative wood-look plaster can be successfully done with your own hands and by those who are still new to the plaster business. It's all about the desire to learn, practice and the desire to achieve high quality.
What's so good about this finish?
The main advantages of this type of finishing (compared to natural wood) are lower cost and greater durability. Decorative plaster for wood:
- doesn't rot
- withstands temperature fluctuations,
- resistant to precipitation,
- does not burn,
- can be renewed by coloring,
- hides minor flaws,
- "breathes"
- environmentally friendly
Materials used and preparation for application
Compositions on various bases can be used as textured wood-look plaster: acrylic, mineral, silicone. These are mainly smooth mixtures or with fine-grained filler, for example, decorative plaster Marmorino tree bark. To obtain the bark beetle effect, structural compositions are used. Often, decorative plaster imitating wood is done by home owners with their own hands, and from materials made independently. For example, they can imitate wood even using ordinary putty.
The work does not require colored mixtures, since the coatings, after completing the formation of the texture, are painted and protected with wax or varnish. As a result, decorative plaster is obtained to resemble valuable or aged wood, as needed in a particular interior.
Achieving an antique plaster effect has become increasingly popular lately.
This type of finishing can hide minor flaws and flaws in the base surface. However, in all other respects it requires the same preparation of the base as other types of coatings. Only in this case can a long, multi-year service life be achieved.
Prepared base:
- cleared of remnants of the previous finish,
- if necessary, leveled and repaired,
- removes stains and traces of grease,
- primed,
- dried thoroughly.
If the surface of the base does not hold the coating well (for example, paint or foam), be sure to install a reinforcing mesh.
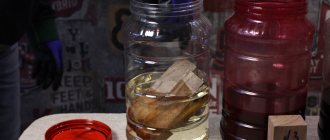
Turning metal or plastic into wood is easy
In the photo – KAOWA SEMENTOL – “liquid wood”
On the Internet you will find many videos in which professional artists, using special brushes, foam swabs and other means, recreate the texture of wood on various objects. After varnishing, objects finished in this way are practically indistinguishable from their wooden counterparts.
Stock up on the necessary tools, patience and try to do something like this. Unfortunately, you most likely will not be able to draw the texture of wood by hand. But don’t despair, there is a way out - this is a special paint that imitates the structure of wood.
For example, in some specialized stores you will find paints and varnishes presented by the KAOWA SEMENTOL brand. On cans of these products you will see such designations as “mahogany paint” or oak, ash, teak, etc.
That is, these paints and varnishes make it possible not only to imitate the arrangement of wood fibers on certain surfaces, but also to reproduce the texture of valuable or exotic wood species. This advantage is especially important when decorating furniture and other elements of the surroundings.
Scope of application
The photo shows a variety of paint colors that imitate wood texture
Special paints and varnishes, sold as liquid wood paint, are intended for treating various surfaces with high and medium density. These coatings can be used both for interior finishing work indoors and for exterior finishing.
The paint can be applied with equal success to wood, plastic, metal, ceramic, glass and other substrates with a matte, smooth and glossy surface. Specialized paints to imitate wood texture do not contain wood-based fillers and are therefore resistant to the negative effects of environmental factors.
As already mentioned, the use of special compounds is important when decorating furniture and other elements in the interior with your own hands.
These paints are widely used in workshops involved in improving car interiors. Thanks to special paints and varnishes, unpresentable plastic dashboards, lids of various boxes and other surfaces in the car can be made “wooden”.
Despite the fact that the price of paints and varnishes that imitate the texture of wood is several times higher than the cost of traditional enamels, this method is still more affordable than paying for the services of a professional artist.
Features of applying “liquid wood”
The use of special paints and varnishes is no more difficult than ordinary painting of wood. But there is one condition: you must use the right tool: a hard, flat brush based on natural bristles.
The length of the bristles determines how pronounced the texture of the wood will be. That is, if you need the fibers to be well drawn, use a brush with short bristles. The longer the bristles, the more poorly defined the texture will be.
The paint is applied directly from the can without special preparation and without the use of solvents. It is necessary to decide in advance on the required color, since it will not be possible to change the tone or color of the paint during application.
Important: Special paint designed to imitate wood is not mixed, but only shaken immediately before opening the can.
It is necessary to prepare the surface before decorating in the same way as before applying any paints based on organic solvents. That is, the base is cleaned of unevenness and dirt, primed and only then painted.
If a glossy finish is being decorated, it should be matted with zero sandpaper to ensure maximum adhesion.
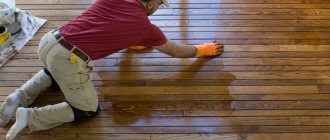
Forming veins with a hard brush
The paint is applied in long stripes from one edge of the product to the other. You should not rub the applied layer, as is done with conventional coatings, as the texture of the imitation wood fibers will be damaged. A shiny film appears literally 15 minutes after application, and complete drying occurs in 1-3 hours, depending on temperature and humidity.
According to people who have used KAOWA SEMENTOL in accordance with the instructions indicated, the finished coating is an order of magnitude superior in quality and similarity to cut wood.
Technology and application methods + video
Bark of tree
As an example of how decorative plaster with the effect of wood bark is made, let’s take a finish made from the least expensive materials.
- The working solution is prepared from gypsum plaster. The purchased dry mixture is diluted in water.
- The solution is applied to the prepared base using a trowel in an even layer of 2-3 mm.
- The initial relief is immediately applied with a roller moistened with water.
- When (after 20-30 minutes) the surface of the plaster dries a little and does not sag when pressed lightly, it is moistened with a spray bottle and the protrusions begin to be smoothed. This is done with a spatula so that after it passes between the smooth areas, ruts remain - deepening cracks in the bark. After each long smoothing movement of the spatula, wipe it with a damp cloth so that the lumps of solution remaining on it do not spoil the surface.
- The surfaces are allowed to dry completely (usually a day). After drying, small flaws that can be scratched are removed with a spatula.
Wax is usually used for the protective layer of decorative plasters. In this case, it can be replaced with non-woven glue mixed with water-soluble acrylic varnish. The glue is diluted, brought to readiness, and mixed with varnish in a ratio of 1:0.5. Then the selected color is added and after stirring, the “budget wax” can be used. It is applied with a trowel. With this application, all the depressions are filled and the surface is smoothed. Excess is removed with a damp sponge, and the surface is smoothed again with a trowel. This type of finish can be varied in various ways, for example, you can apply a little paint of a different tone with a sponge.
First texture
Step 1
Create a new document of 1500 x 1500 px and fill it with #c58352 color.
Step 2
Press Ctrl + Shift + N to create a new layer. Set the foreground color to #bb7f4d and the background color to #472f0f, then go to Filter > Render > Clouds.
Step 3
Convert the layer to a Smart Object and go to Filter > Render > Fiber.
Step 4
Add a Levels adjustment layer above the current one and increase the contrast as much as possible.
Step 5
Create a new layer above Levels. Select the fiber layer, then activate the Magic Wand Tool. Click on the document, highlighting the red areas.
Press Ctrl + I to invert the selection, and then Ctrl + C to copy it. Create a new layer and press Ctrl + V to paste the selection. Hide or delete the Levels as we no longer need them.
I also turned off the fiber layer so you can see the result more clearly.
Step 6
Double click on this layer, select Emboss (Bevels & Emboss). Set the Highlight color to #1c180e and the Shadow to #64522c.
Turn on the fiber layer and get this result:
Step 7
Create a new layer and use the Clone Tool to remove similar details, making the texture more natural.
Step 8
Add a Hue/Saturation adjustment layer to slightly desaturate the surface.
Step 9
Use a Curves to adjust the contrast and color of the texture.
Select all visible layers, then press Ctrl + G , merging them into a group. Name it Tree 1, then hide it.
Coloring
Of course, creating texture is the most labor-intensive task in wood finishing. However, painting the plaster is the final stage of finishing. Therefore it must also be of high quality.
Before painting, a primer is applied to the surface with a brush along the wood lines, colored in the desired tone. The dye used is water-soluble.
The best way to convey the richness and depth of the natural color of wood is with translucent compounds, applying layer after layer of compounds of different shades. To obtain a budget coloring composition, you need to mix sequentially (with stirring after adding each next component) the following components:
- a little primer
- color scheme of the desired tone,
- white water-based paint,
- some dry wallpaper glue.
The mixture is applied with a brush, following along the fibers. Excess mixture is removed with a rubber spatula. After this base layer has dried, you can apply a composition with a different shade. The paint for subsequent layers is made without wallpaper glue and primer - only water-based emulsion with dye.
There are many options for coloring and coloring compositions. Here, as they say, dare and create. Just try it first on “experienced plots”.
Second texture
Step 1
Create a new layer and fill it with color #c19356. Convert it to a Smart Object .
Step 2
Duplicate this layer, go to the menu Filter> Design> Mezzotint (Filter> Pixelate> Mezzotint) and select Strokes .
Step 3
Go to Filter> Blur> Motion Blur (Filter> Blur> Motion Blur), and then set the following values.
Step 4
Duplicate the layer and rasterize it. Go to Editing > Transform > Rotate 90° Clockwise (Edit > Transform > Rotate 90 Clockwise).
Step 5
Convert it to Smart Object again. Add Motion Blur .
Step 6
Create an adjustment layer Hue /Saturation, desaturating the resulting layer.
Step 7
Press Ctrl + Shift + Alt + E , merging all visible layers into one new one. Hide everything except the original fill layer and the merged one. Set the latter's blending mode to Overlay and Opacity to 100%.
Step 8
The middle part of the texture appears blurry and less detailed. To fix this, duplicate the layer and create a mask for it. Use a soft black brush to erase the bottom and top, making them less visible.
Step 9
Duplicate the layer twice, then drag it to the middle, making it more detailed. Use a layer mask to soften the edges and blend areas with the bottom layer.
Step 10
Group all layers with blending mode Overlay (Overlay). Set the group mode to Overlay (Overlay) with 100% opacity. Use a Curves to lighten the texture details.
Step 11
Return to the Tree 1 group. Duplicate the layer from step 3 of the first section, then drag it to place it above the Tree 2 layers. Go to the menu Selection> Color Range (Select> Color Range) and set the Scatter (Fuzziness) 170.