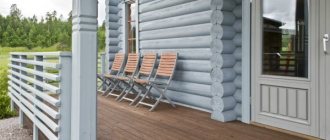
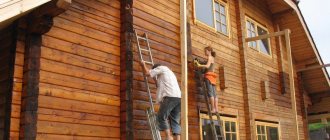
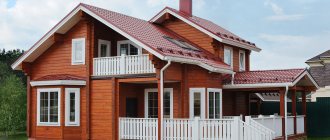
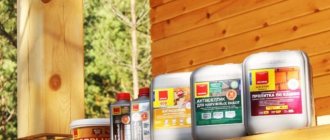
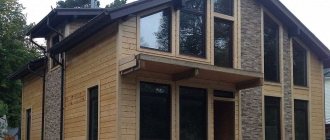
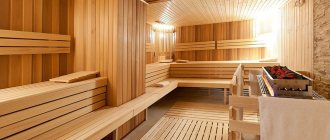
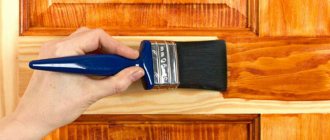
Having bought a plot of land, the owners think about its improvement. The main priority remains building a house. One of the most popular types of private construction is the construction of wooden buildings. They are distinguished by their pleasant appearance, reliability and environmental friendliness. But to preserve these qualities, you need to protect your home from moisture and dust. The best way to preserve beauty is painting a timber house.
- Preparation
- Carrying out painting
Why paint wooden houses
Any structure requires attention and care. The negative influence of precipitation and temperature changes reduce the performance characteristics of the building. Wood is one of the best building materials, but it requires a special approach to protection from external environmental influences. Wood is negatively affected by:
- High humidity. This factor leads to swelling of the wood , the appearance of cracks and subsequent deformation. Dirt collects in the cracks that appear, which is a favorable environment for the development of mold and mildew. With increased humidity the log house darkens and the house loses its attractiveness.
- Sudden changes in temperature. Changes in temperature conditions lead to warping of wood.
- Ultraviolet radiation. Exposure to sunlight causes the material to change color.
- Biological factors. Insects love to settle in wood, damaging its structure with their vital activity. This makes the building material unsuitable for further use.
To prevent negative impacts from affecting the reliability of the structure and to preserve the appearance, is painted. At the same time, finishing work is carried out not only on the outside, but also on the inside of the walls.
Taking into account all the features of external factors, you need to prepare for finishing work . The exterior finishing of the building must be carried out no later than 2-3 months after the completion of the main construction. Painting the timber of a wooden house made from glued material can be done earlier, since it does not require much time to shrink. Before starting work, it is necessary to select the paint compositions that will be used to treat the surface of the external walls.
Technology of painting a house made of timber
The stages of painting indoors and outdoors are slightly different. Before painting the outside of a log house, you need to learn the rules of the job.
Outside
On the outside, they begin by preparing the surface, cleaning it and sanding it. The surface is primed to improve adhesion and save coloring agent. After the primer layer has dried, paint is applied. The process is carried out as standard, paying attention to the ends and seams.
The surface is primed to improve adhesion and save coloring agent.
Inside
They immediately begin by cleaning the surface, then eliminate surface defects, apply antiseptic compounds, and carry out grinding. When the surface is vacuumed, paint is applied. It is important that each layer dries.
It is important that each layer dries.
Painting materials for external use
Painting the outside of a house made of timber is carried out with special compounds , which are schematically divided into two types: impregnations and paints and varnishes.
Impregnations
These substances are used before applying dyes, which penetrate deeply into the deep layers of wood and completely fill the free space. The use of impregnations completely helps solve several important problems:
- Preparing the surface for painting.
- Uniform distribution of dyes to match the selected color tone .
- Substances fill cracks, making the wood structure stronger, eliminating unevenness and roughness. This allows you to reduce the consumption of the coloring composition.
- Some compounds do not adhere well to wood structures and have low adhesion. Impregnation improves the quality of adhesion.
- Protection of wood from the adverse effects of the environment, insects and fungi.
Each type of impregnation has its own composition that solves specific problems, so the main direction of use of treatment compositions should be determined.
Paints and varnish compositions
The main parameters when choosing paint and varnish coatings are performance indicators and shade. The service life is determined by the resistance of the composition to moisture, ultraviolet radiation, and temperature changes.
When deciding on the color scheme for external walls, it is worth considering that the wood itself has a pleasant shade and a unique natural pattern. Therefore, if the surface is well processed and has no visible damage, it is better to use transparent varnish materials.
Suitable for this case:
- Polyurethane varnish. These compounds have a high coefficient of resistance to external factors, are strong and durable. That is why they have the highest cost. If the surface to be treated has a large area, then using this material will cost a lot.
- Water based dyes. They absorb and dry quickly, but require additional treatment with a waterproofing compound, otherwise the paint may become stained or simply washed off the surface. They are recommended to paint timber inside the house.
As a rule, old wooden walls have many irregularities, cracks and defects that cannot be eliminated with transparent varnish; this will require painting the timber outside the house with opaque substances. Then the question arises of choosing a dye, its color and texture. The domestic building materials market offers a wide selection of paints for outdoor use.
The following compositions are suitable for wooden surfaces:
- Facade oil paints. They mask defects well, but have low performance indicators. Literally after 3-4 years the surface needs to be updated. The material fades quickly.
- Alkyd compositions. They have greater resistance to ultraviolet radiation and moisture, but their cost is higher than that of façade ones.
- Acrylic compounds work best. They are resistant to moisture, UV rays, and sudden temperature changes.
- Latex. They have excellent performance characteristics, set quickly, and do not contain toxic components. Well protects the surface from mold and insects.
- Rubber paint. The newest representatives of coloring materials have improved performance characteristics. They have good strength, elasticity, and resistance to unfavorable climates. The paint adheres perfectly, forming a reliable waterproofing layer. At the same time, a house covered with rubber paint breathes, not allowing moisture to linger inside.
Whatever type of paint and varnish composition you choose, it is important to correctly calculate the required amount of material for painting work so that the paint layer is applied simultaneously. If the exterior of a timber house is painted at different times, streaks will remain and joints will be visible, and this will spoil the appearance of the building.
Useful recommendations for purchasing paint and painting
When choosing and purchasing paint for the interior decoration of wooden walls, it is very important to pay attention to the date of manufacture of the composition and the availability of certificates confirming its quality and sanitary compliance. If the seller cannot provide documents for the product, and the production date is not stamped on the packaging, but is written on paper and pasted on top, so to speak, interrupted, then it is recommended to immediately refuse to purchase such paint, especially if a fairly expensive version is purchased.
The fact is that if the paint is expired or frozen, then it may simply not lie on the surface, even if it is well prepared, and you can determine the quality of the composition only by opening the package and trying to apply it to the wood. For example, it will not be possible to paint anything with a frozen solution, since the paint will most likely curdle and have the consistency of liquid cottage cheese.
High-quality paint should spread easily over the surface of the wood, while having high hiding power
If the paint is of high quality, it will be easily applied to the surface, which means that painting the walls can be done by a person who has never even performed such repair work before.
Next, it is worth considering those factors that will directly affect the final finishing result.
- First thing to note. It is a common phenomenon that many homeowners, when doing their own renovations in a house or apartment, are careless about the preparatory stage of work, since they consider it unnecessary. However, if the base for the decorative coating is uneven and untreated with protective agents, you should not expect the desired result. In addition, after a short time, even defects that are invisible immediately after completion of the work will begin to appear, for example, such as blue discoloration, blackness of the wood, or “resin pockets” near knots. Therefore, the preparatory process must be considered mandatory and carried out as efficiently as possible.
- When treating wood with one of the protective compounds, it is necessary to very carefully process the end parts of logs or beams if they face the rooms. If the walls of the house are covered with clapboard, then its side surfaces should also be carefully treated with antiseptic solutions.
- All protective and coloring compounds are applied to wooden surfaces in thin layers along the grain, otherwise their absorption into the wood will be uneven, which will negatively affect the overall appearance.
This simple “improvement” from ordinary rubber rings will greatly simplify the process of applying paint with a brush from a can.
- To ensure that there is no excess paint on the brush, and that it does not flow, but lies flat, it is recommended to use a simple device consisting of two stationery or ordinary rubber bands. One of the rubber bands is put on the bottom and top of the can, and the second along its diameter. The second elastic band will hold the first one, preventing it from sliding to the side.
After dipping the brush into the paint, press it against the stretched rubber band, leaving excess solution in the container.
- When applying paint to the surface of wood, do not try to cover it with a thick layer at once, as the painting will turn out sloppy. If you plan to get an opaque surface, then you should apply the paint in several thin layers, each of which should be applied after the previous one has completely dried.
- When painting walls covered with wooden clapboards, it is best to apply the final top coat starting at the top and gradually moving down - this method will help make the surface of the wall smooth.
- Paint can look different in a can and on the wall, so it is recommended to do a test paint job, that is, apply the solution to a small section of the wall in an inconspicuous area. It is best to choose the lower corner part of the surface.
- In order for the decorative layer to lie evenly on the surface, experts recommend adding a color to the primer that is one or two tones darker or lighter than the base color.
- The optimal temperature for painting surfaces is 22÷25 degrees. You should not carry out this process in hot weather, as the paint will dry too quickly and therefore unevenly. If the temperature is too low, the fluidity and hiding power of the compositions deteriorate, and the drying period increases.
How to choose a shade for a wooden structure
Paints for coating timber are divided into two types: matte and glossy. Of course, glossy ones look more attractive due to their characteristic shine. But on such a surface damage and cracks are visible, which does not allow achieving the main task - eliminating defects. Matte compositions in this case look more advantageous.
To determine the color of paint for houses made of timber, use the advice of professionals:
- The combination of white and dark walnut is considered a classic when decorating a façade.
- Small houses in brown shades of oak look good. At the same time, “light oak” will look good on the facade of a building of any architectural form.
- Blue, light shades are used only on a smooth, even surface. These colors go well with the gold and mother-of-pearl shades of the decorative decorations of the building.
- When choosing light tones, you must remember that the tone should differ from the natural one in no more than 3 tonalities.
- Warm walnut shades look great on low-rise cottages.
Recently, it has become very popular to paint external walls using the European method. This technology involves applying the selected shade of paint, after which the painted surface is coated with a varnish composition. Thanks to this method, the paint remains bright much longer, and the varnish does not leave streaks.
Comparison of painting with other types of finishes
For analysis, we will take the most popular materials and compare them according to the most noticeable parameters during operation. From the table you will see that paints for wooden facades are not a panacea for all occasions, but in many respects they are better and more practical than, for example, siding or ventilated facades made of porcelain stoneware.
| Dye | Siding | Block house | Brick | Porcelain tiles | |||||||
| Decorative properties | Perfectly preserves the texture and characteristics of the wood surface | Completely hides the base | High, imitates a rounded log | Completely covers the tree | Very decorative | ||||||
| Easy to install and apply | Very easy to apply, just need a brush or roller | Difficult to install, requires special tools | Difficult installation | Difficult installation, requires a concrete foundation | Difficult installation | ||||||
| Price | Cheapest finishing option | More expensive than any type of paint | More expensive than siding | One of the most expensive | As good as brick | ||||||
| Durability | 6-10 years | 20 years | 10 or more years | 50 years | 50+ years | ||||||
| Ability to hide design flaws | Virtually no hiding | Hides completely | Hides | Hides | Hides | ||||||
| Weather resistance | High, but depends on the choice of paint | High | High | The tallest | As good as brick | ||||||
| Resistance to mechanical stress | Resistant only to accidental scratches and impacts. | Does not protect, can be destroyed even with a slight blow | Average | High | The most durable of finishes | ||||||
From the comparison it is clear that the most budget option is painting the walls and other wooden elements of the facade. In terms of mechanical and fire-fighting properties, paint is inferior, for example, to porcelain stoneware or brick, but with the money saved when purchasing material and paying professional builders, you can buy the most modern fire retardants, which make wood completely non-flammable for several decades.
Based on the results of the comparative analysis, you can make a choice in favor of paint. Now you need to make another equally important decision - what paint to paint the outside of a wooden house. Manufacturers produce dozens of types of paints and varnishes intended for external woodwork, but only a few of them may be suitable for a wooden house.
It depends on the:
- house material (timber, logs, blockhouse, lining, chipboard, etc.);
- climate zone;
- type of previous finish;
- budget.
As for paint manufacturers, it is best to focus on well-known brands - Tikkurila, Dufa, Finncolor, Beckers, any of the brands that are part of the Akzo Nobel concern. But you should buy them in large retail chains or well-known online stores. Unfortunately, there are now a lot of fakes and outright hack work on the market, so if you decide to save a few rubles, you risk ruining your home and incurring significant financial losses - redoing poor-quality painting is a very labor-intensive and expensive process.
You can find out what paint is best to paint the outside of a wooden house on the official websites of the manufacturers; if the paint offered to you is not there, then you should not buy it, even at the most attractive price.
Paints used for interior work
Painting of timber inside a house is carried out using painting materials that differ significantly in technical characteristics from façade paints. To cover internal wooden walls use:
- Wax. It protects wood well from moisture, increases its service life, gives the surface shine and a pleasant appearance. But the cost of this material is quite high.
- Mastic. The material is used to level the surface. The wood acquires a velvety structure, thanks to which the natural grain of the wood is visually enhanced.
- Varnish. The material makes the surface smooth, but does not allow the walls to breathe. It is better to use it in rooms with low humidity.
- Acrylic, alcohol and oil paints. The saturation of color pigments allows you to eliminate defects, and the variety of color palettes will be a good option for creating an interior of any type.
Each composition solves its own problems, so the choice of material for surface finishing must be carefully considered.
Reasons for the need to stain wood
Why is it generally necessary to treat wood with various paints and varnishes? It would seem that the natural texture of wood is attractive in itself, and in most cases there is no particular need to embellish it? And all this is due to the fact that impregnation and painting of wood is capable of preserving its physical and aesthetic properties for the longest possible time, such as integrity, strength, warmth, environmental friendliness of the material and the beauty of its textured pattern.
As you know, the first enemy of wood is moisture, which, when it penetrates the structure of the material, has a destructive effect on its fibers. As a result, they swell and deform, losing elasticity and strength. Inside a house with damp walls, various fumes that are unpleasant for the senses inevitably dominate, which easily permeate the structure of the wood. In addition, dampness always “kicks off” the biological decomposition of wood, causing the appearance of mold and blue stains, which, in turn, in addition to creating an unhealthy atmosphere in the premises, also weaken the strength of the building material.
Paint and varnish products, as well as special protective compounds, are primarily designed to protect wood from negative external influences and preserve its structure from destruction. And, of course, the task is always to preserve the aesthetic texture of the wood unchanged or to decorate it in accordance with the intended interior design.
Stages of facade painting
Understanding how to paint a house made of timber will help you monitor the correctness of the work at all stages. The owner needs to know how to properly apply paint compositions, technology and stages of facade improvement work.
Preparation
For any repair or finishing work, a preparatory stage is carried out first. To ensure high-quality surface preparation before painting, the following measures are carried out:
- Clean wood from old coatings and dirt.
- Using tools, remove the top layer and level the surface. The use of grinding tools allows you to remove resin residues and remove roughness.
- Large defects, cracks, holes from knots are puttied. You can proceed to grinding work only after the putty has completely hardened.
- Sharpening of timber. This preparation stage is carried out using electric grinders; coarse sandpaper can be used.
- Polishing and treating wood with mastic to give it a glossy finish. Be sure to treat the ends with mastic to prevent cracking of the log. It is this part of the timber that is considered the most vulnerable to moisture penetration.
During preparatory work, a lot of dust and dirt arise, which then settles on the wood. Before applying coloring compounds, all dust must be removed. It is worth considering that you cannot use detergents for this. Dust can be removed using compressed air.
Carrying out painting
Before using paint, the surface must be primed. The primer is applied in several layers. It is necessary to improve adhesion with decorative dyes.
Before the main work, surface testing is carried out. The paint is applied to a small area to see if the owner is satisfied with the shade and quality of the paint.
Façade painting should not be carried out in wet weather or rain. With high humidity, wood swells, paint can crack and crumble. Also, do not apply paint at low temperatures.
Painting the timber of external walls can be done in two ways:
- Manual. The painting composition is applied using a paint brush and roller. This method provides a larger layer of paint, but requires serious effort and time.
- Mechanized. The use of spray guns and spray guns saves paint consumption by 20%. The paint lays down neatly, in an even layer.
When painting by hand with a brush, the paint is applied only vertically. With horizontal strokes, unevenness will be visible, and the surface itself will be poorly painted.
To paint a house efficiently, paint is applied in several layers. Each layer is painted only after the previous one has completely set. You should not drag out the process of painting walls for a long time. This will cause the shade to change and differences between areas will be visible.
Do-it-yourself façade coating technology (photo)
You can paint the house with a brush or using a spray gun, however, the latter method requires dilution to a more liquid consistency, which is sometimes undesirable.
To work you will need:
- Brushes – paint brush for primer, flute.
- Spray gun for mechanized painting.
- Sandpaper, Sanding machine.
- Available means are empty containers and a ladder.
- A set of workwear.
- Protective equipment – gloves and goggles.
Before painting the surface of the facade, it must be prepared; processing is carried out in several stages:
- Cleaning from dust, dirt, paint, oil stains and solvents.
- Grinding.
- Cleaning with a brush or blowing a vacuum cleaner.
- Preliminary primer with fire-retardant, fungicidal and antiseptic effects.
- Primer to increase adhesion.
Each layer of primer must dry before applying the next one. The drying time is indicated by the manufacturer of the composition. The quality of painting and the durability of the coating depend on the thoroughness of pre-treatment. Then the paint and varnish composition is applied in 2-3 layers according to the manufacturer’s recommendations.
ATTENTION: When using a brush, painting movements should be in a vertical direction - up and down, horizontal movements give an uneven stroke.
How to paint profiled timber
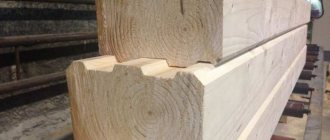
Profiled timber is a material that is often used in the construction of wooden buildings. It has good workmanship. Painting the facade of a house made from this material has its own characteristics.
Since profiled timber undergoes additional grinding in production, it has a smooth surface. Therefore, there is no need to carry out preparatory work to level the surface. But you will need to treat it with an antiseptic as quickly as possible so that the fungus does not settle.
Applying a primer is essential as it allows the paint to bond better to the surface. It is better to paint laminated timber with oil or acrylic paint. You should not use water-based compounds, as numerous stains remain on the surface.
It is worth saying that you should not delay with the facade work of wooden houses, as they can quickly lose their attractiveness. Paint not only allows you to preserve the natural beauty of a wooden frame, but also protects you from the harmful effects of precipitation and microorganisms.
Step-by-step instructions for painting a wooden wall indoors
By adopting all the little tricks listed above, it will be easier to cope with the preliminary stage and painting the walls. Having prepared all the tools and workplace necessary for the process, you can proceed to the finishing itself.
The “lion’s share” of the total amount of work in the process of painting wooden walls is always occupied by the preparatory stage
The main part of the work is preparing the surface for painting, which is why they require a more detailed description.
| Illustration | Brief description of the operation performed |
| For preparation and painting, you need to have at your disposal some of the tools shown in the illustration. In addition to them, you will need a grinder with replaceable abrasive paper blades and, possibly, a grinder with an iron brush. If the wooden wall has an old coating, you can use a hair dryer and a scraper (trowel) to remove it. | |
| The first step is to clean the surface of the old paint coating (if there was any). To do this, the paint layer is heated until it softens and peels off from the wood, and then is removed with a scraper or spatula. This work is quite time-consuming and labor-intensive, but it must be done efficiently, otherwise the remaining paint will appear through the new decorative layer as unaesthetic irregularities. | |
| If the wall does not have an old coating in the form of a paint layer, but has acquired an unrespectable appearance during use, or wallpaper has previously been glued to it, its surface must be thoroughly cleaned by removing the top thin layer of wood. | |
| Restoration of such a surface is carried out using a grinder, on which a brush with soft metal bristles is installed, and then a grinding machine with first coarse-grained (P80÷P120) and then fine-grained (P150÷P180) sandpaper attached to it. In addition, cleaning the wall or its individual areas protruding above the general surface can be done using an electric plane. | |
| When the wood is cleaned, its surface should be sanded with a fine bristle brush or sandpaper. In the case where a wall made of new wood is being prepared for painting, it also needs to be sanded smooth. Cleaning and polishing difficult places, for example, between two logs of a log house, can cause a lot of difficulties. But here, as they say, there’s nothing you can do—you’ll have to “sweat” if you want to get a high-quality result. | |
| If you don’t have a sanding machine, you will have to sand the walls manually - this is a very difficult and time-consuming process, so it’s still better to purchase a specialized tool, since it will come in handy more than once in a wooden house. The sanded surface must be cleaned with a vacuum cleaner to remove any dust generated during the sanding process. | |
| The dust-free wooden surface is then coated with one of the selected protective agents - it can be an antiseptic and fire retardant, or one of the compositions described above. This operation can be carried out using a roller, a wide brush or a spray gun, depending on the topography of the wall and its area. If it is log, then the work will go faster if you carry out this process using a sprayer. At the same time, we must not forget about the need for increased precautions - many protective primers are very toxic before absorption and drying. | |
| As a preparatory, and sometimes even the main decorative layer, one of the types of varnish is used, which is applied with a wide soft brush. | |
| If, after the primer has dried, you plan to apply paint or a dark tinting varnish to the surface, then you should protect the ceiling from contact with the solution. To do this, it is recommended to stick masking tape onto the ceiling along the upper edge of the wooden wall, which can be easily removed upon completion of the work and will not damage the plastered or painted ceiling surface. | |
| To paint wooden walls, you will definitely need a soft brush and roller. The roller will significantly speed up the work, as it covers a large area of the wall at once and evenly distributes the paint solution over it. True, this is only possible on flat surfaces - when painting a log wall, a roller will not be a great help. | |
| A brush is needed for painting hard-to-reach places, for example, corner areas or horizontal joints between logs. It is recommended to paint in two or three approaches, but each layer must cover the entire area of the wall, otherwise the paint will lie unevenly. Each subsequent layer is applied only after the previous one has completely dried. |
So, the process of painting wooden surfaces in a house is a very labor-intensive, large-scale task, which, however, any owner must cope with. And for successful work, in addition to your own desire, you must:
- Have the necessary tools of good quality.
- Select and purchase high-quality primers and paints for preparing and painting surfaces.
- Carefully, without simplification, carry out all the preparatory processes, without convincing yourself that “it will do.”
- Do the painting without rushing and without trying to complete it in one go, that is, do not apply the paint in one thick layer - this approach will result in nothing but drips, overuse of paint and a sloppy surface.
If you strictly adhere to all these conditions, the coloring will definitely turn out the way it was originally intended, that is, neat and uniform, and the finish will last as long as possible.
And at the end of the publication, we invite you to watch an informative video in which the master tells and shows how to properly paint the inside of the walls of a house made of natural wooden beams.
Features of protective and decorative products based on acrylic dispersion
It is worth noting that all of the above products do not contain solvents, so they do not have a strong odor and are absolutely safe. And acrylic dispersion as a base is the key to the durability and practicality of coatings, since it is acrylic resins that provide vapor permeability and elasticity. Therefore, regardless of the type of product used, no cracking, peeling or peeling is guaranteed. Simply because all the unpleasant phenomena mentioned above happen precisely with paintwork materials, which form on the surface of wood not a film that can adapt to “moving” bases, which include natural wood, but a “crust”.
Another important property is that impregnation, paints, oils, and varnishes are easy to use, do not require special skills and can be applied in various ways. At the same time, no streaks, drops or streaks are formed during the application process, and the coating is uniform without excessive effort.
Universal floor paint
