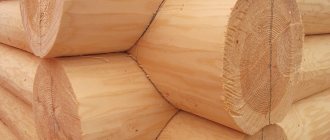
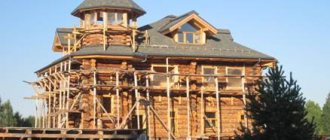
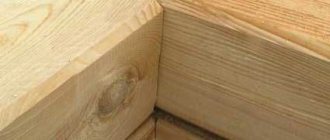
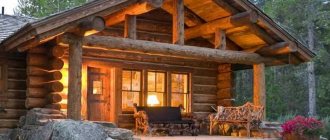
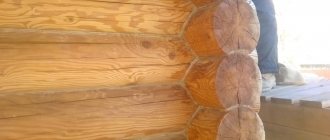
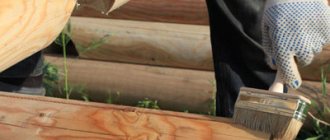
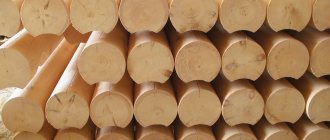
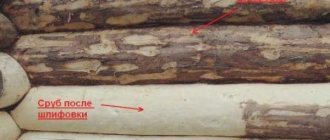
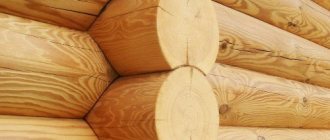
Wooden buildings are extremely attractive, both from the point of view of environmental friendliness and protection from the cold, and their appearance. Now there is a real trend towards building houses made of wood, and similar buildings, clearly not built in Soviet times, can be seen in various regions of the country. However, all the advantages of wooden houses appear only if there are no gaps between the logs in their walls. And in this material we will tell you exactly how to close these seams using traditional and modern methods.
Advantages of log houses
But first, I would like to go through the many advantages of such buildings, which made them so popular among our compatriots, and on a global scale in general. So, let's focus on the main ones:
- Environmentally friendly. Houses made from natural materials are completely safe for the health of the people living in them. Moreover, a person in wooden houses gets sick less, has higher body tone and vigor;
- Walls made of wood, with similar durability and strength, will be much thinner than their brick counterparts. So these houses have more space;
- Wood is a very mediocre conductor of temperature. Thanks to this, such a home is cool in summer, and heat loss to the outside is minimal in winter. Consequently, such a structure warms up faster, and less resources are spent on maintaining comfortable temperature conditions;
- Wooden houses are lighter than concrete or brick ones, so the construction of a massive foundation is not required;
- Wooden walls are very pleasing to the eye, so you can save a lot on finishing activities.
And this is only a small part of the advantages that such buildings have. Listing all or even most of them would be a very lengthy process. But already what is mentioned above is enough to understand the reasons for the newly increased popularity of the tree. It is important that much of the above may not be available if the joints between the logs are not properly insulated.
Preventing cracks: tips and tricks
Most often, the problem of cracks in a log house log is solved by sealing it with sealant. However, this is already a radical decision, although it is more correct to take measures to prevent the immediate appearance of cracks in the wood.
The first step is to create the right conditions for drying lumber.
- The owner must remember the following point: the number and size of cracks directly depends on the drying time of the wood. Therefore, it is recommended to carry out this operation for as long as possible.
- Another important point, which can also affect the appearance of cracks in the structure of the log, is the creation of such conditions for the wood so that it does not lose its natural ability to breathe.
The tree needs to be provided with a constant flow of fresh air . This can only be done if an optimal temperature regime is created and the material is protected from direct sunlight.
By creating such conditions for the tree, you can be sure that moisture will evaporate from all layers of wood evenly, and this will significantly reduce the likelihood of cracks and other unpleasant defects in the structure of the log.
What happens if you don't repair cracks in logs?
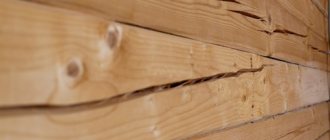
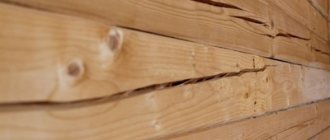
The logs of the log house, covered with a web of cracks, as well as deep crevices, look extremely unattractive, which is why the aesthetics of the structure suffer. But besides this, cracks are a source of many different problems that bring the moment of the first repair closer.
Taking this into account, it is necessary to be very attentive to the condition of the logs and take action at the first appearance of cracks. The main negative point that manifests itself if there are cracks in the logs is a significant decrease in the strength characteristics of the building.
This happens because at the stage of developing the building project, strength limits were laid into it, taking into account the homogeneity and integrity of the material. The appearance of cracks in the logs of a log house can significantly reduce the service life of the material , and because of this defect, destruction of the entire supporting structure can begin.
How our ancestors did
Previously, when there were simply no technologically advanced insulating materials on the market, our ancestors used moss, hemp or tow in their old log houses. However, even now many decide to use such authentic methods. Moreover, many masters still talk about their exceptional effectiveness. Finally, the advantages are that in this case we are talking about natural materials that are safe for health.
Moss can be placed in the cracks between logs without any additives. However, finding sphagnum in sufficient quantities today is not easy. As for tow or hemp, in this case the ideal solution is to add a solution of gypsum or cement to them. Moreover, some experienced craftsmen in this matter can compact these materials into the cracks so firmly that sticking an awl into them will be no less a difficult task than into the wood itself.
Types of packaging
Special attention should be paid to the packaging options for sealants. Regardless of type, these drugs are available in several form factors.
When choosing between them, you should focus only on personal preferences and benefits (large containers are cheaper if you need a lot of sealant).
| Type of packaging | Peculiarities |
| Tuba | The sealant is squeezed onto the seam directly from the tube, and then shaped and leveled with a chisel. But you have to work quickly - within 10 minutes the polymerization process begins, the sealant becomes harder and more intractable. |
| Bucket | In this case, the sealant is manually scooped onto a spatula and applied to the wood. |
| Box | Often equipped with a lid, which simplifies the work with the spatula. Sometimes there is an “adapter” to put the sealant into the caulk gun. |
| Cartridge | Specially shaped to be inserted into the gun. |
| Foam cord | Sold in rolls. It is used according to the principle of caulking with jute - the cord is driven into the crack with some hard tool. |
Modern means of sealing cracks in wooden buildings
There are no special means for sealing seams between logs, since sealants known to everyone are used for this. But not everyone is suitable for such work, and here's why.
Conventional polyurethane foam is not suitable due to the constant, albeit small, mobility of the logs. Thus, the foam will only begin to crack and peel over time. Silicone sealant is not suitable due to the fact that it does not absorb moisture well. And since the tree, as usual, does this very well, and also rots well, rot will certainly form in those places of the log where there are problems with sufficient evaporation.
All of the above makes such sealants unsuitable for sealing seams between logs in wooden houses or barns. And the ideal solution is actually to use polyurethane sealants. The latter can be actively used both inside and outside the building, as they perfectly withstand temperature changes and retain their properties even in the most severe frosts. Such sealants are excellent, unless we are talking about those sold in cylinders; they can withstand the effects of solar radiation without reducing their insulating properties even from the most serious doses of ultraviolet radiation.
Preventive measures
Method #1. Long natural drying
The best prevention is long-term natural drying of the logs before placing them in the log house. The more uniformly the logs dry across the entire thickness of the fibers, the less likely it is for cracks to appear. The drying rate in the inner and outer layers should be approximately the same. Then moisture from the inner layers will move to the outer ones, and they, in turn, will evaporate it into the environment.
This balance can be maintained if the drying period is at least two years. Dry the logs in a shady, dry and cool place. As a result, wood moisture content should decrease to 18-20%.
For comparison: when drying logs for one year, the width of the resulting cracks is no more than 6-10 mm, over two years - no more than 1-2 mm. If the logs have been dried for less than a year, the width of the cracks may exceed 10-20 mm.
Method #2. Compensation cut
A cut in the upper or lower part of the log (timber) helps reduce stress in the wood fibers. This type of cut is called compensation or unloading. It is performed along the axis of the log, often on the upper surface. Some craftsmen make cuts along the entire surface, while others do not cut the groove to the ends.
In a log house, the cut is covered with a lying log on top, so moisture does not get into it. When dried, the cut expands. But, at the same time, the number of natural cracks formed is reduced, their depth and width are reduced.
The cut is an even groove 7-10 mm thick, 1/3-1/4 deep from the diameter of the log. The cut can be made using a chainsaw, a router, or a rounding machine.
Method #3. Sealing the ends of logs
The ends of the logs (cutting areas) dry several times faster than the rest of the outer surface. Therefore, during intensive drying, the ends become cracked first. To prevent this process, you need to close the moisture exit through the ends. That is, cover them with sealant. Then the ends will stop quickly evaporating moisture. It will go into the outer layers of the log and from there it will evaporate, but evenly.
To cover the ends, you can use drying oil, oil paint, oil varnish, and wax solutions. Previously, the ends were coated with lime to seal.
The need to protect the ends of logs is discussed in the following video:
What needs to be placed under the sealant
First of all, it should be noted that there can be very, very many seams in a wooden frame - several tens and hundreds. At the same time, there can be quite a lot of space between them. If you start filling it all with sealant, you will end up using too much, which will result in huge costs. Well, if you use natural ingredients, you are unlikely to be able to find that much moss at all.
All this suggests the need to find something to put under the sealant. Experts say that the best material in this case is a cord made of polyethylene foam. Such a cord itself is an excellent sealant, so it will not affect thermal conductivity.
Which one is better to choose?
From all of the above, we can conclude that for façade installation it is better to purchase ecowool, mineral wool, and basalt fiber:
- A well-known manufacturer of the first material in Russia is Ekovata Extra LLC. Its cost is 1,115 rubles per m3.
- To seal the seams, it is better to use tow or hemp. Reliable products are considered to be material from Kuzmin's Linen Manufactory LLC "Len&Jute", where you can purchase tow. The cost of 30 kg of product in bales is 1,800 rubles.
- For interior work, it is better to use polyurethane foam or acrylic sealant. The Russian company is engaged in the production of polyurethane foam. A kilogram jar of the product costs 312 rubles.
How to properly seal cracks in a wooden frame
Let's consider the process of sealing using modern methods, since few houses have a forest and a swamp near them in order to bring in moss. While the same polyurethane sealant and polyethylene foam cord can be purchased at any retail outlets.
- First of all, we place a cord in the hole between the logs, trying to drive it there as tightly as possible;
- We glue the edges of the logs with masking tape so as not to stain them during the process of applying the sealant;
- It is best to apply the coating with your fingers. However, if you do not have enough experience in this matter, then it is better to use a rubber spatula, which will help make the insulation more beautiful.
Common do-it-yourself sealing mistakes
Sealing carried out independently is often of poor quality. As a result, it is not possible to achieve complete heat and moisture insulation, and the work does not look very nice. To prevent this from happening, you should avoid common mistakes.
| Error | Description |
| Wrong choice of sealant | The selected product must be suitable for the operating conditions. So, only silicone composition is suitable for baths and saunas - it can withstand high temperatures. Polyurethane is only suitable for exterior decoration, and acrylic is best not used outside in regions where the winter temperature is below -15°C. |
| Careless wall preparation | The surface must be thoroughly cleaned. The remaining dust particles sharply worsen the adhesion between the materials, and complete sealing cannot be achieved. |
| No primer | With a primer, the sealant will last much longer and will adhere more reliably. |
| Careless seam alignment | When leveling the sealant is neglected, the seam looks crooked and unattractive. This spoils the appearance of the walls, and the situation cannot be changed if the sealant has time to harden. |
| Temperature violation | As mentioned above, you need to work with sealant at a temperature not lower than +5°C. But temperatures above +30°C are also not recommended. |
| Work during precipitation | Wet weather is especially harmful to acrylic compounds, but other types also suffer from waterlogging. It is better to carry out external work when it is dry outside. |
And finally, when creating a warm seam for a private wooden house, you should leave a little sealant in reserve. When drying, the seam may become deformed, and you will have to add a compound to straighten it.
If you want to add anything, we are waiting for your comments!
