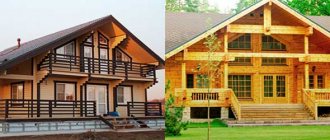
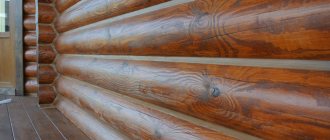
More and more houses are being built from wooden materials, and this is good news. This means that people began to value natural, natural, natural materials that can only benefit residents. Wooden houses are environmentally friendly, warm, and do not allow cold and frost into the room. And in order for them to be strong and stable for a long period of operation, you need to select suitable fasteners to create a strong bond between the wooden materials.
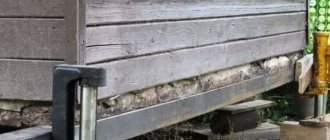
The process of replacing rotten logs
If you need to replace rotten logs on the walls or corners of the house (cuts), then you will not need to lift the entire structure.
And replacing the lower logs is problematic if the structure is not raised to a height of 10 cm. The actual progress of the repair depends on the basis on which the house is installed. The gap between the lower and upper crowns is determined. At a distance of approximately 1 meter from the corner of the house, a niche measuring about 30-40 cm is knocked out. Jacks are installed in the resulting openings under the upper beams of the trim. At a distance of approximately 1 meter from the corner of the house, a niche measuring about 300-400mm is knocked out. The frame is raised to the required height
The structure must be lifted carefully to avoid significant damage. The logs are released and removed from the bottom of the harness. Install temporary supports. It is possible to use supports in the form of blocks, logs, bricks and boards in several layers, depending on the height to which the house needs to be raised. If replacement is necessary in the upper crown, rotten areas are immediately removed and new logs are installed; if the material is not damaged, then temporary supports are removed, after which new logs are laid on the foundation and jacks are lowered synchronously. The cracks are caulked and sealed with tow or other materials.
It is very difficult for one person to lift a house and replace it; even with extensive practical experience and special equipment, the help of several specialists will be required.
- A jack is installed on a solid base (two for each wall). You can use a wooden board or brickwork.
- The structure is lifted and the logs are replaced on each side.
- The jacks are removed simultaneously and the cracks are sealed.
Wooden house after replacing the lower logs
Preparation
Many people have probably heard that in the old days the framed (first) crown was often laid directly on the ground, wrapped only in birch bark. Now no one will dare to do this, and rightly so: a good foundation is one of the keys to the durability of a future building. Therefore, before assembling the log house on site, the support for the bathhouse must be completely ready.
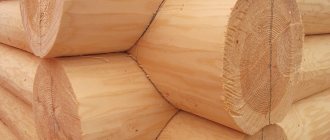
We will begin the construction of walls by laying two “embedded” logs. Before assembly, they (and the others too) had to be marked accordingly. They can also be easily identified by diameter and length. Thicker round timber is always chosen as the basis of a log house, and if they are going to lay the foundation for a cold dressing room, then they are made much longer than the rest of the logs of the log house. Well, another sign of the constituent elements of the first row is the connection of the logs in the corners into the so-called “paw”. This, however, applies only to logs chopped “into a bowl.”
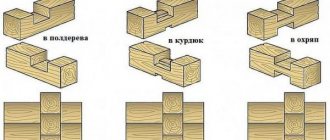
Basic methods of replacing crowns
The advantages of houses made of logs and timber are that they have a prefabricated structure. No binder mortar or fasteners are used during the construction process. Tight joining of the crowns is ensured by gaskets and the force of gravity. Therefore, damage to some elements of the building is not a death sentence, but a problem that has several solutions.
The choice is made based on the following criteria:
- foundation type;
- climatic conditions;
- the degree and size of damage to the walls;
- terrain;
- the presence of a stone oven on a common base.
After assessing the situation, a method for eliminating defects is determined.
Without raising the house
Involves partial replacement of damaged wall elements. This approach avoids the dismantling of structures, the use of special equipment and the application of great physical effort. You can change not only the bottom log, but also damaged areas at all levels. The method is applicable if the corners remain intact. However, even quality work does not guarantee that the supporting structures will not weaken. There is always a risk of further development of infection of the remaining elements. As a rule, detailed repairs are a temporary measure, since they do not eliminate, but only delay, a critical situation.
Over the centuries-old history of operation of wooden houses, several options for carrying out spot repairs have been developed.
The first is to excavate the defective area and install a “patch” made of timber, logs or bricks in its place. It is used for local damage on one or several tiers.
The advantage of this solution is that you can carry out repairs even alone without the involvement of specialists or the use of expensive equipment. The simplicity of the process also determines the time costs, which can be limited to one working day.
There are also disadvantages. Breaks in the links lead to weakening of the external walls, and the appearance of new joints increases the heat loss of the building.
The second method is to gain access to the defective area through the dismantled foundation. The limitation is cases when the building stands on a block or monolithic reinforced concrete foundation. After removing the top layer of the foundation, the crowns are replaced.
The advantage of the solution is its affordable cost and ease of implementation. The downside is labor intensity and a decrease in the strength characteristics of the foundation.
The third option is the most difficult, time-consuming and expensive. Represents a complete dismantling of the log house down to the very foundation. It makes it possible to replace bad timber, update waterproofing and gaskets with more modern and effective materials.
With the raising of the house
This technology is most common in the private sector, despite its complexity and even danger. The reasons for this are simple - citizens ignore the rules for maintaining the log house and put off its repair until the last moment. As a result, several logs have to be replaced at once in order to save the house. The idea is to place support beams under the walls, raise the building above the base and carry out restoration of the masonry.
The advantages of the approach are the optimal combination of price and quality of work, the possibility of updating worn-out seals.
The disadvantage is the complexity of the process, the need for constant concentration and attentiveness. In addition, such an event cannot be called quick. Even with proper organization, stage-by-stage work will take at least five days.
Partial replacement of the lower crowns
If you immediately respond to the situation, you can save yourself from unnecessary financial and labor costs and replace only some damaged parts of the lower crown.
Replacement technology
The essence of this procedure is to remove the rotten area and install in its place a “patch” made of wood, brick or other materials.
- The outer skin is separated from the area affected by rot;
- Determine the boundaries of rotten wood, marking them with a chisel or knife;
- To prevent damage to the entire structure, when removing rotten wood, screeds are installed at a distance of 40 cm from the intended boundaries. Screeds are bars 2-3 crowns high and 40 cm thick. A total of 4 bars are used, attaching them to the sides of the rotten area on both sides of the wall. You need to use ties if a large section of the crown is removed, but if a small area is damaged, you don’t need to use ties;
- The damaged part of the log is removed with an electric or chainsaw. To do this, you first need to make a through cut on both sides. The sawed area must be removed;
- In the resulting space you need to place an insert. To ensure that it is firmly fixed, notches are made along the edges of the resulting opening (width 20 cm);
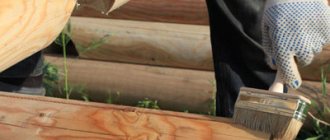
- The lower part of the second crown is cleaned and leveled with a chisel until it is flat. In order to protect the wood from insects, moisture, mold, rot and fire, treat the side walls of the resulting opening and the lower part of the second crown with an antiseptic;
- The foundation is covered with roofing felt in 2-3 layers;
- An insert is made. A piece of exactly the same diameter as the damaged logs is cut out of the log. The length of the insert should be 1-2 cm less than the size of the opening. It is treated with an antiseptic and then installed in the opening. If you have problems with this, you can use a sledgehammer. To make the insert, you can use bricks instead of wooden blocks. To do this, in the opening formed after cutting out the rotten part, bricks are laid on concrete mortar. Thus, brickwork will replace the entire lower crown;
- The gaps between the insert and the frame are covered with fibrous materials such as tow, jute or moss
Cover crown in frame construction
Frame or half-timbered houses came to us from Europe and immediately proved themselves to be the best. The walls of the building consist of a frame and filler, which is used as aerated concrete, any light blocks, glass, brick and anything else. But for the frame, laminated veneer lumber is best suited. It is stronger than natural wood timber and is not subject to rotting or deformation.
The first crown of timber is constructed in a certain sequence:
- the top of the base is leveled to a level, then roofing material is spread in at least two layers on bitumen mastic; for greater confidence, it is necessary to lay at least one layer of glass insulation;
- further, a substrate of boards or slats of small thickness impregnated with an antiseptic composition is laid over the waterproofing; this procedure is performed to additionally protect the walls, and it also prevents the lower beam from coming into contact with the foundation;
- checking horizontality with a building level;
- preparing timber for the installation of the first crown of the foundation: cutting according to the longitudinal and transverse dimensions of the base, coating the space between the beams with diluted bitumen mastic to protect against rotting and fungus;
- The timber is installed around the perimeter of the foundation with strict adherence to horizontal level.
Complete replacement of the lower crowns
Replacement of the entire lower crown can be carried out according to the above scheme. This will require a lot of time and effort, since you will need to gradually cut off all the damaged areas, replacing them with new ones. But there is also a big advantage - you will no longer need to lift the frame with jacks.
It will be much stronger if the new lower crown is made not from pieces, but from whole logs. To do this, you need to move the entire structure of the sauna log house, lifting it with the help of jacks.
Replacement technology
1. Preparatory stage:
- To prevent windows and doors from cracking, they are removed during the raising of the frame;
- The log house must remain empty, and therefore all heavy objects must be removed from the bathhouse;
- The floor joists embedded in the lower crown need to be disassembled. The logs laid above the lower crown are not disassembled;
- To avoid damage to the ceilings and roofing by the heavy chimney pipe, it must be separated;
- The undamaged crowns of the log house must be fixed. This is done like this: on the inner and outer sides of each wall, at a distance of 0.5 meters from the corners of the log house, boards or bars (4 cm thick) are nailed vertically. Their lower edges should end exactly in the same place as the logs of the crown that cannot be replaced (second from the bottom), and the upper edges should be attached to the logs of the topmost crown. To fix undamaged areas, 16 boards are used, which must be secured at the bottom and top with through dowels. This is done so that when the log house is raised on jacks, its walls do not move.
Once all of the above work is completed, you can begin the procedure for repairing the lower crown of the log house. 2. Basic work
The process of replacing the lower crown of a log house depends on the type of foundation.
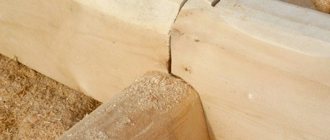
Strip foundation
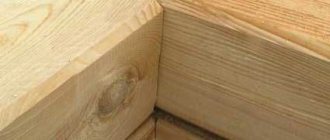
A log frame consists of a top and bottom log that are joined and tied at the corner
It is very important to accurately determine which logs in the rotten crown are the top ones, since it is under them that the jacks will be installed; In the crown of the log house being replaced, at a distance of 0.7-1 m from the corner of the house, an opening 0.4 m wide is knocked out in the foundation. From the log of the lower crown, located opposite the resulting opening, a part is cut out so that the total height of the niche allows placing a jack there
According to this scheme, exactly the same niches are made on two opposite walls. The distance from the corners should be the same; Now you need to install jacks (2-4 pieces). A very important point is the choice of jacks. To do this, you need to select a mechanism with a load capacity of at least 10 tons. Depending on the size of the bathhouse, the lifting capacity of the jack can reach 25 tons. An error at this stage can lead to distortions and broken logs. The number of jacks depends on how the frame will be lifted: all at once or each wall separately. But if you raise the walls one by one, this can lead to distortions, so the best option would be to raise the entire frame together. To do this, you need to install 2 jacks under opposite walls so that they rest against the upper logs of the crown bandage; Using jacks, raise the frame by 7-10 cm and remove the lower logs of the dressing; Reliable temporary supports, such as bricks, concrete blocks, logs, boards, bars, are placed under the lower logs of the second crown. The main thing is that they can withstand the weight of the entire log house; The jacks, along with the upper logs of the crown being repaired, are lowered, and instead of them, new ones are immediately installed and pressed with jacks. All supports installed under the lower logs of the second crown are taken away. The upper logs of the dressing are placed on the lower ones, and the lower logs are laid on the foundation. The jack is lowered very slowly and synchronously; At the last stage, caulking is carried out - the cracks formed when connecting new logs with the second crown of the log house are sealed. To do this, fibrous materials (tow, moss and jute) are used, which are hammered into the resulting seams.
Columnar foundation
Replacing the crowns of a log house on this type of foundation is quite simple.
- It is necessary to install 4 jacks between the foundation columns, which are connected to the upper logs of the lower crown trim. Place 2 of them on each wall. It is necessary to install these jacks on a very solid base, such as a board made of boards measuring 50x50 cm. The head of the jack rod should rest against the log only through a metal plate;
- The jacks are raised synchronously. Further actions are exactly the same as when replacing the lower crown of a strip foundation frame.
The difference between replacing rotten crowns of a log house with a strip and column foundation is only in the process of installing jacks. The first option is more labor-intensive, since the foundation must be partially destroyed. There is no need to do this for a columnar foundation, since there is a lot of space in its structure for installing jacks.
Using a rigid mount
Tools for installing rafters.
When installing rafters on beams using the rigid fastening method, it is important to adhere to certain requirements and eliminate bending, twisting, turns and shifts between elements.
These requirements can be achieved:
- secured with a corner with a hemmed block for support;
- making a cut on the rafter element and fastening this connection with nails and staples.
Using a corner with hemmed support bars, the rafters are placed on the mauerlat. The element itself must have a rigid stop along the load line due to a hemmed beam about 1 m long. It is also fixed on the sides with a metal corner to avoid shifting.
The second installation method is most applicable. With this option, fixation with nails is carried out from the side, at an angle, they are crossed inside the Mauerlat, and a third nail must be driven vertically. This results in a rather rigid assembly when fastening.
In both options, the connections are secured by another fastening of the elements to the wall, using wire or anchors.
At the same roof slope angle, the rafters are prepared using a template, that is, the same size.
Reasons for replacing a damaged lower crown of a wooden house and repair options
Failure to comply with construction technologies, as well as wear and tear of waterproofing, are the main reasons leading to the start of the process of rotting of the building’s foundation. If this is not noticed in time, then very soon you will have to replace the crowns of a wooden house. However, timely assessment of damage will help limit drying, impregnation with mastics and changing waterproofing.
There are five ways to repair the embedded elements of a wooden building:
- Complete dismantling and reinstallation - this technology is mainly used for non-residential premises, when it is necessary to change not only the base elements, but also other structural components.
- Partial replacement - involves replacing only the damaged log, the new one is treated with special impregnations, after which it is installed to replace the old one. The technique is applicable in cases where raising a building is impossible for some reason.
- Brickwork instead of load-bearing logs - it is also possible to replace only damaged areas.
- Jacking method - used on a strip or solid foundation. The method makes it possible to quickly repair mortgages and carry out waterproofing.
- The use of special hangers - the technology consists of manufacturing a structure for hanging house construction, which must correspond to the size of the building. The method is very expensive, so it is used quite rarely.
How is the condition of logs assessed?
A visual inspection allows you to determine the need for repair work. Additionally, light tapping with a mallet is used - if there is rot, a dull sound will be heard. The second and third rows of logs are checked in the same way.
It should be additionally noted that replacing the lower crown of a wooden house may be accompanied by repairs to the foundation, which can easily be done with your own hands. The presence of cracks requires restoration using M400 cement and sand.
How to attach rafters
You can secure the rafters using several methods:
- using Mauerlat;
- through floor beams;
- with tightening and rafter wooden bars;
- connection with the upper crown of walls made of logs;
- using the strapping of a house that is built using a frame system.
Mounting points for the rafter system.
Rafters used when installing roofs in log houses are divided into hanging and inclined. When constructing wooden houses with a large roof area, hanging rafters are used.
The main tools for work are:
- roulette;
- saw;
- square;
- pencil;
- hammer;
- screwdriver;
- level.
For what reasons can logs rot prematurely?
Operational wear and increased load on the lower part of the structure are the main reasons that lead to damage to wood. However, there are factors due to which the tree rots earlier than planned:
- In order to save money or due to an oversight of the owner, logs of inappropriate quality were purchased for construction: high humidity, which did not undergo antiseptic and hygroscopic treatment.
- Low quality waterproofing material that protects the log house from environmental aggression.
- Violation of storage rules during construction of the building. Even properly dried logs stored in damp or dirty conditions during construction lose the necessary properties.
- Incorrectly installed ventilation system in utility rooms with high humidity (kitchen, bathroom). Impaired air circulation leads to the appearance of rotten areas and further rotting of the tree.
- Failure to follow the rules for caring for external wooden elements. Contact of logs with the ground in the event of shrinkage of the backfill leads to freezing and further thawing, as a result of which the process of rotting begins.
Logs can rot prematurely due to the fault of the developer. An oversight, incorrect construction technology, and banal “hackwork” lead to the need for early replacement of logs.
Repairing wall cladding
The interior decoration of a bathhouse is the first to fail, since it is mainly made of wood. Due to temperature changes and high humidity, it begins to rot and warp. It is necessary to tap the walls to determine the problem area. Replacing a deformed section of finishing will not be difficult.
It is much more difficult when you need to completely change the skin
| Actions | Subtleties |
| You must first bring the lining into the room. | It is necessary that it adapts to the temperature regime of the bath. |
| The surface of the walls must first be leveled so that the lining does not subsequently resemble “sea waves”. | This is achieved using lathing. Frame slats are installed perpendicular to the floor in increments of 0.7 m using a level, starting from the corner of the bathhouse. A thin string is pulled between them to align the horizontal slats. Separate bars are attached near windows and doors. The sheathing must be fastened with stainless or galvanized self-tapping screws that do not corrode. |
| The lining is installed on the ideal sheathing, starting from the corner, in a vertical direction (so that moisture drains easily without lingering on the panel). | Experts advise lining the steam room with deciduous wood; you can use coniferous wood to decorate the washing room and rest room. |
To prevent rotting and destruction, it is necessary to treat the wooden elements of the bathhouse with antiseptic impregnations. If you decide to tile the wooden walls of your bath rooms, then just follow the following recommendations.
- Lay the tiles on a flat and clean surface. To enhance the moisture resistance of the walls, they are first sheathed with roofing felt. To add strength, a metal mesh is sometimes attached to it. Then they plaster and apply a primer.
- To determine the angle for laying the first tile, you need to stand at the front door and choose the most noticeable one.
- The glue is applied directly to the tile, and not to the work surface (this will make it more convenient to attach the material). The glue quickly becomes unusable, so it does not need to be prepared in large quantities.
- To ensure that the gaps between the tiles are of the same thickness, special fasteners (dividing crosses) are used. They help to install beautiful tiles without various defects, which will increase the service life of the tiles.
Possible errors and safety measures
Errors during work often lead to the destruction of building structures, and violation of safety measures can lead to injury or death.
Security is ensured:
- working in calm weather;
- serviceability of lifting mechanisms;
- reliability of supports and racks;
- installation of safety bars;
- a ban on working under a raised load (do not put your hands under the walls, do not move under the crowns in and out of the house);
- installation of spacer beams;
- using steel bearings between the jack rod and the log against which it rests.
Using a steel jack support
The durability of the repaired structure is achieved by:
- thorough examination and identification of all crowns requiring replacement;
- choosing a quality material - the lower crown, or better yet two, is made of larch;
- waterproofing with modern materials;
- arrangement of storm drains with water drainage as far as possible from the log house.
How to replace the crowns of a wooden house with your own hands using jacks
The method is quite common, so we have a wealth of technological experience at our disposal. The process consists of several stages.
Preparatory operations
The first step is to strengthen the structure of the log house; this will be useful even if lifting is not planned. For these purposes, a 40 mm thick beam is suitable, which is attached across the logs.
Preparations for lifting before replacing the rotten lower crown of a wooden house with your own hands include the following points:
- Reduce the weight of the building as much as possible.
- If there is external cladding, remove its lower part.
- Secure the undamaged logs from below with vertical ties in increments of 0.5 m. If possible, do this both outside and inside the building.
- Dismantle the baseboard in the house and separate the floor from the walls.
- Disconnect all hard communication systems - gas, sewerage, water.
- If there is a stove or fireplace, then along its perimeter you need to remove part of the floor. On the roof, the chimney or the area of the roof around it should be dismantled.
Tools and materials
To carry out repair work you need to prepare a number of tools and devices:
- Four jacks with a lifting capacity of at least 2.5 tons and supports in the form of metal plates.
- Wide timber or blocks for support.
- Levers and chisel.
- Ax and plane.
- Sledgehammer and chainsaw.
If you look closely, in many videos on how to replace the rotten crowns of a wooden house with your own hands, you will notice additional supports. That is why craftsmen recommend that you first stock up on a support lintel in the form of a channel or timber structure to secure and support the walls.
The following products are purchased from materials:
- Bitumen mastic.
- Special impregnations for wood.
- Logs or beams.
- Sealing material for logs.
- Bricks, cement-sand mortar for foundation repair.
The process of lifting a building using jacks
- In accordance with the dimensions of the jacks, cut holes in the upper logs of the lower crown for their installation, the distance from the corners is 1 meter.
- Place support blocks under the jacks. If the foundation is strip, then a channel is installed on the lifting device as a lever. With a columnar foundation, jacks are placed directly under the walls.
- Start lifting the building evenly with the help of several assistants.
- Remove lower logs after lifting.
- Install a supporting structure under the walls (if the foundation is columnar) or place wedges (if it is a strip foundation).
- Proceed to repair the foundation and dismantle damaged materials.
- Lower the jacks and lay the new base log on them and, lifting it above the supports, securely fix it. Similar actions must be carried out on all sides of the room.
- Treat all cracks with tow.
Work technology
As practice shows, the destruction of logs initially begins from the corners, since these places are more exposed to the external environment. Therefore, most often a complete replacement of the lower crowns of a wooden house is carried out.
Step-by-step instructions for conducting this event:
- Assess the condition of the corners of the building. If they are completely worn out, you need to use a screed around the perimeter of the house.
- Install support plates on each side of the house. If necessary, make a backfill of crushed stone under them. If the base is low, make holes of appropriate depth next to them.
- In two opposite walls, cut 3 holes in the damaged element the size of the supporting product. It is best to use an I-beam steel beam.
- Insert supporting products into the openings so that their ends protrude from the building by at least 50 cm.
- Install jacks on the slabs, combine them with I-beams, and simultaneously raise the house to a height that allows further manipulations. Insert strong blocks into the resulting opening.
- Remove the rotted logs from the walls opposite the jacks and clean the upper fragments from dirt.
- Adjust the size and install a new log into the masonry, after attaching a sealant to it.
- Remove old waterproofing. If necessary, repair or level the foundation. Treat it with an antiseptic.
- Move beams, support plates and jacks to opposite walls under the updated crowns. Carry out similar actions with the remaining defective crowns.
- Cover the foundation with new waterproofing. It’s better not to save money here, but to use the most expensive and durable material.
- Lower the house onto the foundation. Remove the beams, remove the jacks and slabs, and fill the holes.
- Seal the remaining cracks and holes with chopsticks, mineral wool, tow or jute.
It is recommended to purchase replacement larch logs. This type of wood is distinguished by its strength, durability, and only becomes stronger from contact with water.
Repair of crowns in a house on a strip base
- In the logs that you are going to replace, you need to cut out recesses in order to insert the lever there (they can serve as a log, a channel). The floor inside needs to be dismantled.
- Jacks are placed outside as close to the foundation of the house as possible.
- Insert the lever into the sawn recess and place a support - a block of concrete - under its inner end.
- Place the outer edge of the lever on the jack.
- Thanks to the jack, the lever will rise, and with it the building. At this point, place wedges between the foundation and the raised house.
- Repair the crowns. Please note that when using levers, each side must be lifted in turn.
- After repairing the logs, the recess through which the lever was inserted will need to be sealed.
Make sure that the house is lifted evenly on jacks.
After completing all the work, do not forget to treat the crowns, this will extend the service life and preserve the appearance of the wood. To do this, use wood preservative and insect repellent. In addition, be sure to take care of high-quality waterproofing of the lower crowns. To do this, lay 3 layers of roofing material treated with bitumen mastic. And only after this the first mortgage crown is laid.
Therefore, if you have the slightest doubt, it is advisable to enlist the support of professionals. It is advisable to carry out work in dry weather. Properly performed repairs to rotten logs will allow the house to stand for a long time, increasing the strength and reliability of the entire structure.
Unpredictable wood
Even experienced builders cannot always predict where moisture will go and where it will begin to accumulate.
Alexey Galimov
A very recent incident. They polished the inside of a log house made of chopped logs. The days were very hot. The heat is oppressive - moisture goes inside the house. The inner surface of the walls turned out to be wetter than expected. The sawdust formed during sanding stuck to the walls and underneath it turned blue. Well, they noticed it in time and cleaned it up. To prevent moisture from forming anywhere inside the log house, the log house must be well ventilated.
Protect the upper and lower crowns from rot: preventive measures
Also, the use of waterproofing prevents the wood from rotting. The use of several (usually three) strips of roofing material between the logs of the lower and upper crown and as a lining on the foundation and cuts is a guarantee of protection from excess moisture.
If the house has a basement, then it is necessary to ensure its normal ventilation. It is easier and cheaper to install a ventilation system once and rid the room of condensation than to frequently make repairs and raise the house to replace the lower parts of the frame.
According to fire safety requirements, finished replacement materials must be treated with a fire retardant. It is imperative to check for the presence of such treatment, otherwise a fire may result from a normal electrical short circuit.
The volume of repairs, the area of damaged areas, the ability to access rotten structures - each of these factors affects the final cost of the work. Depending on whether the house will need to be raised completely or partially, how much special equipment will be used, and how many specialists will be involved, the price also depends.
Saving on repairs is unprofitable; there is a risk of not only damaging the structure, but also not taking into account the features of the replacement technology. In this case, the new repair will take place much earlier than expected. And these are new expenses: monetary and nervous.
Below is a table for an approximate calculation of prices for replacing logs in St. Petersburg and the Leningrad region. Using it you can get information about how much the planned work will cost. The final estimated cost can only be obtained after a detailed study of the project.
| Service type | Price,. |
| A set of lifting works (if required) | from 1000 rub |
| Dismantling a rotten log | 300 rubles m/p |
| Preparation and installation of new logs | 600 rub m/p |
| Laying inter-crown insulation (if required) | 100 rubles m/p |
| Waterproofing device (if required) | 100 rubles m/p |
| Installation of fasteners | 200 rubles m/p |
Replacing damaged elements will not lead to significant expenses and stress if you entrust it to professionals. We have been working with wooden houses for several years, we are familiar with the features of the technology and have the appropriate experience and equipment. By contacting us, the customer can count on:
- Qualified assessment of the situation. We will not require large financial investments if the client's budget is limited.
- Work without nerves. Replacement of logs by our specialists is carried out at a time convenient for the customer and is completed within the agreed time frame.
- Assistance in choosing quality materials and advice on use options.
The organization operates a hotline, so you can do so without leaving your home. In addition to repair work, we can modernize external structures and provide reliable protection of wooden surfaces from bad weather.
Guarantee
Each project we complete is unique. Therefore, the terms of the guarantee for work are considered individually. They depend on many factors:
- Type of construction material
- Type of soil
- Terrain conditions
- terms of Use
- General characteristics of construction quality
- And many other factors that have a direct or indirect impact on the area of work for which we are responsible.
In most cases, the warranty is provided for a period of 1 year (to cover all seasons). For some types of work and subject to basic conditions, we provide a guarantee of up to 5-7 years!
Practical recommendations
The repair-free service life of the restored lower crown largely depends on the correct choice of wood species. Considering that it is this part of the house that is most susceptible to moisture penetration, it is advisable to purchase larch timber (or logs) to replace its structural elements, even if other wood was used in the construction of the log house. The peculiarity of this tree is that by absorbing liquid, it only gains strength, and over time it becomes as strong as stone.
When choosing replacement wood, you need to pay attention to the following points: degree of drying, grade, and price as well. No one will trade at a loss
Too low a cost is a reason for some consideration. Considering the role of the lower crown in the construction of a wooden house, it is hardly wise to save on lumber. If you purchase, then from a reliable supplier who has an impeccable reputation in the construction market.
It is not worth using such a popular material in the private sector as roofing felt for arranging cut-off waterproofing. No matter what manufacturers and advertisers claim, even the highest quality variety, “euro”, will not last more than 5–6 years in such conditions. And the usual (cheap) modification at 270 rubles per roll will not withstand even 3 - it will rot.
The choice of the most appropriate method of replacing the lower crown depends not only on the capabilities of the owner and his skills. A number of other factors should be taken into account, neglect of which can subsequently significantly complicate the work:
- the presence of extensions that have a common roof with a wooden house. In this case, the possibility of using a jack or lifting the entire structure is questionable and requires careful calculations and a number of preparatory measures;
- location of the house. It is necessary to determine whether there is enough free space along its walls, whether it will be convenient to work by implementing a specific technique for replacing the lower crown;
- features of laying communication routes, type of heating unit. For example, if this is not a boiler, but a brick oven, then lifting the building with a jack or crane is hardly possible. First of all, not because of the total mass of the wooden house, but because of the likelihood of destruction of the masonry and chimney.
When using jacks in the process of replacing the lower ring, you should focus on mechanisms with a lifting capacity of at least 2.5 tons.
There are a number of other methods, but they are not suitable for DIY implementation, which is why they are not mentioned in the article. The above methods are quite enough to choose the most suitable one for replacing the lower crown yourself. And most importantly, it is recommended to do this work only in warm, dry weather! Otherwise, a lot of problems will arise later. Therefore, when planning the repair of the lower row of a wooden house, you should focus on the forecast of weather forecasters.