As you know, feathered friends that live near human habitation require a place to feed. Moreover, it is year-round, independent of the time of year, weather or air temperature. This dramatically increases the survival rate of young birds, and even adults, which means that the noisy bird community will only grow. It is better not to use polymers and plastic; the most balanced solution would be a bird feeder made of wood. Natural material definitely won’t scare birds, and it looks much better than plastic bottles.
In winter, the right place for feeding can be a real salvation for birds
Types of bird feeders made of wood
There are not many convenient designs for bird canteens. Typically, homemade wooden bird feeders are a simplified version of the classic birdhouse, with a tray for food and a roof on legs. This is not a bad option for birds. If you wish, you can always make your own wooden feeder from a birdhouse, which the birds for some reason refused to use for nesting.
The most common schemes include:
- Feeders are houses made in the form of a canopy over a tray with food;
- Container designs, the design of a bird feeder made of wood assumes the presence of a container with food inside, protected from water. Thanks to this, food for birds is not blown away by the wind and does not get wet in the rain;
- Feeders made from tree trunks. This option is the most difficult to make with your own hands. Dugouts are hung around the perimeter of gardens and summer cottages to attract birds living in the forest and local plantings;
- Hanging feeders, usually a vertical platform with food attached to it, are ideal for small birds;
- Structures assembled from slats or cuttings of branches are the most labor-intensive to manufacture, but always have a bright and unusual design;
- Decorative models. The first include carved wooden feeders for birds that have long taken root in the estate’s courtyard. The birds do not pay much attention to the creativity of the owners of the farmstead, and for the latter, carved structures become a real decoration of the yard.
In addition, collapsible structures are often used to feed birds. And both homemade and purchased.
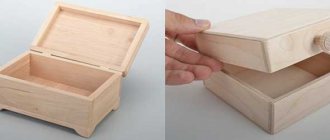
Composite model
For example, a large wooden bird feeder is often the solution to a problem if you need to support a whole flock living in the garden next to your house. In this case, the problem arises of how to deliver the bird “dining room” to the site, especially when it comes to traveling by public transport.
Option to protect birds from predators
The prefabricated wooden bird feeder base fits easily into a medium-sized bag and can be assembled directly under the tree in minutes.
Projects, drawings and sizes of bird feeders made of wood
For those who for the first time have to build a place for feeding birds with their own hands, we can recommend the classic version in the style of a wooden house. One such design of a bird feeder made of wood is shown in the drawing below.
Essentially, this is a birdhouse without a front wall. The bottom, tray and walls of the feeder can be made from any available wood. Roof slopes are best made of wood lined with PVC film, sheet plastic or tin. The wood will need to be treated with acrylic varnish.
A more colorful design can be achieved if you try to make a feeder in the style of a wooden log house. A sketch of a wooden bird feeder is shown below.
The material of the walls is old dry birch branches, the roof and bottom can be made from the same tree, but do not forget to line it with sheets of bark. This model can also perform purely decorative functions if placed next to a chopped sauna or summer kitchen.
Dining rooms for birds are often arranged at a distance from the tree. Feeders have always been a favorite bird hunting spot for cats and rats, so it would be a good idea to place the box of food on a vertical support dug into the ground.
Homemade bird feeders made of wood, mounted on vertical stands, often suffer from the same defect. If pigeons, crows or any other heavy birds come to feed, the support will become loose over time. In the model shown in the drawing, the problem of stability is solved with the help of side struts.
Another successful option for a feeder, but already designed for installation on the wall of a house. It is essentially a wooden bunker with a slot at the bottom and a small perch for birds.
Building a bird feeder. Nuances
Creating a bird feeder on your property is not just a whim, but also caring for the birds: in this way you help the birds better survive the winter and frosts. By hanging a feeder on your property, you will prevent the birds from starving to death.
However, even this simple matter has its own nuances. Firstly, it is important to place the feeder correctly on the site, choose the right tree - it should not be too tall and too wide.
The second point is painting. If you want the feeder to be bright, paint it only on the outside, so that when birds eat the food, they do not accidentally ingest harmful chemicals.
Here are some more important tips:
- After making the feeder, make sure that the hole in which the birds will fly is smooth on all sides (this is especially important for feeders made from bottles, the edges of which can be scratched). This way you will protect the birds from accidental injury;
- If you use glue or varnish in your work, carefully study their composition. They must not contain toxic elements;
- Do not make paper feeders too large - birds sitting on them can push and tear them with their weight and get hurt;
- Take care of the safety of the bird house: wooden feeders, over time, can develop dangerous mold and mildew, and metal ones can become covered with rust, which can poison the animal. Therefore, it is better to protect them with special varnishes (without chemicals harmful to health);
- You should regularly check the cleanliness of the bird feeder and check to see if any parts are damaged.
Okay, we've sorted out the nuances. Let's now look at what and how various bird feeders are made.
What tools and materials will be needed
Working with wood is easy. The material can be easily cut with a hand saw, drilled and sanded by hand with sandpaper. If you need to make a bird feeder with your own hands from pieces of wood, then it is best to stock up on electric carpentry tools.
To work you will need:
- Jigsaw;
- Electric drill or screwdriver;
- Carpenter's square;
- Clamps;
- Tape measure or any carpentry marking tool.
The materials you will need to purchase are carpentry screws, glue, you can use any boards 10-15 mm thick, plywood, wooden slats 15x15 mm or more. For the roof of the feeder, you can use tin, galvanized metal, and linoleum scraps. If we are talking about making a decorative version of the feeder, then some parts will have to be made on a machine, an electric sharpener, or cut out the threads with your own hands, with a knife or jigsaw.
Oil or acrylic varnish is best for protective coatings. If we are talking about making colored wooden bird feeders with your own hands, photo, then it is best to use water-based paint and PF enamel.
How to make a simple bird feeder from wood with your own hands
The simplest version of a dining room for birds needs to be made from literally two parts. For example, for tits that love to cling to vertical tree surfaces with their claws, you can build a feeder in the form of a plank suspended under the roof, although only one, or maximum two birds will fit.
If you are planning a full-fledged feeding area for a small flock of tits, the easiest way to make a feeder is from scraps of slats and boards:
- We cut out two rectangles measuring 350x150 mm from wood. The thickness of the wood should be between 10-20 mm;
- We cut out three blanks of 150 mm and two of 350 mm from a 40x40 mm strip;
- We connect two rectangles together with a vertical stand 150 mm long. To make the fastening more rigid, we additionally screw on one pair of aluminum corners;
- The remaining two pairs of blanks, 350 and 150 mm each, are nailed along the perimeter to the end of one of the boards.
All that remains is to hang the feeder on a tree; to do this, we wrap one self-tapping screw in the corners of the roof, tie a polypropylene cord to them and connect it with a safety knot. We cut a cord 100-150 cm long, tie it to a common knot and fix the feeder to the tree.
How to make a bird feeder from tree branches
The use of natural material requires great care in work; dry branches must be smooth and always without cracks, preferably without knots. Otherwise, the first time you need to tighten a screw or hammer a nail, the wood will simply split and the work will go down the drain.
If you have the opportunity to choose, it is best to use walnut or oak branches; most often, for the construction of a wooden feeder, the material is selected according to the residual principle. They take what grows near the house.
To make a feeder, you will need four pieces of wood without bark, 25-30 cm long. We use a saucer or any container with low sides for the feed. You will also need a container board 5-8 mm thick. The roof covering can be made from thin branches, for example, using young trees that have sprouted under a tree.
The procedure for making a bird feeder is as follows:
- We cut out blanks of 25-30 cm from the branches, select a board for assembling the bottom with a width of 50-60 mm, 4 pieces per plane;
- The first step is to make the bottom and roof. To do this, we lay out pieces of branches in pairs on a flat surface, perhaps on a workbench or a piece of plywood. We cover them with blanks from a container board and nail them with thin nails. The ends of the branches should protrude beyond the edges of the boards by 15-20 mm on each side;
- To give the roof of the feeder a more elegant look, we glue on a decorative roofing made of thin twigs.
After the roof finish has dried, we assemble the feeder. You need to tie knots from twine at the protruding ends of the bottom and roof, measure the length so that the roof of the feeder is slightly inclined, make one additional knot at the protruding ends of the base of the roof. We collect the ends into one knot and attach the feeder to the tree.
Bird feeder options made from plywood
Plywood is a very good material for making feeders. It is much lighter than boards, it is easy to handle and can be assembled simply and quickly.
In some cases, wooden blocks may be needed. They go on the sides of the feeder tray, as well as on the four posts in the corners. The roof is usually attached to them.
If you are making a regular feeder without using design techniques, then a hacksaw will suffice. With its help, we cut sheets of plywood to the required size, and then nail them together.
If you want something beautiful and shaped, then you will need a jigsaw and a burning device for the job.
In general, design is only for our eyes. Birds don’t care whether the feeder is shaped or not, whether it’s painted or not. The main thing is that you can get into it, that there is food there that is protected from rain and snow.
The simplest option is a feeder without a roof. It is hung under some kind of canopy so that food is always available.
If you do not take into account the polygonal shape of the feeder in the above figure, it is simple to make. We cut out a sheet of plywood to the required size, nail on the edges and attach twine for tying. A rail is suitable as sides.
But a feeder with a roof is more practical and can be hung anywhere without worrying about snow getting into the tray.
To make one, you need to prepare the following material:
- piece of plywood for the floor (20 cm x 20 cm x 2 cm) – 1 pc.
- piece of plywood for the roof (15 cm x 20 cm x 1 cm) – 2 pcs.
- block (rail) for sides (20 cm x 5 cm x 1 cm) – 4 pcs.
- block (rail) support for the roof (20 cm x 2 cm x 2 cm) – 4 pcs.
As a tool we take nails, a hammer, a hacksaw. Having prepared everything, we begin to make the feeder.
It is always necessary to collect from the very bottom, i.e., the tray. We saw off a piece of plywood for the floor. Then we cut four bars for the sides. After this, we nail the bars to the plywood. The result is a tray.
Now let's assemble the roof. We cut out two pieces of plywood of the same size, lay them at an angle of 90 degrees, with one edge of the plywood overlapping the other. Then we hammer together with small shoe nails. To make the roof hold better, you can take a small block and nail both sheets of plywood onto it.
Now we take the bars for support. We bevel the top edge to the angle of the roof. Then we nail these bars to the tray, and nail the roof onto them.
There is another option. We make the rafters on which we attach the roof like for a real house.
The given option is the simplest and easiest. If you are only interested in feeding birds, then don't bother with the design and make a simple bird feeder like this.
It's another matter if you have your own home and want to decorate the yard. Then, of course, the feeder should look beautiful. Here you can provide not only the option of hanging it on a tree, but also installing it on a pole.
In this case, we cut out shaped blanks from plywood, which we then fasten together. However, this is already a whole creativity.
How to make a bird feeder from wood on a leg
Feeding areas for birds, made in the form of a platform on a vertical stand, are considered the safest and at the same time convenient for replenishing food supplies. The peculiarity of this design is to properly secure the wooden feeder on a vertical stand. If you screw several screws into the end of a wooden support, after a certain time the fastening will still come loose under the weight of the birds.
Therefore, a feeder on a leg is made using an intermediate mount:
- First of all, you need to dig a hole and install a leg, it can be metal, but it is better from wood, for example, linden. Any strong stick will do, or, as an option, you can buy a ready-made handle for a shovel;
- We install the support, level it vertically, place large stones in the hole, fill it in and compact the soil tightly;
- We cut two 40x40 mm blanks from the slats, with a length equal to the width of the future feeder. We attach the parts to the end of the leg, so that we get an impromptu letter T;
- The feeder itself can be made from a board or from wood available at hand; we make the sides from any available slats;
- We place the feeder on the leg, align it horizontally and fix it with self-tapping screws to the previously screwed horizontal slats.
Important! If a roof with a heavy top is used in the design of the feeder, then the leg will need to be additionally strengthened with struts. For these purposes, it is not necessary to use wood; scraps from galvanized profiles used for assembling suspended ceilings are perfect.
How to make a bird feeder from a tree trunk
As a rule, such structures are cut out of wooden chocks 35-40 cm long and 20-25 cm in diameter. Making a full-fledged dugout feeder from wood with your own hands is quite difficult, since you will need to choose the right wood and a special tool.
The harvested wood must not be treated with chemicals.
First of all, we need high-quality material, so for the preparation of the feeder we select a block of healthy wood, without defects, with even fibers.
The dugout feeder is cut according to the following pattern:
- We cut off two round pieces 35-40 mm thick from the end, they will be used for making walls;
- We fix the remaining block on the carpenter's workbench so that there is access to the side surface of the workpiece;
- Using an electric or chainsaw, we cut out the core of the tree; what could not be removed with a chain saw will need to be carefully removed with a chisel or chisel. We grind the inner surface using an emery wheel fixed in the chuck of an electric drill;
- On previously cut round timber we cut off the bark and sapwood, leaving only the core. The diameter should be equal to the internal size of the feeder body.
For assembly, you can use glue or wooden pins; in any case, the side walls must be firmly fixed inside the case. All that remains is to trim the edges of the cutout so that the birds can sit on the perch without hindrance. The inner surface can be coated with varnish or a water emulsion of PVA glue. All that remains is to unscrew the screws with round heads - hooks and secure the feeder to a tree branch using a thin nylon thread.
Wooden feeders
A traditional wooden feeder is shaped like a birdhouse or house. They can also be manufactured in several versions. Let's look at the most popular of them.
Bird house with vertical supports
Assembling such a feeder is not difficult if you use the following diagram:
You can make vertical supports (racks) yourself or replace them with thick branches. Everything inside can be sealed with plywood, but it will need to be painted.
The bird house can also be made of varnished plywood.
Width, length and height are at your discretion. Fortunately, wood is a malleable material, and you can easily make a feeder so that it harmonizes with the design of your home or site.
Bird house with side walls
An approximate assembly diagram for this option is as follows. The dimensions don't have to be this way. If you need a larger or smaller feeder, they can be changed proportionally.
The side walls can be open or solid. And the unusual decor will give such a wooden bird house an attractive appearance.
You can also cut additional round holes in the sides. Be sure to sand them down so the birds don't get hurt or pick up a splinter.
If you purchase ready-made stencils, you can decorate a birdhouse very beautifully. Wood painting paint or aerosol cans are suitable for this (don't forget the non-toxic coating).
It is best to hang wooden feeders from a strong rope or wire. All that is necessary is to make hooks on the roof of the feeder and stretch a strong thread.
Wooden wall feeder
If the feeding of birds is organized according to the rules, then the birds cease to be afraid of humans and willingly use his house for nesting or for temporary rest on the eaves and on the roof.
It doesn’t always make sense to make a wooden feeder according to the classical design; if the farmstead has buildings with smooth wooden walls, a wall-mounted structure will be much more convenient, photo.
The procedure for making a wall-mounted wooden feeder will be as follows:
- To assemble the body, you will need a wooden lining or board with a thickness of at least 20 mm and a width of 100-150 mm;
- Using a jigsaw, we cut five blanks from the board, 350-400 cm long and 150 mm wide;
- We select the three most even pieces and connect them together using wooden pins and glue. The result is a wooden shield measuring 35x35 cm, from which the back wall of the feeder will be made;
- We use the remaining two blanks for the side walls, using a jigsaw we cut them so that we get a trapezoid with a base equal to 12-15 cm, the smaller part can be quite narrow - 4-5 cm;
- We fasten the walls to the shield using self-tapping screws or nails. The upper edges of the sidewalls will need to be trimmed so that they are in the same plane;
- We cut out the roof from any available wood; you can use waterproof plywood or OSB. We attach it to the body of the feeder using self-tapping screws and glue.
The last part of the feeder is a perch; it can be made from a piece of trim. If the feeder is planned for large birds, then it is best to make an additional round perch.
Feeders made of wood of a similar design are mounted on a flat vertical surface; they can be installed on a fence or on a wooden wall of a barn. At the top we screw a loop cut from sheet aluminum or galvanized steel. The diameter of the hole should be 1 mm larger than the size of the head of the nail driven into the wood or wall. If the feeder will sway under the weight of the birds, then you need to additionally screw one screw into the wall at each of the sides of the body.
Tin feeders
They can be made from ordinary paint cans. You cannot use cans or coffee cans, as they have too sharp edges - birds can be injured and killed by them.
How to make a feeder out of cans on your property? It's very simple: first, thoroughly rinse and dry the jars. Then paint them with paint. In this case, the composition of the paint is not critical - the bird will not come into contact with them.
Next, the tins should be nailed to the tree. You can use plywood or some other flat wooden surface. Tin feeders are attached to wood using nails or screws.
There is an alternative way: you can tie a tin feeder with ribbons and hang it directly on a branch.
When setting up a tin feeder, it is recommended to drill a small hole and push another horizontal branch into it so that the birds have the opportunity to perch without flying inside the can.
It’s even easier to make a garden feeder using cookie or tea jars.
All you need to do in this case is to drill small holes in the body and lid of the jar, then insert ropes or chains, pull them together and hang them on the tree. In this case, the lid acts as a support for the side surfaces. This is necessary to ensure that the bird does not get entangled in the feeder.
Birdhouse made of wooden lids
You can assemble this design yourself or use any wooden box as a basis. Just drill a few holes in it, insert hooks, and thread a thread or chain through them.
To create a bird feeder in this style, you can even use wooden crates as a pallet. A simple and practical solution!
Feeders made of wooden sticks
This version of the birdhouse can be made from wooden craft sticks sold in stores or a regular popsicle stick.
Thanks to the even and flat shape of the sticks, such bird houses are easy to assemble and glue, and the structure itself is very durable.
Baking dish feeder
A bird house on your site can be made from ordinary metal tins for baking pies or muffins.
It's easy to build a feeder from metal molds. First, drill 3-4 holes in the sides of the mold. Then thread the chain or rope through. Pull them together and tie them in a knot. That's all. The feeder is ready.
Bird house made from plastic containers
Old plastic containers can be turned into excellent bird feeders, with a unique design and minimal labor (since they won't require additional coating or painting).
How are plastic feeders made? It's simple - buy a round food container. Make one or two round holes in it, the size of a toilet paper roll. Place a branch or pen inside so that the bird can sit. Make two small holes in the top of the container and thread a string through it, closing the container with a lid.
The container itself can be filled with seeds or grains: the bird itself will decide how much to eat while sitting on the feeder.
Bird feeders made from dishes
If you have a collection of old dishes in your house and you know how to use a drill well, you can easily turn these 2 things into a very beautiful and unusual bird feeder.
All you need to do is drill a hole in the center of the plates and secure them together.
There is also a simpler option. Hang a chain on a branch and secure it with a hook to the cup. Then glue or screw the saucer.
You can make the same birdhouse design using an old teapot.
The plate can be replaced with a regular wooden board - just nail it to the tree. The main thing is that the bird could sit on something and peck the food.
How to make a stylish bird feeder
Often feeders and places for feeding birds have to be made from the most unexpected materials. But sometimes you want to make a wooden feeder especially elegant, observing the main conditions - strength, the design must be reliable and durable, and of course, the birds like it.
The version of the wooden feeder given below differs from the models sold in construction showrooms and supermarkets in its reliability and excellent decorative appearance. We will make the frame from slats, the roof and base from scraps of wood available in the house.
The construction process itself will not take much time:
- First of all, you need to make a bottom; for this we use cuttings of a floorboard or lining with a width of 100-150 mm. We clean the surface, especially the ends, and connect the two halves with glue into a wooden board on a clamp;
- The next step is to make vertical posts; for this we use a regular square-section lath, cutting the top edge at an angle of 45°. We attach the legs to the wooden base using ordinary carpentry screws;
- Next, you need to make fences around the perimeter of the tray, sew on a regular rail, or try to design the fence more elegantly in the form of an improvised railing;
- The next step is to cut out the cross members for the roof frame, connect the opposite posts with small wooden jumpers made of wood;
- To install the roof, you will need to make rafters from wood in the shape of a triangle.
Since the main goal was not just to make a bird feeder, but to try to make it more stylish and elegant, we will make the roof in a unique shape. Not just from a piece of plywood or slats, but we will try to lay the board in a tiled manner, so that the top row overlaps the underlying material.
In general, the design turned out to be quite successful, taking into account the fact that only scraps of wood left over from the farm after the renovation were used to make the feeder.
Important! All parts of the feeder were connected to each other using ordinary carpentry nails 20-40 mm. The only exception is the method of fastening the vertical posts holding the roof with self-tapping screws.
The use of nails is due to the small thickness of the material; wooden parts with a thickness of 6 - 10 mm are often used. Any attempt to tighten a carpentry screw may result in the workpiece cracking, so we hammer in the nails after wetting them with liquid soap or regular oil. If you press down the fastener with light blows, the nail enters the wood smoothly, without destroying the wood.
Fruit and vegetable feeders
We believe that you are convinced that a bird house can be made from anything. Even from what nature gives us, such as orange peel.
How to make a feeder out of peel? Cut the fruit in half and remove the pulp with a spoon. Then dry the orange peel and make holes in it using a thread and a needle. Fill the peel with bird treats and hang it on the tree.
You can do the same with pumpkin. Don’t forget to add wooden bird skewers to the design.
Moreover, you can make a bird feeder from the whole pumpkin or make it edible. We will try to tell you more about this in the following articles of our blog.
Did you find this article helpful? Please share it on social networks: Don't forget to bookmark the Nedvio website. We talk about construction, renovation, and country real estate in an interesting, useful and understandable way.
Wooden feeder for homework
The first design, assembled with your own hands, does not always turn out to be so beautiful and attractive that it can be displayed in front of relatives and guests. For the first experience or in a situation where a wooden feeder needs to be made urgently, within a few days, as homework, for such a case you can choose a simple wooden model, like the photo below. No special preparation is required for its manufacture. All you need is desire, patience and a supply of tools and materials that can be found in any home workshop.
The sequence of the operation of making a feeder is approximately as follows:
- We select the material for the bottom of the feeder and vertical posts. For the tray, you can use a regular board, cut to size and sanded with sandpaper to a velvet surface;
- Next, you will need to secure the legs to the wooden base using long carpentry screws. The height of the stands is selected according to the size of the birds for which the feeding area is being built;
- The next step will be to cut out two roof gables in the shape of a sector of a circle. The part can be cut out on a milling machine or cut out by hand with a regular jigsaw from the remains of clapboard or boards;
- We fasten the gables to the vertical legs of the feeder and at the same time align them in a vertical plane;
- The last point is the simplest. To form the roof, you need to cut the slats into pieces of the same length, lay them on the gables and nail them with wallpaper nails.
For hanging on a tree, you can use a nylon cord or soft metal wire. In the first case, the feeder may sway in the wind or under the weight of settled birds, so polymer fasteners are often replaced with wire ones.
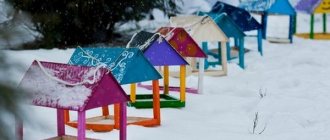
Original and beautiful bird feeders made of wood
Despite the fact that most places for feeding birds have a very simple structure, if you wish, you can always make a bird feeder with your own hands in a more interesting style and design.
Where to place a bird feeder
It is very important to choose the right place to place the feeder. It is imperative that the story be told in such a way that the cat does not have access to it. Also place it higher so that cats cannot catch the birds.
It should be convenient and easy for the birds to get to it; you should not hang the feeder in the middle of the crown of a tree or bush, because because of the branches it is not very convenient to approach it. When choosing a place, you need to pay attention so that it is clearly visible from the side.