What types of flowerpots are there?
They can be outdoor or garden; they differ in the manufacturing method and materials used. The principle of operation is to place the main pot with the plant inside the decorative shell.
Kinds
Outdoor pots are divided by:
- form;
- material.
The shape of the shell can be different: round, square, oval and irregular (polygonal).
Materials
Pot stands can be made from plastic, metal, foam, stone, wood, and even cast from concrete.
Stone and wood are natural materials, so their use is advisable when creating landscape design for a private area with an architectural structure made of wood and stone.
To extend its service life, wood should be treated with antiseptic compounds. To give an aesthetic appearance to stone structures, surfaces can be coated with wet-effect impregnations and varnishes that give a glossy or matte shine to the structure.
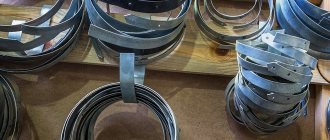
Metal flowerpots for the garden are purchased in stores and have different shapes. The most diverse of them are forged multi-tiered structures in the form of flower petals, butterfly wings, on which flower pots are installed.
Forged containers include simple containers painted in different colors.
In addition, the stands can be cast yourself from concrete mortar. The laboriousness of the process pays off in the result: the manufactured products can be decorated to your taste, decorating the walls with paintings, ornaments, and various images.
Flowerpot made of car tires
Any tires are suitable for making flowerpots, but it is easier to cut winter tires without studs, which have soft, pliable rubber. The tire must have a wheel rim that serves as a stand for the flowerpot.
Flowerpot made of car tires
To work you will need:
- sander;
- very sharp knife;
- pencil or piece of chalk;
- soap solution;
- primer;
- dye;
- paint brush.
Step 1. Marking
We draw the design that we are going to cut out of the tire
. Take the tire, clean it of dirt and lay it flat on a flat surface. Around the metal disk, mark a cut line for the side part with a pencil or chalk. The line can be smooth, wavy, zigzag - as your imagination dictates. If the cut is curly, all the protrusions must have the same shape and size, otherwise the edging of the flowerpot will look sloppy.
Step 2. Cutting along the contour
Contour cutting
Contour cutting
Cutting along the contour
Now you need to cut off the upper sidewall of the tire along the drawn line. To facilitate the cutting process, the knife should be periodically moistened in a soapy solution. To cut out a shaped contour, it is better to use a jigsaw, the blade of which must also be dipped in a soap solution.
Step 3. Turning the tire out
Turning the tire inside out
The tire is turned over with the cut side down, you step on the wheel rim with your foot, pry up a small section of rubber on the cut side and begin to turn the product inside out. This will require considerable physical effort, but the more the tire is turned out, the easier the process is.
Step 4. Processing the slices
The flowerpot is almost ready, all that remains is to give the ideal shape to the cuts and decorate the outside. Figured edging can be made in the form of sharp or rounded petals, fringes, triangles, using the same knife. After this, it is recommended to sand the sections to make the edges perfectly smooth.
Step 5. Decorating the flowerpot
Making flowerpots from tires
Decorating a flowerpot
The outer surface of the flowerpot is cleaned of dust, degreased and coated with a primer. When the rubber is dry, you can start painting. There are a lot of options here: you can make the flowerpot one-color, two-color, striped, draw ornaments or flowers on it, or decorate the flowerpot itself in the shape of a flower. Nitro paints, oil and enamel paints, as well as automotive paints in spray cans, are excellent for painting rubber. It is also recommended to paint the inside of the edging, since it is clearly visible from the side.
Step 6. Filling the flowerpot
The last step is to plant the flowers.
The finished flowerpot is placed in a permanent place, dense agro-fabric is laid on the bottom, a layer of sand is poured for drainage and the container is filled with fertile soil. After this, you can plant flowers and admire the work of your hands.
Flowerpot made of tires
There are other options for such flowerpots. For example, you can use the tire itself, without a rim, and use an empty smaller car ramp as a stand. Flowerpots of different diameters stacked on top of each other look beautiful, as well as hanging items made from figuratively carved slopes.
How to choose a place for flowerpots?
The most common location for pots is the porch of a house. Planters with lush flowering living decorations will decorate the entrance, emphasizing the architectural style of the house.
The second most popular installation location is occupied by terraces, gazebos, and wells.
For private buildings with a wide blind area, it would be appropriate to place flowerpots along the house - they will emphasize the line of the foundation and make it more contrasting.
When choosing a location, you should follow some tips:
- Oversized forms will look awkward in a small area, just as small pots will get lost in a spacious area.
- When installing flowerpots, their mobility plays a role: portable types should be lightweight, and stationary ones should be positioned in such a way that the plants feel comfortable in them.
- When selecting structures, it is recommended to pay attention to the material of the architecture. For example, tubs are suitable for wooden log houses, while garden flowerpots cast from concrete will be inappropriate.
Second life for old things
Both for indoor flowerpots and outdoor flowerpots, recyclable materials are perfect - an inexhaustible source of creative ideas and creativity. An outdoor flowerpot can be seen in almost any object...
Unusual uses for old things
Flowerpot made from old tires
In this video from the channel GARDEN, VEGETABLE GARDEN, WITH YOUR OWN HANDS, you will find a simple explanation of how to turn a tire into the shape of a flowerpot, and the decor is everyone’s imagination and skill.
And this flower basket made from tires from the Kaleidoscope will be an excellent decoration for your garden.
Master class on making outdoor flowerpots with your own hands
Pots displayed outside along garden paths, on both sides of the stairs or on the porch at the front door will be a delight to the eye. Landscape design from floral arrangements, created by yourself, will highlight the architecture of a private house.
How to make a flowerpot from cut down trees or a stump?
Wooden flowerpots will decorate any garden area. To make them, you only need to select a suitable workpiece.
A sawn trunk, an old stump, or a snag are suitable as raw materials. The main thing is that the surface is textured.
The technology for making a wooden stand is as follows:
- First, the height of the future tub is measured, and the fallen trunk or stump is sawn according to the marks.
- A circle is marked on the saw cut, which will become the inner border of the tub. The entire internal contents of the circle are removed with a drill: holes are made across the entire surface to a depth of 10-15 cm, then the wood is knocked out with a chisel.
- The resulting hollow cylinder is treated with stain on both sides. It is recommended to apply the composition with a paint brush, carefully painting each area.
- After drying, the block is nailed onto the bottom treated in the same way. The same cut of the trunk can be used as the bottom of the tub.
- A flower pot made of plastic or baked clay is placed inside the cylinder, soil is poured into it and street flowers are planted.
The most convenient height for a flower pot is considered to be 40 cm, so it is advisable to measure this value and saw off the excess from the trunk. If desired, you can organize not one tub, but several, stacked on top of each other in a checkerboard pattern. Then the height of the tubs can be varied so that the structure looks like a separate landscape item on the site.
Made from natural stone, ceramics or clay
The simplest material at hand is clay, from which it is easy to build a flowerpot of any shape.
Stone flowerpots for the garden are distinguished by their durability. The materials used for production are natural stone, pebbles, fragments of brick or granite.
To build a flower stand made of stone or ceramics, you need to do the following:
- Prepare the site: clear the area, level the surface.
- Prepare a cement-sand mortar with a viscosity similar to liquid dough.
- Lay out the first row on the surface: first, using a trowel, lay a layer of mortar in the form of a border, then lay stones or fragments of ceramic bricks on it.
- Coat the masonry with mortar when laying a new row.
Masonry layers should be alternated with mortar and a stand of round, rectangular or oval shape should be formed.
After complete laying out, the stone flowerpots should be left for a week, periodically watering them with water for good setting.
An easier way is to build gabions. To do this, a frame with hollow walls is assembled from a fine-mesh mesh, into which rubble stone, cobblestones, and pebbles are then poured. Flower pots are placed inside.
Tires for flowerpots
Another quick and easy way to make flowerpots. To work you will need a jigsaw, a knife, and chalk for marking.
The technology of work consists of cutting car tires according to the markings made:
- The old tire is cut over the entire area - the cut should go along the thick upper rubber.
- A pattern is marked on the wheel for the edges of the future stand.
- The tire is cut with a jigsaw, the depth of the cut is from 5 to 10 cm.
- The cut parts are turned inside out, as a result of which the finished flowerpot takes the shape of a pot with patterned edges.
- Inside, the bottom is covered with geotextiles, soil is filled in, and annual flowers are planted.
This stand can be decorated with enamel painting or painted in a single color by applying several layers of paint.
Vases made from plastic bottles
The easiest way to make it is to build a flower pot on a leg. To make flowerpots from plastic, you will need a 2.5-liter plastic bottle, superglue and an old CD.
The whole process looks like this:
- The bottle is cleared of stickers and cut into 2 parts (1/3 and 2/3, respectively).
- The lid is unscrewed and glued to the pre-degreased disc.
- The lid is screwed back onto the cut off part with the neck.
- The resulting flowerpot on a leg needs to be decorated - pasted over with colored paper, small broken glass or painted.
- A flower pot with a plant is placed in an inverted bottle.
The second method is even simpler: a large hole is cut out on the longitudinal side of the bottle, filled with earth and plants are planted. This option is convenient for decorating a street wall, when you hang flowerpots with your own hands on twine.
Flowerpots made of silicate blocks with several tiers
Manufacturers specially produce hollow silicate blocks intended for planting plants. To create a multi-level mini-flower garden, you first need to think about the future structure - the structure must be stable and hold the maximum load.
It is necessary to arrange drainage in the blocks so that when watering, moisture does not accumulate inside the structure.
First, a base is made, which is recommended to be filled with earth to ensure strength, then the first tier of blocks is glued to it. After this, all tiers are lined up according to the intended design. Silicate blocks should be fixed with special glue.
After installing all tiers, the voids in the blocks are filled with soil, where plants are planted. The resulting decorative flowerpots will be large, so you should choose a permanent place for them.
The tiers can be laid out in the form of a pyramid, a semicircle, or a single-line multi-story structure.
DIY polystyrene flowerpot
Polystyrene foam is an easy-to-process material that can be used to make a rectangular outdoor pot.
First, the foam sheets are cut into identical rectangles, which are fastened together with an adhesive solution. Then the internal and external surfaces of the walls are coated with plaster in several layers. At the same time, the outside of the product is reinforced with a plastic mesh to enhance its strength properties, after which irregularities are removed from the surfaces.
The final stage will be covering it with a decorative finishing layer. You can use plaster as decoration by adding pigment dye to it - then the stand will look like it’s made of concrete.
From boards and plywood or wicker
Flowerpots can be made from lumber. For this, edged boards and plywood sheets are used. The boards will serve as the base to which the plywood “walls” will be attached. Such products have a rectangular shape and can be decorated with painting or varnished.
Closer to natural material is a wicker pot made from grape vines. It is distinguished by strength, durability and aesthetics.
Made of metal
Metal flowerpots, mostly forged or cast, are sold in specialized stores. They are suitable for those areas whose landscape requires the presence of wrought iron gates or metal fencing.
From barrels, tubs and other cooperage products
Cooperage products are good because they are a ready-made basis for crafts. An old tub can be used as a stand by restoring the walls: sanding the surface, impregnating the wood with an antiseptic composition to increase the service life of the product, and covering the walls with varnish.
An old metal or plastic barrel can be cut into several parts, using each of them as a separate container. A base should be attached to parts without a bottom, the walls should be painted or sheathed with wooden slats. Sheets of plywood and corrugated sheets can also be used as sheathing.
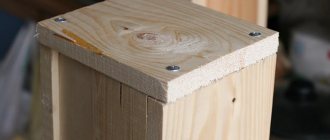
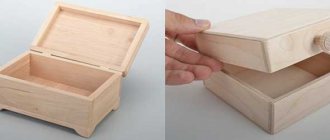
Wooden box as a flower pot
Wood, in its properties and qualities, is a universal material; it can be used to make boxes where we will place our plants.
In the previous example, we already figured out that wood is very easy to process to a fine finish; you can remove absolutely all the irregularities and make the surface perfectly smooth. No special skills or abilities are required for this.
Below we suggest getting acquainted with the options for boxes that you can make yourself without any skills with your own hands. The shape and appearance of the structure will depend on your personal imagination.
You may not use a power tool at all when working with wood, saving some money, but much more time will be lost, keep this in mind. With a set of all the tools, you will get exactly what you planned in the shortest possible time without making any effort.
Be sure to stock up on paint and antiseptic to cover the surface of the finished products.
If the box was originally planned for planting flowers, then you can first purchase ordinary plastic pots where the flowers will be planted or plant them directly in the box. If you are going to plant in a box, do not forget to spread a plastic film and make holes for drainage.
Homemade concrete flower pots
Outdoor flowerpots made of concrete are the strongest and most durable. Finished products can be purchased at specialized flower shops, but do-it-yourself forms for planting flowers will be distinguished by their uniqueness.
What concrete should I use?
The proportions for the solution are as follows:
- white cement - 2 parts;
- perlite – 1 part;
- high-moor peat – 2 parts.
What to make forms for pouring a concrete flowerpot from?
The simplest form for pouring is a large basin, an old floor flower pot, or a wooden tub. Also, a homemade formwork structure made of wood or plywood sheets is used for pouring.
Manufacturing process
The components are thoroughly mixed in a container and filled with water in the amount necessary to obtain a homogeneous thick mass. As a template for measurements, you can use any container - a glass, a cup, an old flower pot.
After obtaining a homogeneous thick mass, you should prepare a mold for modeling. To do this, use any plastic flower pot (you can take an old cup) of the required size. The container is covered with film and smoothed until wrinkles and folds are removed.
Then pour the mixture into the pot, starting from the bottom and spreading it along the walls. The thickness of the smeared layer must be at least 5 cm - it can be checked using a match immersed in the thickness.
For strength, the concrete structure must be reinforced with thin wire, running it around the perimeter of the pot. Another reinforcement method is to add a small amount of shredded fiberglass to the mixture.
When making a concrete flowerpot, you need to remember about drainage, so you should make a through hole in the bottom using a cork wrapped in film. The resulting structure must be left to completely harden for 2 weeks, periodically moistening the surface throughout the entire hardening period.
Pigment dye can be added to the mixture to change the color of the product.
The quality of the resulting concrete tub should be checked using an ordinary pencil. To do this, tap the structure with a pencil, pen or thin hammer: if the sound is dull, then the container is left to harden further, but if a ringing sound is heard when tapping, then the pot is almost ready.
The product is removed from the mold, the surfaces are processed - internal and external using a metal brush, after which dust and dirt are removed from the sanded sides, washed with water and dried. Then the product is again wrapped in film and left until completely hardened.
When the tub becomes lighter, it means that the pot is ready for use.
Finishing a concrete flowerpot
There can be many options for finishing the finished product:
- ornament on the surface using a spatula;
- painting on the walls;
- painting in different colors.
In addition, the walls can be decorated with shell shells, drowning pieces of decorative material, small pebbles, and multi-colored stones on the surface.
The main principle of finishing is that the color should not be brighter than the seedling. Otherwise, the flower will be lost against the background of bright colors. Designers recommend using a single-color finish, the color of which will be in harmony with the overall architecture of the house. The most popular tones include white, gray, brown, and terracotta.
What materials and tools will be needed for manufacturing?
To make a wooden flower box with your own hands, you need to prepare the following basic tools:
- jigsaw or saw;
- grinding machine;
- forceps;
- tape measure with a square;
- plane;
- screwdriver;
- hammer.
The design of the future box is selected in accordance with the equipment present: if all manipulations have to be performed manually, it is better to give preference to the simplest form. The presence of power tools allows, in turn, to realize any design ideas.
As base materials you can use:
- slats and boards with a thickness of at least 1 cm;
- OSB scraps;
- plywood sheets, including those that can be reused.
Subsequent surface treatment will be carried out using an antiseptic, a variety of paints and varnishes, and stains. Nails, waterproof glue, and self-tapping screws are suitable for connecting parts.
Thin holes are drilled along the edges of the workpieces