July 7, 2018
A carpenter's chisel is used for working with wood. Used for shaping wood, smoothing edges or thinly cutting the surface of wood.
Due to the similar operating principle of the tool, a chisel is often confused with a chisel. But the chisel is distinguished by a different sharpening angle of the blade, and the very size of the cutting part. The bit has a larger area.
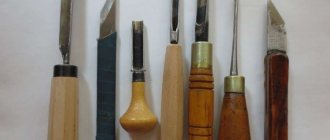
Chisel models are divided according to the direction of work, how they move along the surface of the material, the type of handle and the size of the tool.
The processing of the material with a tool occurs as follows: the cutting edge rests against a wooden workpiece, and then with a special hammer - a mallet, methodical tapping is performed on the handle of the chisel. With each blow, the tool goes deeper into the wood and knocks out a groove in it.
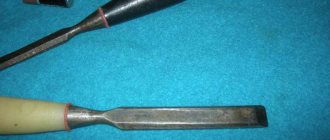
A few words about the structure of the chisel
Where the metal part of the chisel enters the handle, a reinforcing metal ring is sometimes installed. This is done so that the metal part does not get driven into the handle over time and does not split it. This detail applies more to chisels with a wooden handle, and newer models do without a ring.
One of the tool models is designed for working with hard wood. It has a longer cutter and handle. For durable material, an electric chisel is also used.
When the cutter, on the contrary, is shortened and a long handle is used, the tool is optimized for soft wood. You can remove material using only your hands, sometimes resorting to a hammer with a rubber striker.
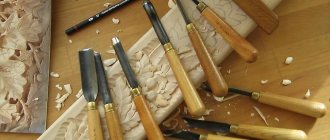
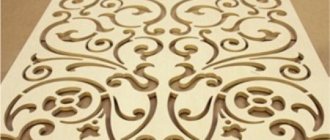
There is the most delicate area of chisel work associated with inlay and decorative carving. These instruments are made thin and short. Working with them involves solely hand movements, without the use of mallets.
Classification
By method of use
Impact chisels
Immersion is ensured by light blows on the end part. The handles are equipped with metal rings on the back. It prevents the handle from breaking.
Hand chisels
Immersion into the tree is done by hand effort.
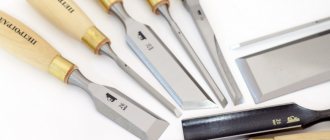
According to production method
- Stamped.
- Forged, having a thickened blade.
- Cutting, from less hard and dense steel.
By shape
The purpose and appearance are determined by the name:
| Name | Working part width (mm) | Handle size (mm) | Longitudinal section type | Cross-sectional shape |
| semicircular | 12 | 145X25 | smooth | ͝ |
| semicircular | 16 | 145X25 | smooth | ͝ |
| semicircular cerasic | 4 | 145X21 | smooth | ᴗ |
| eismus | 8 | 145X21 | smooth | ˅ |
| cranberry | 12 | 145X25 | spoon | ͝ |
| curved cranberry | 4 | 145X21 | spoon | ᴗ |
| cranberry-cerasic | 4 | 145X21 | spoon | ᴗ |
| semiclucarza | 12 | 145X25 | curved | ͝ |
Among classifications, national traditions can be taken as a criterion. For example, Japanese craftsmen proposed their own unique form of chisel. It is equipped with a shorter blade with a thick, long cone-shaped neck. This makes the tool comfortable, easier to hold and control while carving.
Thanks to a special recess on the back side, sharpening is more economical and faster. The combination of the shank and the conical cup makes the connection to the handle the most durable.
Thanks to two layers of the metal part (soft iron and high-strength steel), the sharpness is maintained for a long time, the blade is easily and quickly sharpened.
According to work purpose
- Plotnitsky . Allows rough processing of workpieces of different types.
- Carpentry . Used for neat, delicate work. Suitable for carving linden, spruce and poplar.
- Lathes . Cutters used for working on a lathe.
- Klukarzy . Thanks to the curved working part, they allow material to be removed from deep grooves.
- Multifunctional . Combines a nail puller and a frame lifting device. It's called "European".
- Looped . They have a special device. Used for rounding corners, preparing hinges and locks.
- Scrapers . Made from plastic. Needed for cleaning irregularities, repairing wheels, removing burrs and protrusions.
- Pocket . They have a folding blade.
- Mini chisels . Purpose: fine thread. These include rivets (miniature models with a narrow blade similar to a sharp leaf, allowing you to create a neat, high-precision design), marigolds (designed for cutting out thin elements with rounded shapes).
- Chisels . Used when knocking out unnecessary elements in the material.
- Shoals . Cutters equipped with an oblique blade for decorative work on relief. Used for sculptural carving.
- Shtiheli . They are distinguished by mushroom-shaped handles and an oblique cutter. Used for preparing grooves.
By type of longitudinal section
- Direct . The most common. The blade and blade are completely smooth.
- Curved . A special feature is the noticeable bend of the blade and blade.
- Klukarzy . They are distinguished by a sharply curved blade along the entire length. Used for punching wide pieces of wood.
- Reverse . The presence of sharpening on the other side of the blade and a notch on it allows you to create relief elements above the main surface. Such specimens are called “reverse cranberries.”
By cross section type
Flat . The difference is the straight profile. Available in many sizes.- Angular cerasics . The cross section resembles the letter "V". Its angle is 60-90 degrees. Convenient for three-dimensional carvings, for example, images of hair.
- Radial . The cross section resembles a semicircle. Allows you to carefully and smoothly bury the tool into the wood. Used for contour carving. The working part can be sloping or flat.
- Bracketed . The smooth cutting part is equipped with sides of various sizes, placed at certain angles. Gives a narrow, even sample.
- Cerasics are round . Similar to the radius version, with a smaller thickness. Purpose – figured carving.
According to the shape of the working part
- Straight (the blade is perpendicular to the blade, used for rough processing in even stripes).
- Oblique (the beveled blade makes it easier to penetrate the wood).
Choosing chisels
Before purchasing, decide what the chisel will be used for. For rare use as a tool for primary wood processing, it will be enough to buy a basic set of inexpensive chisels. This option is suitable if, for example, you are planning to repair windows or install a door lock. By the way, an electric chisel is also used for similar purposes.
As your first chisel, we can recommend a tool from the VIRA line. This is the option when the tool has a sufficient margin of safety and is adapted for use at home.
- the range allows you to choose a chisel in the range from 6 to 32 mm
- two-component handle: a base made of impact-resistant plastic + a dense rubber coating that provides a secure grip. Such a handle, unlike a wooden one, does not dry out, does not get wet, and will not crack from blows from a mallet or hammer.
- Diamond sharpening of the cutting edge is achieved using a diamond-coated abrasive. the edge remains stronger and more wear-resistant compared to other analogues
- The handle ends with a special palm rest. this makes working with the tool safer.
In addition to a mallet, you will need a mallet for work - VIRA also has a well-designed one. The tool combines strength, light weight and low impact impact.
- fiberglass handle with rubber coating - strength comparable to metal, yet light as wood
- rubber coating improves the grip of the tool and dampens unpleasant feedback in the hand
- striker made of dense rubber: clear blows, while the chisel handle does not experience damage.
- the shape of the striker is semicircular, because it is more convenient to hit the handle of the chisel
In addition to working with wood, the mallet can be used for work on correcting warped sheet metal. The white rubber of the mallet does not leave any marks on it from impacts, which cannot be said about black rubber.
Another situation is when you are engaged in professional carpentry or perform artistic tasks. In this case, it is worth delving deeper into the chisel production technology itself.
So, here are the methods for making a chisel:
- forging method
- tools made using this method have a thickened working part and are intended for processing hard wood; - cutting method
- chisels are designed for delicate processing on soft wood. - stamping method
We recommend the length of chisels in the range from 11 to 16 cm. After all, the longer the tool, the less load it can withstand.
Many people prefer wooden handles for work. Despite the fact that they appeared a very long time ago. The material fits snugly in the palm, it is pleasant and relatively light, but it can hardly be called very durable. Of course, this also depends on the method of use: a varnished handle in a workshop will not be damaged for many years, but in difficult conditions it can dry out and crack.
Plastic definitely wins in terms of durability: it does not dry out, does not rot, and can withstand significant impacts, but it may not be suitable for some for reasons of personal comfort.
How to do it yourself
Using available tools, you can make a chisel yourself. In some cases, it is enough to slightly correct the shape and sharpen it, while in others you will have to resort to forging.
Chisel from a milling cutter
Often, a milling cutter is used as a base material for making chisels yourself. The metal of this part is quite durable. It is easy to give it the desired shape. Manufacturing principle:
- Cut out a piece of metal of the required size from the cutter.
- The surface of the workpiece is carefully polished. The workpiece is given the desired shape.
- The next step will be making the handle from wood.
At the end, all the constituent elements are assembled. Usually the handle is made of 2 parts, which are connected by pins.
Metal drill tool
You can make an angular version of the working blade from a drill. How to make a tool from such a base:
- Select a drill with a suitable diameter. Flatten the tip to form the desired thickness and width.
- Using grinding, you can give the knife part the desired shape. A drill can be an excellent base for creating a “nail”.
- The final stage of manufacturing will be the handle. You need to prepare two halves of wood and twist them with a pin.
If you use a drill as a base, you can get a working part of any parameter.
Semicircular chisels
A semicircular chisel for wood carving can be made from a punch that has a similar shape. Algorithm for making a semicircular chisel from a punch:
- Prepare a punch of approximate size.
- Using a grinder, remove the excess part of the radial part.
- While the metal has not cooled down after cutting, you need to immediately sharpen the edges.
- The last step is to sharpen the blade using a grinder.
The tool is ready to use.
We use a file
A file can be an excellent base for making a straight chisel. The working tool is a grinding wheel. But first you need to choose the right file. Take into account the desired parameters of the future device, the type of metal and the grain size of the file.
Using a grinding wheel, all excess is cut off and the desired shape is formed. The next stage will be sharpening and shaping the handle. It is the handle that deserves special attention. Often a standard file tip is used as a base, but it is not suitable for a chisel. You need to flatten the narrow part and only then attach the wooden base.
If you cut the cutters correctly and then perform high-quality sharpening, then you can also get a corner chisel from a file. In this case, you will have to put in more effort.
Files
A needle file is also a good basis for forming homemade woodworking equipment. Manufacturing and processing features:
- The file needs to be heated strongly and evenly. This is necessary in order to perform actions similar to forging.
- After heating, bend the base until the desired shape is obtained.
- The finished workpiece must be immersed in water. This will cool the metal and harden it.
Sharpening the “blade” and attaching the handle will be the final stage in creating the equipment.
Angle chisels
Angle chisels can be obtained from profile tools by heating metal. After heating the workpiece, it is given the desired shape. Then the handle is hardened, sharpened and secured.
A chisel is the main tool in working with wood if you need to create a beautiful pattern, remove excess wood or form a groove. There are many types of this tool, each of which has its own intended use. You can make the device yourself if you use available materials.
Quality check
We determine the quality of a chisel by the duration of its service and the level of processing of the material. In fact, in addition to the handle, the main thing here is the hardness of the metal itself for the working part of the tool and its hardening.
The first step in choosing a good chisel is determining the appropriate type of steel.
The following types of materials are available on the market (sometimes only processing methods are indicated):
- forged
- drop forged; - CrV
– made from chrome vanadium - CS
– tool steel
We offer a way to determine the type of steel of a tool if for some reason it is not indicated on the chisel.
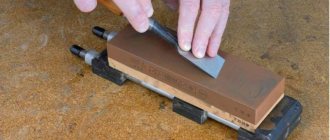
Try sharpening a chisel on a stone. The point is that on well-hardened steel, burrs appear from sharpening; they are then easy to remove. Steel that does not produce burrs is overheated and too hard. There is a possibility that the steel will split during operation. This may cause injury. And the third case - the steel produces burrs, but they cannot be removed. This indicates that the steel is too soft. When cutting into wood, steel will crumple.
In general, the more information the manufacturer leaves on the packaging of the chisel about materials and sharpening, the better.
From the history of terminology
The word "chisel" is borrowed from the German - Stemmeisen. The German word Stemmen translates to “chiseling, chiseling, gouging.” This term in German is used to refer specifically to a chisel, but a thin one, pushed forward by hand without using a mallet. To designate this particular type of cutters, it was borrowed by Russian craftsmen.
This term most likely came into use by craftsmen during the era of the reforms of Peter I. Interestingly, a chisel most often meant a flat hand tool, which today is called a chisel. Here is a fragment from A. A. Pchelnikov’s book “Conversations with Children” (1858): “With this flat one, which is called a chisel, sawn spikes or hollowed out holes, etc. are cut out and cleaned. With a semicircular chisel, semicircular recesses are removed and cleaned. Using slotting tetrahedral chisels, wide and narrow, they gouge out holes, take out grooves for inserting thin planks into frames, etc.” And in the Dictionary of Church Slavonic and Russian Languages (volume 4, 1847) a chisel is defined as “... a kind of chisel. Carpentry chisel, flat and tenon.” A more detailed definition is given by the authors of the Desktop Dictionary for reference in all branches of knowledge (volume 3, 1864): “A chisel, a carpentry tool, is used for gouging out holes and replacing a chisel. It is made of steel, 4 inches long, up to one inch wide” (1 inch = 4.45 cm).
It is not known exactly when the term “chisel” began to be used to refer to semicircular incisors. But in the publications we found before the end of the 19th century, this term is used specifically to designate a chisel, while the word “chisel” refers to cutters of various shapes, including semicircular ones. In the 30s of the XX century. Several editions have been published in which the chisel comes in different shapes, including a semicircular one. In the current linguistic tradition, including in the professional vocabulary of woodworking masters, a chisel is a common name for cutters of a similar design (most often semicircular), and a chisel is a straight cutter with a profile in the form of a hexagon or trapezoid, intended for creating grooves and splitting material and other operations.
Read about the types of chisel handles, recommendations for choosing chisels and other features of working with this type of hand tool in other specialized articles on our website.
What methods of using the instrument exist?
Working with a wood chisel is distinguished by different positions of the tool towards the plane being processed.
There are the following methods of processing wood with a chisel:
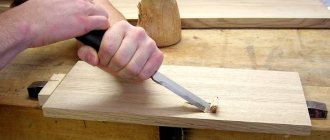
- The cutting method involves moving in the direction of the wood grain, the working surface without sharpening is facing the ceiling, you hold the handle and at the same time hold the blade, with your thumb facing the handle. This method of work gives good control over the work process, while movements are performed accurately.
- Cutting with the side edge of the blade - for this, tools with a flat blade section are used. In this case, the cutting edge is not necessarily straight; it can also be beveled. In any case, the model has only one sharpened side. Instances with a cutting edge in the shape of a half circle are used for circular cuts.
- Perpendicular cutting
How to hold a chisel correctly when working: the handle is held with one hand, the blade is held with the other hand, using the thumb and index finger.. You make small cutting movements, gradually selecting thin layers of wood. The method requires the greatest endurance and, accordingly, time.
Chisel techniques do not allow cutting thick layers of wood in one go. The layers of wood are removed gradually, one after another, following their own markings on the workpiece. If you remove a lot of material, you can start the work again, not to mention the fact that such an attitude ruins the instrument.
When working, use reinforcement with your hands and with a mallet/hammer. Impact tools are used for quick work and knocking out recesses and holes of various shapes. Of course, doing this manually would take a long time and would not be effective.
For decoration, only controlled manual effort is used; it eliminates strong impacts and haste.
We hope that this text will be useful to you and now it will be easier for you to navigate the variety of chisels.
Tags:
- Carpentry work
Rate the material:
Content:
- 1. Master's hands and direction of wood fibers
- 2. If you take a hammer to help
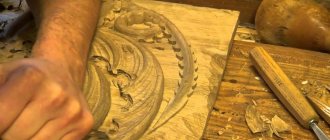
Professional carpenters and carvers, as well as those for whom working with wood is more of a hobby, use chisels according to the same pattern. First, a pencil drawing is applied to a wooden blank or part—drawing. Then the outline is deepened using a wood carving knife. Only after all the contours have been cut, are clearly visible and are not erased, do they begin to work with a chisel.
The method of using the tool is chosen depending on what kind of processing needs to be performed. There are two most common:
- Pressure by hand, when the tool is set in motion only by the force applied by a person, for example, as when trimming the edge of a piece of wood.
- With a mallet blow when additional force is needed to gouge grooves or holes in wood.
It is worth noting that for all its apparent simplicity, this is a rather complex and time-consuming matter. Largely because you need to use the tools very carefully and with extreme precision. After all, in some places you don’t put enough pressure on the chisel, and in others you squeeze it too hard, it’s very easy to ruin the part. One awkward hand movement or a not-so-successful blow with a mallet - and all the work will go down the drain. We'll have to start everything from scratch.
If you want to avoid such failures, we recommend reading this article. Here you will find some useful tips for working with chisels and mallets.