Feather (feather) wood drills are used for drilling mainly through holes in wooden products. They differ in the shape of the cutting part, diameter, and sharpening of the blades. This tool is easy to use and affordable. When drilling wood, it can replace an expensive disk cutter.
Application area
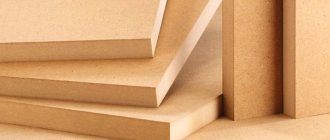
The tool is used when working with all types of wood, as well as its derivatives (MDF, chipboard, plywood). It is equally widely used for repairs, in the manufacture of furniture, doors, window frames, and in other areas of industrial production. There are two main types of drilling in which it is used:
- For non-through holes of small diameter. For example, the production of fastening sockets for door jambs, furniture production.
- For through holes. For example, sockets for installing studs and other fasteners.
Important! Spade wood drill bits are recommended for shallow drilling. You also need to remember about the thin tip. It goes deeper into the wood than the main head.
Feather drill for wood: dimensions
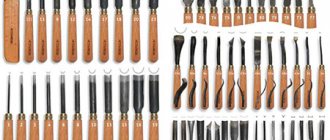
A wide range of different devices used for drilling holes is presented to the consumer's attention. Feather drills are designed for working with wood.
These products are used by both carpenters and professional furniture assemblers, as well as home craftsmen. Information about the design features, technical characteristics and sizes of pen drills for wood is contained in this article.
Design features
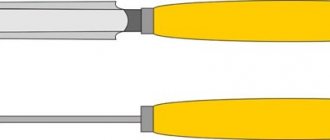
The uniqueness and efficiency of feather drills lies in their design simplicity. They consist of two parts:
- The working part is the main part of the tool that comes into contact with the wood being processed. The shape resembles a shovel with a sharp tip. He is responsible for the exact position of the blade and cuts out the main part of the wood. On the sides of the working surface there are blades and cutting edges. If you look at the longitudinal section, they are sharpened to the right side.
Feather drills for wood are made according to strictly verified patterns. The proportional ratio of the width and thickness of the working part is strictly observed:
| Width (diameter) | Thickness |
| Up to 1 cm | Up to 2 mm |
| Up to 2 cm | Up to 4 mm |
| Over 2 cm | Up to 8mm |
- tail - a steel rod in the shape of a hexagon. The multi-faceted configuration allows you to securely attach it to the drill chuck, as well as use adapters to increase the working depth.
Design Features of the Adjustable Spade Drill
One option for a feather drill is the universal adjustable drill bit. It can be installed in both a screwdriver and an electric drill. It replaces a set of feather drills because the size of the tool is adjustable.
An adjustable drill bit looks like a metal rod with slots cut into it for a removable blade. At one end there is a sharp tip, sometimes with a spiral thread - it is necessary for centering the hole and literally cuts into the wood. The other end is a hex socket for secure mounting in a drill, screwdriver or drill press. Thanks to this shape, you can use magnetic extensions and adapters if necessary.
The tool comes with replacement blades. There is a small scale on the blade and the dimensions are indicated; there is one mark on the metal rod. When inserting a replacement blade into the slots, you need to align the marks, focusing on the desired size, and then firmly tighten the lock nut with a hex wrench so that the blade does not fly out.
The pointed tip is for centering the hole
The blade has a cutting edge along its entire length. The threaded tip burrows into the wood, then the bit comes into play, and then the entire cutting edge begins drilling the hole.
If a hole of up to 25 mm is needed, then one blade is inserted; if more than 25 mm, then another blade of a larger size is used. Two blades replace drills up to 45 mm in size. Accordingly, such a tool can be successfully used instead of a set consisting of 30 feather drills. The existing gradation allows you to set sizes in 1 mm increments, i.e. 15mm, 16mm, 17mm, 18mm, etc. up to 45 mm. In principle, this is not the limit. You can purchase blades of both 50 and 60 diameters.
Characteristic
The most complete idea of the technical characteristics can be obtained in comparison with other types of attachments. There are three types of wood drill bits that seem to perform the same task. This is not entirely true:
- Spiral - designed for through drilling. It will not be possible to make a mounting socket using it. It is possible to obtain deep through holes of small diameter with smooth edges.
- Forstner drill - used to make shallow, large diameter holes. It is characterized by high cost. The shank is short, which limits the scope of application. The edges of the hole are smooth, without flaws.
- Feather - inexpensive, with a wide range of working diameters. There is an extension option. Convenient, easy to use. Suitable for all types of wood. With a drilling diameter of more than 60 millimeters, creases and torn edges are possible.
Feather drills for wood outperform their competitors in many ways. The only drawback is uneven edges with a large drilling diameter, but this is not worth paying attention to. You need to know that high-quality large-diameter holes are drilled with crowns.
Adjustable Spade Drill Cost
One drill replaces a whole set.
One small-diameter feather drill costs approximately 100-150 rubles. The cost of larger diameter drills reaches 300-400 rubles. The price varies depending on the manufacturer. Buying one universal drill will cost 1000-1500 rubles. Craftsmen advise saving on tools by purchasing such a drill, and note that it is convenient to use.
Did you manage to solve your problem using the recommendations from the article?
Yes!
46.45%
No. More answers required. I'll ask in the comments now.
38.48%
Partially. There are still questions. I'll write in the comments now.
15.07%
Voted: 803
Selection rules
Finding a high-quality nozzle at an affordable price is not so difficult. If we are talking about trusted companies, such as Bosch, Hitachi, then with a high degree of probability the product is of high quality and reliable. To determine the quality of drills from lesser-known brands, there are several rules that can be easily checked by visual inspection:
- Geometric dimensions. The cutting edges must be symmetrical to each other and be the same size.
- Quality of sharpening of cutting edges. It is checked by touching it with your finger, similar to checking the sharpness of the blade of a kitchen knife.
- The quality of the nozzle. Any irregularities in the working or tail part should alert you. Reliable products have an almost perfect sheen.
- Metal color. An important parameter to pay attention to first is:
Gray steel is highly likely to be completely untreated.
Black - the metal is calcined with steam. This treatment increases the strength and wear resistance of the nozzle.
Golden – internal stress has been removed from the metal. This significantly increases strength.
Bright golden – the drill is coated with a thin layer of titanium nitride. It will last a long time and will cope with the toughest wood.
Features of use
To increase the efficiency of using feather drills for wood and obtain maximum effect, you should follow simple rules for their use:
- wood is drilled at low drill speeds: 300-400 rpm;
- It is advisable to use a power tool with the ability to adjust power;
- mark future holes;
- Periodically remove accumulated chips.
You can choose the right wood drill bits for you in the online store. We offer tools manufactured at our company's production facilities in China. Our products have been awarded quality certificates. A guarantee is given for each product. You can pick up the ordered equipment from a warehouse in Moscow, or use the services of transport companies. Please check all the details on payment terms, guarantees and delivery in the appropriate section of the website.
Features of operation
- Before starting work, the drilling area is carefully marked and clear boundaries are drawn. If there are many of them, then the depth of each is indicated.
- It is recommended to use a drill with variable speed control. This will make the job easier.
- The drill rotation range does not exceed 600 rpm. The golden rule is that the larger the hole diameter, the lower the head rotation speed and vice versa.
- An adapter is used to increase the drilling depth. One end of it is inserted into the cartridge, and the other into the tail section.
- The angle between the drill and the wooden surface is always 900. Otherwise, the tip may break and the workpiece may deteriorate.
- The main thing in work is the smooth increase in speed.
- Wood shavings are removed periodically.
Every craftsman should have feather drills for wood. They are easy to use. They are durable, productive, and easy to sharpen. The low price allows you to have several models of different sizes in stock.
Features of work and safety precautions
The design features of the drill require compliance with certain rules when working with it:
- Since drilling is performed at fairly high speeds, safety precautions must be observed: carefully tighten the lock nut when inserting the blade. If the blade flies out, the risk of injury is very high.
- Feather-type drills are not recommended for drilling deep holes and holes with a diameter of more than 60 mm due to the reduction in the quality of the edges - they may be uneven. For such cases, it is optimal to use a core drill.
- Drilling with feather drills is performed at low speeds (about 200-500 rpm). As the diameter of the hole being made increases, fewer revolutions are required for efficient operation. The strength of the feed also matters, i.e. the force with which the master presses on the tool.
- Do not apply strong pressure to the tool.
- A pen drill with a threaded tip is more suitable for working on a drill press. The part must be secured with clamps so that the hole is round and not oval.
- Drilling begins first at minimum speed, and then increases it as it goes deeper into the thickness of the material.
- Chips will accumulate in the hole. It must be removed periodically, interrupting work.
If these rules are followed, the drill will last longer and the quality of work will be high.
Types of metal drills and their purpose, characteristics of spiral drills
After reading this article, you will learn:
- what types of metal drills exist;
- where to find their markings;
- what important characteristics do these instruments have;
- what do they influence;
- What kind of equipment are metal drills installed on?
Photo No. 1: metal drills
Let's start with the basics.
Storing feather drills
We try to select original, aesthetic and convenient solutions for storing power tools and consumables. Now we propose to make a stand for pen-type drills.
It will be beautiful, convenient and portable, because you often have to mix both the drill and its attachments.
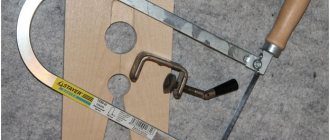
First you need to figure out what size the stand will be. We suggest leaving a gap of 1.2 cm between the feathers, 2 cm on each edge, and as a result, the width of the product is 3 cm and the height is 6 cm.- For the base, plywood is used, the thickness of which is 1.2 cm, and for the front insert with holes for the size of the feathers, plywood 0.4 cm thick is used. For the frame, you need to cut plywood on a circular saw, and its width should be 2.2 cm. Next, we make blanks of the required size on the trim.
- The 0.4 cm plywood has a length of 30 cm and a height of 5 cm, because the widest feather makes a hole whose diameter is 4 cm. The result is a whole set of parts.
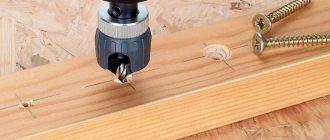
The most boring part is creating the markings for the holes and then drilling them. First, you should measure the width of the largest feather from the edge, this is 4 cm, and then mark the middle at these 4 cm; Then we make an indent of 1.2 cm and proceed to create the next hole for the pen. Through holes should be made on one part, and drilled 0.5 cm on the second
- To begin with, use the 5th drill, and then widen the holes with the 8th, exactly to the diameter of the feather shanks.
- Afterwards you need to sand the surface well.
- In through holes we grind like this - screw the sandpaper onto the drill, fix it on the screwdriver and grind.
- Next, you can start gluing everything together, while clamping all the parts as tightly as possible, because you can only use PVA glue.
- The frame is ready. Now let's move on to creating a beautiful facade. It is worth transferring to it all the same markings that were made for the previous parts, and using each drill, make a hole for each replacement model.
- Next, you need to bring everything into perfection using sandpaper, don’t forget to sand the holes, and then glue everything to the frame.
- From the remnants of plywood scraps with a thickness of 1.2 cm, you can make legs, which should be screwed with self-tapping screws to the almost finished product.
- All that remains is to cover everything with oil for beauty.
- Ready!