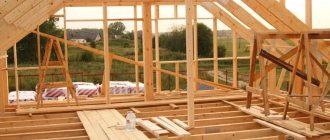
Many people in our country prefer to do things themselves for which specialists would have to pay a lot of money. If you have the knowledge, skills and experience for this, why not? This article will talk about how to make drawings of a wooden staircase with your own hands, what parameters to use for this, and how to connect them together.
Installation of steps
Any drawing is preceded by calculations, on the basis of which the dimensions of all parts of the flight of stairs are determined. It should be as safe and comfortable as possible for movement in any direction - both up and down.
In order for it to turn out exactly like this, when designing, you need to try not to go beyond the recommended parameters for the steepness of the staircase, its width, the size of the steps, etc.
Standard dimensions
If the design involves the use of a large number of steps, then it is preferable to arrange special intermediate interfloor spaces. The optimal solution would be to create a wide platform. Its parameters are equal to the width of two flights with the addition of an additional 10-20 centimeters.
Various regulatory requirements affect the construction of stairs and prescribe certain parameters for them, for example, according to SNiP, the permissible norm varies from 80 to 140 centimeters in relation to the width of the steps.
For stairs used as evacuation stairs, there are separate parameters according to which the flight standards must be at least 90 centimeters.
Depending on the functionality of the stairs, the transfer of large objects is also taken into account
This is especially important to take into account on the so-called turning stairs. The useful width of such structures must be at least one meter, otherwise transporting things will be problematic
It is necessary to note such a parameter as the depth of the tread. Its peculiarity is that it varies depending on the length of the element: towards the inner part the tread narrows, creating something like an opening, and towards the outer part it expands. Based on this, the average value, that is, the central line, is always taken as a basis. This is what is taken into account in the design.
According to GOST, the minimum tread size should be 25. By substituting this parameter into the Blondel formula, you can calculate its height. It is 19.5 cm, and this is considered an ideal indicator. Of course, it is not necessary to observe exact values when arranging the staircase yourself in a private house. However, taking into account the standards will make the design as safe, convenient and comfortable to use as possible.
The optimal height of steps varies between 12-25 cm. In private houses with a height of more than two floors, this parameter should not be more than 20 cm.
Much attention should be paid to the distance between the balusters. The largest value reaches 15 centimeters
Otherwise, the stairs lose their original supporting function.
Since the staircase consists of individual modules, their dimensions also need to be taken into account. An indicator of these elements is the interaxial distance between the modules, which ranges from 225 to 300 mm, depending on whether the topmost step is taken into account.
Regulatory documents place the safety of the stepped structure at the forefront. It is considered safe only if the sum of the dimensions of the tread and riser is 46 cm, for example: 23 and 23, 28 and 18. Such calculations are called the “safety formula”, in which the best indicator is considered to be 29 and 17
However, it is not necessary to follow this parameter, it is only important to adhere to the number 46 cm, because in practice it is quite difficult to realize ideal indicators in individual projects
Calculations of staircase dimensions
Before you start designing, you need to make accurate calculations, draw a diagram and put all the data on it. If you are not sure of the correctness of the calculations, then it is better to entrust the work to professionals who will make a competent drawing, which will allow you to carry out the installation step by step without errors.
Total height of the stairs
The height can be determined by measuring the distance from the floor of the first to the second floor, taking into account the thickness of the ceiling. For example, if on the 1st floor the ceiling height is 2700 mm, and the thickness of the interfloor ceilings is 300 mm. As a result, the total height will be equal to 3000 mm.
Basic data for measurements
If there is no finished floor, then its optimal dimensions need to be determined by eye.
Number of steps
If the height of the staircase structure and the riser are known, the optimal number of steps can be determined. For these purposes, you need to divide one indicator by the second. For example, with a total height of the lifting structure of 3000 mm and a riser height of 175 mm, the calculation will be as follows: 3000: 175 = 171 mm. After this, you need to round the value. As a result, we get 170 mm. The table shows an example of a calculation:
Calculations of main indicators
Riser height
The recommended, optimal riser height should be 150–180 mm. In fact, this is the average human step size. This height can be 150–200 mm. Typically, the average value according to the standard is 160-170 mm.
Optimal slope range for stairs
Step width
In order to avoid injuries as a result of incorrectly selected width of steps, you need to calculate it correctly. Based on many years of practice, the width of the element should be in the range of 220 – 400 mm.
Optimal step width
To determine a more accurate value, you can apply the following formula. You need to take the average width of a human step (this is 600 - 640 mm) and subtract from it the height of the riser, multiplied by 2. That is, 640 - 2x175 = 290 mm. The resulting indicator will be the most optimal for movement.
March width
According to safety rules and for convenient movement, the span should be at least 80 cm wide. It is better to take at least 90 cm. For convenient carrying of furniture, the optimal width is 100-120 cm.
Plan length of the staircase
To calculate this parameter, you need to multiply the number of steps and the width of the tread. In our example, we multiply 29 by 17 and get 493 cm. That is, the staircase turns out to be quite long and when constructing one flight, a room of at least 6 meters will be required. In a small building, you will need to make 2 flights, with a 90° or 180° turn.
A platform is installed between the flights or turning steps are installed. If you can’t perform the calculation yourself, you can use the special program presented below, which will clearly reflect the localization of the staircase parts.
Ceiling opening size
When building a staircase from solid wood, you need to remember to calculate the ceiling opening so that you don’t have to bend over when going up. This indicator will depend on the slope, which affects the ease of movement and is selected individually.
The optimal result is considered to be a slope of 23°-36°. But more often, due to the small area of the room, it is not possible to completely maintain the required angle.
The size of the opening in the ceiling area will depend on the angle of the flight of stairs. So, for a folding structure, a small opening will be required, and for a larger slope, a more significant one will be required (up to 2 m).
Optimal opening size
Stringer length
To determine the length of the stringer, the Pythagorean formula is used: (length of the staircase in plan)²+ (height of the staircase)²= (length of the stringer)².
Determining the length of the stringer
That is, with a length of 493 cm and a height of 300 cm, we get the following: L = √ (4932 + 3002) = 577 cm (the indicator is taken with a margin of 580 cm).
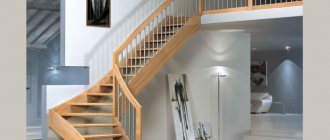
Types of staircase designs
When choosing a staircase structure, the main factor is the size of the area required for its construction. In second place is the convenience and comfort of ascent and descent. Here you need to take into account the frequency of use, the presence of children and elderly people in the house.
Aesthetics is also an important criterion. The staircase should be combined with the interior of the room. In addition, it is necessary to take into account material possibilities: the production of wooden stairs with a complex configuration requires more time and financial costs than options that are simpler in form and execution.
Marching
Are the most popular. They got their name thanks to marches (flights) - a group of united steps. The staircase may have one or more flights.
There are straight structures (single-flight and double-flight, with a rest area). They can be free-standing or placed near the wall. But straight models require a lot of space, so in order to save useful space, two-flight options are provided with a rotation at an angle from 90 to 180 degrees.
The flight has a curved shape with an optimal angle of elevation, then rotary steps are used, which are also available in structures with two and three flights without platforms.
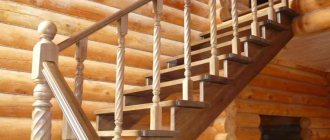
The most popular types of wooden stairs for a country residential building are:
- Ordinary one-march ones. They have a simple design with a span in the center of the room or near the wall - the most durable with reliable support.
- Curvilinear single-flight. Installed in large rooms to emphasize spaciousness. They are distinguished by a smooth turn and steps widened on the outside.
- Marching with lower turning steps. Sometimes this option is provided for by the layout of the room and can support the chosen architectural style.
- A simple 2-flight system. A staircase with two flights and an interfloor turning platform can be mounted above the door and save space.
- 2-flight L-shaped design. It is located in a rectangular opening along perpendicular walls and saves space.
- 2-flight U-shaped staircase with an upper platform and turning steps. The design is installed in luxury mansions with a large hall.
- 3-flight system with two platforms. This type of staircase saves space, but requires a significant ceiling height.
To select a specific configuration, you must correctly calculate and measure the free area for installation and draw up a drawing. A detailed guide on how to do this will be below.
Screw
Screw-type structures are used less frequently, as a rule, with limited space or for aesthetic reasons by the owner of a private house. They are not as convenient as marching ones, and it is difficult to transport furniture on them. To install the ladder, you will need to perform complex calculations, since with a small error it may lose its functionality.
Spiral staircases sometimes serve simply a decorative function, especially with a fence made of artistic forging. The installation of such options is possible in almost any room, because they take up less space than rotating designs. The following types are distinguished:
- with cantilever pinching of steps on the internal pillar;
- with steps supported on the internal pillar and perimeter walls;
- with cantilever support of steps on the casing pipe;
- with support on the fence and bent bowstrings.
More complex options are modular spiral staircases. The structure is assembled from modules, folding them at an angle in a certain sequence. They come with a central stringer (the steps are attached to the modules, and the edges are connected by bolts) and a central column (rested on a stacked column, connected by bolts). Read more about wooden spiral staircases.
Spiral staircases save space
Calculation of stairs with winder steps
Calculating a winder staircase with a 90-degree turn is a very important process. If even a small mistake creeps in at this stage, then you risk assembling a dangerous structure that will be inconvenient to use. In addition, a design error will result in the parts having to be adjusted “after the fact,” which means additional work and delaying time. Therefore, make a plan and strictly follow all the stages of calculating a staircase with winder steps by 90, so as not to forget about anything.
Carefully watch the video with the calculation of the winder steps of the stairs at 90 degrees and write down the main points in the form of a plan.
After the main dimensions of a curved wooden winder staircase are determined based on the video, you need to calculate the configuration and number of winder steps.
Calculation of the steps of the winder staircase
U-shaped staircase with winder steps
Let's take a closer look at the design of a U-shaped staircase with winder steps. First of all, it is necessary to mark the center of the arc coinciding with the inner radius of the staircase, that is, point “A”. Then determine the number of turning steps: the more there are, the smaller the angle of rotation for each step - and the more comfortable it will be to move along the winder stairs to the 2nd floor.
Let's assume that the winders will be steps up to the seventh inclusive. Then a straight line DE is drawn through the beginning of the eighth step. Line AB divides the staircase into left and right parts. In the middle of the march it is necessary to draw a curve ac corresponding to the line of movement. From AB on the line of movement a section equal to ½b is laid out, where b is the width of a regular step. We get point 1. Next, we lay off a segment equal to b from it and mark point 2. Similarly, at equal intervals we mark the remaining points 3-7. These calculations are clearly presented in the schematic photo of the winder staircase below.
Visual diagram of a staircase with winder steps
Next, through point 1 and A we draw a straight line until it intersects with DE. We also draw a straight line through points 2 and A. On section DE we obtain points 1 and 2. We lay off segments on line DE equal to section 1-2 and mark them with numbers 3, 4, 5, 6 and 7, respectively. Now we connect point 3 on the line of movement ac with point 3 on the straight line DE, then we connect the corresponding points 4, 5, 6, 7. Thus, the configuration of the steps is determined. A similar calculation is made for the right side of the staircase with turning steps.
Calculation of a 90 degree rotary staircase
As in the case of a U-shaped staircase, point “A” is located and straight line AC is drawn. There are two options for the arrangement of steps:
- straight AC divides the corner step in half;
- two steps are adjacent to straight AC with their edges.
In the second case, similarly to the calculation of the U-shaped winder staircase to the second floor, the line of movement ac is drawn. On a curved section, segments of length b (the width of a straight step) are laid out. In this way, the number of winder steps of the turning staircase is calculated. Let's assume these are steps 1, 2, 3 and 4. Then straight line EB is drawn through the end of step 4, where “B” is the intersection of straight lines EB and CA. Next, segment AD is arbitrarily drawn from point “A”, and points 2, 3 and 4 are marked on it so that segment A2 is equal to two parts, segment 23 to three, 34 to four. An arbitrary segment equal to 1 conventional unit (cm, dm) is taken as one part.
Diagram of how to calculate a winder with a 90-degree turn
Now we connect points 4 and B. From points 2 and 3 to the intersection with AB we draw straight lines parallel to segment B4. The resulting points on section AB are connected, respectively, to points 3 and 2 on the line of movement ac. These lines determine the configuration of the winder steps of the 90 degree turning staircase.
In the case where the straight line AC divides the step in half, the calculation of the winder staircase is performed in a similar way.
Calculation of the elevation angle and opening size
Finished drawings of a winder staircase to the second floor may differ in the angle of elevation and may not fit the dimensions of the opening in your particular case. Let's figure out how to calculate a 90-degree turn on the winder staircase in order to maintain comfortable and safe values.
The most common version of this design consists of 2 straight flights, which are located at right angles to each other in the corner of the room. The safest and most comfortable slope is determined by the ratio 1:2-1:1.75 or 30 degrees.
When calculating wooden stairs with winder steps, an inclination angle of up to 45 degrees is often used. The design in this case is more compact and miniature, which is a plus for many. However, using steeper stairs with winder steps will be more difficult and dangerous. If you have a choice and the area of the house allows, it is better to design a winder staircase to the second floor with an angle within 30 degrees.
An example of a drawing with the calculation of a winder staircase with a 90-degree turn
The approximate number of treads is determined by dividing the height of the opening, taking into account the slab or floor beam, by the recommended vertical size of the step. For example, in a room with a height of 2.8 m, you will need to place 2.8/0.15 = 19 steps (round off the larger side, i.e. to the whole number). From the obtained value we subtract 1 (ascent to the floor of the second floor) and get 18 steps in the calculation of the winder wooden staircase.
Assembly and installation of wooden stairs
Installation of stairs on stringers is carried out in the following order:
- The stringers are installed close to the top beam, floor slab or pillars, and secured with metal corners.
- At the bottom, the structure is supported on a board or block, firmly fixed to the floor with metal anchors.
- For stability, the load-bearing elements are connected to each other by steel rods with threads and a nut or wooden beams with wedges.
- Mount the risers with glue or self-tapping screws.
- Lay the steps with a protrusion of 2-3 cm above the vertical part. Glue, hardware, and wooden dowels are used.
- Install balusters on studs, wooden dowels, zip bolts or self-tapping screws. Fastener length - 80-120 mm. They control the verticality of the balustrade by plumb or level. After preliminary assembly, the upper edge is processed for even laying of the railing.
- Cut a groove in the handrail equal to the width of the baluster.
- Install the railings with self-tapping screws.
- From the outside, finishing is attached to the staircase - boards, decorative panels.
The assembly of marches on strings is somewhat different:
- Steps and risers are inserted into the grooves on the supporting beams, coated with glue.
- The strings are connected with tension bolts and nuts. A flight of 18 steps will require 3-4 hardware.
- The flight of stairs is installed in the same way as stringers.
- The lower part of the balusters is sawed at an angle and installed directly on the bowstring or baluster. For a more reliable connection, strips are used that are attached to the spaces between the supports.
- The railings are laid.
During installation, all joints and fasteners are coated with glue. Measurements are taken very carefully. After all, even a small mistake can lead to the failure of the entire part or structure. When working with cutting tools, observe safety precautions.
Installation
When the steps, platforms and beams are ready, you can proceed to installing the stairs yourself. The example considers the option with stringers. It is necessary to make notes in advance for the location of their installation. On the floor of the first floor, stringers are installed on a support beam. Where the staircase meets the second floor, support members are placed in gaps in the floor beam. In some cases, metal supports are used to serve the same purpose. The stringers are fastened using anchor bolts.
During the installation process, you should always have a building level at hand; you can also determine the position using the body kit, so that you don’t end up with a stepladder. Elements of a wooden structure must be installed perfectly level. The tread panels need to be secured on top of the stringers; this is most conveniently done with self-tapping screws.
Risers are an additional element.
Are the steps ready? This means you can begin installing balusters on the floor. At the top and bottom of the structure, support posts are mounted that limit the handrails. They are also decorative and supporting elements.
The image shows how to attach balusters.
Now installation:
- Finished balusters must be covered with handrails (railings), which are mounted on support posts. If the structure is large, then additional support in the middle of the stairs will not hurt.
- Sometimes 3-4 racks are required. In this case, you should not waste energy on balusters, since even boards will be a more rational solution.
- After assembly is completed, the wooden surface must be thoroughly sanded. You can do this with your own hands or using a power tool.
- Next comes the preparation before painting: all debris and dust are removed, it must dry completely. If necessary, putty is applied after sanding. Of course, this job requires wood coatings.
- When the preparatory work is completed, you can paint the wood elements. A primer is applied, and then 1-2 layers of paint. After drying, it is necessary to coat the structure with varnish. As an alternative, you can use stain.
The result is a convenient staircase, with which you can climb to the second floor with comfort and safety. If the angle is calculated correctly, then there will be no stepladder.
Features of wooden stairs
Wood is chosen more often than other materials for making stairs in private homes, as it is environmentally friendly, easy to process and inexpensive. Of course, we are not talking about exotic wood - it is unlikely that a non-specialist will take on this expensive and unyielding material.
But the manufacture and assembly of stairs from wood of common varieties among us is quite within the capabilities of people who are familiar with carpentry tools and have some experience in wood processing.
Constructions
The assembly plan for a wooden staircase will depend on its design. It, in turn, is selected in accordance with the size and shape of the area allocated for the stairs. And also on the design of the house, the preferences of the owners and other parameters.
There are two main types of staircase structures: screw and marching:
Spiral staircases are usually chosen when it is necessary to limit the size of the space allocated for climbing to the second floor. Visually, they are quite impressive, but not very convenient for movement, especially with a large load. And much more difficult to manufacture.
Screw designs save space
Marching stairs are more comfortable and easier to implement. In addition, they come in a variety of shapes and designs: on stringers or on bowstrings, single-flight or double-flight, with a turn of 90 or 180 degrees, with an intermediate platform or winder steps.
All calculations, design, and production of individual parts that make up the wooden stairs and the assembly diagram will depend on the chosen design.
A detailed drawing of the entire structure and each element separately will help in further work
What does the staircase consist of?
Both homemade and prefabricated wooden stairs consist of many elements that are interconnected to form a solid structure. Each of them has its own name and purpose.
Let's start with the supporting elements, which include bowstrings and stringers:
A string is a supporting beam to which the steps are attached at their ends using overhead corners, bars or grooves cut into the body of the string. Fastening is carried out with self-tapping screws or bolted connections and is reinforced with wood glue.
Assembly diagram of a wooden staircase on bowstrings - various options
Stringers are load-bearing beams with cuts on which treads are laid and fixed with fasteners. This is a more reliable and common design.
This picture clearly shows the difference between a bowstring and a stringer
For making your own, stringers and bowstrings are equally simple. The main thing is to choose high-quality lumber and a cross-section of supports that provides the calculated load-bearing capacity.
Load-bearing elements also include support pillars for spiral staircases and pillars supporting the turning platforms of two- or three-flight staircases.
Other elements that make up a prefabricated wooden staircase include:
- Treads – horizontal surfaces of steps;
- Risers are the vertical parts of steps. They close the space between them and serve as additional support for treads.
Photo of a wooden staircase without risers
- Balusters are vertical fencing elements attached to steps and railings. They serve for the safety of walking on stairs and give the entire structure additional strength and rigidity.
- Handrail - elements of the enclosing structure, attached to the balusters.
Also, various decorative elements that do not carry any functional load can be used in the design of stairs.
All structural elements of wooden stairs
Basic parameters for calculation
In order for assembled wooden stairs to be convenient for movement along them and safe, it must comply with the following standards:
Tilt angle – about 30-45 degrees;
Changing the angle of inclination depending on the purpose of the stairs
- Riser height – 15-21 cm;
- Tread depth – 25-33 cm;
Recommended depth and height of steps
The width of the march is at least 80 cm, preferably larger;
Recommended flight width for stairs for various purposes
The height of the fences is 90-100 cm, the distance between the balusters is up to 15 cm. Additional children's railings are installed at a height of 50-60 cm;
Parameters of stair railings
The minimum distance between the steps and the ceiling should not be less than 200 cm.
The vertical size of the opening should be such that you don’t have to tilt your head when climbing
When designing prefabricated wooden stairs, you need to try to comply with all these standards. Since each of them has a certain “fork” of values, by selecting them in different options, you can create the most convenient design.
Preparation of materials and work features
Before you think about building it yourself, you need to draw up or take ready-made drawings, as well as prepare tools and materials for the staircase connecting the second floor to the first.
Let's start with the materials for building the structure on the second floor:
- screws;
- thick boards, which will later turn into steps;
- bars - the cross-section must be at least 40 millimeters.
It is impossible to complete the work without a drawing; the image below shows in detail what needs to be measured so that the dimensions of the future structure can ultimately be calculated.
It is also worth considering the following dimensions when planning a structure for the second floor from the first:
- angle of inclination of the stairs;
- width;
- height of the entire structure;
- number of steps.
If you have skills in working with a 3D editor, you can make a detailed diagram. For example, the project will demonstrate whether a ladder can be made into a stepladder. It is also recommended to study the drawings.
Ways to make a ladder on bowstrings with your own hands
There are several ways to install a ladder on strings. The most popular are free-standing and wall-mounted stair bows. A wall string for a staircase can only be seen from one side of the staircase, but a free string, otherwise called a light string, is visible from all sides.
It is these properties that need to be taken into account before making a ladder on a bowstring with your own hands and choosing any specific type of wood, as well as when processing the surface of wooden blanks.
Assembling a ladder on strings differs from installing a structure on stringers in the method of fastening. The steps of such stairs are inserted into the grooves of the supporting beams, which are called bowstrings. Sometimes only one string is used in a design. In this case, the second side of the steps is installed into the wall.
Stairs on bowstrings can be open or closed. Open staircases look lighter, and when creating closed structures, risers are used, making the staircase visually appear massive.
The most convenient and simplest to create are staircases on bowstrings with a straight flight, in which the steps are fastened between two straight beams - bowstrings. Such staircases can be single-flight or double-flight - depending on the size and design of the room. In addition, bowstring structures can be designed with an intermediate platform or winder steps. The shape of the landings (rectangular, square or rounded) directly depends on the chosen structure design.
One of the simplest designs of ladders made of wood on bowstrings, as well as ladders on stringers, which is suitable for novice craftsmen, is considered an extension (single-flight straight). The angle of inclination of the flight of stairs will depend on the amount of free space for the structure and on the height of the floor.
If there is not enough space, then it is recommended to build a two-flight straight staircase with winder steps or an intermediate platform. Thanks to this, you can save useful floor space. In addition, such a ladder is very convenient to use.
You can make your own bowstring stairs with risers, although the latter are rarely used in this type of structure. Due to the absence of these elements, the stairs look lighter and less massive.
As for the decor, in the stairs to the second floor, mounted on bowstrings, load-bearing beams, as well as stringers, may well act as decorative elements.
If desired, they can be decorated, for example, using artistic wood carving. A good decoration is forging metal, which is attached to a bowstring made of wood.
Fences play an important role in the design concept of a flight of stairs. They can be made of wood or wood with forged or stainless steel elements. The railings are usually light, so the staircase looks even more “transparent”.
Another distinctive feature of the design of staircases on bowstrings is the ability to place balusters in any order and at any frequency, which is problematic to do in staircases on stringers, where the order is more limited.
Do-it-yourself wooden ladders on bowstrings are reliable and easy to use. They are safe and durable, since, despite their apparent lightness, they are able to withstand significant loads.
The basic principles of constructing a staircase structure on bowstrings do not differ from constructing a staircase on stringers. Openings supporting bowstrings on the lower and upper beams are built according to the same principles as when installing stairs on stringers.
The main difference is in the way the steps are supported. In staircases on stringers, the steps rest on the boards on top, and in staircases on bowstrings, the steps are located between the boards (strings). When a vertical load is applied to a step, the tread bends down and then straightens. At the same time, a spacer is formed at its ends. To prevent the strings from moving apart, it is recommended to connect them with a metal rod with a diameter of 8-12 mm with threads at the ends and nuts. You can also use cords of other designs.
One of the common designs is a staircase with mortise steps. When erecting it, cutouts are made in the bowstring - grooves 15-20 mm deep into which treads and risers will be inserted. For a tight fit of the tread, the grooves of the bowstring must have even planes and the same depth.
Watch the video “String Ladder”, which shows various ways to install such structures:
https://youtube.com/watch?v=2YSwsjJWhiQ
Manufacturing of staircase parts
To make elements for the stairs to the second floor with your own hands, you need to create a drawing of the future one and transfer the dimensions of all elements to the material. Selecting quality wood is an equally important step. Manufacturing (cutting) staircase parts is a complex process, it includes:
As for handrails and balusters, it is best to purchase them ready-made with all the necessary fastenings. If there are children in the family, it is better to install 2 balusters on each step.
Before making any dwg drawings, you need to select a stair type.
Design and calculation
Before you start building any structure, you must first carefully plan everything, from the location to the amount of materials. It is necessary to approach this step as responsibly as possible, since the success of the entire enterprise largely depends on preparation. The optimal values will be given as an example, however, an important step is to take your own measurements. To begin with, you should draw up a drawing that will clearly display all the basic information. To do this, you need to make simple calculations using the step-by-step instructions given below.
Number and height of steps
First of all, calculate the height and number of steps. However, before moving directly to these calculations, you need to know the height of the stairs themselves. This is done very simply: you just need to determine by measuring the height from the floor of the first floor to the floor of the second floor. You can do it simpler: take the height of the walls on the first floor and add to this value the thickness of the floor between the floors. For example, the height of the walls is 3.1 m, the thickness of the ceiling is 40 cm. Then the height of the stairs will be 3.1 + 0.4 = 3.5 m.
The height of the riser is standard and can vary between 15.2–19.7 cm. It is not recommended to make steps higher or lower, as they are inconvenient when climbing. You should choose any value within the given limits, for example, let's take 18 cm. To calculate the number of steps, you need to divide the height of the stairs by the height of the riser: 350/18 = 19.44 cm. It is better to round up: the number of steps will be 20. For simple recalculation it turns out that the height of the riser will be 17.5 cm: 350 (height of the stairs) / 20 (number of steps).
Tread width
The width of the step should be in the range of 22–40 cm. To calculate the width suitable for a particular case, there is a formula: double the height of the riser in sum with the width of the step gives 64 cm. According to the second formula, the height of the riser, summed with the width of the step, gives 47 see. It is worth visualizing how the formulas work.
- 64 – 17.5 (riser width) = 46.5 cm. In this case, the width turned out to be too large.
- 47 – 17.5 = 32.5 cm. The width of the step is within optimal limits, so you can take this value as a reference. Should be rounded to 33 cm.
March width
The minimum width of a flight of stairs is 80 cm, however, it is not strictly recorded anywhere. Greater emphasis is placed not on the need to make marches of a certain size, but on their number. It depends on the location of the stairs and is determined on site. It is worth taking note of the definition method used by professionals. They choose a march with a width that can be divided without remainder by the width of the tread. In our case, the following values are suitable: 66 cm (33x2), 99 cm (33x3), 132 cm (33x4) and so on.
Stair length
The length of the stairs is determined simply. To do this, you will need two previously derived values: the number of steps and the width of the step. It is necessary to multiply them: 33x20 = 660 cm. The staircase turns out to be very long, so you need to consider options for a rotary or curved staircase. Few houses can accommodate a staircase almost 6.5 m long. The length of the spiral staircase will need to be calculated using special programs.
Clearance height
This refers to the distance from the ceiling to the steps. This parameter determines the exact size of the hole in the floor of the second floor to which the staircase adjoins. It should be remembered that the gap between the ceiling and the stairs should be at least 180 cm, ideally 200 cm. You should mark the place under the opening where this distance between the ceiling and the step becomes smaller.
Stringer length
To calculate the length of the stringer, you will need to use the Pythagorean theorem: add the length of the stairs squared to the height of the stairs squared and take the square root. In our example, we get 660² + 350² = 435600 + 122500 = 558100; √558200 = 747.06 cm. Let’s take it with a margin, rounding up to 750 cm. As you can see, the calculation scheme is quite simple. You can do without all sorts of professional quantities such as the angle of inclination by simply calculating all the necessary indicators using school knowledge in mathematics. The slope of the stairs will be comfortable, so you won’t have to bend down or be afraid of falling because the stairs are too steep.
Choosing wood for stairs
A wooden staircase looks organically in the interior of both modern and classic styles. Designs made of lightweight and plastic material fit into space with any geometry.
The photo shows pine - the absence of defects in the wood is the key to a high-quality staircase
When selecting wood for making marches, it is advisable to adhere to the following principles:
- Load-bearing stringers or bowstrings are made from mechanically strong and inexpensive materials - spruce, pine. The wood must be dry, without knots or cracks.
- For critical parts of stairs - steps, platforms, handrails - harder rocks are used. These are oak, ash, beech, larch, maple. They are resistant to abrasion, do not crack or creak when dried.
Ash
The texture of valuable wood is very expressive and does not require additional decoration. The surface is covered with transparent oils, varnishes or wax, emphasizing the natural grain of the wood.
Important. Solid wood steps are strong and durable. One drawback is that the material is difficult to process at home. Therefore, it is more convenient to buy them ready-made or order them from a professional workshop.
What do the standards say?
Elegant and beautiful structures leading to the second floor must be carried out in accordance with technical requirements and standards. Materials for construction are selected according to the criteria of strength, convenience and safety. A stepped product is constructive, decorative and utilitarian at the same time. It matches the interior of the space, does not overload it and is convenient to use.
Based on the current SNiPs, we can draw conclusions about the location of the stairs in a private house:
- from the end of the corridor to the flight of stairs there is a distance of at least 160 cm;
- the width of the steps is 105-120 cm;
- the ideal angle of the stairs is 45 degrees, which is the maximum slope of the flight;
- there are at least two lifts in one march;
- the optimal number of steps is from 13 to 18;
- The width of the steps is 25 cm and the height is at least 12 cm.
Basic requirements for flights of stairs
If the size of the tread, risers, the angle of inclination of the flight and the width of the structure are chosen incorrectly, walking on the stairs and carrying bulky objects along them will be very inconvenient. Therefore, when creating it, you should adhere to generally accepted standards.
According to GOST, the minimum width of the opening should be from 0.6 m. But it is advisable to make even a narrow staircase to the attic floor larger, 0.8-1.0 m wide. This size will be quite enough for one person to pass through, as well as for carrying fairly large objects. of things.
Wide structures with a step length of 1250-1500 mm look more impressive. Two people can climb them and even carry bulky furniture.
Stair width
The size of the steps is also considered the most important parameter. It will be uncomfortable to walk on steps that are too high, so do not make them higher than 16-19 cm. The width of the tread should be equal to the length of an adult’s foot and average 30-32 cm. Slightly smaller steps can be made only for attic or basement spaces.
To maintain a person's balance when walking, the steps are always made the same . Otherwise, you will have to feel each step with your foot.
Optimal step sizes
So that a person can start climbing the stairs with one leg, the number of steps in each flight is made odd. The number of steps in one flight can reach up to 18. You should not do more of them, otherwise the climb may be difficult.
It is better to provide an intermediate platform for a short break. The minimum number of steps, according to the rules, in one march is 3.
DIY concrete staircase to the second floor instructions
Such a staircase can only be installed in houses with reinforced concrete floors.
Manufacturing of supporting structure
The construction of a concrete staircase is divided into several stages: erection of formwork, reinforcement and pouring mortar.
The formwork is constructed from moisture-resistant wide boards, plywood or OSB sheets on wooden supports. It should form the future staircase
It is important that there are no gaps between the formwork panels, so they are tightened with self-tapping screws. They were all leveled
The inside of the finished structure can be covered with film so that the concrete does not stick to the wooden elements. Formwork for a marching concrete staircase
Next, reinforcement is carried out with a metal mesh made of metal rods with a diameter of 8-12 mm fastened by welding or tied with knitting wire. The reinforcement cage is laid on spacers - it should not come into contact with the bottom and walls of the formwork. After reinforcement, boards are installed to form the steps. Finished formwork with reinforcement cage
The final stage is pouring concrete mortar grade B15 and higher into the formwork. During the process, it needs to be compacted with a special vibrator. The surface of each step is carefully smoothed to the level of the board.
Finishing work
Concrete must be cared for so that it adheres well and does not crack. To do this, during the first week the surface is periodically watered with water and kept under film.
The formwork can be removed no earlier than 28-30 days after pouring. And start finishing work after completion of the main construction work, simultaneously with the interior finishing of the premises.
Such a staircase can be finished with any materials: porcelain stoneware, natural stone, wood. But many of them put too much strain on an already heavy structure, so wood, laminate, and carpet would be the ideal choice.
Finishing concrete steps with wood
Blueprints
Experts recommend purchasing the necessary elements in advance so as not to slow down your work and not search for a particular item for a long time.
Advantages of pine stairs
Material such as pine is extremely popular. Pine is characterized by its low cost and versatility. If we talk about pine stairs to the second floor, most often they are distinguished by a light shade and decent appearance. Another important plus is the amazing aroma. Remarkably, it holds up even after several months of using the ladder.
Pine is a very light material that does not create significant loads on the walls and floors. These characteristics mean ease of use. Thanks to its special structure, pine can be easily sawn and sanded. These properties allow for artistic finishing on pine.
To create elements of stairs, you can use glued products. It is better to choose wood with small knots, category A. You can use knotless solid wood, category Extra.
Height and width of steps
The most suitable parameters for the step are: height 14-17 centimeters, and width from 33 to 37 centimeters. The height should not exceed 20 centimeters, since at this value the safety and ease of movement is reduced.
The protrusion of the step should vary from 2 to 4 centimeters. This is the most suitable value.
Typically, specialists make a step whose width is equal to the length of the foot 42 sizes.
Practical work
The calculations are completed, and you can begin installing the wooden staircase: instructions, photos and videos are attached. Let's start with preparation
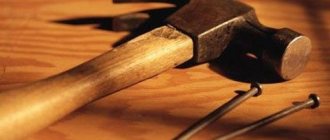
Tools for work
In order to assemble an excellent staircase, it is not enough to make just one drawing - you will need “straight hands” and a good tool that will allow you to accurately adjust the parts to each other.
Let's list it:
| Compact woodworking machine | This is of course ideal. The price of such a baby will be no less than 20,000 rubles, depending on the model and functionality. There is no point in buying one to assemble one staircase, but you can always rent it for a while, or try to find it from friends and acquaintances. Using such a machine, you can perform a perfectly even longitudinal or transverse cut, a conveyor cut at an angle, plan raw boards, mill workpieces and accurately drill holes. In general, we recommend it! |
| Miter saw | Another tool for cutting parts, which is indispensable for precise perpendicular cutting of steps. Unfortunately, it is impossible to make a longitudinal cut on it, but it is not always required. |
| Lathe | You will need a compact lathe or access to one if you want to try making figured balusters yourself. |
| A circular saw | This tool can be used for longitudinal rough cuts, but if you additionally use guides, you can achieve greater accuracy when cutting. |
| Jigsaw | You also can’t cut anything straight with a jigsaw, so be sure to use guides that are made from a flat metal strip and a pair of clamps. |
| Manual frezer | A milling machine can be useful when making bowstring stairs, or if you want to get creative and make tongue-and-groove joints for treads and risers. |
| Electric planer | If you purchase unprocessed lumber, then you cannot do without a plane. Such a tool will allow you to get the job done quickly and efficiently. |
| Hammer | A hammer drill is needed to fix parts of the stairs to ceilings and walls made of concrete and brick. |
| Screwdriver | The photo shows a beautiful copy of “Hilti” - whoever knows, will understand. A screwdriver is an indispensable tool for any work with wooden frame structures. With its help, we will tighten the entire staircase with self-tapping screws. |
| Sander | With its help, we will grind large parts of stairs, such as stringers, risers, treads, landing boards. |
In the table we have listed the main power tools, but no work can be done without a hand tool, namely:
- Hammer;
- Mallet made of wood;
- Wood saw with fine teeth;
- Plumb;
- Building level;
- Set of chisels;
- Tape measure, square, pencil and ruler - for precise marking of workpieces;
- A brush or spray gun for applying paints and varnishes.
We may have forgotten to mention something, so you will have to do some additional research on the spot.
Materials for work
Selection of lumber for installation of wooden stairs
Now we have reached one of the most crucial moments - the selection of wood for your structure.
- The best candidates for stairs made from domestic species are oak, maple, larch and ash. The fact is that they are much less susceptible to shrinkage, and, accordingly, warping of the wood.
- In addition, these rocks have excellent density characteristics, due to which they cope well with mechanical loads and surface abrasion.
- Under no circumstances should you buy soft, porous or coniferous types of wood (except for the larch mentioned above) like pine. They will not last long and will very soon lose all their visual appeal. In addition, conifers emit resin, which can ruin the appearance of the product.
- Despite the high cost of the listed species, you still save on work, and do not forget that a longer service life is also a kind of savings for the future.
Advice! When choosing oak, remember that it is the densest and most durable of the listed varieties. To process it, you must acquire a good power tool.
It is very important to choose lumber with a moisture content suitable for the installation of internal structures, namely no more than 12%. Humidity is determined at the manufacturer's factory, but improper storage could again saturate the tree with water. A good store should have equipment for these purposes.
Conductometer for measuring wood moisture content
To determine the moisture level of wood, a compact device is used - a conductivity meter. If you don’t have it at hand, then you will not be able to determine the degree of moisture by color, weight, presence of cracks and warping, as experienced craftsmen do. But there is one simple way: saw through the board and collect the resulting sawdust in your palm, clench your fist and look - if the particles stick together, then the wood is raw, if they crumble, then you can safely conclude the deal.
Now let’s be more specific about what we need to purchase (let’s immediately say that the material is specified for assembling a single-flight structure, purchase the rest depending on the circumstances):
| Lumber | We will need:
Inspect all wood carefully. Set aside boards that are warped, cracked, moldy, have wormholes, resin pockets, or other defects. |
| Support pillars | Here again you have a choice - buy a ready-made solution in a store or try turning them on a lathe. You can install simple massive square beams. They certainly look rougher, but certain interior styles require this brutality. As a last resort, you can buy a carved knob and install it on top. |
| It’s better to buy a handrail in a store, and it won’t be expensive, but if you stubbornly want to do everything yourself, then arm yourself with a grinder, a cutter and go ahead. |
| Types of balusters | It is very difficult to cut truly beautiful figured balusters yourself without proper experience, so we advise you not to waste your nerves and time and purchase a ready-made factory version. |
| Hairpin screw | The studs are needed to securely fasten the support posts. They can also be used to fix balusters. |
| Dowels | But more often, balusters are attached to dowels, since such a connection is quite strong enough. |
| Paraffin candle | An irreplaceable material, which we will talk about a little later. |
In addition to the above, you will also need:
- Concrete drill;
- Wood drills;
- Sandpaper with abrasive of different fractions;
- Self-tapping screws, galvanized;
- PVA or wood glue;
- Protective impregnations;
- Impregnations to give the desired shade to wood;
- Colored or clear varnish.
The use of these materials will become clear as the work progresses.
Manufacturing and installation of stringers
Instructions for installing a wooden staircase: structure of the stringer
This part of the work is the most important, since accuracy in the manufacture of stringers and their installation will affect the geometry of the entire structure, the evenness of the installation of balusters and future comfort of use. First you need to decide how the stringers will connect to the ceilings of the second floor and the floor of the first.
There are two main methods of connecting to a wooden floor beam (by the way, stringers are connected to intermediate platforms in a similar way):
- The first is performed with a cut in the stringer. This can be clearly seen in the diagram presented. A rectangular groove is sawed into the beam, into which a horizontal tenon cut into the stringer is placed and secured.
- In the second case, the stringer does not move, but the shape of the gash in the platform beam changes - its lower edge becomes inclined, repeating the angle of the stringer itself.
In both cases, the frieze step is installed flush with the floor level of the second floor. However, if necessary, you can retract the step by raising the level of the platform.
What to do if it is not possible to disassemble the floor of the second floor in order to make a cut, if you forgot about this nuance and incorrectly calculated the shape of the stringer, if the thickness of the beam is not enough for a normal cut, or if you want to install a wooden staircase on a metal frame or concrete floor?
Installation of a wooden staircase to concrete is carried out in the same way as shown in the photo
Steel corners and bolted connections will come to the rescue. The strength of such fasteners will be quite sufficient, but do not forget to periodically inspect the connection.
Supporting the stringer on the base
- The lower part of the stringer should rest against the support bar, which is well secured to the base. As can be seen from the diagram, the device is very simple: a groove is cut into the stringer to fit the shape of the support bar on which it is installed. The parts are fastened with steel corners and screwed to the floor.
- Separately, I would like to say a few words about the foundation. The floor is the main load-bearing element on which the entire staircase rests. Under no circumstances should installation be carried out on sagging boards, as the stairs will begin to deform along with the floor, which will inevitably lead to creaks.
- If you still have to rest the stringers on the boards, then first strengthen them with bars from below. Sometimes you even have to partially disassemble the floors to perform this procedure.
How to mount wooden stairs: a device for marking stringers
Now you can start marking. The easiest way to do this is with a construction square or a homemade blank, as shown in the photo above.
Marking with a square
You can also install improvised limiters on the square so as not to constantly measure the required distances.
We mark all the steps and start cutting. We use a hand saw or jigsaw for this purpose. Do not forget about the guides so that the cut is as smooth and accurate as possible. It is not recommended to use a circular saw, as there is a high probability of cutting further than necessary.
Wooden staircase, installation: making stringers
Afterwards, we thoroughly process the cut areas with a file and sandpaper, bringing them to perfect condition. We install the stringers using the chosen method, strictly monitoring the parallelism of the location and level.
Surface painting
DIY wooden staircase installation: wood processing
Painting the wood structure can be done after assembly, but it is best to do it now. The fact is that sagging will not form in the corners of the structure, and surfaces that stand vertically will not contain drips.
- But that is not all! The well-known creaking of wooden stairs occurs due to the diffusion of paints and varnishes. What it is? Carry out a small experiment - place two boards coated with a layer of varnish to each other and clamp them in a vice. Then remove them and you will see that, despite the fact that the varnish has long hardened, they stick together. Try to separate them, and you will hear a characteristic click.
- The fact is that varnishes and paints have the property of mutual penetration of molecules. When pressed tightly, a bond is formed, which is destroyed when a person walks up the stairs - that’s the creaking sound.
- The effect of breaking diffuse connections can occur due to poor fixation and fitting of parts, drying out of wood, excessive stress on the structure (if a would-be master tries to hide fit defects by tightly tightening parts) and when the floor sag.
From here we can immediately deduce a strict rule that varnish and paint should not come into contact with the joints of a wooden staircase. This applies to risers, bowstrings, stringers and treads. Therefore, before starting painting, all grooves, tenons and simply adjacent areas are covered with masking tape - preferably good automotive tape.
Treating steps with colored varnish
Let's talk about the painting itself in a nutshell, since we have very little space left:
- First, the surfaces are carefully sanded;
- Then protective impregnations against fire and rot are applied - optionally, if desired;
- A stain is applied to give the wood the desired shade;
- Repeated sanding is performed, since stains, penetrating into the wood structure, lift the fibers;
- The finishing coat is applied in several layers with intermediate drying and sanding.
Attention! When working with paintwork materials, be sure to use respiratory protection.
Assembling the stairs
Wooden stairs: installation of risers
Assembly, as well as dismantling of wooden stairs, is carried out in stages. First of all, we screw in the risers: this can be done from the outside, scrolling through the parts, or from the inside, using steel furniture corners or triangular slats.
Then the treads are installed - the method of attaching them is similar. Now let’s name the most important trick, how to assemble a “quiet” staircase that will never creak. All adjacent parts of the structure are generously rubbed with paraffin. Such a dry lubricant will prevent the formation of diffuse bonds, and will not dry out even 20 years later. We rub all the parts, including the mentioned triangular slats.
Some people recommend using sealants. This treatment will also eliminate the appearance of squeaks, but keep in mind that such a staircase is very difficult to disassemble. After all, something can always go wrong, and you will need to go back a few steps.
You can clearly see the assembly process in the video: “Installing a wooden staircase with your own hands.”