An arch can be an excellent replacement for an interior door. This solution is especially beneficial for small apartments where you need to save space. Unlike a door, arched openings do not take up space, but at the same time perfectly divide the room into zones. An excellent choice would be interior arches made of wood. Let's consider how you can make this design with your own hands.
When renovating an apartment, many people decide to remove some interior doors and install arched openings instead. This will visually delimit the space and save space.
Interior wooden arches are suitable for almost any interior. If you wish, you can master making arches with your own hands, you just need to make the calculations correctly and carefully study the instructions.
Choosing the type of arch
An arch is an architectural element that carries a certain structural load.
The circular ceiling of the opening can withstand higher loads than the beam ceiling. The design of the vault, which is what the arch is, creates lateral thrust, transferring part of the load into the wall, and not just down to the supports. Of course, decorative arches, which are used to decorate the opening in an apartment, do not serve any load-bearing function. In fact, these are just platbands of this shape. Depending on the construction techniques used in different eras and in different regions, several different types of arches can be distinguished.
Types of arches
Thus, for ancient architecture and its ideological successor, the architecture of classicism, the use of semicircular or round gentle arches is most typical; lanceolate (pointed) arches and flying buttresses are most often found in buildings dating back to the Gothic era. Tudor or three-lobed arches were used in Romanesque architecture and in Renaissance buildings, and Moorish horseshoe arches were used in Arab countries. When decorating an interior to suit any architectural style, it is worth choosing an architectural structure that matches this style as a decorative element.
Material selection
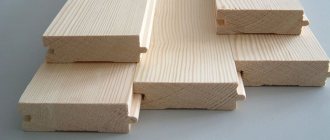
Trees of different species are suitable for the production of arches: larch, oak, pine, linden, ash and others. Here are some tips on choosing the starting material that will help you construct a strong and long-lasting interior arch.
- Oak slats are resistant to decay and are well suited for arranging wet rooms. Lack of material means high cost.
- Pine is a softwood tree and is susceptible to water, but due to its high resin content it does not decay. The advantage of the material is its availability. Pine arches are suitable for interior apartment skylights.
- Natural wood can be replaced with narrow MDF boards - they are ergonomic in operation, undemanding, and the finished product has a decent appearance. MDF can be varnished, shaded or repainted in the desired color.
- For economy projects, chipboard is suitable. An arch made of chipboard can be covered with decorative film, taking an exclusive product.
- The design of the arch is also made from veneer - a narrow cut of wood. The material looks impressive and representative, is resistant to negative factors (temperature, humidity, sun) and is cheap. Veneer can be used when arranging doorways in the kitchen and bathroom.
DIY wooden arch
Ready-made decorative designs offered for sale most often have a semi-circular shape and classic decor in the form of flutes. That is, they are ideal for interiors in the style of classicism. But what if the interior design uses Moorish or Moroccan style? Order the production of this decorative element in a carpentry workshop or try to make it yourself.
Is it possible to make a wooden arch with your own hands using step-by-step instructions with photos and videos? Theoretically, yes - after all, in a carpentry workshop, a master will make the ordered product with his own hands. But practically, it’s unlikely that a good video instruction will help you, in which this same carpenter shows in detail the process of manufacturing a wooden arched structure using a milling, jointing, two circular machines, as well as a manual router and a miter-bevel machine, if the specified equipment is at your disposal No. Although, all operations can be done without buying carpentry machines, however, the process will be long, but truly, with your own hands.
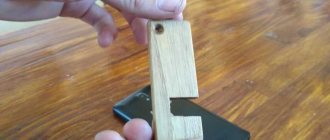
Before creating an arch, you need to make a template
In short, step-by-step instructions for making a wooden arch come down to the following:
- Making a template . You will need to make a template that will help you shape the product into the shape you need. The template serves as a support in the process of gluing the arch from individual elements.
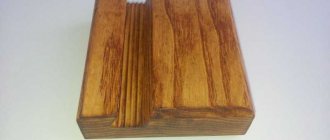
- Calculation and cutting of workpieces. Since the arch has a curved outline, it is therefore made up of separate segments. The smaller the size of the segments, the smoother the resulting curve will be. Here you need to take into account the balance: the smaller the size of the segments, the more seams. Having decided on the optimal size of the parts, they need to be trimmed at an angle so that the parts fit tightly into the given template. The cutting angle is also determined depending on the shape of the arch and the size of the parts.
- Gluing parts according to a template . Having assembled the arch “dry” from individual elements, and making sure that everything fits perfectly, you can begin gluing the parts and fixing them with clamps.
- Leveling the inner surface . Even if you used small parts, the inner surface of the arc of the arch will still be a polygon rather than a circle. To reduce the polygon to a circle, you need to cut off the excess. In a workshop setting, a milling machine is used for this purpose. At home, this operation can be done using a hand router and additional equipment for it.
Important! Power tools require careful adherence to safety precautions. Do not risk the integrity of your fingers or other parts of your body.
- Assembling the upper part of the arch . Using this method, the required number of wooden arches is made. This depends on the depth of the opening in which the arch is installed and on the size of the source material. The template allows you to make identical arcs that are glued together. The final sanding of the arch surface is done manually using sandpaper.
- Manufacturing of stand parts . Vertical straight sections are made from boards of suitable width. If the width of standard boards is not enough, you can use a ready-made furniture panel or splice several boards together.
Arch installation process
- Fastening the arched part and the pillars . The upper part of the arch and the straight sections can be fastened together using a tongue-and-groove joint and the joint reinforced with wooden or metal pins. This operation can be abandoned if it is possible to connect the parts of the arch directly during installation.
At this point, the manufacture of a wooden arch can be considered complete. In addition to the arch itself, additional decorative elements are made: platbands, imitation keystone, “heels” and other details. Wooden surfaces are tinted and varnished or painted.
Advice. If this is your first carpentry project, keep in mind that you may not get the desired result the first time. If you are planning an arch made of valuable types of wood - oak, beech, walnut, then first try to make an arch from a cheaper material, for example, pine boards.
About overlay elements
Overlay decor for arches is available in various options
Overlay decor for arches is available in various radii of curvature, but not any to order. Therefore, if you plan to finish the arch with curved platbands, skirting boards, etc., you need to select the lining according to the curvature of the arch, or vice versa, and check the compliance with the width of the passage.
The best decorative elements for arches are made from MDF; they are not affected by temperature changes and do not fade in the light like PVC. However, decorative parts made from MDF require careful handling and are installed only after all other work has been completed. The texture of their surface is created by a plastic coating, and it is impossible to eliminate a scratch or dent.
It is also impossible to sheathe a smooth-lined vault with thin MDF, no matter what anyone claims to the contrary. MDF does not bend, and curved parts are obtained from it by pressing the original mass during manufacturing.
This is where fiberboard can help out: the sheet is impregnated on the reverse (corrugated) side with a water-polymer emulsion, and the front side, after installation and puttying, is pasted over with self-adhesive to match the trim and/or overall color scheme. The longitudinal lintels in the vault frame should then be spaced in increments of no more than 15 cm. A fiberboard sheet attached along the contour to the frame and to the lintels with a fastener installation increment of 15-20 cm will provide a completely reliable sheathing.
Interior wooden arches: photo
Tips for installing a finished structure
If you don’t want to waste time making an arch, you can purchase a ready-made kit and assemble the arch yourself. When installing a finished structure, you must adhere to a number of rules:
- Before starting work, the old wooden box must be removed and the surface cleaned;
- It is better to start installing a multi-component arch from above - this way it will not be more difficult to adjust the dimensions and fit the product into the doorway;
- The gaps between the walls and the arch can be closed with wood, plasterboard, MDF or chipboard;
- All of the “preliminary” material must be hidden under the trim;
- When assembling the structure, you should not immediately tighten the screws too tightly - you may need to adjust the arch to a suitable position;
- The wooden arch must be treated with an antifungal compound.
Plants for decoration
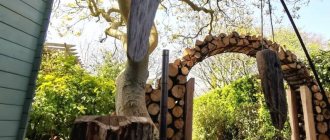
Most arched structures benefit greatly when they are decorated with climbing plants.
In addition to grapes, these can be climbing roses - flowers with unusually bright, rich and abundant flowering. Wisteria, honeysuckle, and clematis look simpler and nicer.
You can make an arch monumental and “heavy” if you decorate it with ivy.
The arch frame can be used for vegetable crops: cucumbers, zucchini, zucchini, pumpkins, watermelons. Using lattice ceilings, you can grow any berry bushes in the form of trellises.