Wood burning is a very interesting activity that attracts more and more people of different ages to its ranks of fans. Pyrography, as this creative process is called in a modern manner, has been known since the 18th century, and today burning is experiencing a new wave of popularity . Perhaps the popularization of such a fascinating process occurs thanks to the uniquely beautiful works of world-famous masters; moreover, modern burning devices allow you to transfer any creative ideas to a wooden object. As you know, a good tool is half the success, and today we will tell you how to choose a wood burner, taking into account the technical characteristics of the devices and relying on reviews from experienced users.
Materials and tools needed for work
Before you start mastering wood burning, you need to decide on the tools and materials that will be required for the work. There is no need to use anything expensive or rare.
You can start training with simple plywood and a special inexpensive apparatus.
The tool can always be replaced with a regular soldering iron, and any pieces of wood can be used as material:
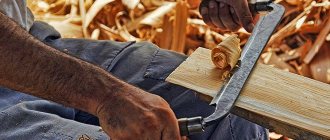
- Cuttings of boards, fresh dead wood cleared of bark, or waste from woodworking in a suitable format.
- To expand creative possibilities or replace equipment with improvised means, various metal objects are used: nails, knitting needles, stamps.
Such tools need to be heated over an open flame. To create professional masterpieces, you can use pieces of solid wood as a material, but this is expensive.
Pyrography: master class for beginners
We will need:
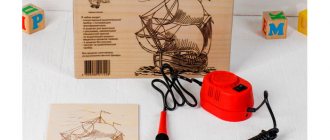
- device (pyrograph) for burning;
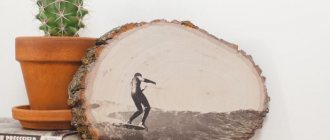
- dried wooden cuts;
- simple soft pencil;
- acrylic paints (set);
- brush for painting;
- picture loops;
- magnets.
So, let's work:
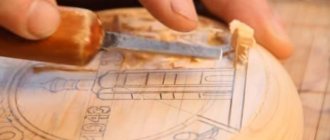
1. Burning only seems simple. Moreover, on saw cuts, in which the fibers are arranged in such a way that they make the treated surface loose and heterogeneous.
- To achieve straight lines, you will have to make some effort, that is, press the pen of the burning device. Work with strong, confident movements – “smooth” the wood fibers. If the burning of the lines is uneven, go through it again, and maybe again.
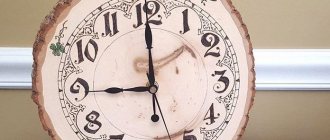
3. Now let's take white paint and place the necessary accents on the almost finished work. The white color sets off both the wood and the burnt lines very favorably.
4. That's it! The decor is ready! These cuts can decorate the New Year's table, become Christmas tree decorations, elements on gift wrapping, coasters for cups... whatever!
Preparation of the workplace
A well-lit, thoroughly ventilated place is suitable for work. If possible, this is best done on a balcony or on the street near a private house.
In an enclosed space, it is appropriate to sit near a window into which fresh air will flow.
- The working surface can be a table, but it will need to be protected from possible damage.
- This is easy to do with a piece of rags and a sheet of tin. You can use a regular baking sheet.
It is important to prevent accidental sparks from touching flammable objects: textiles, furniture. If you handle the working device carelessly, damage to property may occur, which is expressed in the form of holes and scorch marks.
Which burner to choose
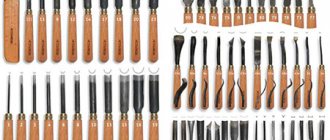
When choosing a burning machine, you need to consider the type of work for which it will be used. We recommend buying only those burners that have an incandescent adjustment. It makes it much easier to control the pressure, thickness and brightness of the lines. The second parameter is the length of the rod. The shorter it is, the easier it will be to “switch on” to work, since the shape of the device resembles a familiar pen or pencil. Also pay attention to the presence of protective plates. These plates are located on the rod. They neutralize heat, so you can work with the burner for an unlimited time. The last parameter is the set in which the equipment is sold. In a good way, it should include a nozzle for drawing, for shading, for applying thin stripes and several stamps (optional). This is the minimum set required for work. All other attachments can be purchased separately if necessary.
If you don’t know where to find a high-quality burning device, contact our online store Nemolotok.ru. We have several types of foreign-made burners in our assortment - there is plenty to choose from. In cases of difficulty, our consultants will help you choose a prior.
Wood burning technology
It is better for beginners not to think about technologies that involve working with hot dies, acid and a lathe. To begin with, it is useful to master the simplest pyrography technique.
The process involves drawing a design using a device that resembles a regular pen. With its help, an image is created on the basis, similar to ordinary drawing.
Surface preparation
It is better to use soft wood for burning. These types of wood include: linden, alder, poplar, chestnut. They also have a light shade appropriate for this type of creativity and the absence of a clearly defined wood pattern.
- Plywood is perfect for training. It is important to use a flat surface.
- If the material requires preparation, it must be done in advance. To do this, remove knots and irregularities.
- It is better to sand the surface, clean it with fine sandpaper, or coat it with wood varnish.
Creating a Sketch
Without a sketch, only people with artistic abilities will cope with the task. Any template can serve as the basis for the drawing. It is convenient to print the desired image on a sheet of paper and cut it out along the contours.
It is easy to outline the workpiece on wood with a simple pencil. For beginners, it is better to choose simple images.
If the drawing is an intricate pattern of thin lines, then it can be transferred using carbon paper. The printed picture is left in front of your eyes for clarity of work.
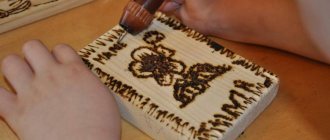
Burning process
To start the main work, you need to warm up the burning device. The prepared instrument is grasped with your fingers, similar to gripping a pencil. Based on the sketch, lines are drawn using a hot metal rod. Start with the outer contours of the picture. Straight lines are created with quick but light movements. No pressure needed here.
- If you want to make the line thicker, then do not use force, but slow down the speed of advancement.
- To create points or curved lines, the tool is held perpendicular to the surface being processed.
- When you need to draw several lines in close proximity, it is better to wait time between drawing them.
- The surface at the work site becomes very hot, stripes created nearby risk unsightly merging into one large scorch.
- It is better to do all the work on the picture in parts, moving from one part of the picture to another.
Every 3-5 minutes the instrument should be given a rest, turning off its heating. The shape of the strokes can be changed by tilting the tip of the device; you can change the pressure, but do not make it too intense.
The line color can also be varied. To do this, increase or decrease the heating power of the device. If the burner is equipped with interchangeable figurative feathers, then adding variety to the technique of drawing a picture will become easier.
Post-processing
The finished picture should be processed again with fine sandpaper. This will make the drawing more natural looking. After this, the picture can be colored. Filling with color can easily be replaced with a simple treatment with glossy or matte varnish.
- To paint the picture, watercolor or oil paints are used.
- Before painting, it is important to prepare the surface with special care.
- Using glass paper will help with this. After this, the surface is etched with an alum solution.
- This treatment is necessary to apply the paint in an even layer without stains or scratches.
- Color application is done with extreme care, using different brushes and palettes.
The technique of wood burning is considered to be a simple and exciting creative activity. It is akin to traditional Russian artistic crafts. There are several methods of burning.
The simplest and most understandable for beginners will be pyrography or hot painting on wood. His technique is simple, does not require special skills or expenses, and the result is similar to artistic skill. Both adults and school-aged children can master the technology.
Darkening with open flame
When it is necessary to apply a background or darken too much of the design, the burning device is replaced, for example, with a blowtorch. Due to the fact that fire can burn wood, this technique must be used with extreme caution. Make sure that the edge of the flame barely touches the workpiece. To begin with, it is better to practice on unnecessary pieces of wood.
In general, if you correctly determine how close you need to bring the lamp to achieve the desired color, the work will go much faster. Use this technique only on large workpieces.