The art of wood burning - pyrography - was given to the world by the Peruvians back in the 7th century BC, who decorated their homes with burnt products. Some researchers consider the African continent to be the birthplace of this type of creativity.
It is known that many creative personalities, such as artists Rembrandt and Picasso, writer Victor Hugo, were fond of burning.
In Rus', burning originated in the 9th century along with carving and other types of decorative and applied arts. They burned it using hot nails and other metal objects.
Thus, Permogorsk painting consisted of burning patterns and subsequent application of paints, Sergiev Posad painting involved burning on three-dimensional figures (matryoshka dolls), although due to the great demand for them, craftsmen had to switch to a faster method - painting with paints.
Burning was then used on things for practical purposes: bread bins, dishes, furniture, souvenirs, toys.
In the 19th century, steam, alcohol and gas pyrographs appeared, and in the mid-20th century, the progenitor of modern burners was invented.
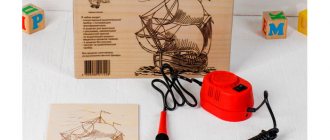
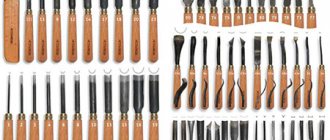
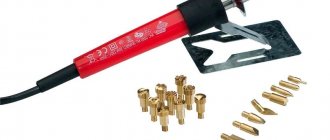
Today, anyone who wants to do burning can purchase all the necessary tools in craft stores: an electric burner, wooden blanks for future products (boards, boxes, pencil boxes, three-dimensional figures), varnish and paints, as well as copying and sandpaper.
From antiquity to modern times
The USSR was the era of handicraft circles, when girls were taught to embroider, sew and knit everywhere, and boys attended wood burning classes for beginners.
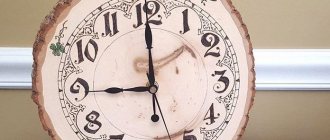
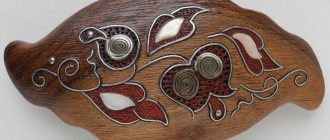
Many people still keep items decorated with burnt painting in their kitchens. For example, a cutting board or even a stool.
Burning has become significantly more accessible and safer with the advent of a new type of device, and the scope of use of the device has significantly expanded.
Now they were able to decorate not only wood, but also leather, textiles, bone and paper. The reason lay in the contents of the device.
The simplest burner included:
- a step-down transformer;
- handle;
- attachments of all varieties, from feathers to threads;
First stages of preparation. How to start burning?
Alas, you won’t be able to rush into battle right away and there’s no escape without initial preparation. To prevent your passion from becoming covered with a layer of disappointment, carefully read all the subparagraphs below.
It is strongly recommended not to neglect basic safety rules; this will protect you and your loved ones!
Selecting a base
As mentioned above, modern technologies have made it possible to improve the device, and the scope of use has expanded significantly. And yet, most often, experts recommend taking on wood, since it is more pliable and better suited for beginning burners.
When choosing a wooden material, it is best to give preference to soft larch over spruce species. For example, ash, maple, linden or birch are good options.
Consider the flammability level - not all trees are suitable for a temperature of 120°, while others are stable at 250°.
And the softer the chosen breed, the more comfortable and high-quality the design will be burned.
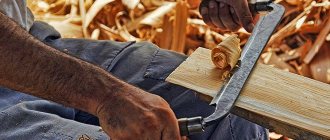
Wood processing
Let's say, in our case, a cutting board or a box from a set of screwdrivers. Before you pick up the tool and get down to business, treat the work surface.
The surface must be dry and smooth, without visible flaws and roughness, otherwise the quality of the work will deteriorate. If necessary, dry wet areas with a hairdryer and use sandpaper where necessary.
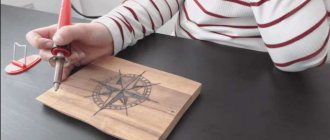
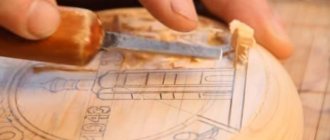
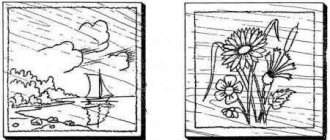
Then carefully, barely noticeably transfer the image, outlining the sketch using a pencil or a thin-tipped knife blade. If you wish, you can use ready-made templates to apply smooth, aesthetically beautiful lines.
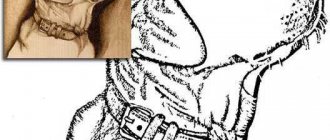
When working on complex drawings or photographs of people, carbon paper is used. Unfortunately, it gets too dirty, and experts additionally transfer the contours onto transparent tissue sheets.
After which the picture is tightly glued using glue made from boiled starch or wheat flour. They burn directly on top of the paper, after which the sketch is easily separated from the main surface.
Additional recommendations
Beginning artists are recommended to take on easy images that do not require serious skills and abilities. Gain experience, be sure to attend professional master classes and train, the more the better.
Don’t be afraid to take advice from masters, attend their classes and get better at it. Over time, the clarity of the lines will improve. It’s even better if you order tools from a special store - the success of your future work depends on a high-quality burner.
Use non-flammable materials as a stand. For example, ceramics or thick glass. Make sure your workspace is clean and free of creativity.
Do not start work until the element of the electrical appliance is heated to the required temperature. If uneven heating is clearly observed, this indicates a problem with the instrument or the need to replace the nozzle.
Attention! Remember to turn off the tool periodically to prevent parts from overheating.
When starting work, be extremely careful and careful. It is impossible to erase or remove the drawn lines; try to avoid blots and inaccuracies.
For even greater convenience, secure your leading hand on a stable stand to avoid uneven lines and accidental sketching errors.
The volume of artistic work is given by using lines of varying thickness and shades depending on the intensity of burning.
To achieve a thin, burnt outline, move the burner quickly across the “canvas”, and do not stop in a specific place for more than a few seconds.
Accordingly, adjust the heating temperature to control the shades of the resulting result. Movements should be light, no heavy pressure or pushing, and do not stop in one place for a long time.
Try to draw from top to bottom, but not vice versa. If desired, you can use curly attachments when making decorative crafts.
Remember, good, high-quality projects are a combination of several skills, including experience, knowledge and skills, and attentiveness to your health.
Don’t neglect comfort: if you feel your neck, back or arms numb while working, it means you urgently need to adjust your position. Do not place the board too far away from you; your hands should move easily along the “canvas”.
And finally, try to start work from the outside. It is believed that initially the eye is drawn to the central contours, where errors will be much more noticeable than if they were located closer to the edges.
After the finishing touch, it is recommended to paint the work or cover it with a thin layer of varnish so that the design is preserved in its original form.
Let's start decorating
Finished drawings can be painted. Watercolor or acrylic are suitable, and you can also use oil if you know how to work with it. Color will add elegance and brightness to your work. You can also use a wax finish to add shine to your painting and preserve colors.
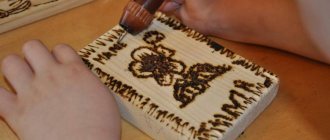
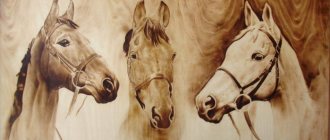
Pyrography will be especially interesting for children, because so many beautiful and interesting paintings can be created using this wonderful technique! Boys can burn out animals, favorite superheroes, car or motorcycle models. Girls will prefer to burn princesses, horses or unicorns, cute kittens or flowers. How great it will be to come up with your own stories for burning! There is room for your imagination to run wild. Here are some photos to inspire kids:
And a few more complex options:
Alternatives if you don't have a cutting board at hand
As for plywood, the mechanism remains unchanged. The material also requires processing (humidity and roughness should be absent), only after that we draw a sketch of the future picture and slowly, carefully draw a heated tip along the lines.
Lightly, as if running a brush along the surface of the water, barely touching it. It is also recommended to choose plywood from soft, hardwood materials. For example, birch or beech. Compared to wooden boards, plywood is noticeably lighter and lower in price.
The eyes are afraid, but the hands are doing. A well-known expression that is entirely said about pyrography. If you think that wood burning is hard, tedious and requires good artistic skills, then you are deeply mistaken.
All today's masters once only began to comprehend the basics of pyrography, eventually achieving unprecedented heights. And they all unanimously repeat only one thing - don’t be afraid of anything!
Safety precautions
When working with a burning tool, you should adhere to the following rules:
- When the tool is turned on, only grip it by the handle to avoid burns. The device is very hot. Avoid touching the tip to other parts of the body.
- Place the instrument only on a special stand.
- Nozzles cannot be changed with bare hands. Use pliers for this.
- Do not allow the tool to overheat, otherwise it will quickly break. While working, turn off the tool for a while and rest.
- Do not leave the device turned on unattended, even for a couple of minutes.
- If exposed wires or other damage appears on the device, it is recommended to replace the device. Such damage is very dangerous and can lead to fire.
If your child is engaged in such an activity, always keep an eye on him, do not leave him unattended, and always check that everything is fine. Of course, before starting work, tell him the safety rules.