Pyrography or burning is one of the ancient types of applied art that has been known to mankind for many centuries. Most likely, man learned to burn designs on wood and other materials immediately after conquering fire. Stencils for wood burning appeared much later, but significantly simplified the work and made it possible to obtain more complex designs.
PYROGRAPHY AND ITS ADVANTAGES
Wood burning can be easily combined with both furniture restoration and carving .
The unusual paintings created with a soldering iron will open up endless options for creativity and inspiration in the process. Let's try.
Burning (pyrography) is the creation of a design using a hot metal pen. And although there are quite a lot of materials used in the burning technique (leather, felt, plastic, fabric), wood is considered the main one. This is what we will talk about.
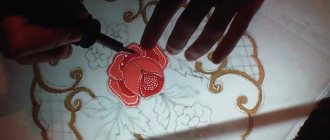
Using a pyrograph, they create original patterns on boards, boxes, and furniture, turning everyday things into unique masterpieces.
Burning is closely related to folk crafts, however, in recent years this decorative processing has become an independent technique in the interior.
What is the secret of the popularity of this activity? We came to the following conclusions.
Take a break and dream Have you heard amazing stories about how the greatest writers created their works without knowing fatigue and without feeling time? This happens with any business you like. A favorite hobby inspires and replenishes vital energy resources, and, without exaggeration, can bring happiness to a person. Finding something you like, something in which you feel significant, with complete freedom of action - what could be better?
Change boring things A person receives the first information visually. What surrounds us, what we see every day, leaves an imprint on our worldview. If you are tired of everyday life, but that brown cabinet is annoying you more and more each time, maybe you should try changing something? You and I already know how to restore furniture, carve entire paintings on wood, and very soon we will learn about burning methods. Using these skills, it will not be difficult to make beautiful accessories for a room, change a boring interior, or give friends something that they won’t buy in any store.
Make money on burning
As with any skills in decorating, designing furniture and interior design in general, wood burning, with due effort, can become an independent form of income. If you are looking for a vocation, have not decided on a profession, or want to change your place of work, it is quite possible that this material will interest you as a way to gain first experience. Later, if you wish, you can monetize your hobby and turn it into a main or additional source of income.
Tips for Beginners
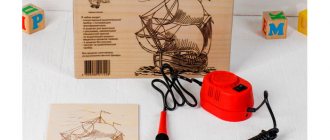
Start practicing on any old piece of wood to become proficient in this art. Keep in mind that some types of wood will be easier to work with than others. When you understand the essence of the process, buy everything you need in a special store. And if you are happy with your results and want to continue, then take on more difficult options.
You can buy different types of wood, some pieces may have bark on the outside, which will add originality to your work.
How to transfer a drawing to wood
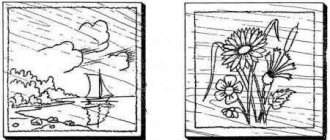
There are thousands of different templates. The easiest way is to find pictures of animals, birds, airplanes, looking through children's drawings or books. There are plenty of suitable samples there.
You can also download templates from websites or buy them in special stores. Or use your imagination and create your own images. The choice is yours. Once you select your design, you need to transfer it onto tracing paper. Place a piece of carbon paper, ink side down, on a wooden surface, then lay down your design. Without moving the paper, redraw the template onto the tree.
Burning tools
You need to buy the tool in a special store or order it online. When purchasing, ask the seller to advise you on which tool to buy. The size of the pin depends on the type of wood you are going to work with.
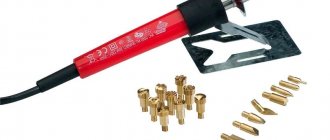
The burning device looks like a regular pen with a plastic holder and a nib that heats up at a constant temperature. Controllers regulate the increase or decrease in heating during various operations.
Burn the drawing
Before you start working on a good tree, practice on something unnecessary. If there is no one to show you how to burn, ask the store to advise you. Finally, join some club of similar interests.
Be careful not to press too hard with the hot pen, you may burn too much. As you gain experience, you will even be able to vary the colors in your work.
You can finish your work by coloring it for added effect and making it look more professional.
Other types of pyrography
On the skin
– in some ways it might be simpler. You have to be careful as the skin burns easily.
Advice
– when working with leather, use a thin tip; a wider one will burn hotter and leave a darker pattern.
Burnout-pumpkin
- This is burning on dried fruits.
Drawings for download
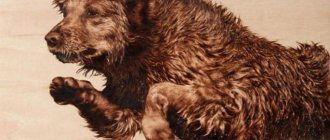
This Labrador pattern
will give you the opportunity to experiment with the depiction of fur texture. Burn the outline of the dog first, then burn the background, making it darker to create a sense of depth.
Download >>
Snowflake pattern
- This collection of 50 snowflakes is quite relevant in winter.
- Download >>
- Download part 2 >>
This sample
I still haven't completed it. If you make it, please send me a photo and I will show it here.
Size 40 by 45 cm
There are 4 pages here. Just click on each page, when the page loads, right-click and select print. Set your printer to print “portrait” and the print area to “maximum”.
- Download page 1 >>
- Download page 2 >>
- Download page 3 >>
- Download page 4 >>
- Flowers
Firefighter
Horse
Source: https://doit-yourself.ru/interesnye-kartinki-dlya-vyzhiganiya-po-derevu/
A LITTLE HISTORY
Russian history is inextricably linked with burning. Suffice it to recall the artisans in Sergiev Posad, who carved wooden spoons, salt shakers, and ladles, and then decorated them with burnt designs and ornaments.
Initially, craftsmen used burners and pokers, until in the 20th century. The first device did not appear - a pyrograph with a soldering iron. The design was cumbersome and not very convenient to work with. In 1962, Englishman Roy Child modernized the burning part of the apparatus. Modern pyrographs are based on that very first model. In the late 70s - early 80s in the USSR, burning became a massive youth hobby: many clubs were opened, and “Ornament”, “Silhouette”, “Pattern” devices appeared in almost every home. The pyrograph kit included boards with ready-made drawings: Olympic bears, landscapes and heroes of Soviet fairy tales.
In the 90s, wood burning lost popularity among the population, becoming the preserve of the creative intelligentsia: artists, designers, and was replaced by game consoles and robots.
Burning across the grain
We do not recommend burning out fibers for those who recently purchased a machine. Because first you need to learn how to burn, and only after that hone your burning skills.
When burning against the plywood fiber, you get this PAPYRUS effect, due to the fact that the wood fiber goes in one direction, and the tip of the CNC machine moves perpendicular to it. Some people say that when you burn over the grain line, the work appears "PATCHY". This effect will only be visible up close, but it will not be suitable for most paintings. For some paintings, you can create this effect on purpose - now you know how to achieve it. When you burn out fibers across a painting, it becomes clear that you burned it not by hand by a master, but by a machine yourself, because all the lines that the machine makes become noticeable.
This can be corrected by making an oblique pen; this pen will cut the fiber and not jump over it. To make a bias feather, sand the edges of the loop as shown in the illustration. f. Grind or sand both sides of the flat edge to the desired angle to obtain a sharp edge. Because the oblique pen also cuts while burning, it faces fewer problems than other pens. It cuts through the waves of the fiber in much the same way as the bow of a ship cuts through the waves of the sea. The writing pen and touch-up pen don't cut into the wood when burning, so as they encounter each wave of grain, they tend to jump over it, causing more problems.
It is most difficult to work with pine when burning across the fiber; it is especially susceptible to this effect, so when you take pine, think about what to place so that the burning proceeds parallel to the fiber.
TOOLS FOR WOOD BURNING
We, as aesthetes and great lovers of unusual things, will continue to engage in pyrography, and for this we will need the following tools:
Pyrograph with a wire pen - a device with a nichrome loop that heats up within 15 seconds is suitable for more experienced artists. The device allows you to burn complex patterns with many shadows.
A pyrograph with a hard pen is an exact copy of a classic soldering iron, but with a lightweight handle. Allows you to change attachments, thereby complicating and making simple designs visually more voluminous.
Heating of a metal pen takes longer than a lavalier type electric burner. You can change the attachments only after they have completely cooled down (on average after 7-10 minutes). One of the disadvantages is the lack of power control.
The choice of an electric burner depends only on personal preferences and financial capabilities. But it is not recommended to save too much on the tool. Craftsmen are aware of, to put it mildly, the unacceptable quality of cheap pyrographs: over time, the handle begins to melt, the device heats up for a long time and unevenly, and often burns out after a week of operation.
In addition to the pyrograph, we will need:
- Wooden board or plywood;
- Graphite (copy) paper;
- Simple pencil;
- Fine-grit sandpaper;
- Finish coating.
Which plywood is suitable for burning
For burning on a Pyroprinter, we recommend buying FC plywood, 2/2 or 2/4, Ш1, 6mm.
Now let’s look at what all these designations mean:
Plywood grades according to the degree of water resistance: FSF - plywood with increased water resistance for indoor and outdoor use, FC (plywood + urea glue), FB - bakelized waterproof plywood.
Grades of plywood according to the degree of mechanical processing: NSh - unsanded, Sh 1 - sanded on one side, Sh 2 - sanded on both sides. Sh2 is rare, so we usually buy Sh1
Plywood grades: E (A) - elite, 1 (AB) - standard, 2 (B) - cracks are acceptable, 3 (BB) - knots are acceptable, 4 (C) - the lowest quality for construction work. When marking, indicate the grade of each side of the plywood. Therefore, 2/4 is sold - this means that one side is grade 2, and the other side is grade 4.
thickness for burning portraits is up to 10 mm, otherwise the portrait will weigh quite a bit. We ourselves prefer 6 mm plywood for burning, because... 4 mm plywood is often bent in a figure eight, which is why it is completely unsuitable for large formats.
STEPS AND MAIN WORK
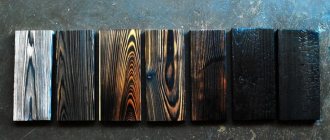
Before drawing the sketch, you should select a tree for the base. Since the main factor in working with wood is its density, beginners should choose soft hardwood: ash, poplar, linden.
The surface must be dry and pre-prepared. For a smooth texture of the base and smooth movement of the soldering iron tip, the wood, if necessary, is sanded with fine-grained sandpaper and wiped from dust.
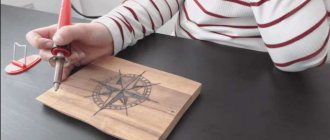
Transferring the drawing to the base
To better draw the pattern, especially if you don’t know how to draw, use a sketch. You can create it in several ways:
- Draw using special stencils for decoration;
- Trace the sketch with a pencil through carbon paper;
- Trace the sketch with a pencil through graphite paper.
The last option is highly recommended by practicing burners. They say that graphite paper, unlike carbon paper, does not leave a mark on wood. You need to try - everything is learned in practice.
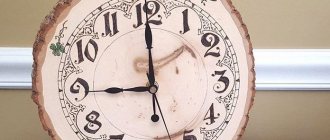
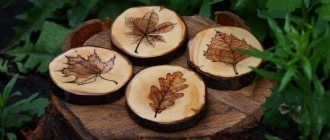
At first it can be difficult to decide on the ornament and the final look of the product. Interesting works can be obtained from a regular tree cut.
Such small but unusual patterns will harmoniously complement any interior, made in both classical and modern styles. For a beginner, this will be the optimal start: simple to try, but effective to see the first results.
Features of the technique: tips for beginners
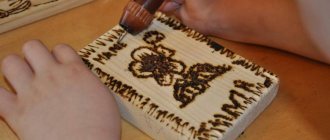
Before you start burning complex compositions, you should practice on rough boards. Try different strokes, straight and curved lines.
Simple pyrography techniques include the following techniques:
- Contour – applying dots and short strokes that create a single silhouette;
- Silhouette - the picture is burned out in solid, continuous lines;
- Simple shading - creating areas of shading using thin strokes and dots.
To give the pattern expressiveness, shading is used. Using strokes and dots with different depths of saturation, hatching is performed in one direction.
According to the laws of creating an artistic composition, the nearest elements of the picture should be made several tones darker than the distant ones.
Work begins after the design has been selected and transferred, and the soldering iron tip has heated to the desired temperature. Uneven color development during burning indicates that the tool is faulty. Periodically (optimally after 10 minutes), the tool must be disconnected from the network, allowing it to cool completely.
Features of burning
It is impossible to correct incorrectly drawn lines without losing the quality of the drawing. Drawing complex patterns requires experience; beginners train on basic elements (lines, geometric shapes, etc.).
You can still eliminate the mistake you made - with sandpaper. But you need to sand the area carefully, trying not to get on the burnt adjacent elements of the pattern.
The soldering iron handle is held in the same way as a pencil. You should not put pressure on the soldering iron or hold it at one point for a long time, unless, of course, the goal is to burn out the black spot. With quick smooth movements you get a solid thin line.
The location of the wood fibers also plays an important role in the design. It is more convenient to move the soldering iron along. If the bar was poorly processed, and the master burns the pattern across the fibers, there is a high chance of getting black marks or, by catching the soldering iron tip on a fluffy fiber, leading the line in the wrong direction.
Experienced craftsmen recommend protecting the burnt pattern with a finishing coat to avoid loss of brightness. The wood can be varnished or the empty elements of the design can be painted over, and then also varnished.
The choice of varnishes is variable and depends only on personal preferences. We recommend trying acrylic. It does not have a strong odor and can be used in residential areas.
Choice of base material
Any material on which traces remain from exposure to high temperatures is suitable for pyrography, but wood is traditionally the most popular, because it is much easier to create drawings and use stencils on a hard surface. Cutting boards and other wooden kitchen utensils are ideal for this.
If we talk about which types of wood are preferable, then it is better to opt for linden or elm. Of course, you can burn on any tree, but on some species it is not very convenient. For example, oak has too high a hardness and there are almost no clearly visible marks left on it from the pyrograph. Thin plywood is very suitable for burning paintings.
For those with high artistic abilities, it is easiest to choose a subject for creativity, because it can be taken from any magazine. If you couldn’t find suitable ornaments at home, you can always find them online. The drawing you like is printed on a printer, or you can make a copy of it. It is best to transfer the ornament onto a wooden base using carbon paper.
If you have at least basic drawing skills, it will be faster and easier to apply a pattern to the base using a simple pencil. After the work is completed, excess traces of stylus can be removed with an ordinary eraser.