To make the salt shaker box, I took acacia; this is a very decorative tree of a light green hue, which, when polished well, gives an unusually beautiful mother-of-pearl effect.
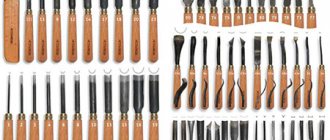
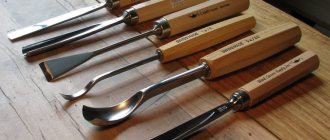
To make the box you will need various cutters for a lathe; I have homemade ones from simple files. Their steel is quite suitable for carving.
Wooden box manufacturing technology.
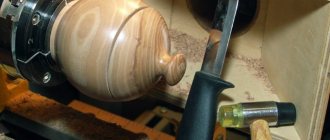
1) We clamp the cylindrical blank for the body of the box into the lathe and first roughly round it, removing the edges. For this purpose we use a semicircular cutter:
2) Round it off more smoothly with a jamb cutter.
3) Using a jamb cutter, we apply indentations that will serve as decorative bands for the box.
4) Then we cut on both sides of these recesses, creating bulges on the box.
5) Round off the resulting edges.
6) Now we need to make the internal cavity of our salt shaker. To do this, we move the support bar to the end of the workpiece and begin to deepen it with a straight narrow cutter from the center to the edge. We do everything smoothly, without sudden pressure. Let's go deeper into the steps:
7) Then, using the tip of a triangular cutter, we smoothly expand the cavity from the center to the edge, reaching the bottom.
8) We level the bottom with a wide straight cutter, use it to form the required thickness and make a groove for the lid.
9) Sand the bottom and side walls of the box with sandpaper.
10) When everything is sanded, cut the workpiece from the machine with a hacksaw. I do this with the machine turned on. But to do this, you need to confidently hold the hacksaw in your hand, you need to constantly watch how much is left until the end of the cut so that the work does not fly out. It is also necessary to remove chips stuck between the swells, otherwise they cause friction:
Yes, you need to move the hacksaw away from you towards the part! Before completing the process a little, you need to stop the machine and cut the workpiece. 11) Now you need to make the lid of the box. I have it dome-shaped. We adjust the lid to the size of the inner diameter of the box, for which we try it on:
12) Make the inner part of the lid dome-shaped, forming it with a semicircular cutter:
13) When the inner part of the lid is ready, we begin to form the outer part with the handle:
14) Sand the lid of the box with sandpaper to a light shine. 15) For final finishing, it is better to cover the inside of the salt shaker box with wax (if it will be used for food purposes). Non-toxic varnish can be used outside.
- Related Posts
- DIY bedroom dressing table
- DIY decorative furniture made from logs
- DIY wooden box
« Previous entry
Wet and dry wood
Wet wood usually processes better. The advantage is not only the simple and quick capture of material, but also the minimal dust formation during operation.
However, the resulting product will undergo major changes over time. Gradual drying can change the shape and size of the object. Rapid drying may even cause cracking.
Unlike fresh wood, when processing dry wood, you can count on stability of shape and final color. However, such turning work is more labor-intensive, but a number of modern devices solve this problem.
The lower availability and higher price of dried wood are also important.
Goblet turning
When making a cup, a wooden block is hammered into the chuck and screwed onto the spindle.
The blank is ground and given the rough shape of a cup. Then they begin to grind out the internal cavity. To do this, place the tool rest across the guides of the bed and move it towards the end, and turn the semicircular chisel with the groove downwards and, placing it slightly obliquely, press from left to right from the center of rotation. This results in a rather deep depression (recess), which is finally bored out with recesses-hooks of the appropriate shape. The cavities and holes being machined are checked with a bore gauge. When turning, you must ensure that the internal recess is smooth and the walls are of uniform thickness. Turning a cup: a - general view, b - section
After recessing the internal cavity, the external processing of the cup is performed. The thinnest parts of the product, such as the leg, are ground at the end of the work.
Turning technology
Depending on the intention or the product to be produced, it is necessary to select a turning technique. The most common and simplest form is spindle turning, which is based on a cylindrical shape.
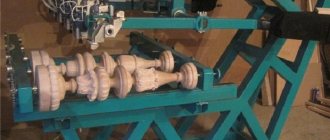
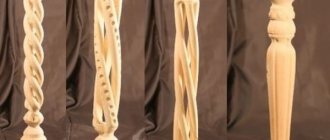
The firmly fixed material rotates smoothly around its axis, and special knives or planks shape the wood. In this way you make legs for chairs and tables, separate partitions for railings or fences.
Longitudinal or transverse turning will be used in the production of decorative elements or bowls, containers and toys. Here you can interestingly combine mechanical processing of the material from the outside with modification of the cavity inside the tree.
Other types of turning include, for example, annular, multi-axis or segment turning. However, for normal wood processing, knowledge of classical techniques and their combinations is sufficient.
- When working, pay attention to high-quality equipment. It’s definitely not worth saving on knives.
- High-quality, well-sharpened steel guarantees ease of use.
- The material under the blade will change smoothly and there will be no unevenness or unwanted edge abrasion.
- Choose knives, lathes, chisels only from high-quality manufacturers with the possibility of repeated grinding.
Quality knives are an investment, but it will come back to you soon. This will save your time, complex repairs of finished products and damaged material.
What can you do with it?
A lathe in skillful hands and with the necessary materials for the job is an extremely effective tool for the manufacture of metal or wooden products, and this can include both high-precision parts for other equipment and a variety of handicrafts for home or leisure.
Wood products
You can make wood products both “for the home, for the family” and for sale. In the latter case, the things made have a magical prefix in their name “made individually,” which in our era of globalization of all processes has considerable weight in the eyes of many potential buyers.
You can make furniture elements for its subsequent assembly (we think everyone remembers school stools made and assembled in labor lessons), tool handles, medium and small decor - the basis for wall clocks, vases, figurines of creatures, a popular type of machine-made products are chess, checkers, backgammon.
Metal crafts
Lathes for metalworking are usually not associated with crafts, because with their help, a lot of enterprises and individual craftsmen work on the manufacture of nuts and bolts, bushings and couplings, rings and shafts for various purposes, the maximum that a person who does not have information can imagine is this boring some parts during repairs and similar actions.
However, the range of tasks performed is not limited to work. Metal crafts can be made by both an experienced worker and a novice trainee; most often these are figurines or individual decorative elements: balls and keychains, cubes and entire models (for example, cars).
In conclusion, I would like to note the following: the world of lathes, with all its size and diversity, is available to everyone who wants to try themselves on this path. Moreover, now, with the active proliferation of CNC devices, a small lathe can be installed even at home, and after taking courses on its use, with time and growing experience, you can become one of those who can turn a piece of material into a real masterpiece, be it it is intended for work or leisure.
Structure of a lathe
The universal center lathe is the most common lathe. The name of a lathe comes from two points between which the workpiece is clamped in the center.
The structural elements of a lathe can be divided into 5 main groups:
- Bed in the form of a massive cast base;
- Headstock and tailstock;
- Feeding device;
- Longitudinal or transverse support;
- Set of replacement gears;
- Transmission.
Some lathes are additionally equipped with an apron to drive the mechanisms.
Lathe bed
This is the main part of the lathe, it is shaped like a beam and is usually made of gray cast iron. The bed must be rigid and strong enough to support the weight of other parts of the lathe, not bend, and withstand the forces encountered during turning.
- The lathe bed is usually mounted on two frame legs.
- The left leg mainly hides the engine and gearbox, the right one serves as a toolbox.
- At the top of the bed there is a guide for the support and tailstock.
- The feeder slides on outer guide surfaces and the tailstock slides on inner guide surfaces.
Due to possible damage, tools and semi-finished products are not placed on it; storage compartments are provided for this purpose.
Lathe headstock
It is a hollow shaft mounted in bearings designed to prevent bending of the spindle and maintain the pressure generated during machining.
- The front and rear main bearings (sliding) perceive pressure perpendicular to the spindle axis.
- These pressures are also called radial pressures.
- The pressure in the direction of the spindle axis (axial pressure) is absorbed by the rolling bearing.
- The spindle and headstock should not vibrate during operation.
Most lathes have a box-shaped headstock (in exceptional cases they are cylindrical).
The right end of the spindle protrudes from the headstock and has a thread on the outer end to which a clamp is screwed for clamping the workpiece. The main part of the headstock is the spindle.
Spindle
The spindle is driven by a motor, which, as already mentioned, is installed in the left rack of the lathe. The motor shaft has a drive pulley with grooves for drive belts that transmit motion to the driven pulley and the gearbox.
- A gearbox has multiple gears, and the movement of the sliding gears changes the gears and therefore the speed of the drive pulley.
- The movement from the drive pulley is transmitted by a wide flat belt to a pulley in the headstock.
- The pulley is mounted on a housing mounted on two ball bearings.
The spindle passes freely through the housing and can be connected to it using a coupling or gear template.
Feeder
During turning, the knife is moved manually or mechanically, radially and axially relative to the workpiece. The feeder is driven by a shaft and replaceable gears. The movement is transmitted to gears in the feed reducer.
Shifting gears changes the speed at which the blade feeds when turning.
- In the feed mechanism, the gears are divided into three groups I, II, III. In Part I, the gears are changed by moving the sliding gears using a flywheel.
- Part II introduces the Norton gear, which is driven by an intermediate shaft on which is mounted a wide pinion, with which the pinion is constantly in mesh, mounted on a swing arm.
Wood turning is a beautiful and creative activity. It takes some skill, but with quality equipment and a powerful lathe, you can master the basic techniques relatively quickly.
In addition, treated wood is widely used. You can equip or complement it with conventional furniture production, it will also serve as a practical accessory in the interior and exterior.
Decor, souvenirs, advertising, jewelry, etc.
The ability to process completely different materials using several strategies - 3D milling, cutting and engraving - allows you to use CNC milling in completely different areas and produce an endless variety of objects.
Possibilities of a CNC machine in the production of promotional products and decorative items
The use of a milling machine allows us to produce a wide variety of products: toppers and words for celebrations, photo frames, boxes, plaques and signs from various materials including plastics, wood, metals and artificial stone. By engraving two-layer plastics of various colors you can make signs, badges, license plates, and nameplates.
Workshop of Daria Shved https://.com/id232777509 (Krasnodar), aluminum machine Modelist90120al
1/8
Nikita T., (Perm), aluminum machine Modelist60120
1/8
(Ekaterinburg, Belinskogo str. 34, office 321, tel. 89122455596, 89028733571) is engaged in the manufacture of products for advertising activities, decoration of premises and furniture made of artificial stone, aluminum machine CNC-6090al
1/6
FROSTBERG company (Dmitrov, https://.com/frostberg_decor), aluminum machine CNC-6090al
1/4
Using a CNC machine to make jewelry
A collection of works on the manufacture of jewelry, costume jewelry and souvenirs is listed on a separate page
Here is an example of using a CNC machine to make jewelry. Alexey Yuvelirov (Gelendzhik, https://.com/gelengrav), machine cnc2535al2
1/7
Milling of model wax in 5 axes on a 5-axis CNC machine
Milling a ring from model wax using a specialized rotary device, which, together with a special software plugin, makes it quite easy to create models of rings of complex shapes that require processing both from the end and sides of the ring, an example of such a ring in the photo
video of making this ring on a CNC machine
Using a CNC machine in furniture production.
A collection of works from our users on the production of furniture decor, milling furniture fabric, etc. is included on a separate page
Milling machines can be used to process a wide variety of wood types. Using the machines, it is possible to create signs and indicators made of wood, prototypes, unique products, toys, molds for casting furniture fittings and much more.
(Gorokhovets, gorfurnitura.ru) is engaged in the production of furniture decor, aluminum machine CNC-6090al. The slide show uses photos of decor made using molds made on a CNC-6090al
1/8
Andrey E. (Rostov-on-Don), made boxes for his workshop on an aluminum CNC-3040al2 machine
Souvenir products.
A CNC machine allows you to make souvenirs, award diplomas, dedicatory inscriptions, engrave a wide variety of products made of plastic, glass and non-ferrous metal, including cups, medals, tokens, pendants, bottles, and much more.
Dmitry U. (Novosibirsk), plywood machine Modelist3040
1/9
Andrey E. (Rostov-on-Don), aluminum machine CNC-3040al2. Making molds for creating gift chocolate bars
1/2
Vitaly F. (Orel), plywood machine Modelist3030. Cookie mold
Sergey K. (Gagarin), plywood machine Modelist4060. Coat of arms, bottle packaging and night light Eiffel Tower
1/3
Alexey P. (Moscow), plywood machine Modelist3030
1/2
Sergey (Krasnodar), plywood machine Modelist4090. Making models for construction companies from PVC
Vladislav G. (Krasnodar), aluminum machine CNC-3040al2. Milling parts of RC models for drag racing
1/4
Using CNC for equipment production. Devices, printed circuit boards, cliches.
Using engraving and milling machines, you can produce instrument cases, panels, engrave inscriptions, signs, serial numbers on a wide variety of parts, from plates on equipment and instrument panels, to final products.
Andrey K. (Primorsko-Akhtarsk), aluminum machine CNC-3040al2. Engaged in the manufacture of devices for video operators and video cameras from duralumin alloys. In the photo POOLiRiG is a shoulder rest for various video cameras.
Konstantin K. (Krasnodar), aluminum machine CNC-2020al. Printed circuit board manufacturing
Alpha, LLC (Simferopol), aluminum machine CNC-2535al. Magnesium cliche
A collection of works on the production of molds, clichés, and sealers is included on a separate page.
Photos of wood turning
Vase turning
The general principle of turning a vase is the same as turning a goblet. The difference is that the cup is sharpened as a whole, and the vase in parts.
Turning a vase: aa1 - column-leg, b - hollow part
First, the column-leg is carved, then the upper hollow part, and finally the lower part - the base of the vase. Having turned the column on a trident in the usual way, prepare a piece of wood and, according to the drawing, grind out the upper part from it, in the center of which, using a center drill, make a recess for the column and cut it off, then grind out the base using a cup chuck when turning. A recess is also made in the lower part for the lower end of the leg. Having finished turning the individual parts, they are assembled using glue. When the glue dries, the product is finished on a machine.
Turning a Russian nesting doll
First, the outer side of the lower part of the base is machined, then the internal cavity, a transition is made to put on the upper part, and the workpiece is cut off.
The upper part of the toy is first machined from the outside. Then they bore out the internal cavity and grind a ledge along the diameter of the machined lower part of the nesting doll.
Turning a Russian nesting doll: a - turning the cylinder, b - marking and turning the outer surface, c - boring the internal cavity and turning the ledge, d - cutting off the base of the toy, e - marking and turning the upper part of the toy, f - boring the internal cavity and turning the ledge, g—adjustment and turning in assembly, h—cutting of the product, i—jutton product
The lower part of the toy is put on top. After adjusting them, a mark is made on the surface of the toy. A carved nesting doll always closes well in only one position. Once assembled, the toy is finally turned, finished and primed for subsequent painting. When making a family of nesting dolls, inserted one into another, the smallest one is turned out first. In this case, the internal cavities of subsequent nesting dolls are machined to match the size of the previous one. It should be borne in mind that the connector location for all nesting dolls of this family must be in the same plane.
