Geometric wood carving is a complex process, the implementation of which requires certain knowledge from the master. Over a long period of its development, this type of decorative and applied art managed to influence the development of several basic techniques that make it possible to create truly attractive and unusual sculptural compositions. In order to improve the skills of making geometric patterns on wood, first of all you need to study the methodology of this work and pay attention to the sketches available on the Internet.
Tools for work
In stores you can purchase various professional tools and multifunctional woodworking machines. They make work much easier and are convenient and safe to use. However, knowing how to use hand tools is more important. Every beginning woodcarver should learn to work with simple chisels, saws and planes.
These skills will help you in the future:
- master professional machines faster;
- correct inaccuracies;
- make miniature patterns.
Experienced craftsmen do not recommend buying ready-made sets of tools for manual cutting. They are expensive, but do not always differ in quality.
A set may have a good knife but bad chisels, so it's better to buy each tool separately and put together a truly useful set that will last for several years.
The most important tool for working with wood is a saw. With its help, you can separate even pieces of the desired size from a solid block.
Suitable:
- hacksaw;
- bow saw;
- jigsaw
It is advisable to purchase several types of saws with different tooth sizes. The condition of the paintings must be carefully monitored. Saws should always be sharp and the blade should be well tensioned.
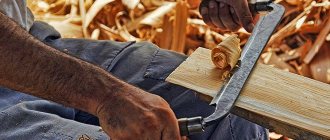
You should also buy a plane . A novice craftsman can buy a hand tool with a cutting surface of medium width. When you gain experience, you will need a jointer and a scraper. They are needed for more thorough leveling of wooden surfaces.
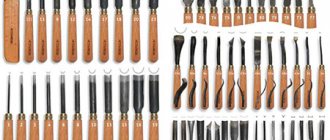
To work with small parts you need chisels . The set should include tools with wide, pointed edges, as well as narrow and thin ones. Blades can be straight or beveled. They should always be sharp, so chisels will have to be sharpened frequently. For this purpose, you can use sandpaper or a special machine.
Working with blunt tools is dangerous because the blade will not penetrate the wood as deeply as required. This increases the risk of the tool “jumping off”, which is dangerous for the carver. He could be seriously injured. In addition, the carving made with such a tool will turn out crooked, and the work will take more time and effort.
In the table you can see what other tools may be required and why:
| Tool | Purpose |
| Hand drill | Drill through holes and small recesses |
| Knives of different sizes | Hew small pieces of wood, plan small parts |
| Small ax | Cutting off small branches and making notches |
| Sandpaper of different grits | Sanding products |
| Clamp | Securely attach the surface to be treated to the countertop |
There are many other wood carving tools available. When a novice master gains experience, he will be able to independently determine which chisels, knives or saws he needs and what is more convenient to work with.
Materials for work
Each type of wood for carving has its pros and cons. Soft wood is easy to work with, but there can also be a lot of defects. These are aspen, linden, birch. This wood is best for beginners.
Oak, boxwood, mahogany are more expensive and complex wood. It is hard and durable, so it is difficult to carve from such wood. Very often there are troubles when working with such types of wood. Either the instrument or the craftsman may be harmed.
An experienced carver can easily work with a variety of woods, including juniper. Well, for beginners it is better to use inexpensive materials - spruce, pine, pear or birch.
Whatever tools are chosen for wood carving, safety precautions must be strictly observed!
Tips for choosing wood
Professionals divide wood into 3 types:
- soft;
- hard;
- superhard.
Beginners should give preference to the first 2 options. Soft wood is pliable. It is easy to cut small parts from it, forming beautiful patterns. Hard materials are a little more difficult to work with, but they are more durable. Figures made from such wood do not dry out over time and do not burst.
It is easy to work with the following types of wood:
- spruce;
- chestnut;
- fir;
- pine;
- willow;
- Linden;
- poplar;
- alder;
- beech;
- birch;
- aspen;
- ash;
- elm.
Expensive and high-quality furniture is made from super-hard wood. It is difficult to work with this material manually; large machines are often used for processing, so this wood is not suitable for carving.
Carver's workplace
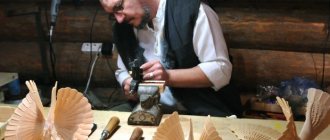
Professional carvers work at a workbench. For beginners, you can limit yourself to a tabletop. It should be stable and wide. The height of the table is adjusted individually for the master. In order not to strain your back and feel comfortable, you should choose a tabletop that is waist-high, but not higher.
The countertop needs to be wiped regularly and its condition monitored. When working, knives often slip and stick into the table, which creates nicks that need to be sanded down. To minimize damage, you must follow the rules for using the countertop. You cannot throw sharp tools at it, chop with an ax or hammer in nails.
To work you need good lighting. Installing a tabletop near a window is not enough. You will need 2-3 more lamps that will illuminate the work area from different sides. The lamps should be installed above the carver's eyes so that they do not blind him. You can purchase lighting fixtures with flexible legs that can be tilted in any direction.
Types of carving and technique
Types of wood carving are divided into several groups:
- contour;
- geometric;
- flat-notched;
- sculptural;
- end-to-end;
- embossed.
Each technique has its own characteristics, which you can read about later in the article.
Contour
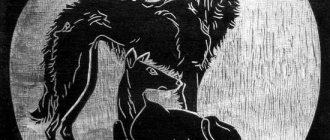
Contour threads are characterized by narrow recesses with 2 edges. They are made shallow and carried along the entire product. The main patterns are elements of living nature, for example, plant leaves, inflorescences, berry bunches, as well as animals and birds. The picture that is obtained thanks to this technique visually resembles engraving. All lines are rough, with clear edges. Light and shadow remain undefined.
Experienced craftsmen prefer to mix this technique with other types of carving, for example, geometric and flat-relief. This style also goes well with many traditional paintings.
Pure contour patterns, without collaborations with other styles, look good only on small wall panels. Such patterns are made using chisels and a knife with a beveled blade. The technique of contour carving is simple, but in order to decorate various products with it, you need artistic experience and skillful use of tools.
Geometric
This type of carving is one of the easiest to perform. The patterns consist of indentations of different sizes, which have from 2 to 4 edges.
Together they form various geometric shapes:
- triangles;
- diamonds;
- circles;
- rectangles.
This technique is used to decorate furniture and also create unusual-looking kitchen utensils, for example, hot pads. For work, they use the simplest set of tools: knives, chisels and cutters.
Flat-notched
Another simple wood carving technique that requires only a knife with a beveled blade. The peculiarity of flat-pit carving is the smooth surface of the background. The recesses in the wood are made shallow. The lines are smooth, but have sharp edges.
The finished drawings are visually similar to those made using the contour technique. They also do not have a clear division into light and shadow. The main patterns are elements of living nature, such as trees, flower buds and animal silhouettes.
Sculptural
This is one of the most difficult types of wood carving. It differs from previous techniques in that the image is not flat, it is three-dimensional. Sculptural carvings include three-dimensional figurines of animals, people and divine idols.
Sculptural wood carving
In the Middle Ages, such carvings were used to decorate the roofs of rich houses, decorate the inside of rooms, and place large wooden figurines on the bows of ships. Currently, sculptural carving also refers to decoration.
Wood is shaped with more than one tool; more often than not, several sets are used. Learning to work with this technique will require a lot of time and patience.
Through
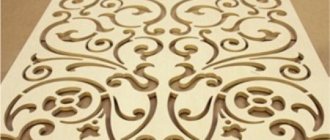
This type of thread has several alternative names: through, openwork and sawn. The resulting pattern resembles thin lace. This effect is achieved by sawing through sanded boards.
The peculiarity of this technique is the complete or partial removal of the background. Craftsmen use this wood processing technology in various design options. Through carvings decorate the frames of windows and doors, as well as cornices. Often such wooden patterns can be replaced on stair railings.
This technology is also used for small decorative elements, for example, for boxes, picture and mirror frames and caskets.
Embossed
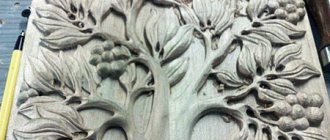
This technology is similar to sculptural carving in terms of complexity. On a flat background, craftsmen carve convex, three-dimensional images. These can be figures of animals, plants and even human portraits.
Relief carvings are divided into 2 groups: bas-relief and high relief. In the first version, the ornament turns out to be convex to more than half the thickness of the main workpiece. In the second case, the pattern is made very voluminous. All lines rise above the background and have smooth curves.
About wood carving for beginners
To decorate the internal and external space, various types of carvings and techniques for realizing the plan can be used. If you are interested in this type of needlework, then you must understand that you need to master the methods and techniques of wood processing, acquire the necessary tools and improve carving skills.
In the modern world of smartphones and tablets, a wooden stand decorated with wood carvings looks very original.
Skillfully executed carvings in the form of simple and ornate patterns and ornaments seem to enliven the world and endow it with sophistication, charm, emphasizing the taste of the owner of luxury items and the talent of the craftsman.
Panel
Cutting boards
Wooden icons
The works of the best carvers decorate the temples. Pay attention to the photo of the iconostasis of the upper Church of the Holy Image of the Savior, which is located in Moscow, in the Church of the Intercession of the Blessed Virgin Mary in Fili.
Modern masters with delicate taste create real masterpieces.
And thanks to finishing technologies and protection of the finished product from the destructive effects of mold and insects, these wood carvings have served people for hundreds of years.
Pay attention to the magnificent carved pieces of furniture:
Stylish doors:
Delightful handmade figurines:
Very often, connoisseurs collect handmade carved items. Wonderful chess that is worthy of any collection.
Perhaps, over time, your wood carving masterpieces will be carefully preserved by collectors or decorate temples.
Types of wood carving
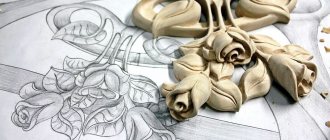
Of all the types of wood carving, openwork or through wood carving is very interesting, which is characterized by some transparency, in which only the image remains, without a background. An example is an applied carving - this is an ornament that is attached to a finished background after production by a craftsman.
Geometric wood is a type of carving in which a pattern is formed using a variety of simple geometric shapes (a rhombus is often used).
Oriental wood carving is distinguished by its whimsical forms. Egypt is the cradle of the oriental type of wood carving.
Relief wood carving. In this technique, the image is located above the background or at the same level with it. These are carved panels of various shapes with three-dimensional images.
Carving in the Baroque style is a flat-relief carving, but distinguished by an abundance of carved and molded decorations, various colors, curls, leaves, figures of people in unnatural poses, and fabulous fantastic animals.
Kudrinskaya carving originated in the village of Kudrino. Well-known products in this type of carving are boxes, vases, dishes, ladles, and home decor items. The main element is a floral ornament: rosettes, curls and twigs.
Three-dimensional (sculptural) carving is excellent for making sculptures, animal and human figures, and toys. Bogorodskaya carving is a subtype of three-dimensional carving. This is the main industry of the village of Bogorodskoye in the Moscow region. The famous Bogorodsk toys are figurines of animals and people made of linden and alder.
Scandinavian carvings were most often used to decorate wooden Scandinavian churches. Wood carvers decorated the inside and outside of church buildings with images of Gods and various animals.
Contour carving is the simplest and most unique type of carving. On a flat background, the master cuts out grooves - grooves, forming a pattern. Carved landscapes - images of landscapes on wood.
All these types of carvings are quite conventional. Each master chooses the most suitable one, taking into account work experience, quality of wood and creative inspiration.
What can be decorated with carvings?
The simplest staircase is transformed, decorated with carved balusters. Balusters are curly posts in the form of columns, a stylish and noble decoration of the staircase. Wooden balusters look organically with a spiral wooden staircase.
Bas-relief. Another name is "low relief". This is a sculptural image on a plane. Most often these are figures of people and animals .
Precautions during operation
Before you start getting acquainted with wood carving, you need to learn about safety rules. The entire instrument is very sharp. They can easily get hurt, and sometimes you can get so seriously injured that you end up with disability.
What needs to be done to reduce these risks:
- Install the countertop securely and firmly. The table should not sway from side to side or move around the floor.
- The workpieces should be secured to the table with special tools - clamps. Only they are able to reliably fix the part. Any other available materials are not suitable for this purpose.
- Lamps and lamps should not blind the carver. They need to be placed so that the tabletop is well lit and no shadow falls from the master.
- When sharpening chisels and knives, you should wear gloves and safety glasses. Small chips can get into your eyes, and the knife blade can accidentally slip off the machine and injure your hands.
- The quality of sharpening of any tools should be checked on a special whetstone, and not with your fingers.
- When working with cutting tools, you should hold them away from you, and also make sure that your other hand is at a safe distance from the knife.
- There should be no foreign objects in the workplace.
- After each cutting stage, you need to remove chips from the table using special brushes. If too much debris accumulates, a sharp tool may get lost underneath it, and when cleaning, it will stick into your hand.
- All knives and chisels should have a place. Experienced craftsmen recommend placing a jar on the table in which the carver will put away the tools and take them out when necessary. When the work is completed, all accessories must be placed in places for permanent storage.
- When using electrical appliances, it is important to ensure that the cord does not become tangled or twisted.
- You cannot plug several devices into an outlet at once. Many wires on the floor can become intertwined. It's easy to trip and fall on them.
Wax mastic is often used for work. It should be heated on an electric stove, but not over an open fire.
It is unacceptable to place heating elements where chips will fly. It ignites quickly. Wood blanks smolder at a temperature of 214 degrees, then begin to burn, so it is important to monitor fire safety.
The workshop should always have bandages, cotton wool and disinfectant solutions for the skin. Even professional craftsmen are not immune from accidental injuries. Wounds need to be treated as quickly as possible. If the damage is serious, you should postpone work until complete recovery.
Preparing the workpiece for carving (marking)
Geometric carving is most easily, quickly and cleanly performed on linden wood. The workpiece must be carefully planed (strictly to fit a square, not counting cases where threads are placed on curved or double-curvature surfaces), its end edges must be perpendicular to the longitudinal ones. The surface is cleaned with a plane or jointer.
When marking geometric carvings, usually only the main lines of the design are drawn, and small divisions are made by eye, according to the pattern. This is probably why dry geometric compositions do not look boring, but quite alive. The techniques for marking geometric carving ornaments are the same, regardless of whether we perform it on a workpiece or on an assembled product.
Marking begins by drawing with a hard (2T-4T) pencil the lines delimiting the ornament. Lines parallel to the longitudinal edges of the workpiece are drawn by hand, moving towards you, holding the pencil with the thumb and forefinger, and sliding the middle finger along the edge of the workpiece. Lines perpendicular to the longitudinal edges are applied using a carpenter's square, and lines at different angles to the longitudinal edges are applied using a jig or chalk.
After drawing the lines that limit the ornament, they divide its internal space into elements of a geometric pattern: first, as a rule, into squares or rectangles, and then into triangles. The lines are divided into parts using a ruler or divider compass (two- or multi-needle), and the division into small elements is done by eye. Here are diagrams for drawing the main ornaments.
A straight and inclined ladder is marked in the form of a tape formed by four longitudinal lines (external - internal - internal - external) with the distances between them (in parts) 1: 2: 1 (counted from top to bottom), and the resulting tape is divided into segments by perpendicular transverse lines 1.5 parts in size. After which the intersection points of the external and internal longitudinal lines with the dividing transverse lines are connected through one on both sides of the tape. Thus, on the border of the tape a series of isosceles triangles elongated along the base is formed. The same is done if the transverse dividing lines are drawn not perpendicular to the longitudinal ones, but at an angle of 15°. In this case, the triangles will not be isosceles, but scalene.
Easter cakes are the simplest ornament, which is a ribbon formed by two longitudinal parallel lines drawn at a distance of 7 mm (parts). The upper and lower forming longitudinal lines of the tape are divided into parts of 10 mm each, and the upper one is divided with an offset relative to the lower one by half a step. The marking points of the upper and lower lines are alternately connected to each other by a zigzag broken line, forming a series of isosceles triangles, inverted one relative to the other and having adjacent sides.
Triangles are marked within a longitudinal tape formed by three lines, in proportions (counted from top to bottom) 4:3, so that the width of the tape is 7 parts. We divide the upper and lower lines with a half-step shift into segments of 10 parts, after which we connect the marks of the upper line with the middle one with perpendicular segments. Next, we connect the intersection points of the perpendiculars with the top and middle lines with the division points on the bottom line in pairs on the right and left. As a result, we obtain a series of triangles with medians intersecting at their centers.
Depending on the ratio of the heights of the triangles and their bases, the triangles can be elongated vertically or elongated horizontally. If at the heights of isosceles triangles elongated vertically, at some distance above the base, we mark two points that are connected to the corners at the base of the triangles, then we get the marking of a triangle with a jagged edge.
The viteyka is marked within a tape, 8 parts wide, and formed by four longitudinal lines drawn at intervals (in parts) 3: 2: W. After which the operation of constructing triangles is repeated, with the only difference being that the triangles are constructed both on the bottom line and on the top (as on the base). As a result of this, mutually inverted triangles have adjacent sides, as in the case of constructing “wedges”.
The snake is marked on a longitudinal tape 10 parts wide, formed by 5 parallel longitudinal lines drawn sequentially from top to bottom through 2,3,3, 2 parts, on which two rows of triangles are built offset by half a step. As a result of this, the space between the triangles will be a zigzag broken strip.
The Christmas tree is marked on a longitudinal tape 10 parts wide, formed by 5 parallel longitudinal lines drawn at intervals (counting from top to bottom) in 2:5:1.5:1.5 parts. On the first, second and fifth lines, inverted vertical triangles are built with bases equal to 9 parts, and on the third, fourth and fifth lines, horizontally elongated triangles are built with the same bases, but shifted relative to the vertical triangles by half a step. Alternatively, in a herringbone pattern, instead of horizontal triangles, bracket notches can be marked between the vertices of inverted vertical triangles.
Diamonds are marked on a longitudinal tape 12 parts wide, formed by 5 longitudinal lines drawn at intervals (counting from top to bottom) 2:4:4:2, divided by perpendicular lines at intervals of 4 parts. On the described grid, two rows of mutually inverted triangles are built, with their vertices facing each other. In the diamond-shaped planes formed between the pairs of triangles joined at the vertices, smaller rhombuses can be outlined, formed by two sandpipers built on the larger diagonal of this rhombus adjacent to both of them.
The chain is marked on a longitudinal tape 13 parts wide, formed by 5 longitudinal lines drawn at intervals (counting from top to bottom) 4:2, 5:2, 5:4, divided by perpendicular lines at intervals of 8 parts, on which, as in heights, two rows of triangles with their bases facing each other are built. As a result, a row of rhombuses consisting of triangles is formed, having adjacent vertices of the angles along their minor axes.
The honeycombs are marked on a tape of three parallel lines drawn at equal intervals and separated by perpendicular straight lines drawn at intervals of the same size. On this grid, a series of squares are constructed with diagonals intersecting at their centers. They are made in the material, like a series of concave tetrahedral pyramids.
The squares are marked based on the “ladder” markings. In this case, the elements of the ladder are moved apart so much that on the previously adjacent lines of the elements it is possible to build squares interspersing the elements of the ladder. The intervals of longitudinal lines are 2:4:2, and the intervals of perpendicular lines are also 2:4:2, 2:4:2, etc.
The stars are marked on a tape formed by 5 longitudinal parallel lines drawn at intervals (counting from top to bottom) in 2:3:3:2 parts, and separated by perpendicular lines drawn with the same repeating series of intervals - 2:3:3: 2, 2:3:3:2, etc. On this grid, a series of successive figures are built, consisting of four triangles, with a common vertex, which is also the center of a four-pointed star.
The auroras can be marked in the plane of a square, an equilateral or isosceles triangle, and, finally, a quarter, half, and full circle. By the way, full-circle radiance is just a rosette. The auroras are marked as a series of triangles with a common vertex and adjacent sides.
Pebble corners in a pattern bounded by triangles. In marked triangles, divide one of the sides in half and draw a line parallel to the other side. The segments obtained on the base and on the side are again divided in half and lines parallel to the first are drawn. Do the same with the second side of the triangle. As a result, we will have four similar small triangles at the base of the triangles, and six rhombuses will be placed in the rest of the space.
The scales are marked as several rows of semicircles of the same diameter, offset by half a step. The scales can be marked as a series of segments with a boom to chord ratio of 1:5. Also, the scales can be made in the form of rows of Easter cakes shifted by half a step with a height to base ratio of 1:5 or triangles with the same height to base ratios.
The eyes are marked as two bracketed recesses, with their concavities facing each other and, moreover, having a common chord.
The wave-line is marked as a series of alternating upward and downward facing bracket grooves, continuing one another. The wave-line is characterized by the small size of the arrow and the large chord of alternating brackets.
The wave-pattern is marked as several rows of wavy recesses alternating in direction with a high arrow and a small chord, the tops of the recesses entering each other. More impressive is the pattern without offset rows, as if made by several tools clamped at a distance from each other in one clamp, which made reciprocating movements with an amplitude equal to the amplitude of the depicted waves, while simultaneously moving along the board.
A complex ornament is marked by first drawing a frame for the border, then the inner rectangle for the main ornament of the border tape and the main ornament is divided into rectangles, within which diagonals are drawn. The resulting triangles can be divided into smaller ones by drawing vertical and horizontal lines through the intersection points of the diagonals. You can draw different patterns in triangles: lights, chips, and in rhombuses - scales, etc.
Accurate, neat marking of the design and subsequent checking of the composition of this design as a whole and in parts with a compass and ruler is one of the main conditions for high-quality execution of geometric carving.
You need to learn the craft of carving by doing exercises that you can ask yourself, as long as you are strict enough with yourself. But before you start cutting anything, you need to keep in mind that many elements of geometric carvings (radiances, rosettes, etc.) are cut in different directions, and for this, your workpiece must be able to rotate, being fixed on a special board to avoid chipping due to awkward hand position.
The main tools for performing geometric carvings are:
a) blunt knives are straight with an edge angle of 30° when the blade is sharpened on both sides and with an edge angle of 50° when sharpened on one side;
b) hoof-shaped cutter knives (with a curved blade resembling half a goat’s hoof) with a tip angle of 30° and double-sided sharpening and with a tip angle of 90° with single-sided sharpening;
c) double-edged spear- shaped cutters with a tip angle tangent to the blade up to 60° and one-sided sharpening;
d) corner chisels (up to 5 pieces in a set) from large to small angles;
e) semicircular chisels (up to 3 pieces in a set): narrow, medium, wide;
f) sloping chisels in the same set;
g) straight chisels in the same set;
i) chisels-jambs in the same set;
j) a jamb in a machine for working with two hands (for professionals who perform a large volume of carving).
The main tool for geometric carving: 1-3 - jamb knives; 4 — cutters; 7, 8 — corner chisels; 9 — semicircular chisel; 10 — sloping chisel; 11 — straight chisel; 12 — chisel-jamb; 13 - jamb for working with two hands
Similar articles:
- Triangular recess carving
- Making staple cuts (holes)
- Lesson 7. Cutting board
Geometric rosette thread- Marking blanks
- Lesson 2. Composition
Stages of woodworking
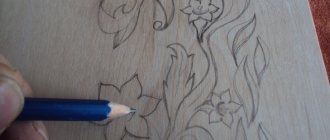
Wood carving (pictures depicting different technologies will help beginners understand how to work with wood correctly) always begins with an idea. The master comes up with patterns and makes a schematic sketch on paper, which he then transfers to a wooden surface using a simple pencil or marker.
He then carves out the rough design, then cuts off the corners and makes the lines smooth. Processes the background, polishes all the details and varnishes the finished product.
Further in the article you can read a description of the stages of work in different techniques.
With house carving
Wood carving (pictures are needed to correctly represent the basics of the technology) of this type is similar to the through technique. The master makes through cuts in the workpiece, completely removes the background and leaves only openwork patterns. Such carvings decorate window frames, doorways and roofs of houses.
The work is carried out in 3 stages:
- Choosing a style . All patterns must be in harmony with each other, so the master first selects suitable stencils. Then he transfers them to the workpieces.
- The background is removed using a drill and jigsaw. The ornament is carved by hand using chisels and knives.
- The finished work is sanded and varnished.
For house carvings, hardwood is chosen. It is not prone to rotting and delamination, so it can last more than 20 years.
Carved wood decor with three-dimensional carvings
Wood carving (the pictures show the procedure for working) with convex patterns is carried out in 6 stages.
They can be examined using the example of making a large brooch with images of mountains:
- The master cuts out a round blank and transfers the sketch onto it.
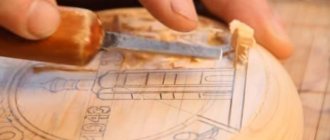
- Using knives and chisels, he carves small indentations along the drawn outlines.
- Using a special knife, the carver gives rounded outlines to the patterns and removes sharp corners and serifs.
- Sands the product using sandpaper of different grain sizes and an abrasive sponge.
- Paints the product with paints.
- After complete drying, treat the craft with wax mastic.
Soft wood is suitable for such work. It is easier to create smooth contours and convex elements.
With geometric wood carvings
Wood carving (pictures will help you make the markings correctly) with geometric carvings is quite simple to perform. Most of the time is spent on creating sketches and markings.
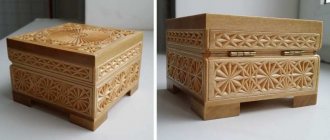
Using the example of making a box, we can consider 5 main stages of work:
- First you need to think about the location and shape of the patterns on each wall of the box, as well as on the lid. You will need to make a schematic drawing.
- Then the product is lined and even squares are drawn on all sides.
- The cells make up the intended pattern.
- Starting from the edges and moving towards the center, the pattern needs to be cut out on each side of the box.
- At the end, the product is sanded with sandpaper. Periodically sweep away the crumbs with a special brush.
Products that will be actively used are varnished by craftsmen. You can choose a colorless coating or a colored one that imitates the natural shades of other wood species.
With slotted
This is a through carving, where the background is completely removed using a jigsaw, but the pattern remains.
The work is carried out in 4 stages, which can be considered in more detail using the example of making a book stand:
- The master selects a sketch, transfers it to paper and pastes it on top of a wooden blank.
- Drills holes. Where the jigsaw blade will be inserted. Then he cuts out the pattern, removing the background.
- Sands the product with sandpaper of different grits.
- Connects the parts of the stand with glue and covers with colored varnish.
For products with slotted patterns, it is recommended to use hardwood.
Practical lesson in geometric carving, making a box
Geometric wood carving of a box requires certain steps, such as:
- thinking through the ornament;
- drawing a picture on the workpiece;
- performing markings;
- cutting out the simplest shapes;
- creating more complex ornaments;
- removing roughness with sandpaper.
A geometric tree pattern can be created quite easily. In order to complicate it, it is necessary to connect a large number of simple elements together. Additionally, you can watch a lesson on the Internet that allows you to understand how to decorate a box with geometric patterns.
Video material on carving a wooden box:
Geometric carving master class
This is one of the most popular types of carving. Professional carvers advise beginning craftsmen to use this technology for their first works.
What tools and materials will be needed:
- harvesting from soft wood, such as linden;
- knife with a beveled blade;
- a simple pencil;
- eraser;
- ruler;
- compass;
- fine grit sandpaper.
Before work, you need to inspect the workpiece and sand it if necessary.
Sketching a pattern
You can download pictures for stencils or draw them yourself. First, the blanks are made on thick paper, and then transferred to a prepared wooden board for carving. To prevent the stencil from bending when tracing, it can be soaked in acrylic varnish and dried.
You need to trace the template slowly. First, draw all the lines along the contour, then highlight the inner pattern.
Cutting out patterns
You need to cut out patterns from the edge, gradually moving towards the center. The knife should be positioned at a 45 degree angle and apply light pressure. You need to remove the layers one by one. If you don’t have enough strength, you can press with both hands, the main thing is that the blade is located away from the cutter, and not vice versa.
In places where the lines are smooth, for example, where there are circles, you need to cut shallowly. It is better to go over one place several times, removing 3-4 layers one by one, than to make a sudden movement and ruin the drawing. When the carving is finished. Use an eraser to remove all markings.
Grinding and impregnation of the finished product
The finished work must be cleaned of dust and crumbs with a special brush. Then take sandpaper and carefully grind off all sharp corners and remove burrs. If you plan to use the product frequently (pick it up, move it from place to place), then it needs to be impregnated with varnish in 2-3 layers.
For decorative crafts that will decorate the room, impregnation with wax mastic is sufficient.
Basic patterns
There are several main types of geometric patterns that are used in wood carving. These include pegs, diamonds, roundels, pyramids, stars, squares and rosettes. Having studied the features of creating each of these ornaments, the master can independently connect them together, making original and unique work.
Skolishki
In order to carry out wood carving, you must first learn how to perform such simple actions as pricking and trimming.
To do this, you need to take the knife in your working hand. Her thumb should be located on the beveled handle. Initially, you need to press the cutter so that it goes deeper into the wood by a few millimeters. After this, you should lower the blade at an angle so that it intersects the line of the side knife in accordance with the previously made markings. In a similar way, you need to prick on the other side.
Trimming occurs as follows:
- The cutting part of the knife should be applied to the left side of the triangle . With its bevel it should be connected to the top of the figure.
- The knife handle must be pulled back . In this case, it is necessary to maintain a parallel between the right side of the ornament and the blade.
- At the end, you should press on the knife, returning the brush to its original position . At the end, the tip of the knife should be on top. In turn, the cutting part will be on the right side of the triangle.
Since the trimmed triangle should eventually break off on its own, the pattern obtained as a result of these actions is called a chip.
Diamond
The rhombus, which is often used in wood carving, is a fairly simple figure. It consists of two triangles. They are connected to each other by their bases.
Reference. The technology for creating diamonds on a workpiece is the same as for making a peg. First you need to cut out the top row, then turn the board and start on the bottom of the figure.
Viteika
Another type of chips is viteyka. It is obtained due to the displacement of two triangles to the sides of each other.
Thus, having made many turns, you can end up with a winding path on your workpiece. To do this, you first need to cut out the bottom triangles, split them off, rotate the board and start creating the top row. After this, a so-called snake will remain in the middle.
Pyramid
The pyramid is the first complex design that can be made with a wood cutter.
It consists of several triangles, which must be located in a certain order in relation to each other. In the center between the three triangles is the point of contact of the corners. That is why, when cutting, you need to ensure that the cutting surface of the knife is always with one end strictly in the middle. Trimming should be done in the direction of the wood layer.
Star
A distinctive feature of an asterisk is that it consists of more triangles than a pyramid.
Despite this, the process of creating this pattern is similar. To cut out an asterisk, you need to make four consecutive triangles on the workpiece in the same way as described above.
Squares
Unlike all previous ornaments, creating squares requires the use of a different technique called straws. The pattern can be either the border of the entire work or part of a larger element of the design.
The creation of a square occurs as follows:
- Stepping back 1 millimeter from the markings, you need to deepen the knife into the workpiece at an angle of 45 degrees by 2 or 3 millimeters. Thus, you need to make a cut along the line.
- On the left side of the strip, you must perform the same actions in mirror image.
- At the beginning and end of the line, you need to make a puncture, holding the knife vertically to the workpiece.
At the end, a piece in the form of a straw should fall off from the wood. If you process all the lines of the square in the same way, you can get an interesting pattern.
Socket
The rosette is the most complex ornament in geometric wood carving. To create it you will need a compass. With its help you need to draw a circle of large diameter. After this, you need to make another one - 5 millimeters smaller than the previous one. Next, you should divide the circles into 16 even parts.
Once the above steps are completed, you need to mark the points in the middle of each segment on the small circle. From these places you should draw a line to the points of the large circle closest on each side.
At the end, having the markings, all that remains is to cut and split off the triangles in accordance with the technique described above.
Master classes on creating wood carvings
Before work, you need to prepare all the necessary tools and materials for marking, cutting and grinding. The production of any wooden figurines begins with a rough blank. This is a rough piece of wood that is marked and shaped into angular shapes. There is no need to remove all the excess, just cut off large corners and burrs.
One of the most popular three-dimensional figures, the production of which first of all novice craftsmen try to master, is a bear.
To make the product beautiful, you must follow the following algorithm:
- On a walnut block 10x5 cm, 5 cm thick, a sketch of the future figure is drawn.
- Trim off the excess and do rough processing with a knife.
- Using a pencil, draw the back side of the figure and its upper part.
- Using chisels of different thicknesses, gradually remove several layers. Each time the thickness of the chips should decrease.
- Using a small knife, they work out the texture of the fur, forming other small details, teeth, eyes, claws.
- Sand the product with fine sandpaper, then polish and varnish.
Walnut is a hard wood. For the first experiment, you can use pine or linden.
Beginners are often interested in silhouettes of sitting animals, such as foxes or cats. They can be made by analogy, with minor changes.
Procedure:
- Select a sketch and transfer it to the workpiece.
- Saw off excess material.
- Carry out rough processing, observing the main contours.
- Then start working out the details. Needs to be specified. Where the animal will have paws, head, torso and tail.
- Cut out the shape of the muzzle, mark the location of the ears.
- Sand the product to make its contours softer.
- Use small tools to make details clearer.
- Sand the work again with fine sandpaper.
- Using a small knife, cut out the texture of the fur, marking the eyes, teeth and other small details.
At the end, all that remains is to do the final sanding and saturate the finished product with varnish.
Wood carving can be learned in a short time. In the process of work, you need to follow safety rules, as well as follow the action algorithms consistently. Step-by-step master classes and pictures with ready-made stencils will help beginning craftsmen.
