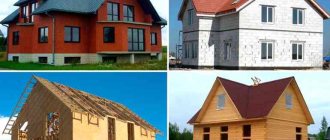
Manufacturing Features
When building a boat, it is worth considering that the most significant element of the frame part is the base on which the remaining parts (keel) are attached.
The bow area is formed by the stem and is fixed on one side. In the aft part, the fastening is carried out by the sternpost - elements responsible for ensuring the longitudinal rigidity of the structure.
They can be made from wooden materials (solid) or glued together separately and fixed with nails and screws.
The transverse parts of the hull allow you to achieve bends and transverse contours, which adds the necessary rigidity to the craft. In the upper part of the stem and sternpost there are boards connected to the frames. This design forms the sides.
The resulting frame is covered with plywood. A deck (slant) is placed in the inside of the boat. This creates the lower deck.
Boats made of plywood material can be equipped with a motor or oars. The main difference in the design is the aft part. For motorized watercraft, a transom (made of multi-layer plywood) is installed in the stern.
Upon request, the boats can be equipped with a cockpit, deck stringers and side stringers. To ensure good buoyancy, the niches must be filled with foam, which will prevent the vessel from capsizing.
What it is?
Marine plywood is sheets with a layered veneer structure. In this case, the direction of the fibers changes from one layer to another. A special bakelite composition is used to impregnate individual layers of material, which is why such products are often called bakelised plywood.
Such wood sheets have a high level of strength and are quite hard.
Marine plywood has a number of important properties.
- Fire resistance. The material practically does not burn. It can only char, while emitting a little smoke, which does not contain a large amount of toxic components. This can happen at temperatures of at least 350 degrees.
- Water resistance. Bakelized sheets do not collapse or deform when exposed to large amounts of moisture. Moreover, the minimum service life of such materials, provided they are used in contact with an aquatic environment, can reach 15 years.
- Strength. The strength level of this type of wood practically coincides with the strength indicators of steel sheets.
The material has good resistance to impacts and significant loads. In addition, it is almost not exposed to harmful atmospheric influences, so it can be used for finishing furniture structures that will be placed outdoors. Entire garden kitchens and gazebos are often built from such wood.
Ship models can also be used for laying floor, wall and ceiling coverings indoors. But in this case, it is recommended to give preference to thin sheets with a laminated coating. For the manufacture of deck parts for boats, special grade FBS marine plywood is used.
The thickness of such wooden sheets can vary from 4 to 40 millimeters. The length of the products can reach 1500, 4400, 4900 mm (but there are also extended options - 5600, 5700 and 7700 mm). The width of one sheet of plywood can be 1250, 1500, 1550 mm.
Deciding on the parameters
Experts presented the most comfortable parameters for a watercraft made on the basis of plywood, the thickness of which is within 5 mm:
- The length of the hull (from bow to transom) is 4.5 (m);
- The width indicator in the widest part of the body (measurements taken from the top) is 1.05 (m);
- The boat depth indicator is 0.4 (m).
The most important stage of construction is the construction of the drawing. You can take a ready-made drawing presented on websites on the Internet or make it yourself.
It is very important to study the proposed drawing very carefully if the diagram is taken from the Internet. It is recommended to construct a scale drawing on graph paper. This will allow you to accurately calculate the body elements.
Stages of creating a general plan sketch
- The first step is to draw an axial (or diametrical) plane - a line dividing the body part along its length into a pair of equal parts. Considering the symmetry of the boat image, all elements should be adjusted as accurately as possible.
- The diametrical type plane is divided into proportional segments. Frames will be located in these areas.
- We draw a vertical projection of the swimming craft.
- Let's move on to building the top view.
- We draw plans of frames along transverse lines.
- We make sure that the locations and scales of all parts are consistent.
- Having drawn up a sketch of the frames, we proceed to constructing its drawing, using a scale of 1 to 1. It is advisable to build drawings on a cardboard base, which will allow you to easily transfer it to plywood.
- To ensure the necessary smoothness , the points should be connected with a metal ruler (from the keel to the side area).
- Having folded the drawing along the diametrical plane, we check the symmetry. It is very important that the sides accurately follow their contours.
An example of a drawing of a plywood boat
Transferring an image from a template to plywood
After checking the symmetry of all elements, we first transfer the image onto a cardboard base. After this, we move on to transferring the templates onto plywood, while accurately observing all the contours. Under no circumstances should you add extra allowances! When transferring the template, the order of the fibers is observed with absolute precision.
Photo of the transom, bottom and sides parts
What kind of plywood is used for formwork?
Plywood is divided into types depending on what glue is used in its production. For the construction of formwork, the following types of this material are used: FBA, FSF, bakelized plywood.
FBA
This is a type of plywood in which layers of veneer are glued together with albumin casein glue. This makes it environmentally friendly and places it among natural materials. It can be laid in residential areas. However, it is not the best option for repeated use as a formwork material, since it is not resistant to moisture.
Environmentally friendly FBA plywood is used indoors, but is not practical as a reusable formwork material
FSF
This type of plywood is moisture resistant. The layers in it are glued together with phenol-formaldehyde resin, which determines its moisture-proof qualities. It is recommended to be used for outdoor work, including the creation of formwork. It will withstand many cycles of use. Phenol-formaldehyde resin is toxic, so using such plywood indoors is not environmentally friendly.
Formwork made from this type of plywood can be reused many times
Laminated plywood
A laminating layer on the surface of plywood improves its moisture resistance. Typically, FSF plywood is laminated from hardwood, usually birch. Such plywood can have a smooth or corrugated surface, giving it anti-slip properties. It is laminated plywood that is often used for formwork.
Lamination increases the moisture resistance of plywood
Non-laminated plywood can be unsanded or sanded on one or both sides. The main purpose of grinding is to improve the aesthetic qualities of the material. It also eliminates minor surface defects and, as a result, makes the material more resistant to mechanical damage - chipping and warping.
Bakelized plywood
Its layers are glued together with bakelite resin. It gives the material special strength and resistance to aggressive environments. Thanks to this, it can be used in different climatic conditions. Bakelized plywood can withstand temperature changes, even significant ones - from -50°C to +50°C. It is used in humid tropical climates and conditions of the far north. If construction takes place in one of these regions, this type of plywood is ideal.
Bakelized (bakelite) plywood is used in extreme climatic conditions
Russian or Chinese plywood?
The domestic market offers plywood from Russian, Finnish and Chinese production. The first two practically do not differ from each other in quality; plywood of some Finnish brands is even produced in factories in Russia. At the same time, the cost of the Russian one is significantly lower. Chinese plywood can be used in low-rise construction as an economical option. Its quality is low. It is not suitable for repeated use in multi-story construction.
Materials and tools
When creating a floating craft, you cannot do without the following materials and tools:
- screwdriver;
- manual milling machine;
- grinding machine (manual type);
- clamps;
- jigsaw;
- waterproof plywood with a thickness of 5 mm (2.5 by 1.25);
- waterproof plywood with a thickness of 6 mm (1.5 sheets);
- planed boards (at least 25 mm thick);
- slats (wood);
- nails (brass);
- wood screws;
- epoxy resin;
- varnish (waterproof type);
- fiberglass;
- timber (50 by 3400);
- timber (40 by 20 by 4000).
Parts of a future boat cut from plywood
Increasing the yacht's strength
For those wishing to build a cruising vessel, it is better to make the internal structure from 9 mm thick plywood, and increase the thickness of the skin to 18 mm in order to increase resistance to damage. In this case, it is advisable to increase the thickness of the skin outward, and not inward, then the additional weight of the structure will be compensated by the increased volume of the underwater part, and the draft will not increase, despite the increase in displacement.
False keel
The false keel has a “deep delta” shape with a bulb, which allows the ballast to be lowered as low as possible. The leading edge is formed by a strip, with a pair of internal thick-walled pipes running through it to provide a very strong set for later sheathing. I made the false keel box in the garage without using any metal bending equipment. Lead ballast was melted in an iron cauldron over an open fire and poured into a steel casing.
Impressions about the project
The yacht was launched and set sail for the first time in late 1995. Over the course of three months, the five-member crew had sailed almost 10,000 miles and completed two transatlantic crossings. The first - from Cape Town to Rio de Janeiro - with tailwinds took 21 days, the best daily result was 240 miles and a speed of 17 knots. On the way to Rio de Janeiro, only one boat of this size passed us - a 38-foot composite trimaran, and of the monohulls - an IMS 42 class racing yacht. The return passage was carried out by two people, and it was carried out mainly in strong winds and tacking conditions. At this stage of the race, one yacht sank and two lost their masts.
The following year, a yacht with a crew of two married couples and my 19-year-old daughter participated in a coastal cruise regatta, and my “Didi 38” proved that it was strong and fast - we took prizes in every race of the series.
The hull, deck and interior materials cost for 1994/95 was $7,000, including wood, adhesive, epoxy coatings, interior and exterior paint, fixtures, slipway, all temporary structural members, etc., and value added tax 14%. Only occasionally did I manage to get noticeable discounts when purchasing materials. The total cost of building the yacht, including spars and electronics, is approximately $45,000 (the author cites South African prices. - Ed.).
But the labor costs turned out to be unusually small. The yacht took approximately 3,000 hours of work to build from start to launch, mostly unassisted and in my own time, and was completed from start to finish in 24 months.
We all complain about the rising cost of yachts and use it as an excuse for still being on shore. I built my first keelboat in 1970, and spent only 40% of the cost of an equivalent boat launched from the shipyard - and there was no big difference from the factory design. This proves the practical possibility of building and launching a yacht on your own, although it is not worth underestimating the costs of both finances and time. The work will not be successful without complete dedication.
I must warn you that the decision should not be made hastily. It’s good if you have the opportunity to seek advice from a professional when doubts arise during construction. Modern means of communication can help with this.
The principle that guides me in designing my yachts is to increase the bonding surface above standard while reducing structural weight where reasonable. As a result, the structure becomes more "tolerant" of the builder's inexperience than usual.
Dudley Dix, yacht designer, South Africa.
Share this page on social media. networks or add to bookmarks:
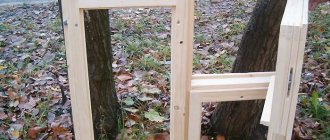
Manufacturing process
The assembly of the frame part begins on the workbench and ends on the floor (ground).
To avoid mistakes during the assembly process, it is recommended to use the instructions below:
- We lay the keel on the workbench.
- We attach a sternpost with a transom to one side of the keel. The stem is connected to the second side.
- Using nails, the keel part (together with the frames) and the stems are connected. We carefully check everything for any distortions. If there are any, adjustments must be made. To do this, a string is stretched between the transom and the stem.
- After making sure that the axes are completely aligned , we perform the final fastening.
- Thin fabric is saturated with paint (quite thick) and distributed between the existing joints.
- After securing the stems, we proceed to installing the frames. To ensure tight fixation, the cut under the keel should be made slightly narrower than the frame (a couple of mm).
- The fit is checked using a taut rope. An exact match with the beams must be ensured.
- to install frames at an angle of 90 degrees.
- We finally fasten the frames.
- Having completed all the operations, we set the deflection angle. For this purpose, round bars can be used, temporarily attached to the outer parts of the keel (from the inside).
- a wooden beam (11 cm) between the beam and the keel
- Fastening is carried out exclusively with beams , which will prevent the occurrence of distortions of the transom.
- Let's move on to covering the frame. It is advisable to transfer the entire sheet sketch to a reduced size of cardboard and cut it out.
- Draw an image for cutting on plywood (observing sheet dimensions).
- Let's try out the templates.
- We cut out all the parts using a jigsaw (small teeth). We make a margin of no more than 2 mm. It is very important to add an additional 70 mm for joining sheets.
- Using threads driven in (between the boards), we align the axes of the elements. We glue and wait for it to harden.
- Using small nails , we knock down identical parts of the craft.
- We carefully adjust them together with a plane.
- We drill holes (2 mm in diameter) at a distance of 12 mm from the edges of the cheekbones, observing a step of 50 mm, intended for (wire) staples. It is the clamps that will become reliable connectors.
- The plating is attached starting from the bow of the vessel. It should be fixed with copper wire through the holes that are made along the bottom and side. The wire is twisted from the outside a couple of turns.
- Next we trim the transom and bottom.
- The assembled sides are subject to installation and are temporarily connected.
- The bottom is assembled according to the same principle as the sides.
- We install the transom and fasten it using screws (3 by 18) and an adhesive base, while maintaining a distance of about 0.5 cm.
- If the side elements protrude beyond the transom into the stern , then you can use a plane to level the edges.
- Finally tighten the paper clips with pliers. We crimp everything in the inner area.
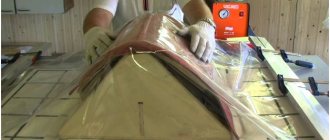
- Each crack and joint of the watercraft must be taped with fiberglass tapes. The width of the first layer should reach 28 mm, subsequent layers should be about 75 mm. When placing each subsequent layer, we move it a little (on different sides).
- After the fiberglass has hardened, it is necessary to remove the protruding edges of the fasteners. We glue the outer area with fiberglass.
- To increase the degree of rigidity and increase the service life, it is necessary to strengthen the bottom with strips. To do this, holes for screws are drilled on the planks (the pitch is 25-28 cm). All the blanks, laid out in places, are fixed with screws, marked with a felt-tip pen and removed. Only after each basting has been treated with an adhesive base can the blanks be screwed into place. After the glue dries, the screws are unscrewed, and the resulting holes are clogged with nails cut from wood.
- Having removed the auxiliary devices , we fill all the holes in the casing with a mixture of epoxy resin and sawdust.
- The outer part of the craft is treated with glue and fiberglass.
- The inside of the boat is covered with hot drying oil.
- The vessel is painted with oil-based paint.
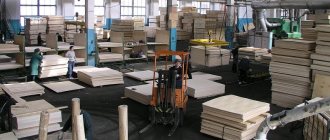
Manufacturers
In Russia, several enterprises are engaged in the production of Finnish plywood. The technological process is based on the use of domestic raw materials. It is processed using Finnish equipment.
- Ivestlesprom holding, which owns the Vyatka plywood plant. This company produces high-class Finnish laminated plywood only from birch veneer of excellent quality using Finnish equipment.
- LLC "Zavetluzhye" The Nizhny Novgorod woodworking company has been operating since 2005. The range of products includes types of plywood of grades 1–4, as well as finished products made from non-e.
- Sveza production group. This is the largest domestic manufacturer, whose plants are located in various regions: St. Petersburg, Kostroma, Vologda region, Perm region. Sveza products have international certification.
- Syktyvkar Plywood Plant LLC is also one of the large domestic manufacturers of large-format plywood and wood-based materials. The products of this company are manufactured in accordance with high international standards.
Finnish plywood requires the use of complex, expensive equipment and belongs to a high class of wood building materials. For this reason, its price per sheet is slightly higher than that of other types.
The table shows distributor prices for laminated Finnish plywood depending on the thickness and format of the sheets.
| Thickness (mm) | Format (mm) | Cost, rub) |
| 6 | 2240×1220 | 650–700 |
| 6 | 2500×1250 | 750–850 |
| 15 | 2240×1220 | 1320–1400 |
| 18 | 2500×1250 | 1450–1600 |
| 24 | 2240×1220 | 1900–1950 |
| 24 | 2500×1250 | 2000–2100 |
When choosing Finnish plywood, it is recommended to choose the domestic version, as it is of higher quality, safer and more environmentally friendly, manufactured strictly in accordance with GOST. Similar materials made in China from poplar or bamboo veneer, despite their lower cost, emit more formaldehyde because they are treated with cheap adhesive solutions and are less resistant to external influences.
Boat testing
After making your own boat, you should take it out onto the pond and be sure to test it. When checking speed characteristics, it is necessary to create conditions as close to reality as possible. In addition, testing is carried out with different load levels.
In this case, you can use an independent exit with two people on board. However, it is advisable that the total weight does not exceed 150 kg. You can measure your speed with a GPS navigator.
It is important to consider that motors with low power (5 hp) have difficulty withstanding an increase in load. This situation will get worse if the boat is too short.
Therefore, for such motors the recommended load does not exceed 90-100 kg, otherwise it will be impossible to switch to planing mode. The sufficient length of the boat and a good motor will allow you to easily plan even when fully loaded (150-160 kg).
Finnish plywood
Laminated plywood is called Finnish. The fact is that in the USSR such material began to be supplied to the domestic market from here. The name is firmly entrenched in the construction lexicon. Finnish moisture-resistant laminated plywood is of high quality. It has a special film that additionally protects the material from destruction.
The presented material is made from peeled veneer. This allows you to create thin workpieces. They are dried thoroughly. Before this, the sheets are cut to the specified formats. After this, the material is impregnated with bakelite resins. When this procedure is completed, the sheets are stacked exactly on top of each other and subjected to hot pressing. After this, the sheets are cut again. They acquire the appropriate dimensions. For example, it could be laminated moisture-resistant plywood 1500x3000 mm or another standard size.
A protective film is applied to the sheets on both sides. The ends also require proper protection. They are coated with special waterproof paint. This completely prevents moisture from entering the material. This is durable, high quality plywood. It has a wide scope of application.
The presented material is used as formwork when creating various objects made of cement. Moreover, it can be used both indoors and outdoors. The material is well protected from various adverse weather conditions.
The presented material is widely used in shipbuilding, automobile and carriage building. The laminating film can be smooth. In this case, the surface of the sheet will have the same texture on both sides. This material is used to create formwork.
However, in some cases, mesh film is also used. It is applied only on one side of the sheet. The second side must be covered with a smooth material. This smooth mesh type of plywood is used in the automotive industry. It is used to make floors in truck beds. The mesh surface has high adhesion rates. This increases its adhesion rate to other materials.
Blitz tips
- When making a swimming device, it is necessary to sand all irregularities that appear after applying epoxy glue with sandpaper.
- Any flaw can be filled with moisture-resistant putty.
- There should not be any particular difficulties when building a boat , but it is extremely important to follow all the recommendations of experts regarding the step-by-step process.
- Before cutting the material, you should once again make sure that the measurements are correct and only then begin cutting out the parts.
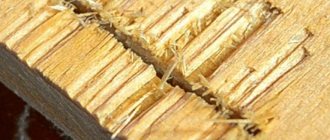
- When choosing wooden material for making a watercraft , you should give preference to products without knots and cracks. We select only the highest quality specimens.
- If the structure is assembled correctly, you can be confident in the strength and reliability of the boat. Products made from plywood very rarely leak.
- A boat made of plywood is lightweight , which does not cause any special problems during transportation.
Surface preparation
Before impregnating plywood from moisture, its surface must be prepared.
This process consists of several stages: The slab is dried. It should be such that the plywood is protected efficiently. Next comes grinding the surface. Before impregnating the plywood for moisture resistance, it is necessary to clean it well. To do this, use fine-grained sandpaper
For ease of operation, it is attached to a wooden block, and the surface is polished with this device. Particular attention is paid to the ends of the sheet. All chips and burrs are removed
If the chips are quite large, you can use wood putty.
It is advisable to acclimatize the plywood; how long this process will take depends on the temperature. If the material is intended to be used indoors, then one day is enough for drying; outdoors at a temperature of 80C and below - 3 days.
Now you understand how to treat plywood to increase its moisture resistance and hydrophobic qualities at home, and you don’t have to buy expensive brands of products. You can use the fairly effective processing methods presented above.
DIY anchor
The anchor is the main element of a floating craft. After all, it helps to stay in one place for a long time, not allowing the current to carry the ship away. In order to attach an anchor, you need to drill a hole in the back of the boat, stretching an iron chain, which will become the basis for the anchor.
Next you need to attach the load itself. It must be a large piece of iron that can stop the boat. It will need to be attached to the chain by welding. Ten minutes - the anchor is ready. This is the easiest way to make a boat anchor with your own hands.
Conclusion
Judging by the material presented above, the construction of the boat can be quite successful, which is not strange if there are accurate drawings and the basic design requirements are met. Therefore, let us clarify once again that it is necessary to build according to a ready-made project.
And of course, one cannot help but note the incredibly low cost of the design, because the price includes the design and materials, and everything else is our work! And we can carry it out without haste, paying maximum attention to details and elements.
The result is a great boat that can last for many years! And in the video presented in this article you will find additional information on this topic (also find out what aircraft plywood is and what it is used for).
Design
As a rule, models of such plywood have good decorative characteristics. They can be made in different colors ranging from light beige to chocolate and red. Some models are produced in black.
Marine plywood is coated with a special varnish. Such samples have a slightly rough surface. Fully laminated products have a completely smooth surface. Today, corrugated sheets are also produced. They are used for laying flooring, as they are considered the safest for humans - it is almost impossible to slip on them.
To learn how to choose plywood, watch the following video.
Rubber dinghy
The answer to the question: how to make a boat with your own hands, drawings will be the first answer. Thanks to them, the product will turn out to be the correct shape. Therefore, the first thing you should do is draw drawings, calculating the smallest details.
After this, we cut out a boat of the specified dimensions from a sheet of plywood. Additionally, we will need boards to securely fasten the bottom and a tarpaulin for covering. These materials must be connected to each other using the same glue and resin. Be sure to give the glue time to set, otherwise the structure will turn out flimsy. And your efforts will be wasted.
After this, cover the product with a tarpaulin, tightly attaching it to the boards. Remember, the design must be wide. This way you will get a homemade boat. It will not be very similar to the rubber one that is sold, but it will provide you with softness and comfort.
For a better understanding of the manufacturing process, you can see how to make a PVC boat with your own hands. There they will explain the principle of operation using a clear example. After all, reading and seeing an example, repeating actions, are completely different things.
Final imparting moisture resistance
This completes the construction of the boat. What remains is the interior and exterior finishing, which serves not only for aesthetics, but also to ensure that the boat does not leak. Ordinary wooden boats will be tarred, but what to impregnate a plywood boat with - there is a very specific answer to this question. On the outside, all seams and the entire body are treated with fiberglass and glue, in the same way as was done when gluing the parts. Before this operation, the protruding wire should be removed or cut off. The inside of the plywood boat is impregnated with hot drying oil.
When covering a boat with fiberglass, you must carefully ensure that there are no bubbles.
First gluing
If you managed to get sheet plywood that matches the length of the future boat, that’s good. But if you have ordinary sheets of 1.5-1.5 meters, you will have to glue them together. The best way is gluing.
Mustache gluing is the strongest connection between plywood sheets
A distance equal to 10-12 sheet thicknesses is retreated from the edge of the sheet, and ground off at an angle with a plane. After this, you need to go through the sander and do the same operations with the second sheet. Cleaned and degreased surfaces are smeared with glue, carefully connected and secured with clamps. Since clamps can only be placed at the edges, a weight must be placed in the center. After the glue has dried, the clamps can be removed, but let the product sit for at least another day.
Painting
At this point, the construction of the plywood boat can be considered complete. It will take some time to dry, and by and large you can already swim on it. On oars, with the help of an engine, if you tried to make the transom for a motor, or even under a sail, if this is provided for by the design. It is already completely waterproof, but absolutely not aesthetically pleasing. Painting is the very last stage, and then the production of the boat will be completed completely.
There are two options here. Or oil paint - the color is chosen according to taste - for fishing, something merging with nature, for walking, something brighter. Or waterproof enamel, selected according to the same principle. You'll have to wait a little longer until the paint or enamel dries - and you can safely set sail.