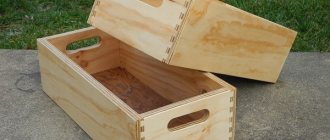
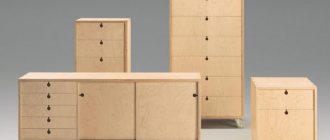
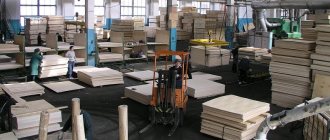
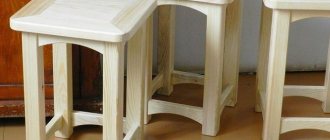
Plywood sheets of various thicknesses are an almost ideal material for the manufacture of a wide variety of decorative elements. Having mastered the skills of working with this material, you will be able to make different shelves, frames, boxes for storing small items, etc. with your own hands. At the same time, each product can be given a unique appearance, since plywood is processed simply and without the use of complex tools. In this article we will tell you how to make a small plywood box, but the techniques used for this can also be applied to other home decor items.
Anyone can do this with their own hands
Features of making a tool box
Things often get lost. It's better if they have their own place. Then they won't get lost. And all the necessary things will always be at hand.
- The boxes can be made in different ways. They can have different shapes and colors.
- It's easy to do. Almost everyone can do it themselves if they wish.
- It doesn't require a lot of money to make.
- Plywood is easy to process.
- You can put heavy things. After all, it can withstand a heavy load.
- Thickness may vary.
- You can store both small and large things.
- Boxes can be of different sizes.
You can decorate them as you wish. They can be of different colors. Suitable for any interior.
Preparation of tools and materials
One sheet of plywood is not enough for the job. We recommend preparing all the necessary items, materials, and tools in advance. Then the process will go quickly and easily. You won’t have to be distracted by searching, shopping or visiting neighbors.
What you will need for work:
- pencil, marker or chalk;
- drawing paper;
- tape measure, a long ruler will do;
- hacksaw, jigsaw, file;
- hammer;
- sandpaper;
- nails, screws, self-tapping screws;
- screwdriver, drill.
The set of materials and tools depends on the chosen box model, the complexity of the design, and the method of connection. You may need a glue gun, additional bars, or planks.
Box making process
You need to understand what size the box will be. The drawer will have sides measuring 19.5 cm by 13 cm. The bottom of the drawer will measure 19.5 cm by 31.5 cm.
- Then they draw a drawing of the box.
- Draw patterns for the components of the box on sheets of plywood. The bottom of the box will be six millimeters thick. And to make the sides you will need plywood eight millimeters thick.
- The elements are cut out using an electric jigsaw or a hand router. There should be five parts in total. Four side walls and a bottom. If necessary, also cut out the lid. The walls can be in the shape of a cone if the box has a lid.
- Once the parts are prepared, the box is assembled. The walls are placed at the bottom of the box.
- The seams are glued with a special glue for wooden products. Excess glue is then removed with a regular rag. After gluing the box, place it under a press so that the parts stick together better.
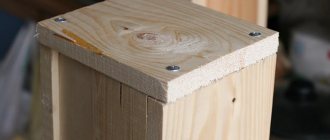
- Then connect the parts with self-tapping screws.
- Then they make holes for the handle of the plywood box lid.
- You can make internal partitions in the box. But a box with partitions is suitable for experienced craftsmen. For novice craftsmen, it is better to make the box simple, without internal partitions.
If the box is large, then special wheels can be attached to the bottom. This will make the drawers easier to move around the room.
How to create a beautiful box?
There are many options for boxes, each person tries to create the design they need. But the decorative item is unique and is used in many ways. The main thing is that the process does not require additional knowledge or extensive construction experience. The box is spacious and can be used for different needs. It is better to decide on the dimensions before starting work and draw up a rough diagram of the future structure. The outer walls are cut out with a jigsaw. In order not to make mistakes with the size and not spoil the material, it is better to make blanks from thick cardboard. After this, transfer them to plywood and cut them out. It's also easy to make interesting lines, giving the drawer special patterns.
To prevent unpleasant odors from accumulating in the box, it is worth making ventilation holes in the bottom. They are also cut out neatly (can be symmetrical or chaotic). Now, when creating pens, everyone will be able to realize their fantasies, especially if they have all the necessary tools, this will not be difficult.
Plywood box finishing
- After making the plywood box, we begin to decorate it.
- You can paint it with varnish. The entire box is varnished. This not only adds beauty, but also extends the life of the plywood box.
- The box can also be decorated with special overlays.
- It is also better to cover the outside of the box with color. This will give a beautiful appearance to the box.
- Before decorating the box, all holes must be filled with a special product for wooden products. The putty is applied very easily. Dries within three hours. After puttying, the box can be varnished.
- Afterwards, the plywood box is sanded using sandpaper. You can also putty a plywood box using a sanding machine.
Plywood box with sliding lid
- You will need plywood 0.5 cm and 1.5 cm thick.
- Parts are cut out. The back wall should be 20 by 15 cm. The front wall should be 18 by 35 cm. The lid should be 34.3 by 33.3 cm. The bottom of the drawer should be 33.8 by 33.4 cm. The handle of the drawer will be 5 by 2 cm. These parts are cut from plywood with a smaller thickness. The side parts of the box are cut from other plywood. Their size will be 33.8 by 33.4 cm. There will be two such parts.
- Using a saw, the parts of the future box are cut out.
- Then the parts must be sanded using fine paper.
- Grooves measuring 0.6 cm are made on the sides of the box.
- It is necessary to make holes 0.4 cm in size on the walls of the box. This is necessary so that they can then be connected to the side walls of the future box using self-tapping screws.
- First, the parts are connected using a special glue. You can use both wood glue and PVA glue.
- Remains of glue are removed with a regular rag.
- View the edges whether they are suitable or not.
- Check whether the cover moves along the grooves. If necessary, process using sandpaper.
- The handle is glued to the lid using glue. You can also attach it to the lid using a special stapler.
- After everything is dry, it is better to sand the box again on all sides.
The top can be coated with special paint or varnish. The color of the box may vary.
Tips for making a plywood box
The thickness of plywood may vary. When making a plywood box where toys, clothes, and food will be stored, plywood with a thickness of 0.5 cm is suitable. And, if the box is to be stored outdoors, then the thickness of the plywood should be more than one centimeter.
- Before you start work, you need to understand whether the drawing is made correctly.
- You need to buy or rent the necessary tools to make the box.
- When purchasing plywood, you need to carefully examine the appearance of the material. There should be no chipped pieces or other defects on it.
- To ensure that the place where the plywood is cut is clear. You need to use tape to glue the place where the plywood will be cut.
- It is necessary to apply varnish to the plywood box. It gives not only a beautiful appearance, but also protects from various external influences.
- It is better to choose fine sandpaper for sanding a plywood box.
- If you need to make several identical boxes, you can make a template for the side walls.
- It is better to paint boxes in neutral colors.
- If the boxes will be located outdoors, it is prohibited to paint them with bright colors. After all, in the sun the color of the box will quickly fade.
- It is better to remove excess glue with a wet cloth.
What will you need for work?
Selecting materials
Naturally, to make a box with our own hands, we first of all need plywood:
- The quality of veneer should be maximum (first or second grade). Blisters, knots, resin streaks, etc. are not allowed on the surface of the sheet.
The higher the grade, the better the result!
- It is very important that the veneer sheets are glued over the entire area of the workpiece, especially if the walls of our box are carved.
- Before work, plywood should be dried, since raw material often leads to tool breakage.
- The color of the veneer will only play a role if we leave all surfaces without painting or varnishing. If any processing will be used, then it is better to focus on selecting plywood according to quality, and achieve the required color through the use of pigments.
- The thickness depends on the dimensions of the product. As a rule, plywood with a thickness of 4-6 mm is used for decorative desktop drawers.
To connect individual parts together, small nails with hidden heads, self-tapping screws, or furniture glue can be used. Also, for the final processing of the plywood box, we will need paint or varnish. Photo of an easy-to-make model without varnishing
Tools
Working with plywood does not require powerful and bulky tools. Here, rather, devices for “fine” work would be appropriate:
- Jigsaw (manual or electric, but always intended for figured carving).
- A supply of jigsaw files.
- Wood saw for rough processing of workpieces and cutting plywood sheets.
- Screwdriver (if self-tapping screws will be used).
- Hammer.
- Set of wood files (round, flat and triangular).
- Sandpaper for sanding.
- Paints, rollers and tampons for finishing the product.
When all materials and tools have been purchased and prepared for work, you can begin making our plywood box.