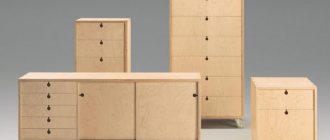
If you absolutely do not have enough space to store various home kitsch, or you just want to make functional furniture for your home yourself, then we have an excellent solution: a plywood box.
This multifunctional and stylish piece of furniture can help you organize the space in your own apartment much more functionally, while creating a unique atmosphere of comfort.
It is also very important to note that there are a lot of options for making such boxes, and none of them will require serious financial, time or physical expenditure from you. We'll talk about how to make a box out of plywood with your own hands in the material presented.
How to make a box from plywood with your own hands
Preparatory work and necessary tools.
Before you start, you need to prepare everything you need. Of course, this stage is required for any work, but in this situation it is worth understanding the specific case. A homemade plywood box can generate income if you make enough of them to sell. But in such a situation you will have to be patient and have the following tools:
- Woodworking Machine. Its price is high and not everyone has it, but when creating batch products it’s worth stocking up on it. Its capabilities are impressive; it is a substitute for a plane, circular saw, and several machines. It is powered from a simple network, so everyone will appreciate the ease of use.
- A drill and a screwdriver, and sometimes just one thing.
- A jigsaw (there is no need for a professional one), but if you have one, the work will go faster.
- Stapler for furniture.
Many of the tools can be rented, but the purchase will be considered profitable, because they will be useful even after the work is completed, but if you have few ideas on how to make a box, we recommend looking at them here: https://fb.ru/article/306910/ yaschik-iz-faneryi-svoimi-rukami-chertej-instrumentyi-i-osobennosti-izgotovleniya.
How to do it?
After the preliminary preparation is completed, you should make sure that you have enough knowledge on how to create a box with your own hands.
Such information will help you more clearly understand the process of creating drawings and assembly diagrams, as well as the sequence of actions, which will help you avoid difficulties in your work.
A plywood box is created thanks to the correct algorithm of actions, which consists of the following points.
Think about what the future product will look like and transfer the diagram to a piece of paper. If all the calculations have been completed correctly, you can begin marking the parts on the plywood. To obtain straight sides and corners, it is best to use a square.
It is this sequence that allows you to create a neat and easy-to-use box that you can keep for yourself or give to someone. The final appearance of the product can be very diverse and depends on the preferences and purpose of the item.
Plywood box with sliding lid.
It is quite possible to make a box from plywood with a retractable lid yourself, and in the household this design is considered unique. Visually, this can be compared to a pencil case; it will be convenient in the household and not only for storing small items, documents, photographs, etc. We will use a small parcel box made of plywood (thin) as an example. It is not necessary to purchase building material. You can use scraps.
How to make a box out of plywood? It consists of the following parts:
- Back and front walls.
- Retractable lid.
- Bottom.
- Pen.
The size should be chosen based on personal preference.
Everything is cut from plywood of the same thickness, although sometimes it is worth strengthening the bottom. Each part is cut using a circular saw and then polished. The side parts need to be worked out, additionally making grooves for the cover. It is important to make them on the same parallel so that there is no distortion when moving.
Holes are installed in the front and rear walls to provide side bracing. To do this, self-tapping screws are purchased in advance (length depending on the thickness of the plywood). But the previously obtained structure must stick. The range of adhesives is huge, it’s worth choosing a reliable one for construction. The composition is applied to the back wall, after which it is additionally fixed. To remove excess adhesive, use a wet cloth. Since the box will have a lid, you need to carefully ensure that all the walls are at the same level and do not differ in size.
Glue is also poured into the lower grooves, after which the walls are fixed with self-tapping screws. Next, the cover is inserted into the grooves and the movement is checked. Any violations are corrected with sandpaper. The handle is a mandatory element; it is glued, and staples from a stapler are used for strength. After 6 hours, the entire structure is further processed with an emery sheet or grinding disc.
Tips for making a plywood box
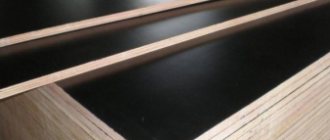
The thickness of plywood may vary. When making a plywood box where toys, clothes, and food will be stored, plywood with a thickness of 0.5 cm is suitable. And, if the box is to be stored outdoors, then the thickness of the plywood should be more than one centimeter.
- Before you start work, you need to understand whether the drawing is made correctly.
- You need to buy or rent the necessary tools to make the box.
- When purchasing plywood, you need to carefully examine the appearance of the material. There should be no chipped pieces or other defects on it.
- To ensure that the place where the plywood is cut is clear. You need to use tape to glue the place where the plywood will be cut.
- It is necessary to apply varnish to the plywood box. It gives not only a beautiful appearance, but also protects from various external influences.
- It is better to choose fine sandpaper for sanding a plywood box.
- If you need to make several identical boxes, you can make a template for the side walls.
- It is better to paint boxes in neutral colors.
- If the boxes will be located outdoors, it is prohibited to paint them with bright colors. After all, in the sun the color of the box will quickly fade.
- It is better to remove excess glue with a wet cloth.
Plywood box with a pull-out design.
Making a plywood box with a retractable structure is considered the most popular. At the same time, it is not always necessary to use complex and expensive accessories for movement. It is important for many people to make such a box without spending a lot of time. Although today modern people like to add something unique to the design of their apartment or house. Having worked on each element, such a drawer can become a unique creation.
If there is a need for such a plywood box, making it yourself will not be difficult. A complete set of all the necessary elements is available for sale. When you have the entire arsenal of tools at hand, it takes two hours to make such a structure.
The thickness of the plywood is selected, the parts are cut out, and the joining method is tongue-and-groove. In this case, you need to have experience in cutting or then finish all the parts with a file, but this is no longer so accurate. If you have a machine, you can cope with the task faster by changing the guides on the machine a couple of times. The parts are cut out to the required size, then you need to create grooves for them. In general, this process will take just under an hour. The entire structure is assembled using adhesive masses and self-tapping screws.
Metal box for tools
This option is most suitable for experienced locksmiths who have the necessary equipment and material.
Factory-made metal tool boxes are made from lightweight metals such as aluminum. As a result, the product is as light and durable as possible. But working with aluminum at home is much more difficult. Even a beginner can make this version of a metal box. After all, the most ordinary box and special partitions will be made of metal. Initially, you need to prepare the main material - galvanized steel (0.4 mm thick). Tools you need to prepare:
- Marking caliper.
- Metal square.
- Ruler.
- Hammer.
- Pliers.
- File.
- Sharpened core or marker.
- Anvil.
Next, drawings and markings are made. You only need to mark those places that will later need to be deleted. Now you can start cutting using metal scissors. After trimming all the excess, you should get a kind of geometric figure (winged rectangle).
Next you need to use an anvil. Tapping with a hammer, gradually bend the edges of the workpiece. It is better not to work in a chaotic manner; all actions must be consistent. First one side is bent, and then the other. To wrap protruding parts, pliers are used.
After these manipulations, you need to go over the entire structure with a hammer to level it. In this case, you will get a small metal box for storing tools. In the future, you can experiment not only with the sizes, but also with the shapes of such boxes.
Almost every home has some kind of tool. When there are too many of them, you can make your own multifunctional box to store them. Experienced craftsmen believe that this type of box is considered an essential attribute for storing various devices. Such boxes can be stored in the workshop and even taken with you on a long journey.
How to create a beautiful box?
There are many options for boxes, each person tries to create the design they need. But the decorative item is unique and is used in many ways. The main thing is that the process does not require additional knowledge or extensive construction experience. The box is spacious and can be used for different needs.
It is better to decide on the dimensions before starting work and draw up a rough diagram of the future structure. The outer walls are cut out with a jigsaw. In order not to make mistakes with the size and not spoil the material, it is better to make blanks from thick cardboard. After this, transfer them to plywood and cut them out. It's also easy to make interesting lines, giving the drawer special patterns.
To prevent unpleasant odors from accumulating in the box, it is worth making ventilation holes in the bottom. They are also cut out neatly (can be symmetrical or chaotic). Now, when creating pens, everyone will be able to realize their fantasies, especially if they have all the necessary tools, this will not be difficult.
Determining the dimensions of the box
Before you start designing the box, you can draw up a sketch and/or decide on the dimensions of the walls and bottom of the future storage product
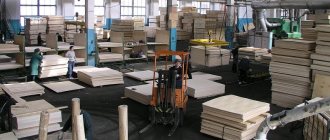
It is important to consider the linear dimensions of the plywood that you can purchase. There are two types of sheets on sale:
square, for example, 1.5 by 1.5 meters or 1.2 by 1.2 m;
rectangular 1.5 by 1.2, 3 by 1.5 or 2.4 by 1.2 meters.
By thinking in advance about the overall dimensions of the future box, you can minimize material consumption. The best option is if at least one of the parts of the box - the bottom or a pair of walls - is equal in size to a plywood sheet. But given the standard sizes, you will have to make a fairly large box.
As practice shows, in most cases it is impossible to do without cutting sheets. But in general, to make a sufficiently spacious and practical container, it is enough to purchase two sheets of plywood. So, one of them is cut out for the back and front walls, and the second - for the bottom, end parts and lid (if one is planned at all).
Plywood box with lid.
Making a plywood box with a lid has its own characteristics. This is an exact fit of all parts. Designer items are unique and in order not to spoil the perception, you should not use self-tapping screws. For this reason, the mortise and tenon must be carefully measured and not have the smallest gaps.
Initially, all parts with a tenon are cut out, all of the same size. The width of the protrusion corresponds to the width of the mating part. This means that the bottom spike does not extend beyond the side walls. To prevent the fixing element from breaking, it is modified manually. This is how you gradually create a plywood box with your own hands.
Having completed the tenon, the part is applied to the mating element to mark the location of fixation. They outline it with a pencil and then saw through the ventilation holes. You should not make them too large, otherwise small items cannot be stored in such a box. The grooves are made carefully, without punching through the surface. Then the only thing left to do is to connect all the parts onto an adhesive base.
To make the box visually attractive, patterns are made on it, tinted and even designs are burned out. It’s easier to work on a flat surface, so it’s worth sanding the box before decorating. If this is the first time a person is taking on such a task, then creating a toolbox from plywood will be quick. And people who put this process on stream complete several elements in one day. When using glue, it is best to let it dry completely for at least 24 hours.
Box making process
You need to understand what size the box will be. The drawer will have sides measuring 19.5 cm by 13 cm. The bottom of the drawer will measure 19.5 cm by 31.5 cm.
- Then they draw a drawing of the box.
- Draw patterns for the components of the box on sheets of plywood. The bottom of the box will be six millimeters thick. And to make the sides you will need plywood eight millimeters thick.
- The elements are cut out using an electric jigsaw or a hand router. There should be five parts in total. Four side walls and a bottom. If necessary, also cut out the lid. The walls can be in the shape of a cone if the box has a lid.
- Once the parts are prepared, the box is assembled. The walls are placed at the bottom of the box.
- The seams are glued with a special glue for wooden products. Excess glue is then removed with a regular rag. After gluing the box, place it under a press so that the parts stick together better.
- Then connect the parts with self-tapping screws.
- Then they make holes for the handle of the plywood box lid.
- You can make internal partitions in the box. But a box with partitions is suitable for experienced craftsmen. For novice craftsmen, it is better to make the box simple, without internal partitions.
If the box is large, then special wheels can be attached to the bottom. This will make the drawers easier to move around the room.
The nuances of performing work.
Each person can do incredible things if they want, and if you have all the tools at hand, the process is simplified. Approximately all processes have the same sequence; the only difference between a plywood box is the selection of material thickness. In order for such a box to last a long time, you need to consider the following:
- The bottom should be made of the most durable material.
- The walls are a thin structure, but you shouldn’t skimp on them.
- Lid - it all depends on the purpose of the box.
- Handles – there are ready-made ones in stores or you can make them yourself.
- Decor elements.
To avoid mistakes, you need to make a preliminary diagram with actual dimensions.
Features of making a tool box
Things often get lost. It's better if they have their own place. Then they won't get lost. And all the necessary things will always be at hand.
- The boxes can be made in different ways. They can have different shapes and colors.
- It's easy to do. Almost everyone can do it themselves if they wish.
- It doesn't require a lot of money to make.
- Plywood is easy to process.
- You can put heavy things. After all, it can withstand a heavy load.
- Thickness may vary.
- You can store both small and large things.
- Boxes can be of different sizes.
You can decorate them as you wish. They can be of different colors. Suitable for any interior.
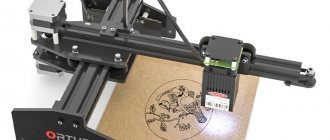
How to cut plywood?
Before assembling the box, you need to prepare all its components.
To do this, you need to cut the plywood sheets. An ideal option if the sawing is done on a sawmill. A good alternative to this method is to use a circular saw or grinder with a suitable blade. If there are no such tools and devices, then instead of a classic hacksaw it is better to use an electric jigsaw. With its help, you can spend less time and effort, and most importantly, avoid chipping the sheets. First, mark all the necessary dimensions on the sheet so that you do not cut by eye, but as evenly as possible.
Using an electric jigsaw, rotate the plywood sheet so that the grain of the top layer of veneer is parallel to the direction of the cut. In this case, you will save your time and overall effort, and minimize the amount of wood chips.
If cutting leaves a wide residue, use a support for the free edge. An acceptable option is a stool or second hands to hold the sheet. If this is not done, then the blank for the box will most likely be damaged - the sheet will break off at the edge due to its own weight.
Follow the safety rules so that the assistant and you yourself do not cut yourself when cutting, hold the plywood by the very edge - at a distance from the cutting path.
Assembling a wooden box
The entire assembly process is very simple, no tricks or hidden mysteries. We take the most ordinary nails 5 by 0.15 cm. Why thin nails? So that the structure is tightly fastened and the boards do not crack.
First, we nail the top and bottom strips from the end, then we place the remaining wooden blanks. We screw 24 cm long planks to the wooden base from below, use 35 mm self-tapping screws.
Drawings and dimensions of wooden boxes are presented below.
Classic wall flower stand
- shelf or board made of wood or chipboard,
- a decorative element for connecting the structure (in this case, a strong tree branch of a suitable configuration),
- drill,
- saw or jigsaw,
- screws,
- paint,
- varnish,
- pencil,
- brush,
- roulette
How to treat the surface → Room decoration → How to choose the right paint → Surface treatment technologies → Leveling and finishing the walls → Selecting and applying a primer → Removal from the surface → Stretch ceilings and technologies → Reviews and testimonials
Portable container
Putting together a convenient box for flowers, pickling cabbage or rooting cuttings is a little more difficult, but the basic principles of operation will remain the same. To make a portable container, select your lumber carefully. You will need to have:
- 6 boards 15 × 75 × 2 cm;
- 1 rail 75 × 4.6 × 2 cm;
- 4 boards 31x15x2 cm;
- 2 bars 25 × 5 × 3 cm;
- 3 bars 80 × 3 × 1 cm;
- 4 bars 30 × 5 × 3 cm.
You will also need to have several types of fasteners:
- decorative furniture nails – 10 pcs.;
- nails 60 × 3 – 20 pcs.;
- nails – 50 × 2.5 – 28 pcs.
In this case, a piece of covering material or polyethylene can be used as a lid (you only need to nail this material if you will use the container for growing seedlings). Using this box usually involves moisture, so be sure to coat all lumber (prior to assembly) with an antiseptic.
- Make a shield from two short planks. Assemble it onto perpendicular bars, which are stuffed at a distance of 3 cm from each edge.
- Connect the shields with two longitudinal strips so that they form the letter “P”. The bars should be directed outward.
- Align the structure and loop it with 2 more planks.
- Fill the bottom - its design consists of 2 boards and a batten, located at a distance of 3 mm. Drill drainage holes in the boards every 4-5 cm. If you pickle cabbage in a container, there is no need to drill holes.
- The bars are now arranged vertically - they are the basis for the handles; fill one horizontal section in the middle.
The remaining slats are needed to make the lid. One of them needs to be secured along with the material to the edge of the box. Wrap the two remaining slats in polyethylene and secure the material with furniture nails. On one side, the material will be securely fastened to the box, and on the other, there will be a weight on it that allows you to stretch the film. Now all you have to do is pour soil into the box and start sowing or placing cuttings.
Source
Types of tool organizers
Tool boxes differ in the material used and the type of items stored. According to the material used they can be:
- wooden. Wood is an affordable and easy to process material. To make the box, use a board or durable multi-layer plywood with a thickness of 10, 16 or 18 mm. The complexity of the design depends on the wishes and skills of the master;
- metal. Steel or iron structures are quite heavy, but they are strong and durable. Lighter boxes are made of aluminum;
- plastic. These boxes are lightweight, durable, convenient and have a modern design.
Wooden tool box
The boxes also differ in the type of tool stored in them and are:
- Unprofessional. They are a design with several compartments. They use bags or cases of different sizes.
- Power tools. Special boxes used for storing drills, grinders, screwdrivers, etc. As a rule, such boxes are equipped with a large compartment for certain equipment and several small ones for additional equipment.
- Professional. Most craftsmen prefer this particular type of tool box, since they have separate seats for a certain type of equipment.
- Universal. Boxes of this type have a large number of compartments and are used to store a wide variety of tools. There are tool boxes with removable partitions, which allows you to rearrange the internal space at your own discretion.
Universal tool box