The quality of the work it produces directly depends on the sharpness of the blade. A dull or deformed tip does not perform its functions and can not only ruin the cutting process, but also injure the operator. Throughout the development of all bladed weapons, sharpeners were invented that could restore the original quality of the cutting edge. The further progress developed, the more high-tech sharpening stones became, and the amount of time that needed to be spent on work was reduced. Models with a motor at the heart of the design are considered the most powerful and efficient. Their range of functions includes straightening a bent edge, removing chips and nicks, grinding, cleaning, and restoring the original sharpness. However, the turning process requires practical or at least theoretical preparation. Unlike manual abrasive bars, where a sharp change in the angle of the blade will not have a critical effect on it, on automated models any mistake can lead to damage to the product. We will explain how a knife sharpening machine works, how to properly sharpen knives on a machine, how to achieve maximum efficiency and avoid the most common mistakes.
How to sharpen knives on a machine correctly
Before you learn how to properly sharpen knives on a machine, you need to become more familiar with its design. Since all motor models are divided into automatic and semi-automatic, instructions for their use will vary.
Figure 1. Wheels for sharpening knives: abrasive and felt
However, the operating principle remains the same:
- The electric motor rotates the axis on which a circle with a special coating is installed. For turning it is crystalline abrasive grains of various sizes, for grinding it is felt (Figure 1). The coarser the crystals on the wheel, the more severe dullness they can handle. It is prohibited to use coarse grain for thin, soft or partially dull blades - complete deformation will follow. The use of small crystals for a completely dull tip will also be ineffective;
- The rotation speed of the axis is selected by the operator himself, depending on the type of steel and the degree of dullness. If you choose the wrong mode, you can overheat the product and inevitably damage it under the influence of temperature;
This is where the similarities between automatic and semi-automatic devices end.
Figure 2. Options for professional knife sharpening machines
A professional automatic knife sharpening machine (Figure 2) operates according to the following algorithm:
- A motor and abrasive wheels of different grain sizes are built into a maximally closed casing with an opening (or several openings) for the blade. The system is designed in such a way that the inclination of the grinding wheel can change depending on the impact on the guides themselves. The operator inserts the product into the opening, and the guides automatically adjust the required angle;
- Since the turning inclination is individual for each tip, such devices imply the ability to adjust down to the millimeter;
- Most devices have several speed or time modes, so you need to know the characteristics of the gun in advance. By choosing too intense a mode, you can also deform the tip.
Figure 3. Typical “Epaper”
A manual machine (Figure 3) for sharpening knives (aka “emery”) requires an integrated approach to the entire process:
- Turning is carried out by applying the edge to a rotating wheel; precise inclination must be maintained. Otherwise, you can either grind off a significant layer of metal, or completely change the slope of the processing, which will ruin the blade;
- The attachment with grain is also selected according to the characteristics of the implement. For kitchen or travel models, fine sandpaper is sufficient, for working tools (for example, shoemakers) – medium sandpaper. Axes and other household and garden tools are sharpened using the coarse fraction;
- To ensure that the process proceeds smoothly, at first it is recommended to work with a partner who will monitor the uniformity and accuracy of the operator’s movements. Even an untrained person can act as an assistant: he only needs to concentrate on the work. At a more professional level, the operator copes independently;
- It is recommended to work in plastic safety glasses and closed clothing to prevent crumbs or sparks from touching soft or mucous tissues. Neglecting safety precautions when working with the machine is strictly prohibited.
DIY carpentry tools
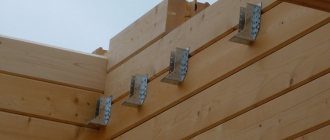
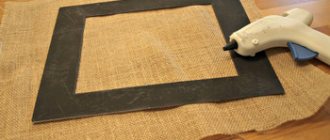
Let's move on and move on to carpentry fixtures. Those who are engaged in “carpentry” will appreciate the budget wedge - an indispensable device for any carpenter for gluing wooden panels.
One day I needed to glue together a lot of wooden panels. I didn't have any clamps. Therefore, I decided to quickly assemble a clamp from wooden blocks with a cross-section of 5x5 cm and metal plates with welded nuts in “tens”.
In total, the user made 3 of these wedges; this was enough to glue a wooden board measuring 1.5x1.7 m and 18 mm thick. To prevent the bars from sticking to the workpiece, under those places where there is a seam and glue may protrude, you can put a newspaper or shoot polyethylene with a stapler.
In order not to spoil the workpiece, you need to place a gasket under the plate into which the screw rests. The gluing width is adjusted by moving the stop bar.
Homemade woodworking tools are constantly being improved. A more advanced version of the wedge, made entirely of metal, is offered by Alano. The components and operating principle of the device are clearly demonstrated in the following photographs.
To make such a wedge you need a welding machine.
On FORUMHOUSE you will find other developments and even drawings of homemade devices.
Cyclone for carpentry workshop based on a vacuum cleaner
And at the end of the material, we offer our readers a photo selection of homemade cyclones, which are a necessary device for carpentry work.
Option 1
My first cyclone failed and I decided to make a new one. It took 20 minutes to do everything. To make it, I took a used putty bucket and polyethylene pipe fittings. They hold better and tighten quickly, ensuring the tightness of the assembly.
An oil filter from Moskvich was used as a filter element.
This is what happened in the end.
Option 2
And here is my version of a construction vacuum cleaner with a cyclone. For strength, I reinforced the bucket from the inside. It turned out that the drain hose from washing machines is perfect for my sander.
To summarize, to make homemade machines and tools of a high level, you need the ability to look at all the seemingly unnecessary household junk from the garage and boards from the carpentry shop with fresh eyes. For a true master and owner, everything should go to work, and by showing creativity and imagination, you can significantly reduce the cost of purchasing expensive “devices” required for one-time or infrequent work.
In the topic on FORUMHOUSE you can see a kaleidoscope of ideas from our users related to the manufacture of homemade machines. We also recommend a topic about the modification and restoration of hand tools.
And this video talks in detail about the selection of tools necessary for a self-builder.
This is interesting: How to make a garden wheelbarrow (trolley) with your own hands for transporting goods according to the drawings: we explain point by point
Sharpening or straightening knives?
Before moving on to the instructions on how to sharpen knives on a sharpening machine correctly, you need to determine what kind of care the blade of your tool needs - sharpening or sharpening. What is it for? The fact is that for different types of deformation, the principles of care will also differ. For example, when bending an edge, one nozzle and one speed are used, when removing chips, a completely different disk and different settings are used. Using standard bent edge turning techniques, you can cut off too much metal. Therefore, it is recommended to edit the gun first. Among the mechanical analogues, musat is used to eliminate wavy irregularities and curves - a round oblong file with a handle (Figure 4). However, if you have a machine, processing with hand tools is too energy-intensive.
Figure 4. Variant of the Musat file
Editing is carried out at minimum speed:
- The wave-bent metal is removed completely under the base. It will be impossible to bend it back. It is worth considering that cutting the deformed layer must be done with pinpoint precision, so as not to double the time of further processing and not accidentally shorten the length of the blade;
- Based on the initial edge angle, further work is carried out.
How to sharpen knives on an emery machine
An electric sharpener, which is based on an emery disc, is used both at home for sharpening cutting edges and in production (Figure 5). The machine is used for sharpening jointing knives, countersinks, dies, drills, spatulas, hand scythes, household and travel blades, scissors and even screwdrivers.
The main requirement for the operator’s work is accuracy and adherence to the algorithm.
Figure 5. Electric grinder in production
How to sharpen knives on a sharpening machine:
- The standard set of sandpaper includes two abrasive discs of different grain sizes. At the first stage of processing, large grains should be used to give the primary shape and sharpness. Finishing is carried out on small crystals. If the blade is made of thin metal, then it is recommended not to use large crystals at all;
- The RPM for most tools should be up to 150 rpm. This value is the maximum, so you can reduce it if you have doubts about the speed;
- The point is made exclusively on the side of the abrasive nozzle. First, the blade is installed parallel to a special stand, then tilted at the required angle (Figure 6). For thin kitchen blades this value will be up to 20 degrees, for tourist and shoe blades - up to 35 or 40 degrees;
- The width of the approach (the transition from the “body” of the blade to the tip) should be 2-3 millimeters. A larger value of 4-5 millimeters is used for rough tools such as an ax or garden shears;
- During the entire process, it is necessary to make smooth and symmetrical movements, barely touching the disk and moving the blade from side to side with the same amplitude. This is necessary for uniform turning;
- To prevent the tool from overheating, if it is impossible to reduce the engine speed, it should be cooled regularly. A container of cold running water will suffice for cooling.
Figure 6. Sharpening a knife: parallel and at an angle
Using replaceable blocks and making a carriage
When making a sharpening carriage, the machine operator performs the following actions:
Welds 30 cm M10 threaded rods with a smooth rod whose thickness is 10 mm;
Uses 2 solid bars 50x80 mm and the thickness is 20 mm. In all blocks, in the center and on top, 20 mm is retreated from the edge, and then a gap is made 10 mm wide;
Screws a wing nut onto the rod, then a large washer and 2 bars, then a nut and washer;
Clamps rectangular sharpening stones between the stones or makes several replaceable sharpening stones.
As a timber base, the machine operator uses a rectangular tube from a profile or a piece of cornice, the width of which is 50 mm;
He sands the flat machine part and cleans it of grease, and glues strips of sandpaper with a grain size of up to 1200 grit using Super Moment glue.
The sandpaper should have a fabric base, and on one of the blocks you need to glue a strip of suede to apply polish to the blades.
Electric knife sharpeners
An automatic electric knife sharpening machine does not require special care. Previously, such models were used in public catering places - canteens, cafes and restaurants and were a bulky structure. Over time, their dimensions began to decrease, and now they are compact devices with connectors for different types of blades. The entire system is hidden under a plastic or metal casing, thereby increasing the safety factor.
Figure 7. Sharpening a knife on an automatic machine
Let's look at how to properly sharpen knives on an automatic machine (Figure 7):
- First, the point is inserted into the opening for rough processing, brought to the end and fixed between the plates. Since the device is equipped with guides, the disks will be positioned at the required angle as soon as the product is inserted into the slot;
- Then you should turn on the device, selecting standard or individual mode, depending on the provided functionality;
- Sharpening is done by lightly pressing the tip and moving it with the same movements in one direction. It is forbidden to drive first towards yourself, then away from yourself, since nicks will appear in the best case, and the edge will deteriorate in the worst case;
- After initial processing, the tool is inserted into a second slot with fine-grained discs, where it undergoes final grinding and finishing.
Homemade sharpening device
In order to make a knife sharpening machine with your own hands, the first thing you need to do is find a suitable drawing. There are many modifications for its production.
The easiest way
This option does not require special skill or the use of expensive components. To make it you will need:
- Wooden corners with a side of 20-30 centimeters: 2 pieces.
- Screws with nuts in the amount of 10 pieces.
- Protractor for precise angle setting.
- In addition, you will need a drill and drill bits.
To make it, you need to mark the corners and drill 3-4 holes at identical points. Place a block between them at the desired angle and secure with bolts.
To sharpen a knife or scissors, you simply need to run the blade along the surface of the block, holding it strictly vertically.
How to sharpen knives on a machine with an abrasive wheel
Another way to sharpen knives on a machine correctly is to use a grinder with a granular disk attachment (Figure 8). This method is popular among both professionals and amateurs, since there is no need to buy a separate device for turning.
Figure 8. Sharpening knives using a grinder
Turning on an angle grinder is carried out according to the same algorithm as on emery.
It is enough to fix the device vertically on the surface and install a medium or fine abrasive nozzle. Since the grinder produces over 11,000 rpm at its lowest power, it should be handled very carefully.
Tool support device
When making a handhold device, the following steps are performed:
Removes the flat inclined part from the base, modifies it and installs a fixation device on it, as well as the clamp of the device used;
Measures 40 mm from the edge in front and, using a garden hacksaw, uses this mark to cut out a groove, the depth of which is 2 mm;
Using a shoemaker's knife, chip off the top 2 veneer layers from the end of the board. The result is a sample into which the mechanic inserts a 2 mm steel plate at the same level as the general surface;
The tool rest consists of 2 steel strips measuring 170x60 mm and 150x40 mm. The machine operator connects them along the large end, which has equal edge indentations, and makes 3 through slots of 6 mm.
Using bolts, tighten the planks along the cracks made. In such a situation, the machine operator leaves the bolt heads on the side of the large top plate;
Next, using electric arc welding, the bolt heads are baked and welded to the plate;
Then he removes metal defects of the weld in the form of beads and grinds the plate to give it a smooth surface;
Applies a small striker plate to the edge recess, moves the slots with a drill and secures the support with bolts.