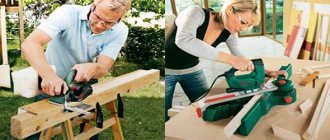
Woodworking power tools can be classified according to the level and volume of work performed:
- professional;
- semi-professional;
- amateur.
Despite the popularity of polymers and metal in construction due to their practicality, durability and ease of use, wood adds a sense of comfort, coziness and peace of mind to any building, which is why many builders love to work with wood.
Among the woodworking tools there are manual, electric, and also “heavy artillery” - machines. In this article, we will focus on portable power tools for woodworking.
Nowadays, each woodworking operation has its own hand-held power tool; let’s look at them in more detail.
Jigsaw
Suitable for cutting materials of small thickness, but the main functionality of an electric jigsaw is figure cutting. The thin and narrow blade gives flexibility and maneuverability to this hand-held electric tool, allowing you to set the desired direction of the cutting line.
When choosing a jigsaw, pay attention to the presence of a pendulum stroke - this increases its efficiency and increases the speed of work. But this mode should only be used when sawing “straight”, otherwise the risk of damage to the surface being processed increases.
As consumables, jigsaws come with all kinds of saw blades, thanks to which you can choose the optimal accuracy and cleanliness of the cut, as well as achieve maximum operating speed.
The jigsaw is slightly inferior to the manual version - in the manual version, the minimum bending radius of the cut line is smaller, which allows you to perform more precise work.
In general, working with a jigsaw is an activity for the patient and requires a lot of endurance, accuracy and painstakingness.
What you need to know when choosing
- The harder the material, the lower the speed;
- To accelerate, use the pendulum stroke (for soft materials);
- For “shaped cutting” and clean cutting of hard materials, a pendulum stroke is not needed;
- The higher the speed, the more often it is necessary to take breaks to “rest” the tool.
Wood sawing tools
The following saws are used for sawing: bow saws (wooden and yoke), hacksaws, award saws, universal saws, circular saws and jigsaws.
Wood bow saws
(Fig. 1.6,
a)
consist of a wooden machine (beam) and a blade with teeth. The wooden machine is equipped with two stands, a spacer, a screw and handles. The saw blade is tensioned using a bowstring made of string or wire.
Bow yoke saws
(Fig. 1.6,
b)
are recommended for cross-cutting thick boards and beams. The saw is a frame (arc) made of a metal pipe with a saw blade stretched in it.
Hacksaws
There are wide ones (Fig. 1.7,
a)
for sawing wide boards and slabs across the grain;
wide with a butt (Fig. 1.7, b)
for filing down tenons and eyes;
narrow (Fig. 1.7, c)
for sawing thin materials and cutting curved workpieces.
Award
(Fig. 1.7,
d)
is used for sawing narrow grooves for dowels on panels and boards.
Universal saw
(Fig. 1.7,
e
) is a hacksaw with replaceable blades for performing carpentry and various repair work on wood.
Depending on the type of component blade, hacksaw saws are used for transverse (Fig. 1.7, h
) and longitudinal (Fig. 1.7,
f)
sawing, figured cuts (Fig. 1.7, g), with a back for making tenon joints (Fig. 1.7 ,
And).
The base (main part) of the saw is the handle to which the saws are attached. This saw is currently the most widely used.
Circular saws and jigsaws
used for sawing curved parts.
The shape of the teeth of the saws considered for transverse, longitudinal and universal sawing is shown in Fig. 1.8.
Preparing hand saws for work
The preparation of saws for work includes the following operations: checking the quality of the tool, sharpening, planing and setting saw teeth.
Saw quality check
includes an assessment of their technical condition - the strength and integrity of the handles, the reliability of the blades and their fastening, the sharpness of the teeth and the quality of the setting. The effort spent on sawing largely depends on the quality of sharpening and the correct alignment of the saw teeth.
During the sawing process, the saw teeth become dull and must be sharpened to restore their cutting ability.
Hand saws are usually sharpened with triangular or diamond files.
The teeth of saws for cross-cutting wood have an oblique sharpening; they are sharpened at an angle of 60...70° to the saw blade (Fig. 1.9, a).
These saws have teeth that are sharpened one at a time and, when sharpening, the metal is removed from the beveled surface of the tooth. Having sharpened the teeth on one side, turn the saw towards you with the other side and, having secured it in a vice, sharpen the remaining teeth at the same angle.
The teeth of saws for longitudinal sawing are straight sharpened, so they are sharpened on one side at an angle of 90° to the saw blade (Fig. 1.9, b).
The teeth of rip saws, in which the angle between the front and rear edges of adjacent teeth is less than 60°, are sharpened with a diamond file.
The teeth of saws for universal sawing are sharpened with a triangular file using direct sharpening, removing metal simultaneously from the front and rear surfaces of the teeth (Fig. 1.9, c).
When sharpening teeth, for each working pass of the file, you need to remove a layer of metal of the same thickness. To do this, the file pressure must be uniform and only when moving forward. You need to move the file in the opposite direction freely, without pressure, tearing it off or without tearing it off the surface to be sharpened. The final finishing is done with a finely cut (velvet) file. After filing, the burrs from the side edges of the teeth are removed with a wet whetstone. For ease of sharpening, the saw blade is clamped in a wooden vice of various designs.
To prevent the protrusion of individual saw teeth and straighten their position along one line, they resort to jointing
a whetstone or a triangular file. If the deviations of the tops of the saw teeth from a straight line are significant, then all the teeth are planed with a file inserted into a wooden block (Fig. 1.10). The saw blade must be secured in a wooden vice. The saw teeth are planed with a file before sharpening or, as a rule, after setting.
During the sawing process, the saw blade rubs against the walls of the material being cut and is clamped in the cut. To avoid this, the teeth must be set apart.
Saw tooth alignment
consists in the fact that they are alternately bent in one direction (even teeth), then in the other (odd) direction. When setting, the tooth is bent not entirely in height, but halfway. When sawing hardwood, the teeth are set apart by 0.25...0.5 mm per side, and softwood - by 0.5...0.7 mm. The total tooth set should not be greater than the thickness of the blade.
When setting teeth, it is important to ensure that the teeth bend equally on each side. If this condition is not met, the cutting quality will decrease. The teeth are set manually using settings of various designs - from simple to universal (Fig. 1.11). The saw blade is tightly clamped in a vice, and then the teeth are bent alternately, in one direction or the other. You need to spread the saw teeth evenly with a simple set, without much effort, otherwise the tooth can be broken. In addition to the simple setting, a universal setting is used, which makes it possible to obtain the correct amount of saw tooth set. The amount of tooth set is checked with a template. You can move the teeth before and after sharpening, depending on their wear. If the saw is significantly distorted, it is better to first loosen and then sharpen the saw.
Electric circular saw
It is also called a circular saw, or a circular saw in common parlance. The main task of an electric saw is straight cutting of wood. For example, if you want to “dissolve” the board lengthwise into two parts.
By installing the required blade, the required depth of cut is achieved. And modifying the saw with a plunge-cut mechanism will allow you to start cutting not from the edge of the product, but from the middle. It will also provide for tilting the saw blade.
An electric saw cannot cope with figured cuts, but it can boast of power and speed.
What you need to know when choosing
- For large volumes of work, choose a model with more power: it will save a lot of time;
- Pay attention to the maximum depth of cut specification;
- Additional features such as speed control, soft start and overheating protection will make work more comfortable;
- Select the most suitable saw blade for processing wood of a certain hardness.
Sharpening hand saws
A saw is a steel blade with cutting teeth called a cutting wreath. Designed for cutting wood into pieces, sawing knots, trimming the edges of parts to length. Saws are distinguished by the size and shape of the teeth.
| Types of saws for manual use | Functions performed | Cutting angle/degrees | Sharpening features | Characteristics of saws |
| With an oblique angle (oblique) tooth | For longitudinal sawing | up to 80 | It is sharpened at an angle of 90 degrees relative to the saw blade, which is why this type of sharpening is called straight. It is performed in order, moving to each tooth in order. | The cutting part of such teeth is its leading edge, which is shorter. The side edges are used to split sawdust. The teeth only cut when moving forward, in the direction of the inclined angle |
| With teeth in the shape of an isosceles triangle | For cross cutting | from 90 | The teeth work on both sides. The teeth are sharpened in an oblique way, i.e. at an acute angle relative to the blade | The top of the tooth is in the form of a triangular incisor. The teeth cut in both directions. |
| With teeth in the shape of a right triangle | For mixed sawing (along curved lines) | 90 | Sharpen teeth at right angles to the blade or with a small bore of 75-80° | Rectangular saw teeth for mixed sawing work, an acute angle is applied to the back edge, cuts the breast on all sides.. |
| The sharpening angle of saw teeth varies within a radius of 45 to 75°, depending on the hardness of the wood raw material for sawing. A small angle is taken when cutting soft wood, when less effort is applied; a large angle is necessary in cases when sawing hardwood: if such wood is sawed with a small angle, the sharpness of the teeth will quickly become dull. Therefore, for rip sawing teeth the angle is from 40 to 45°, for soft and up to 75° for hard wood. | ||||
To sharpen teeth, triangular files with a fine notch are used. To carry out straight sharpening, hold the file at a right angle to the blade, and for oblique sharpening at an angle from 45 to 80°, do not press too hard. In this case, the saw should be clamped with a vice 3-5 millimeters from the base of the teeth.
The ring gear must be evenly ground, with the same pitch depth and not have teeth of different heights.
Belt sander
This type of sander is used for rough grinding. Used for rough surfaces or for removing paint, it allows you to remove a fairly thick layer of wood. After the belt sanding, it is necessary to treat the surface with an orbital or eccentric sander for more precise processing.
What you need to know when choosing
- Sanding is a tedious and tedious process, often in an awkward position. A more powerful device will reduce the pain a little;
- But don’t overdo it: unskilled hands can easily make dents in the wood, which will take a lot of time to fix;
Surface grinder
It is also called vibration.
Used for finishing wood after the belt has been passed over it. Also used for polishing.
What you need to know when choosing
- The “motion amplitude” parameter is responsible for the speed of work, but if it is large, the result of the work will lose its beauty;
- The ability to regulate the oscillation frequency will allow you to select the desired mode for any type of surface;
Random orbital sander
Also known as orbital.
For finishing and polishing, it is very convenient when dealing with curved products.
The selection principle is similar to choosing a surface grinder,
What you need to know when choosing
- Power speeds up the process and reduces the precision of carpentry;
- There is a fastening of sanding sheets of the “clamp” type - the consumables for it are cheaper, while the “Velcro” type is more expensive, but can be removed faster.
The sanding process is one of those woodworking operations that takes a long time, so be patient and wear a protective mask as there will be a lot of dust.
Electric planer
The main task is to plan. Can also be used for trimming boards and trimming.
What you need to know when choosing
Tools and equipment for wood processing
Sawing can be used to cut boards into pieces, saw boards into bars and slats, trim parts and boards, saw boards and plywood, trim edges, cut out curved and shaped parts.
When longitudinal cutting, first cut off the uneven edge or defective part of the board (this can be done “by eye”), then the board is sawn.
When cutting crosswise, first cut off the end of the board (end), since it usually has defects (unevenness). Then, depending on the defects, a part of the board of the required length is cut off. When cutting on machines, limiters (stops), guide rulers and other devices are used. Carpentry hand saws are used for sawing. According to the principle of their design, they are divided into two types - bow saws and hacksaws.
Bow saws include:
— transverse — for cross-cutting;
— loose (swinging) — for longitudinal sawing of long boards;
— tenon — for clean filing of ends, sawing of tenons and eyes;
— fine-toothed — for clean cross-cutting with increased precision;
— rotary (circular) — for figured cutting;
- jigsaw - for cutting out openwork and curved parts.
With a bow saw you can cut wood along and across the grain, as well as at an angle to it. For longitudinal sawing, it is better to use a saw with a long blade and large teeth. For mixed sawing (thin clean cuts, tenons, etc.), it is better to use a saw with fine teeth. For cutting curved shapes, a saw with a narrow blade (7-8 mm) and fine teeth is better suited.
Knife saws - hacksaws - include:
— wide hacksaws — for transverse, straight cutting of boards;
— narrow hacksaws — for figured cutting along the internal contour of the workpiece;
- axle saws - for adjusting joints, shallow sawing, sawing small parts, etc.;
- awards - for cutting grooves, recesses to a shallow depth, etc.
To prevent the saw blade from jamming, set the teeth , i.e., their tops are bent to the side by 2/3 of the tooth height (non-even teeth in one, even teeth in the other). The bend size is approximately equal: for sawing dry, hard wood - 0.25-0.5 mm, soft, wet - 0.5-1.0 mm. The largest spread should not exceed twice the thickness of the saw blade. The amount of spread for all teeth should be the same; in this case, all teeth will participate evenly in the work and bear the same load.
In order for the saw to work well, all teeth must be the same height. To do this, they are planed and then sharpened.
- Back
- Forward
Electric hacksaw
Also known as a reciprocating saw, and colloquially referred to as an "alligator saw"
According to the principle of operation, it completely repeats the classic hand hacksaw, only the reciprocating movement is provided by electrical energy, and not by your hand.
Unlike a circular saw, a reciprocating saw is messier, slower and rougher, but it is safer to work with. However, the alligator also has advantages: the depth of cut, which is limited only by the length of the saw blade (and they are replaceable, so you can always find consumables for any task in the store), and the ability to work in hard-to-reach places.
What you need to know when choosing
Features when sawing wood
Before sawing, you need to use the appropriate posture: keep your back straight, legs slightly apart, the tilt should be in the pelvis, resting on your left hand, taking into account a comfortable balance. Sawing is carried out along the intended strip, avoiding the unnecessary part of the workpiece, so as not to reduce the size of the part itself. This requires experience in holding a hacksaw at an angle and tilting and securing the product. During the process, the working hand should not strain and carry out linear movements along the front side of the part.
The beginning of sawing is called sawing. Several test movements are made on the intended strip, if necessary, the position of the saw is adjusted, and watch how the edges of the teeth are positioned. Make sure that the line is not touched; if everything is in order, begin immersing the hacksaw into the material to a depth of two mm, without pressing movements. The saw must choose the optimal cutting depth itself.
There are three types of sawing:
- Horizontal sawing is the process of cutting wood along its grain into beams.
- Vertical sawing is performed perpendicular to the growth of the fibers.
- Crosscut - used crosswise when cutting thin plywood along curved lines.
Fraser
As the name suggests, it is needed for milling, namely chamfering, cutting quarters and cutting grooves and splines.
What to pay attention to
All the tools collected here are most often suitable not only for woodworking operations, but also for working with other materials: plastic, metal, plywood. You just need to choose the right consumable.
Hand woodworking tools
Hand woodworking tools
MARKING AND MEASURING TOOLS.
In carpentry, the following tool is used as a marking and measuring tool. Roulette
is a round metal or plastic case containing a measuring tape with a length of 1,2,3,5,10,20,30,50,75 and 100 m with divisions marked on it, expressed in meters, centimeters, millimeters.
Designed for measuring and marking any workpieces by thickness, width and length. A folding meter
is a set of metal or wooden rulers with divisions marked on them.
The rulers are connected to each other on hinges and can be easily folded or moved apart. The meter is used for linear measurements of objects of small length. A measuring ruler
is made of wood, plastic or steel, 15 cm or more in length, with graduations in 1 mm, 0.5 and 1 cm. There are rulers with graduations in both centimeters, millimeters and inches.
The ruler should have straight edges and be well leveled. The square
is designed to check the squareness of joinery elements and consists of a base into which a ruler is mounted at a right angle.
There are divisions on the ruler. Squares come in wooden sizes 250x160x22 and 500x300x24 and metal ones in sizes 500x240x20 mm. The erunok
is used for marking and measuring angles of 45 and 135 degrees and consists of a base - a block into which a wooden or metal ruler is inserted at an angle of 45 degrees.
The mark
is intended for measuring angles based on a sample and transferring them to workpieces - parts.
It consists of a block base and a ruler, hingedly connected to each other. Compasses
are used to transfer dimensions to workpieces and to outline circular markings.
The level
is designed to measure the horizontal or vertical plane.
The level has a through hole 300 mm long. The glass tube of the level is filled with non-freezing liquid with an air bubble. The position of the ampoule in the body is adjusted with installed screws, so that the air bubble occupies a middle position in the tube against the mark in the body when the level is strictly horizontal. The levels have widths of 16,22,25 and 28 mm, heights of 30,40,50 and 56 mm, lengths of 230,300,500,750 and 1250 mm. A plumb line
is used to check the vertical installation of wooden structures (window and door units, built-in furniture, partitions).
It consists of a cone-shaped or cylindrical steel body (weight) with an eye, to which a linen or cotton cord is attached. The diameter of the weight is 18,30 and 38 mm, the length is 39,64,98,114,165 and 200 mm. The diameter of the cord is 1.5-2 mm, the length is 3, 5, 7 and 10 m. The thickness gauge
is a wooden block in which two bars pass through two holes.
At the end of the bar, on one side there are sharp pins, which are used to create marks. By releasing the end of the block beyond the block, the required distance from the edge of the block to the applied mark, i.e., the marking line, is established. Using a thicknesser, marks are applied parallel to one of the sides of the part's bar. Vernier calipers
are used to measure the external and internal dimensions of parts and products with an accuracy of 0.1 or 0.05 mm.
There are four types of calipers. The most commonly used calipers are those with double-sided jaws for external and internal measurements and a ruler for measuring depths. For precise measurements (up to tenths of a millimeter), a vernier scale is used. A micrometer
is used to accurately measure saw blades, knives, etc.
Marking templates
come in different sizes, shapes and designs. Templates are made from sheet steel, plywood, and solid fiberboards. The template is applied to the board, block or workpiece being processed, and then the contours are drawn with a pencil or awl. The use of templates reduces the time for marking, simplifies it, and the marking is more accurate.
CUT WOOD.
The hewing of wood is done with an axe. Axes are produced with a straight or rounded blade. An ax handle is made from hardwood - hornbeam, ash, maple, beech, elm or birch. The wood of the ax must have a moisture content of 12% and be free of cracks, blue stains, rot and knots with a diameter of more than 6 mm. The ax handle is impregnated with oxol linseed oil with the addition of 10-12% ocher, sanded and coated with colorless varnish. Axes are made from high-quality tool steel with heat treatment. Axes are produced weighing from 1.65 to 2.17 kg.
TOOLS FOR SAWING WOOD.
Hand saws used in carpentry are divided into two groups: with a tensioned blade - bow saws,
with a loose blade -
hacksaws.
A bow saw is used for longitudinal and cross cutting of wood.
A saw is a wooden machine (beam) with a blade stretched on it. The ends of the saw blade are inserted into the handles of the racks and secured on studs, the racks are connected with a middle, and the opposite ends of the racks are tied with a bowstring, tensioned with a twist. The machine is made of hardwood, the bowstring is made of twisted linen or hemp cord with a diameter of 3 mm. The wooden elements of bow saws are impregnated with drying oil, sanded and coated with light nitro varnish. Since the blade of a bow saw is tensioned, it is made longer and thinner than a hacksaw, so it can be used to cut in full swing, while the cut is thinner and of better quality. Bow saws can be swing saws, transverse saws, circular saws, or tenon saws. Swing saws
have a blade with a width of 45...55 and a thickness of 0.4...0.7 mm, a tooth pitch of 5 mm, and a tooth sharpening angle of 40...50 degrees.
The teeth are sharpened straight. The length of the blade is 780… 800 mm. These saws are used for longitudinal cutting of wood. Cross-cut saws
with a blade width of 20...25 and a thickness of 0.4...0.7 mm, tooth pitch 4...5 mm, tooth sharpening angle 65...80 degrees.
The teeth have the shape of an isosceles triangle, the sharpening is oblique. Blade length 750…800 mm. Circular saws
are used for curved figure sawing.
They have a blade up to 500 mm long and 4...15 mm wide, straight-ground teeth with a pitch of 2...4 mm, a sharpening angle of 50...60 degrees. The thickness of the saw blade is no more than 1 mm, so a narrow cut is obtained. Tenon saws
are used to cut out tenons and lugs.
They have a blade 40...50 mm wide, 0.4...0.5 mm thick, rectangular teeth with a pitch of 3...4 mm and a sharpening angle of 80-85 degrees. The saw has a length of 600-700 mm. At the end of the work, the bowstring must be loosened so as not to stretch the saw blade. To avoid stretching the bowstring when not in use, you need to loosen the twist a little. Knife saws (hacksaws)
are wide, narrow and with a back. A wide hacksaw is used for manual sawing of wood and wood materials when performing carpentry and carpentry work. Hacksaws are made for cross-cutting, longitudinal sawing of wood and are universal. They may have replaceable blades. The teeth of hacksaws must be sharpened and set apart. The tooth should be set apart no more than 2/3 of its height from the apex. The teeth are set by alternately bending them in different directions by the following amount: for teeth with a pitch of up to 3 mm - 0.1...0.3 mm on one side; 3 mm or more - 0.3...0.6 mm on one side. A narrow hacksaw is used to saw thin lumber, cut out curved parts and make through cuts. A hacksaw with a back is used for making shallow cuts, miter cuts and sawing small pieces of wood, as well as for fitting joints. The upper part of the saw has a thickening. Handle thickness 22 mm; blade thickness up to 0.8 mm. The teeth are shaped like a right triangle. Since the canvas has a small thickness, a butt is riveted in the upper part to give it rigidity. A hacksaw is used for blind sawing of grooves for dowels, as well as for sawing out narrow grooves. They have a thickness of 0.4...0.7 mm. The wooden parts of hacksaw saws are made from birch, beech, thick plywood or textolite. To fasten the blade to the handle, rivets with washers or screws and tubular nuts recessed into the handle are used. The shape of the saw teeth determines the nature of its operation. Isosceles teeth are used for cross cutting, rectangular teeth are used for mixed sawing (lengthwise and crosswise), and inclined teeth are used only for longitudinal sawing. Isosceles teeth are sharpened at different points from different sides, one at a time, so that a chamfer with a sharp cutting edge is formed on the tooth on both sides. Rectangular and inclined teeth are sharpened perpendicular to the blade on both edges so that a sharp tip is formed that shears the fibers like a chisel. Saws with isosceles teeth are set to half or a third the thickness of the blade (the total width of the slot is equal to approximately one and a half thickness of the blade). Small teeth, both rectangular and inclined, are not set apart. Open the saw teeth before sharpening, bending the upper half of the tooth. You cannot bend the tooth completely - it will break. Wirings of various designs are available for sale; if they are not available, you can do the wiring with pliers. Excessively bent teeth are straightened with light blows of a hammer.
TOOLS FOR PLANING.
Sherhebel
designed for initial rough planing of wood;
You can plan along and across the fibers, as well as at an angle to them. After planing with Sherhebel, the surface of the wood is uneven, with traces of grooves in the form of grooves. This is because the knife blade has an oval shape with a radius of 35 mm. During operation, the knife is released up to 3 mm. A planer with a single knife
is used for preliminary planing of wood and planing it after processing with sherhebel.
The blade of a knife with a width of 40 mm is straight and extends 1 mm. Since this plane does not have a chipbreaker (hump), the chips come out without breaking. Therefore, the surface of the wood being processed often produces burrs and sometimes chips. A planer with a double knife
is used for clean planing of wood.
You can also plan the ends, rough, twisted surfaces of wood. Unlike a plane with a single knife, a double plane has a chipbreaker in addition to the knife, which allows for better planing. After separation, the chips rise up the knife, bend and, falling on the chipbreaker, break. The breaking of the chips after separation prevents the possibility of them flaking or breaking off from the surface of the wood. The jointer
is designed for smooth planing and leveling of large surfaces.
The jointer is almost three times longer than the plane, which allows you to plan long surfaces. When processing wood with a wavy surface, shavings are obtained in the form of small pieces of tape, and when repeated, continuous thin shavings are obtained, indicating that planing should be completed, since the surface is smooth. Short parts are planed with a jointer having a body 500 mm long instead of 700 mm, a knife 50 mm wide and 180 mm long. Tsinubel
is used to form small, barely noticeable grooves and hairiness on the surface of wood for gluing and veneering.
Tsinubel is a plane with a knife set at an angle of 80 degrees and having a serrated blade. When replacing a serrated knife in a tzinubela with a regular plane knife, it can be used as a sander. A sander is
a plane with a shortened body, used for cleaning wood that has burrs and curls.
The sander has a narrow slot (5 mm wide) and an increased additive angle (600), due to which thin chips are removed during operation and the surface of the wood is processed cleaner. The knife blade extends by 0.5 mm. The end plane
is used as a regular plane and for planing the ends, since the knife installed in it at an angle to the side surface facilitates the planing process and improves the quality of processing.
When planing at an angle to the axis of the board, a regular plane can be used as an end plane. Zenzubel
is a carpentry tool for selecting and cleaning quarters, folds, grooves, and sharpening perpendicular surfaces.
It can have a single or double knife with a width of 10 to 33 mm, shaped like a spatula. The presence of a free hole in the body ensures free exit of chips during operation. A zenzubel with a single knife is used for preliminary processing, and with a double knife - for finishing work. The “double” chisel for precise installation of the gap in the block in most cases has a movable front sole. The knife and the sole must fit exactly together: only under this condition is its good performance ensured. Rebate
- designed for selecting and stripping quarters (for sharpening folds).
Unlike the zenzubel, it has removable stepped soles. It is losing its importance as electric planers and electric milling machines are increasingly used to form quarters. A door rebate is a special tool for attaching doors. There are cutting edges on each of its faces, which allows you to sharpen the inner corners of the door frame trim. Tongue and pile
- this tool is used to select grooves - tongues on the edges and faces of parts.
Allows you to process parts of different sizes and make grooves of different depths and widths. It consists of two housings connected by screws, and a knife is secured in one of the housings. The primer
is used for removing the groove, as well as cleaning the trapezoidal groove selected by the reward.
Fillet
forms grooves of different widths or depths with different radii of curvature.
The fillet body has a convex sole. Gal length, width 10…25, height 60…80 mm. The staple
is designed to form curves on the edges of parts.
The base of the body and the knife have a concave shape. Kalevka
is a carpentry tool with a figured cutter for figured (profile) processing of the front surfaces of parts, bars or boards.
The sole has a mirror (reverse) profile shape of the part. The humpback
is used for planing concave and convex surfaces. The body of the humpback fish has a convex or concave shape along its entire length (with constant curvature), which must correspond to the profile of the workpiece. The humpback's knife has a straight blade.
MANUAL CHECKING OF WOOD.
Chisels are used to form nests, grooves and eyes of rectangular cross-section in wood parts. Chisels
divided into carpentry and joinery.
The chisel consists of a blade with a blade at the end and a handle. To prevent the handle from splitting when hit with a hammer, a steel ring is placed on it. The handles of the chisels are made from dry hardwood - beech, hornbeam, ash, maple, dogwood, birch (its butt part). The handle fits tightly onto the shank; there should be no sharp corners or irregularities on it. The blades of chisels and handles are coated with colorless waterproof varnish. Carpenter's chisels are designed for making sockets, grooves, and tenons. Length 345, blade width - 16, 18, 20 and 25 mm. Carpenter's chisels serve the same purposes as carpenter's chisels. Length 315, blade width - 6, 8, 10, 12, 16, 18 and 20 mm. chisels
are used for cleaning and selecting sockets, grooves, tenons, and chamfering , and semicircular chisels are used for cleaning rounded tenons and processing concave and convex surfaces. As in chisels, chisel blades are made of tool steel with heat treatment of the working part, the handles are made of wood of the same species as in chisels. Use semicircular chisels to process curved surfaces and hollow out curved holes. The sharpening angle of the chisels is (20-30)°.
MANUAL DRILLING OF WOOD.
Round (cylindrical) holes for round tenons and bolt pins are selected with drills consisting of a shank, a rod, a cutting part and elements for removing chips. For drilling, feather, center, screw, spiral drills and universal drills are used. Twist drill bits are great for making small, precise holes and work well in both soft and hard wood. Twist drills sharpened for woodworking make the drilling process much faster. Extra long drill bits can be used to make very deep holes. Spiral drills, depending on the shape of the cutting part, come with a conical sharpening and with a center and scorers. To remove chips, the rod has grooves located along a helical line. Drills with a center and a scorer are produced with a diameter of 4...32 mm, and with a conical sharpening - with a diameter of 2...6 mm (short series) and 5...10 mm (long series). Screw drills are used to drill deep holes across the grain. The end of the drill has a fine thread screw. When drilling with them, the holes are clean, since chips are easily removed through the screw channels. Drill diameter 10...50 mm, length 40...1100 mm. Feather drills have a grooved shape; they are used to select holes mainly for dowels. The groove also serves to eject chips. Due to the fact that it cannot completely throw the chips out, it must be removed from the hole frequently to avoid overheating. The disadvantage of perks is that at the end of drilling a hole, they squeeze out the wood and cause chips. To avoid this, you should not drill through the material at one time; when the center of the hole appears on the back side of the material, you must turn the workpiece over and finish drilling on the other side. Drills have a length of 100...170 mm, a diameter of 3...16 mm with a gradation of 1...2 mm. Center drills are used to drill through and shallow holes across the fibers. Drilling deep holes with these drills is difficult due to poor chip ejection. The drill is a rod ending at the bottom with a cutting part, consisting of a trimmer, a blade and a guide center (point). The diameter of the center drills is 12...50 mm, the length depending on the diameter is mm. The universal drill replaces a whole set of drills. The movable cutter can be easily adjusted to the desired size and drill holes with a diameter of 25 to 80 mm. Drills, screw drills, and spoon drills are useful for drilling very deep holes, although the operating speed is low. The drills are driven using a brace and a drill bit. A ratchet rotator is a cranked rod, in the middle of which there is a handle for rotation. At one end of the crank rod there is a chuck for fastening drills, at the other there is a pressure head. The ratchet should rotate right and left, and the direction of rotation is set by a ring-switch. The chuck jaws must ensure that the tools are securely secured. The hammer can be used to tighten bolts and screws, for which socket wrenches (square or hexagonal) and screwdrivers are inserted into the chuck. The brace can accommodate drills with a shank diameter of up to 10 mm. To tighten the screws, screwdrivers are inserted into the brace. The rotator, consisting of a crank rod, a four-jaw chuck, and a switch ring, is made of structural steel. Holes with a diameter of up to 5 mm are drilled with a drill. A drill is a rod with a screw thread on which a handle is attached. At one end of the rod there is a chuck for installing drills, and at the other there is a head. The rod, and with it the drill, is rotated by moving the threaded handle up and down.
