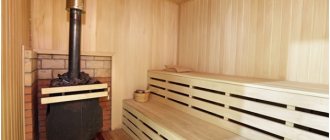
In small country houses where there is no constant heating, a problem arises: how to quickly heat the room so that it becomes warm and cozy. To solve this problem, you can use wood-burning stoves for summer cottages, also called potbelly stoves.
In this article we have given a rating of the most popular models. When compiling it, we took into account their characteristics, price range, advantages and disadvantages according to users. We also outlined recommendations for choosing heating devices and rules for the safe operation of stoves.
Types of furnaces
In our country, many types of furnace equipment are built and operated; we list some:
- Swede
- Dutch
- Baby
- Heating and cooking
- Fireplace
- Stove with fireplace.
Types of stoves
Despite the difference in design, all stoves are characterized by the following parameters:
- Purpose.
- Maximum oven heating temperature.
- Duration of fuel combustion.
- The time required for the structure to warm up and begin full heat transfer.
- Smoke exhaust device.
- Scheme of the movement of warm gases through channels arranged in the furnace body.
- Oven shape.
- Options for finishing external walls.
- Material used in the construction of the furnace.
Stoves installed in homes have ancient traditions. Our distant ancestors cooked food on it, heated their homes with it, and used it as a sleeping place.
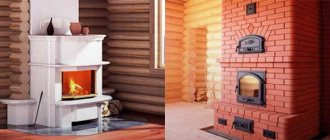
Do-it-yourself brick oven for a summer residence
If you have come to the conclusion that you will build the stove yourself, then you should decide on the type of construction. The Swede is considered more functional , as it contains an oven and hob , as well as niches and compartments for simmering food or drying clothes and shoes. The Dutch oven is a purely column-type heating stove; the only openings in its walls are the firebox, ash pan and cleaning doors. But this also determines its advantages: simplicity of design , reliability and durability . In addition, summer residents do not often cook food on the stove. Most people have either bottled gas or an electric stove and oven for this.
The initial stage of laying the furnace
According to stove makers, the construction of the “Swedish stove” was rather driven by the desire to get many functions in one device. In addition, the cast iron oven located next to the firebox quickly heats up and begins to heat the room. The hob does the same. But at the same time, a low combustion height leads to incomplete combustion of substances in an open flame, as a result - more soot and soot, the need for frequent maintenance, and in the absence of it - clogging and a decrease in efficiency. Therefore, for heating purposes, it is better to build a “Dutch stove” - although it will not allow you to cook food on it, it will cause fewer problems during operation.
The classic “Dutch” does not have an ash pan, grate or ash pan. Firewood placed in the firebox, thanks to this, burns longer, but produces more soot, and less heat is produced. Therefore, stove makers recommend equipping a classic ash pan with a grate and a door for the ash pan, which will not only allow for better heating with wood, but sometimes use coal or peat .
Typical "Dutch"
Foundation
Despite its light weight, it is reckless to install a “Dutch” without a foundation, since the logs can sag over time, and the structure will be damaged even to the point of cracks. The best option is to make a monolithic concrete base , reinforced with corrugated reinforcement. It can also be made from solid brick, but there is a risk of cracking. If the house has never had a stove, you first need to make a hole in the floor. The finished floor is removed, then the logs are sawed so that their ends rest on the posts.
In the resulting hole, you need to remove the top layer of soil and make a backfill of sand and crushed stone. Formwork is built on top and reinforcement is tied in. Considering that the structure is small in area, a rod of 10 mm . the pitch between the rods is 40 cm . You need to make at least two horizontal layers. Fill everything with concrete and leave to dry. After drying, even such a small foundation is better to stand for a couple of weeks, or even a month for settlement. The foundation for a standard stove is usually made into a square with a side of 120 cm .
The best foundation is made of reinforced concrete
Step-by-step laying of the furnace
The mortar for stove masonry experiences constant temperature fluctuations. When the stove is heated, it heats up very much, and during the winter period of inactivity it cools down to negative values. Cement mortar cannot withstand such changes and quickly cracks and crumbles. Clay is used to lay the stove. You can buy it, but the easiest way is to get it yourself by making a hole to a depth of 1 - 1.5 m .
When removing the clay to the surface, you need to check its fat content. The softer and more flexible it is, the fattier it is considered. The optimal ratio for a solution of normal fat content is two parts sand to one part clay . You can take quarry ; it also contains clay particles. Sift everything through a sieve. Laying one hundred bricks requires about 20 liters of water .
Prices for fireproof mortar for stoves and fireplaces
Fireproof mortar for stoves and fireplaces
Mixing the solution must be approached very responsibly
Step 1. Having laid rolled waterproofing on the dried and settled foundation, we begin to lay out the stove. It is best to print yourself an ordering diagram on a color printer in advance. Make each level on a numbered sheet, or take whatman paper and present the entire diagram on it.
Step 2. The masonry is carried out in half a brick, preferably solid, fire-resistant. Lay out the levels sequentially according to the order scheme. Where required by the design, bricks must be placed on edge or beveled. A grate is placed between the ash pan and the firebox.
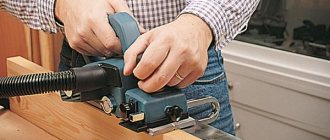
Step 3. It is easiest to attach the vent door, and then the firebox, to nichrome wire . It is inserted into the holes on the door frame, and then twisted into a “pigtail”. Such bundles are inserted into the masonry two bricks deep and bent. The following layers overlap the wire, and after the solution has hardened, the door is firmly seated. The main thing is to prevent the wire harness from loosening. An asbestos cord is placed under the door frame for sealing.
Door fastening
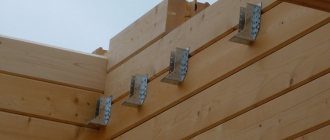
After the construction of the furnace body, it is necessary to equip a transition to the chimney steel pipe. Before this transition, a damper is installed to adjust the draft. Cleaning doors are installed in the chimney ducts, usually on both sides.
Chimney installation
It is easier to make a chimney from a pipe. You can take an ordinary thick-walled steel one - it’s cheaper , pass it through the roof and bring it half a meter above the highest point of the roof. Nowadays there are ready-made prefabricated elements on sale that are assembled using locking connections. All that is needed for it are holders welded from the profile. This prefabricated chimney is suitable both for exhaust through a wall with a knee bend, and through the roof. The first option is easier to do.
The prefabricated elements are a sandwich of two stainless steel cylinders, between which a layer of non-combustible insulation is laid. If you just have a steel pipe, you can insulate it with mineral wool - it does not burn or melt even at high temperatures.
Factory lock pipe
Finishing
The decoration for the summer resident opens up space for imagination. You can decorate the stove with tiles or refractory tiles , or you can simply whitewash it . Neat red brick with embroidered seams looks good on its own. Another option is to take a steel sheet 1 - 1.5 mm , pickle or burnish it and close the stove with it, arranging decorative rivets. Don't forget to place the pre-furnace sheet in front of the stove front. It will protect the wooden floor from fire if a coal or firebrand flies out of the ash pan or firebox. It is usually made from stainless steel.
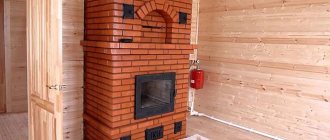
Russian brick stove
The Russian brick stove has the following specific advantages:
- maintaining heat in the home due to long cooling;
- the ability to maintain heat in a room of any size;
- fire resistance.
Meanwhile, these devices also have a set of certain disadvantages:
- To build a furnace, you must have certain skills and knowledge, which is why it is advisable to invite specialists to construct it.
- To build a furnace, it is necessary to first build a separate, buried foundation.
- The oven is quite large in size and can take up quite a lot of space.
- This circumstance must be taken into account when determining the location where the stove will be installed.
Russian brick stove
For the manufacture of stoves, two materials are used - metal and brick (plain red, and fireproof, also called fireclay).
A stove for a house made of wood, for the manufacture of which I use steel or cast iron, the thickness of which is from 3 to 5 mm.
The wall of this design consists of two layers of metal. There is an air gap between them. This layer is designed to protect the room from so-called thermal shock.
Do-it-yourself iron country stove - step-by-step instructions
The simplest version of an iron stove is the well-known potbelly stove , which is absolutely undemanding in terms of fuel. Improved factory versions can be made of steel and cast iron, have decorative trim and a glass door, and be installed on bent legs. But for self-production, something else is important: simplicity, reliability, straight lines of the design.
Table 2. Characteristics of popular Butakov iron stoves.
| Model | High school student | Student | Engineer | Assistant professor | Professor |
| Room volume, cubic meters m | 100 | 150 | 250 | 500 | 1000 |
| power, kWt | 6 | 9 | 15 | 25 | 40 |
| Dimensions, cm | 37*66*78 | 37*66*78 | 44*76*89 | 57*97*115 | 67*111*125 |
| Weight, kg | 55 | 77 | 113 | 182 | 235 |
| Chimney diameter, mm | 120 | 120 | 120 | 150 | 200 |
| Min. height of the chimney from the grate, m | 5 | 5 | 5 | 6 | 8 |
A good option for self-production is the Loginov . It is distinguished from a conventional stove by the presence of two shelves at the top of the firebox, which more than double the path of burnt gases, increase efficiency and heat output.
Step 1. Cutting the material . Having drawn a diagram of the potbelly stove on paper, estimate all the dimensions. The best option: 80 * 45 * 45 cm. In addition to the box itself, inside you will need to place a grate and two reflective shelves. It is better to make all elements removable. The cutting can be done with a grinder, and the chamfer can be removed from the edges with a grinding wheel.
Drawing of Loginov's potbelly stove
Step 2. First, the side and rear walls are welded together , pointwise. They are tapped with a hammer for leveling, placed on the bottom, which is also welded, now along the entire seam to make the parallelepiped rigid. The grate can be made from a sheet of steel with a thickness of at least 4 mm , in which longitudinal holes can be cut. 4 pieces of reinforcement are welded along the inner walls, on which the grate will rest. The upper reflectors are installed in the same way, but always with an offset - the lower one is closer to the front wall, the upper one is closer to the rear.
Prices for popular models of welding machines
Welders
The side and back walls are grabbed first
Step 3. To hang the door, the hinges are first welded onto it, and then onto the front wall. The firebox door is larger than the vent. The easiest way to make latches is from bolt-mounted strips that will fit behind hooks welded to the front wall. The front wall is welded last, after the top sheet with a hole for the chimney.
Door version
Step 4. The box is ready . For convenience, legs from pieces of metal corner are welded from below. A section of pipe is welded to the chimney opening, onto which the rest of the pipe is then placed. In this section you need to make a gate, that is, a damper, by adjusting which you can turn an ordinary potbelly stove into a long-burning stove. The principle is simple: if you shut off the damper and close the doors of the firebox and the blower, the air will flow very slowly, and the wood will smolder rather than burn.
By laying a lot of wood, you can stretch one firebox for 8 – 10 hours – just enough to sleep comfortably. Two coaxial holes are drilled in the pipe, a pin is inserted into the bottom, and the outer end is bent 90 degrees . Inside the pipe section, an iron round slightly smaller than the diameter of the pipe is welded to the stud. By turning the pin around its axis, you can adjust the width of the open chimney channel.
The gate allows for slow combustion
Step 5. The height of the vertical pipe is about 1.2 - 1.5 meters . Next comes an inclined part from one and a half to two meters . It is called a hog and also participates in heating the room, because hot gases heat it up greatly. It is better to take it outside through the wall, covering the exit with glass wool or mineral wool.
Well-organized chimney
Place the finished potbelly stove on a steel sheet. Sometimes a screen is hung on the sides. It performs a dual role: protects against contact with hot walls; heating itself, it serves as a plane that releases a lot of heat into the room. With these simple measures you can turn a simple iron stove into a work of engineering art.
Our separate detailed article on the topic - Mixture for laying a brick stove, where we analyzed in detail the correct proportions, as well as tips for mixing it yourself, will be very useful.
Metal oven
Metal stoves have the following advantages:
The homeowner has the opportunity to purchase a finished stove, which includes a chimney, equipped with a temperature control system.
Advantages of a metal stove:
- Furnaces made of metal can have an interesting appearance.
- Fast heating, which allows you to warm up the air in the room to the specified parameters in an extremely short time.
- High thermal output.
- Long service life.
- To perform its functions, the stove can use any existing fuel.
Metal stove
But stoves made of metal also have some disadvantages, among them the following:
They are not suitable for use in large areas due to high fuel consumption.
Fast heating means fast cooling.
Metal stoves are classified as fire hazardous objects and the operation of the stove must be constantly supervised, and a fire extinguisher and other fire extinguishing means must be within reach.
If low-quality metal was used to make the stove, then after the first heating it may become deformed.
Criteria for a good stove for a summer residence
A country stove must satisfy several conditions, which makes it a more or less desirable heating device in a country house:
- It should warm up quickly and give off heat well . This will allow you, when you arrive at the dacha, not to walk around the room for several hours in winter boots and a jacket.
- It should have compact dimensions , if only because the larger the stove, the longer it will heat itself until it begins to warm the air in the rooms. Proper placement of the stove at the junction of rooms will allow you to heat even several rooms. In a one- or two-room house, building a bulky stove makes no sense at all.
Compact stove does not take up space in a small room
- No one wants to buy a carload of firewood and find out there isn't enough for the heating season. Economic considerations are paramount, which means the furnace must have the highest possible efficiency .
- Since the summer cottage can be located far from the gas main, the stove turns from a heating device into a means of cooking. Having an oven and hob is a plus.
- Implementing a long-burning mode will allow you not to waste time and not be distracted by constantly adding logs to the firebox.
Construction of a classic fireplace
Fireplaces installed in modern homes have combined all the best from those that were used in the Middle Ages and Russian stoves, which release heat into the home with high efficiency.
Fireplaces can be used not only as a source of heat, they can decorate the interior of the room where it is installed.
Construction of a classic fireplace
Fireplaces installed in modern homes have the following number of properties:
Cain can be installed directly into the wall, and those that are installed next to the wall. There is another way to install it in the form of an island.
Fuel port type. Fireplaces can be open or closed. The first option is a classic design with an open firebox; in the second version, this hole is closed with doors.
The type of fuel used is coal, gas, electricity.
The design of the fireplace directly affects the efficiency. Thus, the efficiency of an open fireplace is 15%, the closed type shows an efficiency of 70 - 80%. A closed fireplace can act as the only source of heat in the house.
Every homeowner can build such a structure in his home; this requires certain knowledge, a set of tools and the ability to work with them.
Some details need to be paid special attention:
- design and construction of the base (foundation), the larger the size of the fireplace, the larger the base should be;
- chimney design;
- volume of construction and finishing materials
- appearance of the structure as a whole;
- fire safety, fire safety measures must be provided at the design stage;
- Tools that will be necessary when performing construction work.
- trowel for working with mortar;
- hammer-pick for cutting bricks;
- jointing used to seal the seam;
- building level and plumb line, square;
- container for preparing a solution and soaking clay.
Advice from professionals
If the stove is mounted in a wall, it is sealed with brick.
Steel and especially cast iron stoves can have a very beautiful design. Such products should not be covered with bricks or protected with a screen. You need to worry about their successful placement in advance.
- A structure for heating several rooms can be placed directly in a wall or partition. This installation is more complicated and requires bricking.
- When installing the stove and chimney, carefully ensure that all structural components are freely accessible. There should be no difficulty in cleaning and inspecting the elements.
Heating a wooden building with a metal stove is a completely rational solution for a country house or cottage. The structures are light, compact, and very effective, but during installation a number of rules must be followed.
Where is the best place to put a stove in a wooden house?
As a rule, the location for installing the stove must be determined at the design stage of the house. This is necessary in order to ensure efficient heating of the house and make it as safe as possible. What criteria should a homeowner be guided by when planning where to install a future furnace?
Where is the best place to put a stove in a wooden house?
The heat source can be installed in rooms whose area is at least 16 sq.m. the installation must be carried out in such a way that there are no floor beams under the stove intended for installing floors. And at the place where the chimney exits there should be no ceiling beams or rafters.
To reduce the size of the chimney pipe, it makes sense to locate it in the center of the house. In this case, the chimney will exit onto the roof near the ridge of the roof. Construction of a stove in close proximity to the wall is impractical, since a significant part of the heat will be directed to heating the street. In addition, placing the stove near wall structures increases the fire hazard. Based on the above, we can conclude that placing the stove in the center of the room would be optimal.
A wood-burning stove will be at its most efficient if heat is transferred from all its surfaces. This design can easily cope with heating one or several adjacent rooms. This can be taken into account when placing rooms at the planning stage.
To provide heat to adjacent rooms, the stove is installed between rooms in a partition. In order to keep it warm in a four-room house, it is best to install it at the junction of the partitions so that one of the walls of the stove opens into the room. With this arrangement, it is possible to organize the exit of the firebox to the kitchen.
Recommendations for selection
When purchasing heating devices, the choice must be made based on the conditions in which they will operate and what function they must perform. If you are thinking about purchasing a stove to heat the house in which you plan to live permanently, we recommend that you familiarize yourself with the rating of the best wood stoves for heating a home.
If we are talking about a dacha, then the main criteria for choosing country wood stoves include:
- Power . The heat transfer should be sufficient to fully warm the room. So, per 1 kW there should be about 9 m2 of area + 10% of the reserve.
- Additional functions. When selecting this criterion, it is necessary to find out whether convection ribs, a hob, or an oven are needed.
- Supports combustion of different types of fuel . If you plan to use coal or sawdust briquettes in addition to firewood, it is better to clarify this point in advance before purchasing, since many models only operate on wood.
- Dimensions . If the area of the room is small, then it is necessary to take into account the dimensions to be able to install the stove at a safe distance from the walls.
It is better to prepare for the purchase in advance, and be ready to name such indicators as: room area, fuel, desired functionality.
When you go shopping for a potbelly stove, you need to know exactly whether you need a hob or not. Models without a hob usually cost several times less
Don’t want to spend money on buying a potbelly stove for your dacha, but prefer to make a device from scrap materials? In this case, we recommend that you read the detailed instructions for making a homemade potbelly stove and a chimney for it.
Foundation for the stove
If you want to build a fireplace in your home, then first of all you need to think about arranging a foundation for it. A properly executed foundation will ensure its long-term and safe operation. In case of negligence or mistakes made, it will undoubtedly lead to deformations, subsidence of the fireplace, and the appearance of cracks.
The main requirements for the foundation can be defined as follows: reliability and lack of connection with the foundation of the entire building.
The optimal solution would be to build a capital foundation, and it can be built simultaneously with the construction of the foundation for the main building. At the same time, creating a single foundation is unacceptable. The thing is that each foundation is designed for a certain load and as a result they have different shrinkage.
There must be a gap of at least 50 mm between them; it must be filled with sand or other bulk material and compacted thoroughly.
The dimensions of the foundation in plan should be larger than the size of the base of the fireplace. That is, it should protrude from the fireplace by 100 - 150 mm. The depth of occurrence depends entirely on the properties of the soil. Practice shows that for a one-story house it is enough to deepen the fireplace foundation by 0.5 - 0.6 m; if the house is higher, then the depth should accordingly be greater - up to 1 m.
Why a wood stove?
If we exclude gas and electricity, the first - due to the complexity of installing a separate pipeline, the second - as an expensive energy source for heating, there are not many types of fuel left for a country stove. Coal has a high heat capacity and produces long-lasting and persistent heat . But its cost in regions that are far from coal mining areas negates its advantages. Wood pellets and briquetted fuel have now become popular. The calorific value of these materials is higher than that of firewood, but they are also more difficult to obtain and the price is higher.
At the same time, firewood is a renewable material that grows in abundance throughout most of Russia. In forested regions it is the cheapest type of fuel . A wood-burning stove is also convenient because, if necessary, it can burn not only quality firewood, but also wood waste - old boards and wood products that are not covered with varnish and paint. Although this is not the main source of fuel, such recycling can still be beneficial.
Firewood continues to be the most affordable fuel
Channel and ductless furnaces
Channel and ductless furnaces
The peculiarity of channel furnaces is that their design includes channels made in horizontal and vertical planes. Heat moves through them, which in direct-flow structures simply goes up. It should be understood that the movement of heat through the channels may be difficult. Therefore, the design of the furnace provides for the presence of elbows. To prevent stagnation of warm air, certain devices are installed that regulate combustion modes. There is a summer mode, during which the stove warms up and after that you can switch to full heating.
The main advantages of stove heating
Installing a stove is not only a simple process, but also quite inexpensive in terms of the cost of materials. Using firewood is the most environmentally friendly way to heat a space and will not harm your family. The installation of a stove can be combined with the installation of a fireplace, then there will be not only a standard type of heating, but also a stylish design element in the room.
Furnace maintenance is a simple and fairly cheap process. The main advantage is the ability to regulate the degree of combustion and the ability to retain heat using special dampers installed in the stove.
How to properly heat the second floor
Supplying heat to the second floor of a house is a rather difficult task. As an option, you can consider installing a fireplace equipped with additional equipment. The fireplace has a number of advantages. Among them are the following:
- ease of operation;
- small sizes;
- use of almost any fuel.
How to properly heat the second floor
In fairness, it should be noted that most of our people consider it a luxury item, but this design is capable of combining democracy, aesthetic properties, and excellent performance of its main task - heating the room.
Heat supply to the second floor due to air convection. That is, passing by a heated fireplace wall, the air receives thermal energy and continues to move upward through a special box. Warm air is supplied to rooms located on the second floor through air ducts, which must be covered with thermal insulation. This is necessary to minimize heat losses and ensure fire safety.
Features of stove heating
Stove heating has a number of advantages, thanks to which wood-burning brick stoves have not lost their popularity for several centuries. The most important advantage is the ability of the ceramic bricks from which the stoves are made to accumulate and release heat for a long time.
At the same time, radiant energy useful for the human body is released into the space, giving a feeling of warmth and comfort. With regular heating during the cold season, the house is always warm and dry, and natural ventilation is formed due to the stove draft. In hot weather, the stove, on the contrary, cools the rooms by removing excess heat into the ground and air through the foundation and chimney.
In addition to creating a comfortable microclimate, a brick oven can provide additional functions, the availability of which depends on the design:
- cooking - boiling, frying, stewing and baking;
- drying clothes, shoes, food;
- heating beds for sleeping;
- opportunity to admire the open flame.
Furnaces that provide several functions are called combined. These types of stoves include heating and cooking stoves, fireplace stoves, as well as several popular basic models, including the Russian stove.
Stove heating also has disadvantages, including the inability to effectively heat remote rooms. Therefore, in large houses, they usually install several stoves with separate or combined chimneys or combine stove heating with other types of heating.
In compact houses consisting of one or several rooms, the stove is usually located in the center, so that its walls are located in all rooms. The hob and oven are placed on the kitchen side, the stove bench is in the bedroom or nursery, and the open fireplace is in the living room or dining room.
Self-installation of a Russian stove
To build a classic Russian stove, you will need about 1,650 bricks, a valve with dimensions of 260 by 240 mm and a certain volume of clay and sand, which is enough for 80 buckets of mortar.
Self-installation of a Russian stove
To carry out the work, it is necessary to use red bricks; fire-resistant (fireclay) bricks are used to lay out the firebox. When doing masonry, you must remember that the seams that are formed during masonry should be small. no more than 5 - 7 millimeters.
Each level must be laid using a building level and a plumb line. This determines how well the oven will be installed as a whole.
The construction of the stove must be carried out in accordance with the requirements of the order. This is the name of the diagram, which indicates the placement of bricks in each individual row. Such orders exist for almost all types of Russian stoves.
It should be noted that laying a stove is a rather complex construction process and requires a highly qualified mason. It’s not for nothing that there is a separate specialty for stove makers. And to build a stove at home, it is better to invite just such a specialist.
How to install a potbelly stove in the country
When installing a potbelly stove, remember that the metal body heats up quite quickly. Stainless steel ovens heat up less and cool down faster. Potbelly stoves, which are made of cast iron, will retain heat much longer, so they must be installed in such a way that they are visible during operation and for some time after the flame has died out.
If you install potbelly stoves on metal legs, you must remember that these auxiliary structures will also heat up. The heating temperature will be lower than that of the case, but still not too low. To install potbelly stoves in your dacha, you will need to install them on a fireproof base. In this case you can use:
Scheme of a potbelly stove stove.
- tin products;
- concrete structures;
- ceramic tile products;
- brickwork.
Fire hazardous grounds are:
- those made of plastic of any kind;
- plank or parquet floors;
- laminate bases;
- linoleum bases;
- It is not allowed to use carpet or other soft coverings.
If the house has wooden walls or panels, the stove must be installed at a distance of 1 m from them. Chimney pipes in the room are installed from 1 section, without the use of connections. If for some reason this cannot be done, you need to make a tight connection, and one section must necessarily fit into the other. If the pipe passes through the wall, you will need to make a thermal barrier from ceramics or brick. In this case, concrete can also be used, but it will crumble when temperature changes.
The fuel storage container will need to be placed next to the door to prevent sparks from entering it.
Diagram of a potbelly stove with dimensions.
Quite often, potbelly stoves in the country are used not only to provide heating. There are a large number of designs that combine several functions. Such designs include a heating stove with a cast iron stove. They can be used for cooking and at the same time for heating a country house. A household cast iron stove with 1 burner can easily replace a gas or electric stove in the country. If there is a need to feed several people at one time, you should make or purchase a stove with a continuous cooking surface or with 2-4 burners.
Ovens that have a water tank are also popular. Their design is similar to a samovar. A water container is mounted around a wood-burning cast iron stove.
How to install a frame potbelly stove
The structure of a frame stove is somewhat different from simple structures. To equip your garage with a heating structure, you must have:
- Metal sheet;
- corner;
- pipe;
- steel reinforcement;
- thick wire.
The tools you will need to find are:
Installation diagram for a potbelly stove.
- roulette;
- fasteners;
- welding machine;
- jigsaw
The order of work will be as follows:
- A frame is made from the corner. To do this, the metal is sawn into separate strips. Next, the legs are made. 2 rectangles of the same size are welded, legs are welded to one of them. The second rectangle is installed half a meter above the ground surface and attached using welding or bolts.
- The body is attached. Rectangular parts are cut from steel. For this purpose you need to use a jigsaw. The structure is connected using bolts or welding.
- Next, a door with a handle is attached to the body.
- A grate is made from existing wire or steel reinforcement, after which the structure is placed on the bottom.
- Next you will need to make a chimney pipe. One end of the structure is inserted into the oven, and the other end must be taken outside.
To obtain a large amount of heat, it is necessary to come up with a long and wavy pipe path through a heated private house. The chimney can be discharged through a window, roof or wall. In this case, care should be taken to ensure that all connections are tight. If this is not taken into account, smoke will enter the room.