Installing a stove in a bathhouse on a wooden floor is an important and responsible step. It is best to select a stove and how to install it before the foundation of the bathhouse is laid. After all, it is in this case that it will be possible to design rooms of optimal dimensions, provide a place for storing firewood if the stove is solid fuel, or take care in advance to comply with the PUE if the unit is electric. Gas heaters are installed only by qualified craftsmen, and permission to install certified equipment is issued by Rostechnadzor. It is prohibited to independently manufacture and connect to the gas pipeline in “makeshift conditions”. But, if the bathhouse has already been built, and even the finishing work has been completed, it is possible to install a stove on a wooden floor, provided that a number of important nuances are observed.
Installing a sauna stove on a wooden floor
Location of the stove in the bathhouse
A classic Russian bathhouse has an unheated dressing room and a steam room combined with a washing room. Modern projects are much more convenient to use and usually have the following layout:
- dressing room - the furnace of the stove usually opens into this room;
- steam room - inside this room there is the stove itself and the heater;
- washing room - equipped with a large drain (drain or siphon);
- relaxation room - a separate room inside the bathhouse or in the attic floor.
Option for the layout of the bathhouse and the location of the stove.
Therefore, stoves are equipped with a remote or telescopic fuel channel and are mounted inside the walls/partitions between the steam room and the dressing room in order to heat all existing rooms separated from each other by partitions.
Remote fuel channel for sauna stove.
In this case, a heating device installed in this way should be isolated from load-bearing/enclosing structures made of flammable material:
- a sheet of iron, asbestos or any other non-combustible material (brick, clinker, porcelain stoneware) is placed under the stove;
- the junction of walls/partitions with the firebox is lined with ceramic or clay bricks (cutting);
- Aprons or screens made of heat-resistant sheet material are attached to the walls (can be lined to improve the quality of the interior).
Factory protective screens for sauna stoves.
In most cases, a sauna stove has a chimney, inside of which high temperatures remain and there are sparks that are dangerous to the wooden structures of the building. Therefore, in the places where the chimney pipes pass through the floors and roofs, grooves filled with thermal insulation materials are installed.
Important! Providing a set of these measures is mandatory for a wooden bathhouse or a building with a wooden floor, regardless of the energy carrier used in the heating device.
Inside the steam room itself, the oven can be positioned in different ways:
- by moving it to the corner, the working space of the room is freed up;
In both cases, it should be taken into account that, according to existing fire safety standards, the minimum permissible distance from metal stoves that are not lined from the inside to combustible structural materials of the walls is 1 m. The stove in the center of the steam room is very inconvenient to maintain and during steam procedures. Therefore, in 99% of cases, protective screens are used to allow the heater to be moved as close as possible to the wall.
DIY installation
When making vertical/horizontal grooves and screens, the sauna stove manufacturer's instructions must be followed. This document indicates specific values of safe distances from the body of the heating device to combustible materials, screens, protected and unprotected wooden floors, doorways, depending on the actual thermal power of the stove, the nuances of its design.
For example, for some modifications of Termofor, the minimum permissible size of a vertical brick cut is 61 cm. Therefore, the stove cannot be pushed tightly into a corner.
Brick cutting vertical
Regardless of the layout and configuration of the bathhouse, installation of a factory stove-heater with an external fuel channel is carried out in only two ways:
- inside the wall - under the load-bearing structures there is always a foundation or grillage, a window for the fuel channel is made in brick walls, part of the crowns and racks are dismantled in wooden walls, masonry is made in half a brick 1.5 x 1.5 m;
Laying on the foundation.
If the brick cutting is small, you can rest it on a wooden floor without a foundation, but in the place where the joists pass.
The thickness of the cutting portal is ¼ – ½ brick to save the construction budget. However, stove manufacturers take into account that the remote firebox can be built inside walls of greater thickness, so they provide the necessary size margin.
The main difficulties when laying cuttings traditionally arise in the interface nodes:
- brick/wall - the masonry is prohibited from being rigidly connected with reinforcing pins to the crowns of an unsettled frame; a damper tape is glued to the end of the wooden wall; the bricks do not adjoin closely, but leave a gap of 0.5 - 1 cm, decorated with platband or fillets;
Platband around the portal.
Advice! Due to the small volumes of masonry, facing ceramics can be used to get rid of plaster and putty.
Several types of screens are used for metal sauna stoves:
- fireproof - protects wood from ignition or charring, mounted directly on the wall (in some cases through thermal insulation inserts);
In addition to fire protection, screens additionally decorate furnace equipment and give interiors a complete look.
Important! Fire barriers are often constructed from asbestos-containing panels/sheets or steel structures. In 90% of cases, protective screens are made of brick, which is not acceptable for a wooden floor due to its heavy weight. Therefore, you will either have to dismantle the tongue-and-groove board and pour a foundation/floor on the ground along the outer perimeter of the screen, or use other materials and technologies.
The only option for covering with tongue and groove boards without changing the design of the wooden floor and casting a separate foundation is a metal sheet. However, this material has high thermal conductivity, so thermal insulation should be laid underneath it:
- MKRP-340 – heat-resistant ceramic plate based on silicon, 0.4 x 0.6 m in size and 3 cm thick;
Attaching the fire retardant layer.
The galvanized steel sheet is attached to the wooden floor with self-tapping screws through a layer of thermal insulation. Instead of these materials, you can use budget asbestos cardboard (2 layers of KAON 1 cm thick, 0.8 x 1 m in size), PNAKH-1S asbestos fabric or AT-1 - AT-9 fabric, basalt wool.
Fire screen options are:
- steel sheet - mounted similarly to a floor screen on top of a fire-resistant material, has reflective properties, retains some of the thermal energy inside the steam room, but does not have a sufficiently attractive front layer;
Steel fire protection screen.
Fire protection screen made of porcelain stoneware.
Factory steel screens.
There are two types of protective screens:
- metal - Sami manufacturers care about the safety of users, producing screens made of cast iron and steel, installed through special spacers at a distance of 2 - 5 cm from the body;
- brick - more comfortable to use, since it is impossible to get burned on the outer surfaces; large cracks can be made in the masonry for convection heat exchange.
Metal screens reduce the temperature on external surfaces to 80 - 100 degrees, which eliminates the risk of fire in the walls, but does not protect against burns.
Despite the conflict between two structural materials - elastic wooden floors and heavy brickwork, some individual developers use the technology:
- under the stove, a sheet of gypsum fiber board is laid on a tongue-and-groove board, and a platform of large-format paving slabs 40 x 40 cm or 50 x 50 cm is laid on it;
Option for a floor screen made of paving slabs.
Important! The height of the vertical protective screens is much lower than that of fire-fighting modifications - 5 cm higher than the stove body (1 row of bricks, respectively).
Chimney cutting
Unlike brick vertical structures, the horizontal groove where the chimney passes through the bathhouse ceiling is made of bulk, cotton wool or slab material:
- sand or expanded clay;
- basalt wool;
- PKVT, TISK, MKRP slabs.
Filling the cutting with sand.
To fix the specified materials in the design level of the space, galvanized or stainless steel plates with a hole in the middle are fastened with self-tapping screws from below and above along the perimeter of the sawn hole. Thus, step-by-step instructions for fireproof cutting of a chimney at the bath floor level are as follows:
- fastening the bottom sheet to the bathhouse ceiling - with self-tapping screws to the ceiling;
- chimney assembly - sandwich elbows or pipes made of ceramic, asbestos or stainless steel are assembled sequentially, led just above the ceiling into the attic;
- backfilling - refractory material is poured/laid on the bottom cutting sheet from the attic side between the chimney pipe and the wooden floor structures;
- installation of the top sheet - the cutting element is put on the pipe, fixed over the insulation to the ceiling from above.
Installation of ceiling trim.
There are cuttings with their own pipes, a universal size of four sheets.
Important! The sections of the chimney in a bathhouse are always joined “along the smoke” and not “along the condensate”, that is, the socket of the upper pipe sits on the narrowed edge of the lower bend.
Roof passage unit
Unlike ceiling modifications, roofing trim has a more complex design:
- made of galvanized steel, polymers, non-flammable elastomers;
- has an inclined plate surface and a truncated cone;
- ensures the tightness of any roof covering.
Roofing cutting – master flush.
For the convenience of the individual developer, each set of roofing trims is accompanied by a description of the design and method of installation on different roof claddings.
Thus, a home craftsman can install a bath stove and a chimney for it on a wooden floor covering independently, choosing a convenient option with a minimum budget and acceptable quality.
Advice! If you need floor repair specialists, there is a very convenient service for selecting specialists from PROFI.RU. Just fill out the order details, the experts will respond and you can choose who to collaborate with. Each specialist in the system has a rating, reviews and examples of work, which will help with the choice. Looks like a mini tender. Placing an application is FREE and does not oblige you to anything. Works in almost all cities of Russia. Without your desire, no one will see your phone number and will not be able to call you until you yourself reveal your number to a specific specialist.
If you are a master, follow this link, register in the system and be able to accept orders.
Installing a stove in a bathhouse on a wooden floor step by step in compliance with fire safety
Installing a stove in a bathhouse on a wooden floor is an important and responsible step. It is best to select a stove and how to install it before the foundation of the bathhouse is laid. After all, it is in this case that it will be possible to design rooms of optimal dimensions, provide a place for storing firewood if the stove is solid fuel, or take care in advance to comply with the PUE if the unit is electric. Gas heaters are installed only by qualified craftsmen, and permission to install certified equipment is issued by Rostechnadzor. It is prohibited to independently manufacture and connect to the gas pipeline in “makeshift conditions”. But, if the bathhouse has already been built, and even the finishing work has been completed, it is possible to install a stove on a wooden floor, provided that a number of important nuances are observed.
Installing a sauna stove on a wooden floor
Specifications
According to physical properties, warm air masses rise upward, and even in a steam room, where it is hot, the floors are cold. But such a dissonance between the heat from above and the cold from below makes bathing procedures uncomfortable.
Modern technologies make it possible to improve the microclimate in the bathhouse by installing different types of heated floors under the floor covering:
cable - are a heating cable laid under the finishing coating, powered by electric current;
infrared - a film with infrared plates inside that heat up when energy is supplied, the simplest structure in terms of self-installation;
water - a pipeline located under the floor in the bathhouse, the coolant is heated water.
However, the bathhouse has high humidity, so many building owners do not risk installing electric heated floors themselves.
In this regard, water heated floors are considered more popular. After all, the bathhouse is equipped with a stove, and it is possible to heat the coolant from it, so this combination is also economically profitable.
Load on wooden floor
The maximum load on a wooden floor depends on the cross-section of the beams and their pitch. The larger the cross-section and the smaller the pitch, respectively, the greater the load the floor will withstand without any deformation. If under the wooden flooring instead of beams there are inch boards placed on the edge, and their pitch is about 60 cm or more, then in the steam room you will have to be content with a miniature electric heater weighing 10-12 kg. Therefore, the first step before installing a stove is its correct selection, taking into account the permissible load on the floor.
What do you need to know?
First you need to decide on the fuel that will be used and, therefore, on the type of boiler. It is not advisable to make electric and gas appliances yourself, but if the choice was made in favor of one of them, then it is better to buy a ready-made high-quality boiler. Otherwise, the risk of emergency situations will increase.
We invite you to familiarize yourself with: How to treat a log bathhouse outside and inside, how to cover logs, processing, what to process, photos and videos
Solid fuel boiler for baths, diagram
It is also worth noting that an installed gas boiler must be inspected by a representative of the relevant authorities. Therefore, it is much easier to assemble and install a solid fuel unit.
Types and weight of sauna stoves
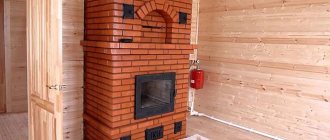
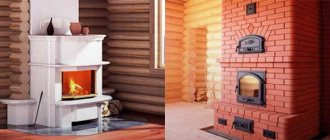
The largest and most massive stoves are brick . Their weight can reach several hundred kilograms. They are distinguished by excellent heat capacity and durability; it is possible to install a large tank for heating water and install a beautiful fireplace in the dressing room. For decorative purposes, such stoves are finished with natural stone: coils, marble, granite, soapstone, flagstone, heat-resistant tiles, etc. However, even without special finishing, neatly embroidered brickwork looks presentable.
Brick heater
A separate monolithic reinforced foundation is built for brick stoves, not connected to the base of the bathhouse. It is not always advisable to build a brick stove in a ready-made bathhouse; you will have to dismantle the floor, ceiling and roof, as well as, possibly, the partition between the steam room and the room next to it, which is associated with significant financial costs. The optimal alternative to a classic brick stove is a thick-walled metal stove with cladding.
One of the foundation options for a brick kiln is columnar
A cast-iron sauna stove itself weighs a lot, and if you add a water tank, a heat exchanger, a lot of stones, cladding, the total load can become critical for the wooden floor. Therefore, we recommend that you plan in advance to purchase a cast iron unit, if necessary, strengthening the floors under the stove installation site.
Cast iron sauna stove "Sibir-24"
On a note! The entire heating unit or just the firebox can be made of cast iron. Some stove models have a steel heater. Fully cast iron products weigh more than steel and composite ones.
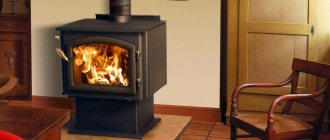
Steel solid fuel
Steel solid fuel sauna stoves cannot boast of such wall thickness as their cast iron counterparts. If we compare cast iron and steel stoves, the latter cool faster and are prone to burning out, the radiation from them is not so soft, but such units are cheaper, weigh less, and the range of models is very wide.
Steel solid fuel sauna stoves with lining
Electrical
The most compact ovens are electric . They operate on 220 and 380 V, saving owners from the need to prepare and store firewood, clean the chimney and other “dirty work”. High-quality electric heaters are compact, do not fail when exposed to moisture, and are equipped with an overheating protection system, a steam generator and temperature sensors. The stoves are selected according to the size of the steam room (the larger the volume of the room, the more powerful the unit should be purchased). On average, the equipment weighs 10-28 kg; from 20 to 75 kg of stones can fit inside, depending on the design and dimensions of the furnace.
Electric sauna stove
Setting up a chimney
You need to understand how to build a chimney so that carbon monoxide does not enter the steam room.
The furnace pipeline gets very hot and can cause a fire, so the place is prepared especially carefully:
- make markings in the ceiling and cut a window measuring at least 50x50 cm;
- install a passage unit with mineralite into it with a hole equal to the diameter of the pipe + 3-5 mm;
- secure the polyurethane foam with special fasteners and attach it to the ceiling;
- insert a pipe into the protective box and cover it with kaolin wool to a depth of 5-7 cm, no more, so as not to create the opposite effect of overheating;
- After completing the work, use a stainless steel protective screen to increase fire safety, as well as for decorative purposes.
Advice: no matter how well the installation is done, you need to know how to properly ventilate the bathhouse, otherwise the balance of air exchange will be disrupted.
Below is a link to a video where you can learn more about this system:
Mounting tank assembly
This mandatory element can be attached as follows:
- fixed on the side wall of the stove;
- placed on top of a single-wall chimney;
- at the end, the heat exchanger is connected to the tank for uniform circulation of liquid.
You can study the issue in more detail and visually examine the process in the video:
TOP 3 popular models of wood-burning cast iron sauna stoves
Hephaestus PB-04 MS
A modern stove made of alloy cast iron (a firebox made of cast iron with the addition of chrome), which harmoniously fits into the interior of a Russian steam bath. Decorated with forging elements. Through the door with heat-resistant glass, the live flame is clearly visible. Stainless steel ash box.
High efficiency (up to 87%), energy efficiency (active afterburning of pyrolysis gases), quick heating of a steam room with a volume of up to 15 m³. The firebox is remote. The thickness of the elements is up to 40 mm.
The stove weighs 130 kg. The heater can hold up to 180 kg of stones. Product dimensions 39.4 x 56 x 64.5 cm.
Vesuvius Legend Forging 16 (271)
A sauna stove made of a special cast iron alloy “Vesuvius Legend” is suitable for steam rooms with a volume of 8 to 18 m³. Wall thickness 12 mm. It has a combustion tunnel with a length of 250 mm (filling firewood is implied from the adjacent room). The door is cast iron, without glass. Convection-ventilated steel casing. Furnace efficiency up to 80%. It warms up the steam room quickly and gently, the steam from the stove is finely dispersed, light and pleasant.
“Vesuvius Legend Forging 16 (271)”
Product dimensions 70x56x69 cm. The weight of the unit itself is 98 kg and the stones additionally up to 120-160 kg.
NMK Sibir-18
The Siberia cast iron sauna stove (grade SCh-15) with a panoramic door is designed for steam rooms with a volume of 12 - 18 m³. It features a spacious firebox, is visually aesthetic and ergonomic. Wall thickness 10 mm. Flame stopper made of steel, thickness 6 mm.
Suitable for use in commercial baths and saunas. Loading firewood from an adjacent room.
The dimensions of the stove are 72 x 72 x 43 cm. The weight of the stove is 104 kg, stones - up to 80 kg.
* Heat exchanger tanks for water are purchased and installed separately. The volume of tanks varies, from 6 to 85 liters or more. When calculating the load on the floor, it is worth taking into account the weight of the metal (10-15 kg on average, indicated in the product passport) and the water being poured.
Selecting a water tank
TOP 3 popular models of wood-burning steel stoves
Varvara Terma-kamenka
Finnish steel wood-burning stove with a closed heater and a panoramic combustion door. Suitable for Russian baths, as well as saunas. You will have to add firewood from the dressing room, a unit with an external firebox. Water tank included.
The heated volume of the steam room is from 6 to 13 m³. The dimensions of the device are 39 x 71 x 65 cm. The stove itself weighs only 50 kg, plus stones - up to 30 kg.
Teplodar Rus 18 L
Another stove that is heated from the adjacent room. Among the advantages are an effective heat exchange scheme and ergonomic design. Open type heater, remote firebox.
“Teplodar Rus 18 L”
A distinctive feature is that the stove can be converted from wood to gas (the burner is purchased separately and installed without welding).
Suitable for a spacious steam room with a volume of up to 18 m³. The stove itself weighs 41 kg, and up to 90 kg of stones can be placed in the mesh. Unit dimensions 81 x 79 x 33.5 cm.
Harvia M3 SL
One of the heaviest steel stoves. Outside there is a mesh casing for laying stones, and there is also a closed heater. The firebox is remote, the door is panoramic with the “clean glass” system. There are also modifications of the oven with a blank door (without glass).
A powerful stove for a spacious steam room with a volume of up to 24 m³. The unit itself weighs as much as 170 kg, stones up to 250 kg.
Design Features
The main feature of the design of a furnace with a remote firebox is the independence and autonomy of the latter from all other elements. The remote combustion channel is welded to the main structure if it is light, or removable if it is heavy. Thus, the firebox with the door is located through the wall in the adjacent room. It is usually made in a rectangular or square shape; it is slightly wider at the place where the door is attached. There are models in which the external channel is located not in the next room, but on the street. This option is not very common, it is found mainly in commercial saunas, where one person looks after the firebox without the need to enter the sauna room itself. This model of heater can be made of metal or brick, but more often there is a combined option - a metal body lined with brick.
Calculation of the load on a wooden floor
Will the wooden floor withstand a brand new stove complete with stones, tanks, cladding, etc.? And given that the floor will be used in conditions of temperature changes and high humidity, it is worth taking this issue seriously.
- measuring the distance between load-bearing walls;
- load calculation;
- calculation of the optimal section and pitch of beams.
If the span length (distance between load-bearing walls) is less than 5 meters, the use of beams made of solid coniferous or hardwood is allowed. If the span is more than 5 meters, it is desirable that glued beams be used (they can withstand increased loads).
Beams are used of square, rectangular, and also I-beams (a profile combining elements made of solid wood and plywood or OSB). For a rectangular section, the optimal ratio is 1 to 1.4 (for example, 100 x 140, 200 x 280 mm). The rigidity of the beams is taken to be no more than 1 to 350 (the ratio of the deflection to the length of the beam). Recommended thickness of flooring boards is 50 mm.
Table for determining the minimum permissible cross-section at a step of 1 m
Accurate data on the relationship between beam pitch and section can be obtained using a calculator.
The recommended cross-section of beams, provided that the stove, together with the cladding, stones and other structural elements, weighs less than four hundred kilograms.
If the calculated load corresponds to the actual cross-section of the beams, you can proceed to installing the furnace. If the load is critical, it is advisable to either strengthen the beams or choose a different stove for the sauna (with less weight).
Increasing the cross-sectional area of a beam
Installing a stove in a bathhouse on a wooden floor step by step
Metal wood-burning sauna stoves are installed in accordance with fire safety rules, as well as for the convenience of steam room visitors.
Furnace installation diagram
Fire safety requirements
Depending on the location of the firebox door, there are three possible options for installing the stove.
- The stove has a remote firebox; fuel is loaded from the street. An acceptable option for small baths. It is inconvenient because you will have to reload firewood and control traction while leaving the bathhouse, which is not always appropriate or convenient. In addition, it is not always possible to dismantle part of the outer wall.
Loading firewood into a sauna stove from the street
The firebox opens into the rest room
When choosing a place to install the stove, you should be guided by a number of rules (SNiP II-L.13-62, SNiP 41−01−2003, SNiP 2.04.05-91 section “Stove heating”).
- The distance between the closed firebox door and the bathhouse wall is from 150 cm. The distance from the other sides of the stove to walls made of combustible materials is at least 100 cm, or at least 70 cm to walls protected by a metal sheet for thermal insulation or brickwork 12 cm thick. Thermal insulation height - more than 120 cm.
- If it is not possible to maintain the distances prescribed in paragraph 1, then it is necessary to install a protective screen (dismantle part of the partition and replace it with brickwork) 25 cm thick and 120 cm high.
- If the stove is mounted together with heat-insulating panels, the recommended distance between the walls of the device and the surface of the panel is at least 50 cm. And at least 50 cm should be between the panel and the wall or partition of the bathhouse.
- The distance between the top of the stove and the unprotected ceiling is at least 120 cm.
Fireproof distances from walls to stove
Fire safety when using stoves
Stage 1. Arranging a fireproof base for a wood-burning stove
It is recommended to lay out a brick platform as a base, the size of which exceeds the dimensions of the stove by 150-250 cm in all directions. On top of the brick, it is necessary to either pour a screed made of branded cement mortar, or lay a steel sheet 1 mm thick.
Kamenki
Heaters with a separate steam room create an ideal microclimate for visitors. Therefore, maximum attention is paid to the construction of the heater.
She must be:
- productive;
- safe;
- compact.
The rules for arranging a heater imply the mandatory presence of:
- metal bases;
- guides for cutting the steam flow.
Bath stones are usually laid on a waterproof base.
Heater stoves are a type of permanent firebox. Unlike other types of stoves, stone filling accumulates heat better, as it acts as a kind of evaporator. Liquid is poured onto the surface of the stones, which, under the influence of heat, turns into bath steam.
Moreover, if a waterproof stove is installed above the firebox, steam can be obtained during the burning of wood and it will not be extinguished by water. If the heater is located in a simple frame, steam can only be obtained after complete combustion of the fuel.
The temperature of the stones in the first placement option can reach up to 600 degrees, and in the second placement option up to 300-350 degrees. It is believed that with optimal placement of stones, soft steam should not cause burns or make breathing difficult.
Where is the best place to place the oven?
The correct layout of the bath will make it more comfortable. This applies to both the design of the room and the placement of the necessary elements inside the building, for example, a stove. The distribution of hot air inside the building, the creation of a comfortable microclimate and the safety of visitors depend on the location of the latter.
Depending on the oven model
The location of the heater depends on the type of sauna stove chosen:
- An electric heater is a continuous stove. Easy to use option. It does not require firewood, just plug the device into the power supply and you can steam. The equipment provides a choice of temperature conditions; there is no need to constantly add firewood. It can be installed anywhere in the bathhouse.
- A regular heater is a variable oven. Heated by wood. Operation requires compliance with fire safety rules, as it has a chamber with an open flame. Its location should be planned during construction. Often the structure requires a separate foundation due to its significant weight.
Electric heaters are usually used in small baths. Variable stoves are installed in spacious buildings designed for simultaneous recreation of a group of people up to 5 people.
Popular locations of the stove in the bathhouse
Let's consider how to properly install a stove in a wooden bathhouse, possible options for installing the structure:
- In the center of the steam room. Mounted in the middle of the washing room on a small separate foundation. The firebox door should face towards the dressing room, if one is provided in the building, or towards the entrance door from the street, if there is none. This arrangement will create a favorable microclimate in the room.
- Next to the internal main wall in the corner or at the entrance door. This location option is the most common. It is convenient because it can be used for buildings of any size; fuel does not need to be carried far to the bathhouse. The structure is placed so that it transfers heat to all surfaces. They are mounted along the inner wall. If the installation is carried out next to the outdoor one, then the heat will be spent not on heating the bathhouse, but on heating the street.
- Between the steam room and the dressing room. A special opening is constructed between the zones into which the stove is installed. The area occupied by the unit is usually only 0.15 square meters.
- The most convenient option involves having a separate room for installing a heating device. This arrangement is only possible in large rooms. From a fire safety point of view, this is the best option.
Additionally: wood treatment with impregnations
Fire regulations require that wood be treated with special impregnations that reduce its flammability. However, we know very well that impregnation in a bathhouse is not particularly desirable, because at a high temperature inside the steam room, all the chemicals begin to be released into the air and poison a person. That's not why we go to the bathhouse.
And yet, not all rooms experience such a temperature load as a steam room, so it would be reasonable to treat at least them with fire retardants, as well as the attic, especially since a considerable proportion of fires occur due to sparks flying from the chimney (here Also install a spark arrester or a deflector with it).
IMPORTANT! You won’t be able to soak wood once and forget about it. Impregnation is resumed after checking: if a sliver catches the flame from a match, then it’s time to renew. The average frequency is once every two years.
The composition should be applied in two or three layers at least 6 hours to dry between stages . Yes, and pay attention to the presence of pigments to indicate impregnation if you do not want the wood to become, for example, a bright pink color. (That is, the color is not from chemicals, it is added specifically to distinguish treated wood from untreated wood.)
***
So, now that you have an idea of how to install a stove correctly, it’s time to put your acquired knowledge into practice. Write comments, we are interested in your opinion about what you read.
If you have not yet decided on the type of stove you need, then you should familiarize yourself with the characteristics and models of different types: gas, wood, electric. The variety of types of designs, sizes and prices provides the widest selection of stoves for baths and saunas. And which one is better, everyone has the opportunity to decide for themselves.
Floor installation
When designing a device for the floor, you need to know its weight, based on which you can calculate the strength of the floors. Matching the weight of the structure and the rigidity of the installation area will prevent the floor from breaking. There are special online services that allow you to make such a calculation. All you need is accurate information about the cross-section and size of beams and joists.
Using approximate load values, we will consider options for constructing a floor covering on which the heating device will subsequently be installed.
The stove with base plate and all structural elements weighing no more than 700 kg can be installed on a wooden floor with support beams. More massive structures require additional construction of a foundation - a foundation for installation.
The following dimensions are observed when constructing a wooden base.
Step between joists 60 cm
Step between joists 1 meter
A 50 mm thick floorboard is placed on top of the log. All wooden parts of the floor structure are ideally treated with fire-retardant impregnation.
How to pour a foundation for a stove in a bathhouse?
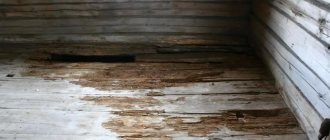
If the stove weighs more than 700 kg, it places a serious load on the wooden floor structure. Without a foundation, over time the floor and stove will deform. Therefore, when building a foundation for a bathhouse, you need to pour it under the heating unit. It is better to entrust the construction of bathhouses, country houses and garden houses to professionals.
The foundation for a stove in a bathhouse without a foundation, the floor in the bathhouse deforms over time
Concrete foundations must be at the same depth, below the soil freezing level. A distance of at least 5 cm must be provided between them. This guarantees the integrity of one of them if the second begins to collapse under the influence of soil deformation.
Technology for creating a base for a metal structure:
- A pit is dug 50 cm deep. Its width and length should be slightly larger than the dimensions of the base of the metal furnace (by 10-15 cm).
- The bottom is filled 30 cm from the ground with crushed stone.
- A cement-sand mortar 1:4 is prepared.
- A mixture of several centimeters (5-10) is poured on top of the crushed stone.
- The frozen layer is waterproofed with roofing felt.
- Knead the solution with proportions 1:2.5:4 (cement, sand, gravel).
- The mixture is poured onto the remaining part of the foundation.
- The building level is used to check horizontal evenness. If there is a flaw, it is smoothed out until the solution hardens.
- The foundation is constructed 30-40 cm below the floor. If the stove is installed at floor level, then brickwork with a height of 3-4 bricks is carried out over the entire area of the foundation.
Construction of a foundation for a brick kiln is a more labor-intensive process, since it must withstand loads 4 times greater. Stages of its construction:
- A pit is dug, the depth of which is at least 70 cm, and the width is 20 cm larger than the dimensions of the future furnace.
- The bottom is lined with sand 15 cm thick, spilled with water and compacted.
- The next layer is rubble material (broken bricks and stones).
- Sand is poured onto the second layer so that all the holes between the stones are covered with it, and the sand itself covers the rubble by 2-3 cm.
- This is followed by a layer of crushed stone 10 cm thick. All layers are carefully compacted.
- The next stage is the installation of wooden formwork, rising 15 cm above the ground and corresponding to the size of the oven.
- Steel rods with a diameter of 12 mm (screed) are laid inside.
- Concrete mortar is poured over the screed to the edges of the formwork.
- After the foundation hardens, the wooden formwork is knocked down. The walls of the concrete structure are coated with tar 3 times.
No ventilation anywhere
An air recirculation system must be installed in the bathhouse before installing the stove. Clean air masses should always enter the room through a channel that is arranged below floor level. It will be considered the input of the ventilation system. If the stove model includes legs, then the ventilation entrance is cut right under them. Channel size, standard – 100 sq. cm. It must be closed with a special grill.
The channel through which the air masses will escape must be located in the place furthest from the heating device, under the ceiling. Its cross-section should be the same as that of the inlet channel. It should also be equipped with a closed grille. It's best if they have valves.
Arranging the area around the stove in the bathhouse
During combustion, the stove sometimes heats up to 400 C. The heat is distributed throughout the room, and primarily affects the walls located next to the structure. To protect a nearby wooden wall from overheating, they construct protective screens or cover it with non-combustible materials.
The need for protective installations when installing a heating unit in a wooden bathhouse arises primarily if the distance from the walls to the side surface of a brick stove is less than 32 cm, and a metal stove is 1 m.
The following thermal insulation methods are used:
- Installation of protective steel or cast iron screens purchased in the store. The product is equipped with special holes for mounting to the wall, so it is not difficult to use. The structure will reduce the temperature by 80-100 C. It is installed around the stove, at a distance of 1-5 cm from the side walls.
- Construction of a brick screen. It can cover all side surfaces of the structure or be located only between the potential flammable surface and the heat source. The masonry is made from solid bricks on clay or cement. The laying thickness is at least 60 cm (a quarter of a brick); if the owner does not experience a shortage of material, they make a laying of 120 cm (half a brick). The screen is raised above the stove by 20 cm. The distance from the heat source to the screen is maintained at 5-15 cm. The same distance is acceptable from the masonry to the wall.
- Reflective trims. Installed in combination with thermal insulation materials (basalt wool or cardboard, asbestos cardboard, mineralite). First, thermal insulation is attached to the wall, and a stainless steel sheet is placed on top of it. In order for the reflection of thermal rays to be ideal, the metal sheet must have a mirror surface. Fastening is carried out on ceramic bushings. They do not heat up and provide ventilation between the wall and the insulation.
The listed methods will protect the wall located nearby from the heat generated by the stove installed both in the steam room of a wooden bathhouse and in the dressing room.
What rules must be followed during work and operation?
Ventilation outlet for metal tiles, what are these elements for, and how to install them.
If you need to install a structure in a structure made of wood, it is important to know certain rules and requirements that will allow you to obtain an element that is safe:
if metal is used, it is important to consider that it heats up quickly and strongly, so it is best to cover it with brick; when using cast iron, it is important to remember that it retains heat for a long time, so it is best to position the stove in such a way that after the combustion stops, its walls are located in an open place; the legs of the potbelly stove, as well as the other elements, quickly and significantly heat up, so they must be located on a surface that is resistant to high temperatures; It is prohibited to install on linoleum or laminate, parquet or plastic, as well as carpet, and suitable floor coverings are ceramic tiles or concrete, brickwork or tin; the distance between the wooden walls and the potbelly stove should be more than one meter; in one room the chimney pipe should be without sections, and if they are still present, then the connections should be strong and reliable; in the place where the pipe goes outside, there must be a thermal barrier, which can be made of brick, concrete or ceramics; Fuel tanks should be located away from the door to prevent sparks from entering them, which could lead to a fire; You cannot load more than three kilograms of fuel into the stove; when the potbelly stove is working, its door should be tightly and very well closed; the ash drawer should be thoroughly and regularly cleaned of ash; do not touch the walls or other structural elements during its use, as they become very hot; the chimney pipe must always be in good working order and clean, otherwise it is prohibited to use the stove.
Thus, in a wooden structure it is allowed to use traditional types of stoves, which can have different shapes, sizes and other characteristics, but it is important to use only suitable elements, and also remember about fire safety rules.
It is best to watch training videos during installation so as not to violate any basic rules and requirements. In this case, you can get the ideal stove for any structure.
How to properly install a metal stove in a wooden bathhouse?
Ready-made heating units are much easier to install than building a brick oven. Therefore, metal stoves are the priority choice of equipment for a bathhouse. It warms up quickly and is easy to use.
Furnace installation
Installing a stove in a bathhouse on a wooden floor requires the installation of a floor base that can prevent the wood from catching fire. A set of works is being carried out step by step:
- Marking. At the location where the heat source is mounted, a rectangle with a size identical to the base of the structure is drawn on the floor. On the side of the firebox, 50 cm is added to it, and on the remaining three sides, 10 cm.
- A heat-resistant plate is being prepared. Its dimensions correspond to the figure drawn on the wooden floor; fire-resistant material is chosen for production.
- Attach the above element to the floor with self-tapping screws.
- A brick pedestal is erected on top of the slab, on which the stove will be installed. To do this, solid or fireclay red bricks are pre-soaked in water. A platform is laid out of them in one layer. In the work, use a heat-resistant mortar for masonry and check its horizontalness with a level.
- To give the masonry an aesthetic appearance, ceramic or porcelain tiles are laid on top of it.
The structure needs to dry for 1-2 days, after which it can be used for its intended purpose.
Chimney installation
Erroneous installation of a chimney is not uncommon in practice. The result of an oversight may be the ignition of the ceiling. The main causes of fire are: overheating of the pipe, incorrect distance between the pipe and the ceiling, emission of sparks into the cracks of the chimney.
Incorrect installation of the chimney can cause the ceiling to catch fire
Installation of the pipe in accordance with all fire safety regulations consists of the following steps:
- To install a cutting box, a square is cut out in the ceiling (if the hole was not planned during the construction of the building).
- The pre-prepared box is a tin rectangle, sheathed on top and bottom with stainless steel with a hole for the pipe.
- The chimney originates in the pipe coming out of the stove. If the diameter of the main pipe is larger, it is connected to the pipe by an adapter. Then a gate is mounted on it. An adapter is taken from the main pipe and installed on the sandwich chimney. The connection must go through the hole in the ceiling. It is very important.
- The pipe is led out through a hole in the duct and roof to the street.
- The voids between the chimney and the duct are sealed with expanded clay, mineral wool or sand.
- On the street side, the area next to the pipe is coated with sealant. The fastening is done with self-tapping screws at intervals of 5 cm. The work on installing the pipe is now complete, all that remains is to install a deflector or umbrella on top.
Mounting a mounted tank
The mounted tank is mounted as follows:
- the location of the tank should be chosen so that it is located above the furnace;
- It is better to install the tank in a wooden bath on a lathing made of slats, and not directly to the wall;
- fastening is carried out from above and below onto brackets;
- the container must have 3 or 4 pipes (two for communication with the heat exchanger, the rest for supplying water);
- one of the pipes is used to fill the container with cold water (it must have a non-return safety valve);
- connection to the heat exchanger is made using corrugated steel or copper tubes, they are attached to fittings;
- one of the pipes must have a tap to completely drain the water;
- the heat exchanger fittings are connected to the tank tubes with fittings;
- if necessary, the fastening points are reinforced with clamps or sealant;
Often, bathhouse owners do not show much wisdom and make everything much simpler, and this also works.