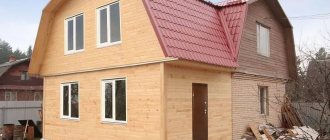
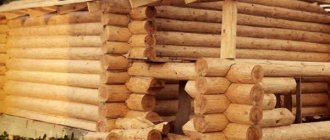
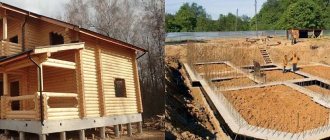
The history of wooden house construction dates back thousands of years. Warm, breathable and lightweight wood has always been valued for its qualities. Despite the emergence of new materials and technologies, it is traditionally considered the best for the construction of residential buildings. The log house is laid out from horizontal crowns connected to each other by cut or sawn locks. The main task during construction is to ensure a tight fit of all elements. Cold corners are not an uncommon problem in wooden buildings. Uninsulated gaps serve as a direct channel for heat loss. The connection point for the corner beams must ensure isolation of the premises from the environment. This type of design is called a “warm corner”. It is performed in several ways. The assembly is installed using locks of various shapes, with a small number of additional fastening parts.
Warm corner connection Source leto-dom.com
Timber in construction
The log house is constructed from profiled or laminated timber. The first type is made from solid wood without destroying the structure and using adhesives. The outer side is processed in the form of a flat or convex surface, with or without a chamfer. The inner one is usually flat, ready for finishing. The supporting edges have a tongue-and-groove system, thanks to which the elements are firmly joined. The profiled material is easy to use, the cross-section has standard dimensions. During construction, wooden beams do not need to be adjusted.
Solid profiled timber Source el.decorexpro.com
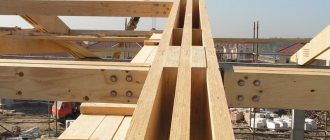
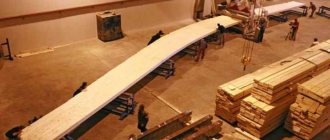
Glued laminated timber, unlike solid profiled timber, consists of glued thin lamellas. To make joints in the factory, grooves are selected and holes are drilled. At the construction site, all that remains is to assemble the finished links, like a constructor.
Laminated timber Source bg.decorexpro.com
Houses made of wooden profiles have advantages over brick or concrete ones:
- They are quickly erected and do not require “wet” work for mixing mortar or concrete.
- Lightweight, they do not require powerful buried foundations; a shallow reinforced concrete strip foundation or a “floating” slab is sufficient.
- Warm, the thermal conductivity coefficient of wood is 0.09 W/m°s, which is comparable to the characteristics of basalt wool.
- Beautifully constructed wooden buildings look harmonious against the backdrop of greenery and nature, and do not require additional finishing with siding, decorative panels, or plaster.
- A favorable indoor microclimate is ensured by the high vapor permeability of wood; in such a house, optimal air humidity is maintained.
- A high-quality log house is strong, stable and durable; its service life is not inferior to structures made of stone.
The warm corner is the area of the most technologically complex units. Due to the nature of wood, joints at the intersections of elements dry out, swell and warp, and are subject to multidirectional stresses and the formation of gaps. Correct pairing is the key to ensuring that, over time, no through cracks will appear from where the wind will blow and dampness will penetrate. Classification, types of structures and recommendations for calculating the dimensions of corner joints are given by GOST 30974-2002.
See also: Catalog of companies that specialize in the design and construction of country houses made of turnkey timber.
Warm corner
Now the same thing, but about warm corner technology. The knot is a connection without any residue, in which a tenon is made at the end of one beam, and a counter groove is made at the end of the other. To strengthen the corner joint, a dowel can additionally be used.
The following can be said about warm coal:
- It is not the easiest to manufacture, as it requires high precision.
- Material consumption is minimal.
- Most people like the look of the finished assembly, since the corners are even, and you shouldn’t ask for more from them in terms of visual perception.
- The most significant advantage of a warm corner is its high energy efficiency, that is, the absence of cold bridges, tightness, and minimal heat loss.
- Since the corners are outside without any residue, there will be no problems with finishing and insulation if such a need arises.
As a result, it turns out that the “warm corner” corner cutting technology has become widespread for a reason. Against the backdrop of numerous advantages, this method has only one significant disadvantage - its implementation requires experience.
Types of connections
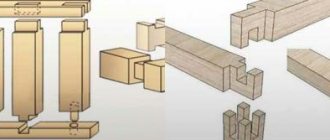
Every builder should know what a warm corner is when building a house from timber. The design documentation contains the necessary information on the designs and dimensions of corner joints. They are made in the form of grooves and protrusions of various shapes. Two, three or four elements are connected to each other and form a solid foundation for laying the next crown.
The design solution of the node can be in the form:
- connections without residue, when the elements do not cross the boundaries of the joint;
- with the remainder - the timber, passing through the knot, comes out;
- end-to-end - elements are adjacent and fastened with brackets, dowels, overlays;
- T-shaped - connecting the wall and the pier.
Grooves in wooden profiles are selected using a chainsaw, jigsaw, or manual cup cutter.
T-shaped connections Source skalice.ru
The requirements for connecting links are:
- Ease of execution.
- Strength.
- Minimal heat loss.
In the construction of wooden houses, the following types of corner joints are used:
- into a “cup”;
- in the “paw”;
- on rectangular keys;
- on dovetail dovetails;
- with a root spine;
- in “oblo” - with one-, two- or four-sided locking groove;
- open or closed “frying pan” - a trapezoidal symmetrical spike;
- an open or blind “half-frying pan” - a rectangular spike.
Methods for connecting timber Source plotnikon.ru
The necessary thermal insulation of the joint is achieved not only by the design of the joint, but also by the use of insulation:
- elastomeric and polymer tape materials;
- tow;
- moss;
- jute;
- flax fiber;
- foam or silicone sealants.
They are placed in the recesses of profiled beams, grooves of locks, seams between the crowns.
Wood for building a house must be well dried and have a moisture content of no more than 20%. This is the main condition for the strength and reliability of the structure. After preparing the elements, they are treated with an antiseptic so that all cuts receive a protective coating.
Half swallowtail
With this connection, the tenon is sawed down into a cone. The characteristics of the half dovetail connection do not differ from the knot described earlier. But the strength indicator increases. The conical cut securely holds the beams and prevents them from moving apart. This connection is used in the construction of walls with a length greater than the length of the beam.
There is no difference in the complexity of manufacturing when joining a half dovetail and a straight tenon. Both methods are performed with or without a template. For an experienced professional, the difference in the labor intensity of making these joints is almost imperceptible.
The half dovetail tenon should not be more than 5cm at its widest point. Otherwise, a crack will appear in the timber with the groove. This happens due to uneven shrinkage. The picture shows this place.
If the half dovetail spike is more than 5 cm
Connecting timber into a warm corner - advantages and disadvantages
The main advantage of this method of chopping a house is the absence of blown and frozen cracks. There is no need for additional insulation of the facade and further external finishing of the walls.
When assembling a house, the tenons and grooves of the connecting units are made manually. This is perhaps the only drawback of this type of construction.
Ready-made sets of laminated veneer lumber do not have this disadvantage. All elements are pre-processed for convenient installation and assembly of units. The crowns are marked according to the working drawings. A house is erected at a construction site in a few days, using instructions with a developed diagram.
A house made of timber with the corners connected to the rest Source 2gis.ru
There are not many disadvantages to this technology, but they do exist:
The technology requires a high level of production - the “warm corner” lock must be manufactured with minimal tolerances, this guarantees good thermal insulation of the house. When building a house, it is necessary to maintain the geometry of the corner joint; its violation is possible when the timber is settled. This requires skill and experience from the craftsmen. After construction is completed, the corners of the building require decorative cladding, with insulation, to close the gaps. When manually manufacturing all connection elements on site, the cost of work increases and assembly time is extended.
To the point:
Project development
Drawing up a diagram of a log house requires careful and accurate calculations.
It is quite possible to draw a project with your own hands. Creating a plan consists of several steps, which include their own nuances:
1
Determining the size of the house and its diagram itself
At this stage, it is important to take into account the specific purpose of the premises and the functions that they will perform, as well as all the necessary systems (ventilation, heating, etc.). It is important that rooms with high humidity (kitchen, toilet, bathroom) are located next to each other.
2
Calculation of the quantity of materials. When calculating material consumption, you need to take into account the thickness of the tree, as well as its length. An ordinary beam is six meters long, so if the walls of the house are planned to be longer, it is joined along the length. Many construction companies create custom projects for log houses. When drawing up drawings, all rules are followed. A house built according to such schemes will be geometrically correct and earthquake-resistant. You can also find many photos on the Internet with examples of ready-made schemes for log houses.
How to properly build a log house from timber
To protect the gaps between the beams from water ingress, chamfer the upper edges, the size of which will be 10x10 mm. The corners of the log house should be connected using the tongue-and-groove method. It is possible to connect the timber with dowels and a main tenon, as shown in Fig. 4 in the form of a diagram. The corners of the initial crown can be connected using the half-tree method, and subsequent rows are fastened with dowels using root tenons. The main tools and materials for construction are:
- beam;
- saw;
- hammer;
- dowels;
- nails.
Figure 5. Different methods of fastening beams and logs.
There may be gaps between the crowns of the beams, so they should be lined with heat-insulating material using caulk. As a heat insulator, they use felt or tow, cut into strips, the width of which is 20 mm less than the width of the timber.
For better drainage of water from the seams running horizontally between the beams, chamfer with a width of 20 to 30 mm is removed. It is possible to reduce the degree of conductivity between the beams by using grooves and stuffing slats in the shape of a triangle.
Using dowels that have a rectangular or round shape, you can join the beams in a vertical position, as shown in Fig. 5. To disinfect all the bars that belong to the first crown, this is done by lubricating each of the bars on all sides. The ends of the beams are left without treatment with the composition.
You should cut curved beams with your own hands by creating small sections of them that fit into window openings and door openings. The oil-treated beams are laid on the base, fastening them with staples. The construction of cobblestone walls can be similar to the process of constructing log walls.
Cobblestone walls have seams that are located in the horizontal direction, which is the main difference between log cabins and log buildings.
You can protect log beams from biological effects on wood, as well as atmospheric influences, by sheathing the outside of timber walls with boards or facing bricks.
Plank wall cladding horizontally makes it easier to install the heat insulator. If the wall thickness is less than 150 mm, then additional heat insulators are used, and if the thickness is about 200 mm, then you can do without insulation.
Advantages of cutting a warm corner
The advantages of this assembly method are so significant that they are worth mentioning separately.
- The assembly of the walls is so strong and dense that there is absolutely no need for additional strengthening of the joints.
- Due to the absence of seeping moisture, mold, rot and mildew will not form in the house, the corners will remain warm even in the most severe frosts.
- A building fixed in this way is so strong that it is not at all afraid of ground movements, earthquakes and other force influences. This indicates the high reliability and durability of the structure.
- The house looks nice both outside and inside.
- The design of a warm corner of a timber house is carried out without any fasteners, which significantly reduces construction costs and allows the design to be simplified to the maximum.
- The construction of the house occurs quite quickly due to the fact that the grooves on the timber are prepared in advance, at the sawmill.
Types of corner fastening with remainder
There are the following methods of corner installation with remainder:
To make it clear, let's look at the options in more detail.
"To the brink"
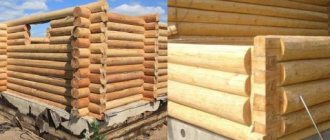
This type of installation involves the presence of two semicircular bowls (for logs). When assembling a log house from a log, this method is also called “in a bowl”. That is, symmetrical recesses are formed, the depth of which is ¼ of the section of the beam, and then the parts are connected according to the lock principle.
"Half a Tree"
Half-tree installation is the simplest type of fastening. It implies the presence of not only a bowl, but also a longitudinal groove filled with insulation - jute, moss or linen. The structure is reinforced with nails or staples. The structure is airtight.
"In the fat tail"
Installation “in the fat tail” presupposes the presence of a transverse recess, groove, mini-protrusions located inside the bowl-pothole, facilitating the construction of a reliable structure.
Loghouse installation technology
Lower junction to the foundation
After the material has been selected, purchased and delivered to the site, you can figure out how to build a log frame. And we will start work from the foundation - installation of the casing crown.
What do the instructions from experts in working with wood advise us to do?
Before laying the first crown of timber, it is necessary to perform high-quality waterproofing of the base. Whatever our foundation, we lay either two layers of roofing felt or a special waterproofing membrane on its upper surface.
- We lay a lining beam on top of the waterproofing layer around the perimeter of the entire base. To make this, this tree is characterized by maximum resistance to moisture.
- The thickness of the lining beam must be at least 100 mm, and the width must be at least no less than the width of the main wall beam.
- Sometimes a profiled beam is used as a lining, cut in such a way that it rests on the base not with the tenons of the castle, but with a plane. In this case, installation of an additional lining is not required, but the waterproofing properties of the structure will suffer somewhat.
- At the corners of the structure we connect wooden beams “in half a tree”. This allows you to achieve maximum joint strength.
We thoroughly impregnate the backing beam or the first profiled blank with an antiseptic agent (Tikkurila, Senezh, etc.). In principle, if finances allow, it will definitely not be possible before installation begins.
We lay a jute sealing tape on top of the timber. If you are choosing how to lay the timber, you should keep in mind that too thick material is just as ineffective as too thin: in both cases, the risk of blowing increases. For a flat beam, a tape thickness of 10 mm is sufficient, and for glued profiled timber – 5 mm.
To avoid displacement, we fix the jute on the beam using a construction stapler.
We attach brackets to the inside of the lower crown, on which we lay the floor joists. The lower plane of the logs should rest on foundation elements or special cranial bars.
In principle, logs can be embedded into the crown, but if we are talking about how to build a bathhouse from timber or build a house on relatively moist soils, then it is better to act according to the first option. This will make it easier to replace a rotten log with a new one.
Timber fastening technologies
After the first crown has been erected, you can begin laying the beams for the set of walls.
There are several nuances to consider:
In principle, high-quality dried glued laminated profiled timber can be mounted without any connecting elements at all, fastening it into a lock only at the corners (we will talk about corner connection technology a little later). But, nevertheless, to increase strength it is better to connect the workpieces.
- For connections, dowels are used - metal, wooden or plastic pins. It is best to use wooden walls, and even those with the same humidity as the wood itself.
- A hole for the dowel is drilled to connect no more than two beams: the upper beam is “stitched” through, and a nest of half its thickness is formed in the lower one.
- The diameter of the hole should be equal to the diameter of the dowel - so that the fastening element is driven into the wood with slight force by blows of the mallet.
Cutting corners
Corner connections of timber can be made in several ways.
Some of them provide for the protrusion of the workpiece beyond the plane of the wall (connection with the rest), others do not.
- The parts are connected to the rest by cutting out a recess in the workpiece - a bowl. A second beam is placed in this bowl, which can be either solid or with a corresponding cutout. The most popular connection schemes with the remainder are “into the bowl” and “into the bowl”.
- The most common technology for joining without residue is the “half-tree” joining. In this case, protrusions are formed at the ends of the beams, the thickness of which is equal to half the thickness of the parts being connected.
Another method of corner connection is the so-called “warm corner”. This technology involves cutting a vertical groove on the side surface of the beam, into which a corresponding sized tenon is inserted at the end of another element.
Windows and doors
Speaking about the construction of walls, do not forget about window and door openings:
- The openings themselves are either cut out in already laid walls, or are provided for in advance by the design (if we purchase the material as part of the so-called house kit).
- In order to maintain the shape of the openings during shrinkage, we cut special strips into their side surfaces - the so-called ribs.
- Above window and door frames, we must leave a shrinkage gap of at least 50 mm.
