The 21st century has arrived a long time ago, and wooden houses do not even think of going out of fashion. More precisely, it’s difficult to call it fashion. Rather, common sense, coupled with a subtle sense of taste, because what other natural material so organically combines environmental safety, reliability and home comfort? True, you won’t be able to escape from the interior decoration (read about how to insulate walls with polystyrene foam from the outside). This is an important component of any construction, and people often have a question: what can inexpensively and beautifully cover the inside of the walls with? Moreover, not every material is suitable for use in a wooden house. We have selected 6 excellent options for you that will definitely help you overcome your doubts and achieve optimal interior design.
- Lining;
- Drywall;
- Cork;
- Decorative rock;
- Plastic;
- Ceramic tile;
- Conclusion.
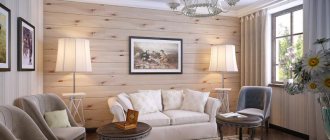
Lining
- wide selection of shades and textures;
- sound insulation and thermal insulation;
- environmental Safety;
- pleasant appearance;
- basic installation.
It seems that we started with a finishing material that does not need additional recommendations. And indeed: in any building materials store you can find several dozen texture variations. As they say, pick it up - I don’t want it. However, it would not be amiss to recall some criteria by which the choice will definitely be correct:
- pay attention to the wooden lining
- it is this that brings tangible notes of unique home comfort into the atmosphere and exudes a characteristic pleasant aroma; - the specification of the material should be marked “for interior decoration”
- an important point, since some types of wooden lining are intended exclusively for facade work; - find out the type of wood used before purchasing
- such information is always relevant, since different types of wood behave differently in conditions of high humidity, focus on lining options made of linden, alder, oak if you are planning finishing in a bathroom, bathhouse or kitchen; - The so-called eurolining is also on sale
- this finishing material has improved characteristics, is well ventilated and is practically not subject to swelling even in conditions of constant high humidity, it is more expensive, but it has an impressive appearance and an impressive long service life.
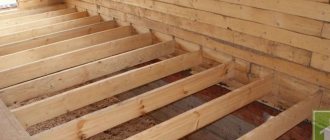
- a frame is assembled from metal profiles or wooden slats;
- sheets of lining are attached to it with clamps or, in the old fashioned way, with nails.
And in this article you can familiarize yourself with step-by-step instructions for installing lining.
How to insulate walls in a dacha before finishing
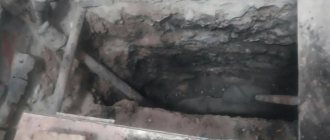
Many people ask the question: why is it necessary to insulate the walls of a dacha from the inside? Firstly, this will make the dacha more comfortable, since even in summer the weather is not always pleasant with sun and heat. Secondly, high-quality thermal insulation allows you to significantly save on heating costs. There are many options for thermal insulation for a summer house, let's focus on one of the popular ones - foam insulation.
To rough-finish the walls in your dacha with polystyrene foam you will need:
|
The technology of work is relatively simple and can be performed even by a non-professional. Do-it-yourself decoration of the walls at the dacha inside is done in the following order:
- Check the evenness of the walls with a level and prime the surface.
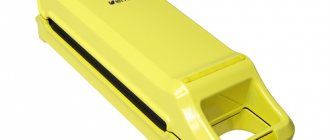
- Apply special glue to the foam using a notched spatula. Next, the polymer slab is pressed against the wall, and alignment is performed using construction markers and a level.
- After waiting until the glue has completely dried, the foam is additionally fixed. To do this, use a hammer drill to drill holes through the foam. Then the sheets are attached plas.
- To align and secure the corners, use aluminum corners.
- At the top of the wall, a reinforcing mesh is fixed to nails, glue is applied to it with a spatula and the entire wall is reinforced.
- For finishing priming, facade primer is used, and the finishing of the walls is made of marble chips, finishing plaster, tiles or paint.
- Insulation of walls in a dacha must be done with high quality - this will allow you to significantly save on energy resources, be it electricity, firewood, gas or something else.
It is easy to understand that, due to the technological features of a country house, the lion's share of heat loss falls on the walls - this figure is almost 40%. When choosing a material for thermal insulation, consider the following characteristics:
- environmental friendliness;
- reliability.
To insulate the inside of a house, the material must be as safe and non-toxic as possible. Heat insulators made from basalt are well suited for brick walls. They can be in rolls or in the form of slabs. Expanded polystyrene materials belong to the “economy” price category.
You can also use tile or rolled mineral wool for thermal insulation. A good option for internal thermal insulation finishing is a multi-layer “pie”, inside of which communications are laid. The vapor permeability of this design is very high, and for strength it is attached to the walls with special glue. The “pie” consists of the following layers:
- interior finishing material;
- slats for utility networks;
- a layer of vapor barrier material;
- insulation layer;
- wall material;
- external insulation;
- facade finishing.
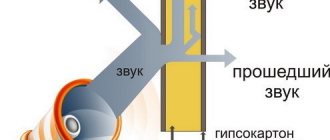
Drywall
- helps hide utility lines;
- allows you to achieve a perfectly flat wall surface;
- absorbs moisture well;
- possibility of non-linear editing.
You should also be careful when purchasing drywall in a store. You should start from the characteristics of the room in which the cladding is planned. If you have to deal with a permanently damp place, it is best to choose moisture-resistant gypsum board sheets
.
They are usually available in blue or green. For rooms with high temperatures and a certain risk of fire, pink
drywall is suitable - it has a reliable fire-resistant coating that will help protect your walls from unpleasant surprises.
One of the advantages of covering walls with plasterboard in a wooden house is that it is easy to install.
Thanks to the dimensional sheets, the cladding can be completed quite quickly. True, you will first have to build a sheathing
- this is an improvised frame made of metal profiles or wooden beams. It can successfully hide all sewer and ventilation communications, cables that spoil the appearance of the room. After the gypsum board sheets have been attached, all that remains is to treat them with a primer, seal all the seams with serpyanka, thoroughly putty all the defects and paint or whitewash them in the color that fits into the format of your interior.
An important point that I would like to pay close attention to: new wooden houses tend to shrink after some time, so it is recommended to cover them with plasterboard only after this.
In this case, it is necessary to leave 1-2 cm
at the junction with the floor and ceiling, since wooden walls tend to swell - and one day the cladding may simply tear. Video with recommendations from experts.
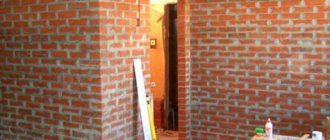
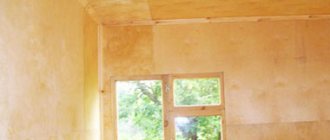
Decorating a brick wall
Wet finishing of brick walls is carried out after complete shrinkage of the house.
Haste will lead to subsequent cracking of the plaster, tearing of the tiles, and tearing of the wallpaper. Using plasterboard along aluminum guides can reduce the waiting time between building a house and finishing it. After installing the drywall, it is necessary to putty the joints of the sheets. To reinforce the seams, use perforated paper tape. Serpyanka is not recommended for these purposes, because the plaster solution is applied on top of it, while the perforated tape is located in the thickness of the plaster. When moving gypsum board sheets, punched paper tape prevents the formation of cracks, while serpyanka will not cope with this task. After sealing the joints, go through the places where the screws are attached.
Wallpaper on walls
There is an opinion that for further finishing of gypsum boards with wallpaper, finishing putty is not needed, because small errors under thick vinyl wallpaper will not be noticeable, however, a thin layer of finish will not only even out minor errors in the walls, but will also prevent damage to the drywall paper when removing the wallpaper. Before gluing wallpaper, it is necessary to remove dust from the surface using an acrylic primer, which impregnates and fixes the previous layer and reduces the consumption of wallpaper glue. Wallpaper on gypsum plasterboard walls is glued according to the manufacturer's recommendations; the work is no different from gluing wallpaper on other surfaces.
Surface tiling
Due to their low hygroscopicity and ease of maintenance, ceramic tiles and porcelain stoneware are perhaps the most practical way to decorate surfaces with high loads. Tiling is appropriate in bathrooms, boiler rooms and the kitchen. There are fewer requirements for leveling the walls, because minor errors will be compensated for by tile adhesive, so applying finishing putty and priming the surface can be skipped. The tiling of a pre-plastered brick wall is carried out according to general rules, including:
- Marking the wall vertically and horizontally;
- Pre-lay out tiles to minimize undercutting.
To avoid problems when using tiled walls, use crosses to separate the rows. Depending on the size of the tiles, lay 2-4 rows, wait for the glue to dry completely, then continue to increase the height. Failure to comply with this rule will result in the tiles sliding under their own weight.
Cork
- 100% environmentally friendly;
- excellent sound insulation;
- magnificent relief;
- solid and expensive look.
This is the case when the obvious visual advantages of a cork correlate with its technical characteristics and the numbers on the price tag. This option is certainly suitable for a respectably furnished wooden house, in which a lot of money has been invested. If you plan to cover the walls inexpensively, then you can use a little trick - use cork to decorate individual wall fragments. In this case, the costs will not be so high - and nothing will interfere with the pleasure of contemplating the spectacular wall cladding in the house.
It is better to glue cork to a wall in a wooden house using special contact glue. It grips the sheet perfectly even with low consumption. Of course, before this it is necessary to prepare the surface of the wall itself:
- remove irregularities;
- clean from dust and debris;
- remove any remaining old material.
It is best to thoroughly level the walls before doing this, but if you don’t really want to do this with plaster, then gypsum board sheets will be an excellent and, most importantly, inexpensive alternative.
Preparation
Finishing begins with the rooms on the top floor.
Finishing is the final stage in the renovation, therefore it is carried out after all the work on laying engineering and plumbing communications has been carried out. When deciding to purchase material, you should remember the specifics of unheated rooms.
If you plan to visit the house in winter, then raw materials should be selected that are resistant to possible sudden temperature changes. It is also worth considering how to insulate the walls from the inside.
Any finishing begins from the back room of the upper floor and is carried out towards the exit. If work is carried out with a high degree of soiling: plastering, painting, whitewashing, then the already treated surfaces should be protected with plastic film.
The necessary materials should be calculated and purchased in advance, and the working tools should be prepared.
Decorative rock
- creates a beautiful natural look;
- favorably emphasizes the relief of noble stones;
- undergoes final finishing.
One of the advantages of using decorative stone for interior wall cladding in a wooden house is the low cost of the base material. As a rule, this is gypsum, but there are also options combined with cement. The latter, as a rule, are a little heavier, but in any case much more convenient for cladding than “wild” stone.
The only downside is the increased demands of this cladding material on the wall surface. It must be perfectly smooth, otherwise the created relief will not be so expressive. In order to cover the walls with decorative stone, it is best to use tile adhesive or liquid nails. The first option is recommended if the cladding material is made on the basis of a weighted mixture of gypsum and cement, the second - for cladding based on lightweight gypsum that is convenient for cladding.
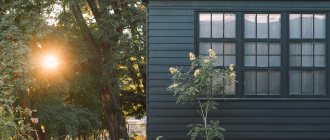
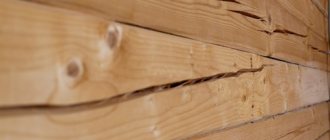
Tree
When choosing a cheap but environmentally friendly solution for a facade, many people turn to wood. Moreover, there is plenty to choose from: a rounded block house, laconic false beams, stylish American lining, shiplap.
The cost of false timber is about 300 rubles per board 300*20 cm, a block house of the same size is 450-600 rubles.
Advantages of cladding the facade with wood:
- Environmental friendliness. You can't think of a more natural material.
- Weather resistant. Wooden panels withstand temperature changes, ultraviolet radiation, and precipitation.
- Relatively light weight. There is no need to strengthen the foundation.
- Easy to install. Even a beginner can handle it.
The downside is that it requires complex pre-processing. Do you want your cladding to retain its beauty and durability for many years? Treat the boards with protective agents against fungus, rot, insects and fire before installation.
Plastic
- attractive appearance;
- modest cost;
- excellent moisture resistance;
- unpretentious care.
People's love for plastic is as imperishable as their love for wood. What if it turns out to be correctly combined in one room?
Due to its good moisture resistance, plastic can be successfully used for inexpensive and reliable interior decoration of walls in the bathroom, toilets and kitchen in a wooden house. In order to properly frame the walls, you will have to build the usual frame - such sheathing will allow you to achieve a perfectly flat surface.
If previously the choice of plastic for wall coverings was quite modest, now you can choose sheets with a wide variety of textures and colors. There are also beautiful relief models, which in some rooms of your house can fit perfectly into the simulated interior.
Security measures
To ensure that your home-made air dehumidifier works smoothly and does not cause harm, follow the safety rules:
- Install the unit away from flammable elements, water and fires.
- There must be enough space around the moisture absorber for normal air circulation.
- Do not expose the device to direct sunlight when the device is turned on.
- Make sure that pets (cats, dogs) do not knock over the equipment.
- Never block air inlets or outlets.
- Connect the device to a working outlet.
- Periodically inspect the cord and plug for damage.
- When leaving home, turn off the system and do not leave the dehumidifier unattended.
Ceramic tile
- reliable and inexpensive;
- suitable option for bathrooms and toilets;
- complex installation.
Another good answer to the question of how you can inexpensively and beautifully cover the walls of your home, if it is made of wood. Good - in terms of material costs and the final decorative effect. However, in order to lay the tiles evenly and correctly, you cannot do without special skills. Still, good specialists are worth it. The tiles are glued to the base surface using tile adhesive, and after direct cladding, the seams are sealed with fugue - a special grout that prevents the appearance of pathogenic flora on the walls of a wooden house and, at the same time, by adding various dyes, also helps to emphasize certain shades in the interior.
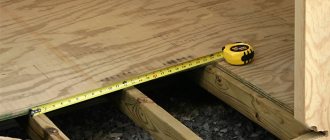
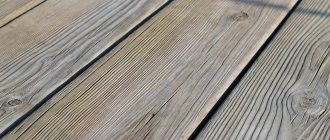
Board
Suitable for both wall decoration and floor covering. The main difficulty is to choose the right material: the boards should not be wet and, conversely, overdried. They look impressive after treatment with protective compounds, give a country house a special charm and fill the atmosphere with coziness.
For dacha floors, there are special boards that are laid using the tongue-and-groove technology. This is the most reliable connection that allows you to create a strong and even floor.
Brushed and barn boards are still in fashion, but despite its aged appearance, the finished material is quite expensive. To avoid costs, the elements can be processed yourself.
Beautiful examples
- Audacity and avant-garde. Walls finished with OSB without further coating create a bright interior with an interesting heterogeneous pattern. Extraordinary aesthetics are accompanied by cost savings. The fashion for such finishing is gaining momentum.
- Natural wall. Finishing the interior walls with timber-like boards allows you to create a monolithic interior with excellent aesthetics. Decorative beams are tinted in a dark contrasting color and highlight the light colors of the finish. The ceiling is covered with clapboard and painted in a light color or covered with matte varnish.
The interior decoration of a frame house is shown in the following video.
Specifics of interior design of country houses of different types
Today, country houses are built from different materials and using different technologies, so the approach to the interior decoration of a country house made of wood will be noticeably different from the methods of finishing a cottage made of stone.
In the first case, the surfaces of the walls will have to be treated with an antiseptic, caulked, and insulated, although further decoration can be done in any way available today, including simply varnishing and covering with plasterboard. It's up to anyone to like it.
Interior decoration of a country house made of wood
The rooms of brick houses require something completely different. The surfaces they contain are plastered and primed. The choice of cottage finishing options is limitless. Here you can use whatever you want: from ordinary paint to hand painting.
Brick house decoration
Foam block and gas block buildings are a completely different matter. It seems to be the same stone, but high-quality interior decoration of a house of this type will be impossible without the use of moisture-resistant and heat-labile materials. If you are going to work on the interior decoration of your home with your own hands, be sure to take these nuances into account.