Waffle iron Kitfort KT-1611, yellow
1790 ₽ More details
Smart watch / Fitness bracelet / Smart watch Smart Bracelet
2290 ₽ More details
The best coffee machines
Any owner of a private home is faced with the problem of long-term food storage. Especially if a lot of crops such as potatoes, carrots, apples, and other vegetables and fruits are grown on the site. The cellar in the house is precisely intended for storing food, household supplies in order to protect them from damage, and storing other necessary things.
How to make a cellar in a house
The most successful option would be to build a cellar during construction. In this case, the creation of the element must be taken into account in the design documentation of the structure, since the cellar can be made correctly only with proper calculation of the entire structure.
Making a cellar under a house with your own hands in an already built house is a more difficult task, but quite feasible. All excavation work will have to be done manually, and there will also be difficulties in ensuring the reliability of the structure. If you make a mistake when creating an underground cellar, the cottage itself may collapse or lean, so you should carefully consider developing an action plan.
You can make a cellar with your own hands
Advantages of a cellar located in the house
The basement of a private house is convenient due to its compact placement and optimal air temperature inside for storing food. In addition, you do not need to leave the cottage to use the cellar.
A basement located separately from the housing will require special efforts in constructing its roof, insulating the walls, and other difficulties will arise. Therefore, professional builders recommend building a cellar in a private house, and not outside it.
Another option for using a basement is to install a boiler room in it. In this case, the heating system will not take up much space in the house; only pipes, radiators and a chimney will remain there.
Cellar construction
Structurally, the cellar consists of the following elements:
- ceiling;
- walls;
- floor;
- ladder;
- ventilation system
- hatch cover.
In this video you will learn more about the cellar: In addition, you can provide vertical ceilings (walls) to divide the internal space, as well as additional elements, such as built-in cabinets or shelves.
The structure of the walls and floor looks like this:
- the soil itself;
- clay castle;
- floor and walls (concrete);
- sand cushion on the floor between concrete and soil.
Preparing and digging a pit
Building a cellar under the house will require some effort, especially if the owner prefers to do all the work with his own hands. This can be described step by step as follows:
- planning;
- excavation;
- formation of walls and floors;
- finishing work, including installation of shelving;
- creating ventilation;
- hatch installation.
First you need to determine whether it is even possible to build a cellar on this site. To do this, you should ask your neighbors whether their buildings are flooding (if the answer is positive, it is better not to build a basement). Or invite hydrogeologists for consultation.
Experts recommend building a cellar under the entire building, otherwise the foundation will weaken and additional strengthening will be required.
At the very beginning, you will have to choose where in the house the entrance to the underground will be located. Usually the hole is located in the hallway or in the kitchen area, if it is large enough.
The pit will have to be dug manually; during the work, you will need to strengthen the walls and ceiling with plywood panels and temporary supports.
The depth of the basement should be 2-2.1 meters, and if a boiler room is planned, then at least 2.5 meters.
It is important to remember that the floor should be located at a slope of 1-2 degrees, directed towards the technical gutter (pit).
When the excavation work is completed, the future floor and walls should be leveled.
First you need to dig a pit
After this, you need to pour out a layer of sand (the pillow should be up to 20 cm thick), compact and level it until it is firm and even, and then pour in gravel of different calibers.
A layer of waterproofing is laid on top of the cushion to protect against groundwater and leakage of liquid cement during pouring. You can use polyethylene or roofing felt.
A mesh of reinforcement should be laid on top, the thickness of the rods should be at least 5 mm.
Now you can fill it with cement, you should end up with a layer 10-15 cm thick, and wait at least 5-6 days. Complete hardening will only occur after a few weeks.
If everything is done correctly, the underground cellar will have a reliable floor that is not subject to deformation.
Selection of waterproofing materials
It is necessary to select high-quality waterproofing materials taking into account the following factors:
- Humidity conditions in the room.
- Presence of underground levels.
- Type of subfloor (wooden, concrete).
- The type of insulators used (for the rough base or finishing coating).
There are situations when hydro- and vapor barrier materials must be selected based on what kind of heat insulator is used. There are varieties of it that lose their effectiveness when interacting with moisture. Accordingly, the thermal insulation layer made of such material must be reliably protected from moisture.
One of the following materials can be used as waterproofing:
It is necessary to decide before purchasing all the advantages and disadvantages of the above materials, and therefore each of the above options will be considered further.
Walling
The best option would be to make monolithic concrete walls. But if you do the work in the house yourself, you will have to order ready-made concrete, since it will take too much time to create the required volume of solution yourself.
When ordering concrete, you should inform an employee of the manufacturer for what purposes the solution is intended, so that the builders add a special mixture to the solution, which will create penetrating moisture insulation.
Before pouring, you should prepare formwork from boards and bars. It is better to use planed lumber to make the structure easier to disassemble.
Important. When creating walls, you need to provide ventilation ducts, as well as install electrical wiring in advance if it is planned to be hidden.
After pouring concrete, it is recommended to pierce the surfaces of the walls with a steel rod to remove foreign air from the solution.
After about 7-10 days, the formwork can be removed, but the concrete will “stand” completely in another 4-5 weeks.
Cellar ventilation
Since it is quite difficult to provide full ventilation in the cellar of a finished house, many owners prefer not to deal with this issue. The result is increased humidity inside the room, since in any case liquid particles will penetrate into the cellar from the outside. Stored foods (vegetables, fruits) will also release moisture.
This is interesting: how to arrange ventilation in the cellar.
Ventilation pipes should be laid in pre-made shafts, and if the house has already been built, this will have to be done before pouring concrete.
The exhaust vent should be located under the ceiling and above the technical gutter (pit), and the supply opening should be located opposite it (at the bottom of the floor).
Both pipelines lead to the street. The exhaust pipe should be located as high as possible - in the area of the roof slope, and the air intake - at the bottom of the wall of the house. Be sure to use protective nets to protect against the penetration of rodents and insects or special filters.
Cellar ventilation is an important element of the cellar
If the cellar is small, then it is allowed to use a single pipe, which will ensure both the penetration of fresh air inside and the flow out.
And if the basement is large, then it is recommended to provide forced ventilation using electric motors, this way you can get constant air exchange and there will be no condensation or unpleasant odors inside.
Waterproofing a wooden floor: how to protect natural material from the harmful effects of moisture
There are many materials that are alternatives to natural ones. But, despite this, floors continue to be made from wood, and not only in wooden houses. There is an explanation for this: wood flooring has a number of unique properties, such as low thermal conductivity, good sound insulation and aesthetic appeal. In addition, this material is environmentally friendly and harmless to humans. However, in order for such a floor to serve as long as possible, it is necessary to take a number of measures to protect it from the harmful effects of high humidity in the room. Wooden floors need waterproofing
It does not matter what exactly it is made of: fiberboard, chipboard or OSB: any porous structure absorbs moisture, which subsequently leads to the formation of cracks, warping and rotting of the wood. To prevent this, it is necessary to apply a continuous protective layer extending onto a vertical surface - up to 30 cm
Let us tell you in more detail, with the help of what and how this is accomplished.
Waterproofing the cellar from the inside
For internal waterproofing of walls in the basement, roll materials (such as roofing felt) or coating materials (bitumen mastic) are used. It’s even better to combine both materials, it’s much more reliable.
You need to know this: how to waterproof a basement from the inside.
First, layers of mastic are applied (with a brush or roller), and after that the walls are covered with sheets of roofing felt in 2-3 layers. In some cases, it is advisable to lay a brick wall in one layer, this will significantly strengthen it.
Recommendations
Advice for developers from specialists with experience in the construction and operation of basements:
- For interior decoration, materials are used that are not afraid of dampness or have been treated against rotting.
- To go down to the basement you need to arrange a comfortable, non-steep staircase.
- It is recommended that the first floor floor be heated over the ceiling with full thermal insulation.
- It is advisable to insulate the blind area and drain surface water into a drainage ditch or perforated pipe.
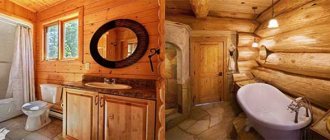
A properly equipped basement will be a great place to relax Source mysticirelandusa.com
Insulation of the cellar
Insulating the ceilings of the cellar will allow you to safely store various products; they will not be frozen even in winter. The most commonly used tile materials are polystyrene foam, polystyrene foam and their analogues. It is best to install panels with a density of 25 kg/m³ or higher.
This is interesting: what needs to be insulated in the cellar from freezing.
It is also possible to use mineral wool, but if the humidity is too high, it will lose its properties in 1-2 years, so good preliminary waterproofing will be required.
Spraying a layer of polyurethane foam is the most reliable method, since the resulting coating will be seamless, and the material itself does not absorb moisture at all and retains heat well. But its cost is quite high when compared with mineral wool and polystyrene foam.
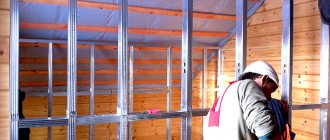
The main method of insulation involves creating a frame from wooden blocks or a galvanized metal profile, which is attached to the walls and ceiling.
Insulation is placed in the cells of the sheathing, after which it is recommended to stretch polyethylene film, and lay sheet plywood, boards made of boards on top, or simply glue the mounting mesh if solid materials (foam plastic or analogues) were used as insulation. After this, the wall surfaces can be plastered.
Overlap
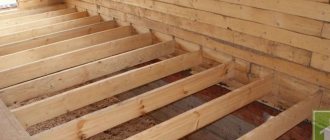
Laying finished floor slabs over a cellar in a house is understandably somewhat difficult. In most cases, the ceiling is made of wood; The thickness of the beams allows you to lay insulation, which reliably insulates the cool subfloor from the heat of living quarters.
The structure of an insulated wooden floor.
How to do this work yourself?
- A solid panel is sewn to the floor beams from below - plank, plywood or OSB. It is better to use self-tapping screws for fastening; if for some reason you prefer nails, drive them staggered at an angle to the vertical.
- The shield is covered with a vapor barrier film. It ensures that there is no filtration of water vapor from a warmer room.
- Then insulation is laid between the beams - polystyrene foam, mineral wool or glass wool. It is better to focus on an insulation thickness of at least 100 millimeters: the better the cellar is thermally insulated, the safer the food in it will be.
- On top, the insulation is covered with waterproofing (the same dense polyethylene); a load-bearing flooring (again, boards, plywood or OSB) and a finishing coating are laid on top of the waterproofing material.
The access to the cellar is equipped with a double hatch; as an option, you can assemble a two-layer lid with insulation inside.
Ladder and manhole cover
The simplest solution to the question of how to easily build a staircase in a cellar is to use boards and bars of wood. If desired, you can use concrete or even metal. It all depends on personal preferences and capabilities.
It should be noted that wood will require impregnation with special compounds (to prevent rotting), and metal will require painting with a primer.
There are many types of stairs, for example:
- stationary wooden;
- complex concrete staircase;
- retractable.
Don't forget about the hatch
The hatch cover can be made hinged (hinged) or completely removable, it depends on how large the hole is inside and where it is located.
Types of basements
Before starting construction, decide what role your basement will play. Why will it be needed at least for the first time? Here are some options:
- Cellar - a basement that will serve as a storage room for fruits, vegetables, all kinds of seams and pickles.
- Garage – underground garage. An excellent solution if you are the owner of a small plot.
- A workshop is an excellent option for using a basement. Every man who has his own house or plot dreams of having his own workshop, albeit a small one. Also a good option for saving space on the site.
- Recreation room - in a properly made basement you can place a swimming pool, sauna, billiards, gym, wine cellar, etc.
- Extra Room – You can turn your basement into a cozy living room.
- Technical room - you can also use the basement to accommodate various communications, as a room for a boiler room.
- The ground floor is for a variety of needs. It all depends on your imagination. Of course, it is advisable to make the basement heated. Then the list of what you can turn the basement into will expand significantly.
