Many home craftsmen have encountered situations where unnecessary holes appear in a wooden workpiece, which as a result only spoil the entire appearance of the final product. This could be a mistakenly drilled hole, a knot that has fallen out of the board, or if the board or lining is reused and there are holes left in it from self-tapping screws. In this article we will look at all the available and most effective ways to seal holes in a lining or wooden board.
Wood putties
Wood putty is a paste-like composition that is used to cover cracks, as well as fill in recesses in the form of holes and level the surface of the material. Puttying is by far the most popular method for eliminating defects in wood due to its accessibility and simplicity. This technique has a number of undeniable advantages, but you will need to familiarize yourself with some nuances in advance. Due to their viscosity, putties perfectly fill depressions and cracks. After drying, which occurs very quickly, the material gains excellent strength and can be subjected to standard woodworking procedures - sawing, sanding and planing.
All coatings that form a film - varnishes, paints and enamels - fit perfectly onto the frozen layer of putty. Due to the different tinting options, you can easily choose a putty to match the wood you are restoring - this will be especially important when further applying stain, varnish or even wax.
Putties can be divided into two main types:
- One-component putties are those putties that are made on the basis of an alkyd, water-based or other type of binder that are offered in finished form. Such materials are as practical as possible, and they are also accessible - all you need to do is mix the paste-like mixture, and you can start working. The relatively long “life” of the mixture makes it possible to slowly repair large areas - sealing cracks in a wood floor or leveling other surfaces with a large area.
- Two-component – compositions that are offered in the form of two separate components (hardener and putty). They should be mixed immediately before starting work, and the recommendations given by the manufacturers should be strictly followed. They differ from one-component putties in a higher level of strength, excellent elasticity, almost complete absence of shrinkage and resistance to solvents/water.
But the disadvantages are mostly relative - high cost and rapid hardening. The “lifetime” of a two-component putty is approximately 4 to 6 minutes, and this can create certain inconveniences when working with large areas, and therefore they are considered to be a material for local repairs - covering small holes and cracks in a relatively small area.
Video on this topic
How to hide a self-tapping screw
This video shows one of the ways to hide a self-tapping screw in wood. Video on how to make boats
.
Let's say we need to fill a small chip in a wooden stock (my case).
To do this, we need two “ingredients”: baking soda and liquid cyanoacrylate glue. The first, I think, can be found in any kitchen, the second is sold in hardware stores, construction stores and large chain markets.
Manufacturers and type of packaging may be different, but one thing is important - the base. That is, it is cyanoacrylate. Nothing else will do.
(Immediately a warning for those who are not in the know: this glue is very poisonous, as can be seen from the name, and besides, it hardens instantly in the air and tightly grips together the surfaces that it comes into contact with. Including your fingers. It is best to store cyanoacrylate in the refrigerator, i.e., together with food, so be careful.)
Let's begin the process of repairing the chip in the wood.
First: add a drop of cyanoacrylate into the chip cavity. Here it is important not to overdo it and not to flood the neighboring areas - the glue flows like water, we will be tortured to scrape it off later. Personally, I dripped from the bottle onto the head of a match, holding it over a napkin, and then transferred this drop to the treated area. Now we take a little soda on the tip of a knife and pour it into the cavity. If you have poured too much, remove the excess and drop a drop of cyanoacrylate onto the soda crystals. The resulting composite instantly “stands up.” Shake off/blow away any excess crystals that did not fall under the drop, and see if the chip is completely filled.
You cannot pour in the entire required volume of soda at once: the glue will harden before it has time to saturate it - so, for example, a depression 2-3 mm deep. filled in layers, in 2-3 steps.
That's the whole algorithm of actions. Next, the composite “cork” is polished: with needle files, emery, a drill, abrasive sponges, or all of these in turn - it all depends on the area of the surface to be treated and the geometry of the object: in a word, everything is as usual with ordinary putty, for example, based on epoxy resin.
This putty, however, has a number of strong advantages over both epoxy composites and ready-made putties (for example, water-based). 1. The cyanoacrylate-based composite is ready for further processing immediately after puttying. 2. During this treatment, it does not chip or wear out, unlike soft ready-made putties, and also, unlike epoxy compounds, it does not “flow” from the heat imparted to it by the friction of the abrasive.
3. It has incomparably better adhesion compared to many other putties. 4. Possessing high strength, hardness and at the same time sufficient ductility, it allows you to model clear, rather than slicked, geometric differences using ordinary needle files, etc. 5.
Tool preparation
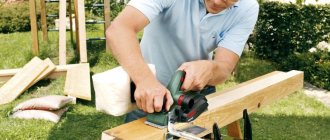
All of the described methods for sealing holes in wood will require the use of tools that every owner should have.
- Putty knife;
- Hacksaw with blade for metal;
- Hammer (preferably a wooden mallet);
- Wood drills or milling cutter;
- Sandpaper.
Safety precautions have also not been canceled, so we definitely arm ourselves with gloves and eye protection.
A popular bookmaker has launched a mobile application for Android,
download 1xBet
You can follow the link absolutely free of charge and without registration.
Recommendations from experienced gardeners
Treatment of hollows in fruit trees is often complicated by infestation of the wood with ants. Insects build anthills in loose, diseased wood, further destroying the tree. Insects are removed using scrapers and brushes. The hollow is washed with hot water and soap or a soda solution, and the root zone is irrigated with poisonous preparations.
Attention! When cleaning a hollow, all rot and debris should be cleaned out into a bag or bucket, then burned. You cannot throw away garbage in the garden or compost it, because it contains infection
Often a hollow is formed near the surface of the earth. You can remove the hole using stones and cement mortar. But treatment makes sense only if the hollow occupies no more than half of the internal volume of the trunk.
It is already useless to treat such a hollow
Will need
- PVA glue.
- Oil (any kind).
- Wood sawdust.
- Long wood screws (thin nails are fine).
- Thin wire.
- Short wood screws.
- Screwdriver for selected screws.
- Two smooth fiberboard sheets, larger than the hole.
- Coarse sandpaper for wood.
- Wood file.
- Self-adhesive wallpaper to match the color of the furniture.
Instructions on how to repair MDF doors: causes of breakdowns
It is very easy to cover an entrance or interior door, for example, veneered or completely wooden, but first you should understand how the defects arose and for what reason. Mechanical damage includes those defects that were formed from direct impact on the door leaf. This may cause a scratch, dent, hole or hole.
If installed incorrectly, problems such as:
- Skewed canvas;
- Incomplete connection of the door to the door frame;
- Too much friction.
Wood and panels made from it have increased hygroscopicity, due to which they have the ability to absorb moisture. If production has been disrupted during manufacturing, this can cause serious consequences. If there is high humidity in the room or if the building is not heated, the structure begins to swell and deform.
It is possible to completely unstick the canvas if it was assembled poorly in a factory or even manually at home
To restore a door made of veneer or MDF from defects caused by improper installation, you should pay attention to a number of recommendations presented below
If the door opens poorly, friction increases, and therefore you need to remove the excess part of the canvas from the edge using a plane, after which sanding, painting and varnishing is required. Ideally, the gap between the frame and the door leaf should be 2 mm. If the door begins to spring back when closing, it may be hitting a quarter of the frame. In this case, you need to trim either the door leaf or the frame itself. In addition, the problem may lie in improper installation of the hinges. The door may sag, and to restore it to its normal appearance, you need to put new washers on the rod of each hinge.
Restoring the hole
First of all, we measure the thickness of the chipboard.
Next, take a wood drill and set either a limiter or a mark on it to make a hole of a certain depth. If your material thickness is, say, 9 mm, then you need to drill to a depth of no more than 7 mm. The thickness of the drill is also selected individually, everything depends on the diameter of the screw being screwed in and the nature of the damage. I took a 5 mm drill. Carefully drill a blind hole.
There is no need to rush, because if you accidentally drill the front side, it will not be pleasant.
Pour wood glue around the edges. You can use the classic one - PVA or any other.
Naturally, the cap must be pre-fitted to this hole in diameter and length. Carefully drive it into the hole.
We are waiting for the glue to dry. Next, we drill a hole under the screw so that when screwing there is less internal stress, since the cap is made of a single piece of wood and with excessive pressure it will easily burst or crack.
That's all! The hole has been restored.
You can screw the screw into place.
The connection is very strong. Most likely even stronger than it was, since the insert adds additional density.
We repair all the necessary holes for the hinges.
Using this simple method, you can repair and restore a hole not only in chipboard, but also in other, absolutely any wood.
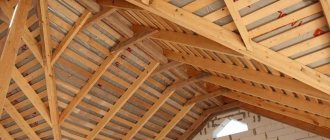
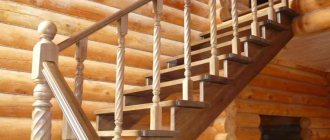
Advantages of log houses
But first, I would like to go through the many advantages of such buildings, which made them so popular among our compatriots, and on a global scale in general. So, let's focus on the main ones:
- Environmentally friendly. Houses made from natural materials are completely safe for the health of the people living in them. Moreover, a person in wooden houses gets sick less, has higher body tone and vigor;
- Walls made of wood, with similar durability and strength, will be much thinner than their brick counterparts. So these houses have more space;
- Wood is a very mediocre conductor of temperature. Thanks to this, such a home is cool in summer, and heat loss to the outside is minimal in winter. Consequently, such a structure warms up faster, and less resources are spent on maintaining comfortable temperature conditions;
- Wooden houses are lighter than concrete or brick ones, so the construction of a massive foundation is not required;
- Wooden walls are very pleasing to the eye, so you can save a lot on finishing activities.
Wood putty
The first method that immediately comes to mind is using regular wood putty. In any hardware store you can buy ready-made putty, which we push from a jar into the hole using a spatula, smooth it out as much as possible and leave it until completely dry. Then we take fine sandpaper and clean off the residue, making the surface smooth.
One of the advantages of this method is its simplicity. Typically, wood putty has a white or light beige color, and if you need to mask the hole as much as possible so that it does not differ in color from the board, then you can use pigments and achieve the desired color.
Among the disadvantages, one can note the long hardening time of the putty. If the hole is large and a lot of putty has entered it, then after drying it may crack and subsequently fall out during active use of this board.
Sawdust and glue
This method is the same in execution as the method using ready-made wood putty, only in this case we actually make the putty ourselves if we don’t have it on hand and don’t want to run to the store. To prepare homemade putty, you will need carpenter's glue or PVA glue, but carpenter's glue is better.
Then you will need small sawdust from the same material that you are going to seal. Ideally, such fine chips can be sharpened with a file or coarse sandpaper. The finer the sawdust, the better. Next, mix these sawdust with glue to the consistency of thick sour cream and use a spatula to cover the hole. We wait for the glue to dry and clean it with fine sandpaper.
Simple ways to clean tile joints from dirt
This method is ideal for sealing holes in lining and wood when aesthetic appearance is important. Sawdust from the same material paired with transparent PVA glue will hide the defect from view as much as possible.
Seal holes with toothpicks or matches
This method is the simplest and to perform it we will need regular PVA glue, matches or wooden toothpicks. Next, put together the required number of toothpicks so that they fit into the hole as tightly as possible, then dip them in PVA glue and insert them into the hole. Then take a hammer and easily hammer them into the hole until the end, leave until the glue has completely hardened. We cut off the remains sticking out of the hole with a stationery knife or a hacksaw, then clean it with sandpaper.
The aesthetic aspect of this method leaves much to be desired and may well be used in places where the hole will be hidden from view.
Which material is most optimal?
Currently, the building materials market provides a wide variety of materials for sealing cracks on log walls. The most modern and popular are putties and sealants.
When choosing the right sealant, you will need to carefully study its instructions so that the product is suitable for specific operating conditions.
According to user reviews, the following putties are the most popular:
- Finnish “Tikkurila” has good adaptation to the color of wood, is suitable for a wide variety of wooden products, and has high resistance to low air temperatures and moisture. Disadvantage: high price: 500 rubles. per package 0.5 l.
- Russian “Extra” is an excellent budget material with high protective characteristics for water and temperature.
Universal, can be used for interior and exterior work, characterized by low specific material consumption per 1 m.p. repair. Price: 60 rub. per package 0.45 kg. - Russian "Eurotex" in convenient packaging has a good plastic structure, and therefore is easily applied to the surface of the crack, sanded and sanded. Budget price: 80 rub. for 0.225 kg of putty. The disadvantages include the poor color range of the material and increased shrinkage.
- Russian-Swedish “Parade” is a putty with increased water-resistant characteristics. Dries quickly and sands quickly. Price: 300 rub. per package 0.4 kg. Disadvantages include difficult application to the surface due to the liquid composition of the paste.
- Russian "Rainbow" has restrictions on the temperature of application to the surface, not lower than 15 C. Otherwise, it has a number of advantages, including low specific consumption for wood repair, high adhesion speed and low shrinkage, price: 119 rubles. per package 0.9 kg.
Among sealants, Russian consumers prefer the following brands:
- Russian "Neomid" is a highly effective sealant that can eliminate cracks with high deformation from 15 to 30% of the cross-section. It features high protection against moisture and temperature changes. At the same time, it is very elastic and flexible, capable of working in both external and internal environments. Price: 1000 rub. per package 0.6 kg.
- Russian acrylic sealant "Eurotex" for external work, has protection against moisture, insects and biodamage. It showed itself well in repairing side and end cracks in wall structures of a house. Very durable and at the same time elastic material. Price: 1000 rub. per package 3 kg.
- German “Remmers” for interior and exterior work, resists moisture and temperature changes well. It has a wide range of colors from colorless to dark brown, and is also well compatible with both varnish and paint. Price: 400 rub. per cylinder 0.6 l.
- Polish "Ceresit" is produced on both acrylic and silicone bases and has a low shrinkage rate. Resistant to low temperatures, ultraviolet radiation and high humidity. It performed well when restoring the external walls of a log house. Price: 160 rub. per bottle 310 ml.
- American “Check Mate” acrylic sealant of an elite modification, very elastic, creates lasting protection of walls from moisture, temperature fluctuations and biodamage, and has minimal shrinkage. The price is high from 1300 rubles. per bottle 650 ml.
Finally
If you made a mistake with the holes for the handles - that is, they are small - then you can buy restoration wax at furniture stores and rub it into the wrong holes. Next, remove the excess and wipe with a cloth until smooth.
When building your own home, it is not enough to pay attention to what materials are used for this - you also need to be very careful about the method of attaching these materials. As you know, any building material “requires” its own fasteners and method of its application. The floorboard is no exception in this regard. Considering the loads that fall to its share, the choice of method of fastening the floorboard simply cannot be an insignificant issue. Indeed, if the boards are not fastened well enough, after a short time they will begin to “demonstrate their dissatisfaction”, loosening and changing their position, and the initially smooth and even plank floor will not only begin to creak underfoot - it will literally fall apart into individual components.
Automotive putty
There are recommendations for sealing holes in the board with automotive putty. The principle of operation is the same as with conventional wood putty, only the price of automotive putty is several times higher, and the process of its preparation is more complicated. Automotive putty is usually two-component and has a pungent odor; it must be used indoors with ventilation. The composition is mixed until smooth and the hole is filled with it. This putty dries very quickly. This method has the right to life if there is nothing else at hand from the above.
Traditional methods
How to seal the seams between the logs of a log house from the point of view of the grandfathers - the best solution is moss. Previously, gaps and splits were caulked. More often, a common plant was used as a material. If it was dry, then the moss was pre-soaked in water for 30 minutes and squeezed out before use. The mass must be rolled into rolls and pushed into the crack. In order to compact the aggregate, it is tapped using a caulking spatula and a hammer or mallet. It is important to achieve a spring-like result.
It takes about 72 hours for the moss to dry. During this time, the volume of material increases to 20-30%. As a result, the cracks are clogged, the filler breathes, and the excess is cut off using a petal circle.
Preventive measures
Method #1. Long natural drying
The best prevention is long-term natural drying of the logs before placing them in the log house. The more uniformly the logs dry across the entire thickness of the fibers, the less likely it is for cracks to appear. The drying rate in the inner and outer layers should be approximately the same. Then moisture from the inner layers will move to the outer ones, and they, in turn, will evaporate it into the environment.
This balance can be maintained if the drying period is at least two years. Dry the logs in a shady, dry and cool place. As a result, wood moisture content should decrease to 18-20%.
For comparison: when drying logs for one year, the width of the resulting cracks is no more than 6-10 mm, over two years - no more than 1-2 mm. If the logs have been dried for less than a year, the width of the cracks may exceed 10-20 mm.
Method #2. Compensation cut
A cut in the upper or lower part of the log (timber) helps reduce stress in the wood fibers. This type of cut is called compensation or unloading. It is performed along the axis of the log, often on the upper surface. Some craftsmen make cuts along the entire surface, while others do not cut the groove to the ends.
In a log house, the cut is covered with a lying log on top, so moisture does not get into it. When dried, the cut expands. But, at the same time, the number of natural cracks formed is reduced, their depth and width are reduced.
The cut is an even groove 7-10 mm thick, 1/3-1/4 deep from the diameter of the log. The cut can be made using a chainsaw, a router, or a rounding machine.
Method #3. Sealing the ends of logs
The ends of the logs (cutting areas) dry several times faster than the rest of the outer surface. Therefore, during intensive drying, the ends become cracked first. To prevent this process, you need to close the moisture exit through the ends. That is, cover them with sealant. Then the ends will stop quickly evaporating moisture. It will go into the outer layers of the log and from there it will evaporate, but evenly.
To cover the ends, you can use drying oil, oil paint, oil varnish, and wax solutions. Previously, the ends were coated with lime to seal.
The need to protect the ends of logs is discussed in the following video:
Wooden plugs
Wooden plugs are cylindrical blocks that can be purchased at any hardware store. They are usually used as guide elements when joining boards at the ends. To seal a hole using this method, you need to drill it out to the diameter of the plug, which is usually 8 mm. Then we moisten the plug with wood glue and hammer it into the hole, after which we cut off the remains with a hacksaw.
Kinds
There are two types of such screws:
- universal;
- confirmation;
- elements with blunt ends.
They can have different sizes. To assemble furniture from chipboard, screws with a diameter of 1.6 to 10 mm are usually used. The length of one unit can vary from 13 to 120 mm. For thin chipboards, hardware 16 mm long is most often used. Conventional screws have a cylinder-shaped shaft and a head of different shapes:
- secret;
- semi-secret;
- semicircular.
Models with a countersunk head are used when attaching handles, hinges, and guides for drawers. The screw is completely buried in the material. Hardware with a semi-countersunk head is used to create fastenings that are completely hidden in the material. Thanks to the smooth transition from the rod to the threaded surface, when twisted, such a head is completely immersed in the material.
Hardware with a semicircular head is used in cases where it is necessary to create a connection of increased strength and eliminate the possibility of deformation of the created chipboard structure. A universal screw can have simple or cross-shaped slots. The use of products with cross-shaped slots provides a number of operational advantages:
- during operation, the drill or screwdriver is firmly installed in the head the first time;
- when twisting, you can only use one screwdriver;
- Such screws are easily installed in hard-to-reach areas of chipboard products.
Euro-screws are called confirmats, which are most often used in furniture production today. These are reliable and inexpensive furniture hardware that allows you to create strong connections that are resistant to strong mechanical stress, including fracture. They can also be used instead of corners when assembling cabinet furniture. To hide the screw after tightening it, the head is closed with a special plastic plug.
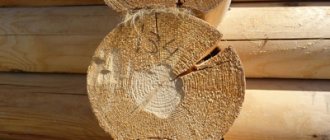
How to fill holes from knots in lining
On pine (and I mostly work with it), healthy knots are a decoration, diversifying the grain of the wood. Another thing is dead branches that will sooner or later fall out of their nests. Such knots need to be sealed.
There are several ways to seal knots, from quick and hacky to elegant and traditional. I usually used the traditional one, in which the embedment site is completely invisible.
For all its advantages, this method is quite slow. After all, you need to carefully make the insert and select a recess for it. And recently I was lucky enough to purchase a set of plug drills that allow me to quickly and efficiently seal knots.
Plug drills must be used in conjunction with Forstner drills.
To work with plug drills, the drill must be firmly secured in a drill stand, or you must use a drill press. Nothing can be done manually.
First, I select a blank for the corks, preferably from the same board as the part with the knot. I clamp this workpiece in a rack vice; a plug drill of the appropriate diameter is already inserted into the drill.
I use a cork drill to drill out corks from a blank.
Then I use a Forstner drill of the same diameter as the cork to drill a knot into the part to the required depth.
I glue the cork into the recess, holding it with a clamp.
Ready! We cut off and grind off the cap of the cork sticking out above the surface, and find it!
( 2 ratings, average 5 out of 5 )
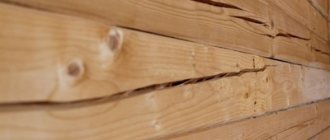
Causes of cracks
When cracks form in the walls of a log house, most owners of such households think about the reasons for their occurrence. In fact, they depend on many factors that affect the tree from its birth to the harvesting of the log.
The key root cause is the uneven shrinkage of logs from the end and sides, under the influence of which internal stresses are created in the fibers, leading to rupture. Especially massive cracking occurs during sudden temperature changes.
On the sunny side of the wood, the density decreases due to a rapid decrease in the level of moisture, and on the cold side it will remain high.
Main reasons:
- The place where the tree grows determines how much the tree has defects - curliness of the wood. Usually, any natural defects are later overgrown with new fibers and hidden by layers of the most ancient growth rings, but during the drying process of the felled tree they are revealed, appearing on its surface in the form of cracks.
- Uneven drying of logs.
The layers closest to the surface dry faster than the inner layers. A situation is created when the outside of the log is almost dry, but the core remains saturated with moisture. As a result, stress occurs on the fibers. The surface layer is subject to a tensile force, and the internal layer is subject to a compressive force. They literally explode the wood from the inside. The process depends on the drying speed; the higher it is, the more cracks there are, and their sizes are wider and deeper. - Shrinkage processes. As a result of such influences, wooden parts twist, changing their shape and linear characteristics.
- Sudden changes in temperature and humidity levels in a finished house as a result of operation. Trying to properly “heat” a home in the first winter season will most likely result in the formation of through cracks due to the difference in temperature and humidity of the walls of the log house.
- Time of year for logging. If it was a warm period, cracking will be high; the best period for harvesting wood for felling is winter.
Other ways to seal holes
If it is necessary to mask holes from self-tapping screws in the lining, then specialists usually use special decorative stickers with wood texture and different colors, as shown in the photo below.
You can also use wood-look sealant or special repair wax, which can be used to seal holes and cracks in the parquet. Wax is sold in the form of bars of different shades; it is applied to a hole or crack, preheated with a construction or regular hairdryer.
Fastening parts with self-tapping screws
If a self-tapping screw is used to fasten two parts, pressing one part to another, then in the part (hereinafter we will call it the upper one), which will be on the side of the head, you need to drill a hole of such a diameter that the screw to be screwed in easily fits into it without rotation, but does not dangle in him. We measure the diameter of the screw along with the thread using a caliper and drill a hole of this diameter. In addition, you can make a recess for the cap. Now we fold the parts the way they should be secured and screw in the self-tapping screw in accordance with further recommendations. Thus, the self-tapping screw, freely passing through one part and being fixed in another, will press the parts one to another. A common mistake is not drilling the top piece or drilling with a drill bit that is too thin. The self-tapping screw does not slide freely into such a hole. It is fixed in the upper part and cannot press one part against another. A gap remains between the parts, the strength and quality of the connection drops significantly.
Varieties
In order to lay a plywood floor in an apartment, you can use one of the following types of material marked as follows:
- FC – plywood with an adhesive in the form of urea resin. It is distinguished by high moisture-repellent characteristics, high strength, environmental friendliness, and can be used to create a finished floor covering.
- NSh is an unsanded type of plywood in which the layers are glued together using casein glue. This plywood is the cheapest, but may require additional sanding after installation.
- Ш1 – plywood with one-sided sanding. It also contains casein glue. It is best to use such plywood for a subfloor, since only one side is sanded.
- Ш2 – plywood with double-sided sanding. The layers are glued together with the same casein glue. Provided that such plywood is used in rooms with a normal climate, it can replace FK plywood.
How to prepare various substrates for laying tiles Training Center
Ceramic and porcelain tiles are among the toughest flooring materials. They need a subfloor that can accommodate this without any wobble or movement. If ceramic or porcelain tiles are installed on an uneven surface, you risk allowing the tiles to crack or become loose. Here are some instructions on how to prepare your subfloor for tiling.
Laying tiles on concrete
Repair all cracks and uneven areas in the concrete subfloor before installation - especially important if the tiles are bonded directly to the concrete. For a subfloor with large cracks, consider removing a large section of the concrete slab and replacing it with a new one instead of sealing all the cracks
If there are severe cracks in the concrete slab, smooth it with concrete filler or a similar compound. If the concrete floor is new, it must be allowed to cure for 28 days before laying the tiles. Cleanliness is paramount. In addition to any surface materials, be sure to remove any grease stains or other substances that have stained the slab as best you can. A cement backerboard can provide a strong, flat surface for tiling if you have a wood subfloor.
Laying tiles on plywood
- A plywood subfloor must be structurally sound and able to withstand installation. Tile floors are heavy, and tile is a hard material. It will break or move if the surface bends under load.
- Remember that you will need a very flat surface to work with. If necessary, sand the plywood to level the subfloor.
- The plywood must be installed over a matching subfloor and must be at least 1 1/8 inches thick when combined with the subfloor. Interior plywood and chipboard are not considered strong enough for tile installation.
Can tiles be laid over linoleum or vinyl?
- Yes, non-cushioned vinyl and linoleum, which have a strong structure and are free from excessive movement, can act as a suitable base for tiles.
- No, soft vinyl is not a suitable subfloor. You will need to remove the vinyl flooring and any remaining adhesive used to install the vinyl.
- In some cases, the vinyl itself can be removed, but not the adhesive. Use the type of thin set recommended by the board backer manufacturer.
- If it seems difficult, you can lay the base board with a thin layer.
Is it possible to lay tiles on tiles?
- Yes, you can either leave the existing tile floor in place and apply a thin layer directly over it, or you can remove the tiles with a hammer, depending on how high you want the floor to be in relation to doors and other interior features.
- If the existing tile floor is installed over a layer of mortar, it may be difficult to remove the tiles without removing a large amount of the mortar layer.
- If you are laying tile directly over an old tile floor, sand the existing tile using sandpaper. Clean with degreaser and test the bond in a small area overnight.
- Also check the floor height with the height of doors and cabinets. Any good solvent can be used to install a new floor.
Unsuitable subfloors for tiles
Subfloors to avoid when installing tile are those that are prone to bending, expanding, contracting or warping. Any excessive movement will weaken the tile and cause grout. Unsuitable subfloors must be replaced or covered with a suitable underlay. Here is a list of prohibited subfloors:
Sequence of repair actions
When you have the necessary tools and materials, you can begin to work. Next, we’ll look at how to repair the door leaf if you’ve punched a hole in a fiberboard door.
We offer you a sequential algorithm of action:
- Before filling a hole in a fiberboard door, remove it from its hinges and place it on a horizontal, flat and stable surface.
- Armed with a construction knife, we make a hole. To do this, you need to retreat some distance from the edge and make a cut with a confident and strong movement.
- Now you need to place paper, newspapers, sections of fiberboard, chipboard, wood, and shavings inside the door leaf. This manipulation will allow the structure to gain strength. In addition, filling the space can reduce the consumption of polyurethane foam.
- Construction foam should be laid on top of the filling materials.
- When the mounting compound has completely dried and hardened, its excess should be removed by cutting off with a knife. If there are many traces of foam on the surface of the door that are impossible or impractical to remove with a sharp object, use a solvent.
- The next step in repairing a hole in a fiberboard door is to coat the area where the hole was with epoxy resin. When performing this manipulation, be sure to wear gloves. This substance coats the foam, forming a dense protective crust on its surface. If resin gets on your skin, remove it with a solvent as quickly as possible.
- After hardening, the surface of the door is covered with putty. The required amount of material is collected onto the tool, after which it is evenly distributed into the cracks.
- When the putty has dried, you need to walk over the area to be treated with fine sandpaper to clean and level the surface.
- We complete the repair of the fiberboard door by applying three layers of primer to the surface. When it dries, you can finally coat the door with varnish or paint.
Option details
How to cover cracks with putty
The basic principles of woodworking with putty are illustrated by the example of how to repair cracks in a large meticulous crack in a walnut cut. So, the compounds should be applied using a spatula and tightly fill the crack cavity. All putties gain strength after drying, but their hardness will not be compensated by sufficient elasticity. If there are large fluctuations in the size of the wood, which are caused by swelling or shrinkage, the putty joints will begin to crack after a while. For this reason, this method of sealing holes and cracks will be effective to a greater extent only for interior work, where changes in temperature and humidity are not so intense.
Glue mixture + wood shavings
How to seal holes in wood from self-tapping screws? As a material for sealing holes and cracks, you can use a mixture of carpentry adhesive and small wood shavings. This method is not suitable for correcting wide depressions and leveling large surfaces, but you will have a more reliable alternative to putties during local repairs. Unlike the putty, which, with its many advantages, fills the recesses, the filler, which is made from wood glue and shavings, additionally helps to ensure strong adhesion.
In those places where the putty will sooner or later begin to crack due to seasonal fluctuations and other factors, a self-made adhesive filler can adequately withstand the test of time. It should be used to seal cracks along carpentry joints, repair cracks in wooden doors and other places where loads will fall on the seam. The adhesive composition is best mixed with fine wood dust obtained from sanding wood.
When dried, such a composition will shrink greatly, and for this reason, when filling cracks, it should be applied in excess, so that the filler even protrudes slightly above the surface. After the mixture has dried, the excess can be carefully removed with a sharp chisel, and the area to be repaired should be sanded with a fine-grain abrasive.
You should think about cracks during design. The fact is that due to seasonal fluctuations in humidity levels, the wood will constantly change its size. This important feature should not be forgotten when designing and creating most carpentry projects. In particular, we are talking about the manufacture of tables from an adhesive board, and even more so from solid wood, and their covers should be fastened using special fittings, which will allow the wood to freely change sizes. Rigid installation of the tabletop, which is tightly screwed to the table frames, can lead to warping and the appearance of long longitudinal cracks.
Epoxy resin
Using epoxy resin is the most reliable method for filling holes and cracks. Two-component resins, which consisted of a resin and a hardener, can be easily modified into an adhesive filler. With their help, you can easily obtain a composition of the required color and viscosity, which will perfectly fill cracks, potholes, chips and provide excellent and durable adhesion.
Repairing deep cracks
As a result of the shrinkage of the building, the seams between the panels often come apart and deep cracks form. The easiest way to get rid of such problems is to seal them with construction foam. It perfectly fills voids and penetrates into the most inaccessible crevices. In addition, such a material adheres well to different surfaces, instantly expands, and hardens immediately after contact with air. If you use polyurethane foam, you can confidently count on a high-quality result in eliminating defects in the wall.
Preparatory activities
Before starting wall restoration, it is important to carefully prepare the surface for future work. The gap must first be cleaned of concrete splinters and dust, then be sure to moisten it with water.
Application process
Before using construction foam, the container must be thoroughly shaken so that its contents acquire a uniform consistency. During use, the container should be kept in a vertical position (always upside down). Then the lighter gas inside will displace the foam mixture from the can.
All cracks must be filled only from the bottom up. In case of serious damage, polyurethane foam must be applied in layers. Moreover, each subsequent one is laid only after the previous one has completely dried. This method allows you to quickly and efficiently seal the gap and dry the material well.
At the finishing stage, using a sharp knife, it is necessary to remove excess polyurethane foam. Then you need to carefully apply putty to the surface. Once it has dried well, it is recommended to level the base with sandpaper.
Polyurethane foam allows you to reliably seal deep cracks and seams, attach some parts, and create a sealed cavitySource sense-life.com
Through hole
A through hole can appear from anywhere, for example, under the weight of household appliances or all kinds of cabinets. When they come off, they violate the integrity of the wall structure. Naturally, this needs to be repaired on both sides, but if you do not have the opportunity to do this, then you can deal with it one-sidedly.
The tools you need include a spatula, dowels with screws, an electric drill, bricks and, accordingly, the mortar itself.
Using an electric drill, you need to drill and install four of the strongest dowels with screws into the hole. This will provide support for the brick so that it does not fall out on the other side. The stone or brick must be selected of the appropriate size so that it covers the hole tightly enough.
All this is strengthened only with cement mortar, made as we described above. Carefully ensure that there are no gaps left, fill all empty spaces with the mixture. Next, carry out finishing work, sand and cover with the necessary material.
Expert opinion
Strebizh Viktor Fedorovich, leading construction foreman
A mixture of brick and mortar is placed inside the hole and compacted tightly, eliminating any gaps and leaving no overhang from the cemented surface; If you want to clarify something, please contact me!
Results
Why do you need a cord and is it possible to do without it? It is forbidden. To create a functional external seam that changes its dimensions along with the material as it shrinks and swells, the sealant must have contact with only two planes. If there is a third plane, the caulked seam will tear or crack. For the seal, you can use natural wool or tow, but as practice has shown, cord is the best solution. Narrow cracks and cracks up to 0.5 cm wide do not require sealing.
Source
The nuances of eliminating holes before wallpapering
It is quite difficult to glue wallpaper onto an uneven and holey surface. Therefore, it is better to remove all recesses and cracks in the wall in advance. This will allow you to subsequently create a perfectly even and beautiful coating.
When preparing walls for wallpapering, the same building materials are used: putty, repair compound. The restoration process itself differs only in that the completion of the elimination of the defect is considered to be cleanup. This is done using tools that are designed to level the base. If all stages of repair work are performed correctly, the surface will certainly turn out neat. The latter will prevent damage to the wallpaper after gluing.
The end of eliminating a defect is a final clean-up performed using tools for leveling the surface. Source sense-life.com