Often you want to give an original gift to your loved ones or even to yourself, to decorate your home with something made with your own hands. A great way to do this would be to burn your favorite photo onto wood. And we will tell you how to convert a photo into a drawing for burning in today’s master class.
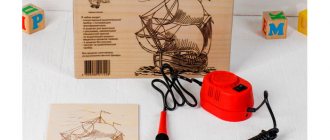
Wood burning or pyrography is a very popular type of needlework. In the old days in Rus', men were famous for their ability to create masterpieces with the help of a burner and a block of wood. Today, this type of needlework is available not only to men, but also to women and even children. You can even buy a special burning kit at hobby and craft stores, or you can buy a pyrograph and a wooden board or plywood separately.
A few rules
Before you start work, you need to familiarize yourself with some rules that will allow you to do the work quickly, easily and without damage.
- Make sure the board you will be working on is dry.
- Heat up the pyrograph. The tip of his pen must be dark red in order for the pyrograph to “write” well on wood. You can regulate the temperature of the pen using a special regulator located on the pyrograph.
- Have a support for the hand in which you hold the device. This is important so that the pen does not come off, ruining the drawing or damaging your hands or clothing.
- For beginners, it is better to choose simple photos or pictures that you want to transfer to the board.
- It's best to hold the pyrograph like a regular pen, this will allow you to apply as much pressure as you need.
- To get a fine line, run the burner quickly over the wood. To obtain a thick line, the pyrograph should be moved slowly.
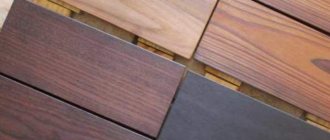
- It is much more convenient to use light and soft wood; it is easy to burn on it. These species include linden, chestnut, and birch.
Related article: Large knitting with patterns for hats and blankets
Why does the work lighten up?
The baking soda solution itself is an alkali, so it “eats” (or in other words cleans) the surface. Many people use baking soda to clean cutlery well. Someone even manages, following advice from the Internet, to ruin the enamel on their teeth using soda.
This property, on the one hand, is useful to us (since it removes tar from the surface of the plywood), but on the other hand, it can cause problems. It is extremely important that the neutralization reaction of the resin and oils takes place completely. Otherwise, the remaining soda will begin to corrode your picture. Moreover, you may notice this not even in the first days, but after a week or two.
This is extremely unpleasant, especially if you do not notice it yourself, but your client tells you about it.
Basic techniques
There are two ways to do this. The first is ideal for wood burning, and the second is for transferring a photograph or picture onto wood with additional burning.
First way
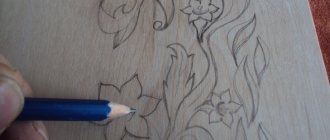
This method of converting a photo into a design for burning is the simplest and most optimal. First, select the desired photo and print it to the size of the wooden surface.
We will also need carbon paper and a simple pencil to trace the drawing. You can also use a pen or toothpick.
The only thing that's inconvenient about a toothpick is that you won't be able to see which line you've already outlined and which you haven't yet. Therefore, several identical lines with a small offset may be printed on the picture.
We apply carbon paper to a wooden surface, put a printed photo on top and simply trace all the lines, shade the hair, and so on. Whether you want a pop art style photo or just an outline photo, this effect can be achieved using computer or online photo editing programs. It will be much easier to translate such a photo.
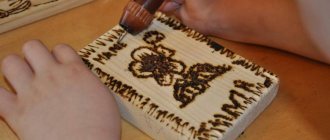
After the photo is transferred to wood, you can begin burning. You need to act carefully, do not forget about the scope of the strokes and the pressure on the pen. If you press hard, you will get deep lines. Once the burning is complete, the painting can be painted with acrylic and then coated with wax or wood varnish.
Second way
You can transfer a photo onto wood using decoupage glue and a printed stencil. You can also choose an edited photo with a pencil or outline effect. The photo or picture must be printed in a mirror image. It is best to print the photo on a laser printer.
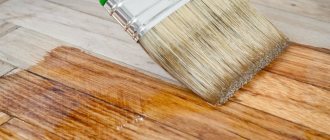
Carefully coat the prepared board with glue diluted with water. You need to coat the entire space of the board on which the photograph will be attached. Then we attach our picture or photograph to the tree. Using a dry sponge, press the picture more tightly to the wood, getting rid of excess glue and air.
Related article: Crochet poncho with granny squares
Now we wait for the glue to dry completely. Next, with a wet sponge, we begin to erase the layer of paper. When the picture is wet enough, you need to start removing the remaining layers with your hands; you need to rub the picture gently, but hard enough to form pellets.
When the paper layer is removed, we see that the design from the printout is completely displayed on the wooden surface. Now, after waiting for it to dry completely, you can bring it to the desired state using a pyrgraph, for example, outline the contours of the entire design or small details, and also paint it using acrylic or watercolor paints. All this needs to be secured with colorless furniture varnish.
And now our panel with the translated and burned photograph is ready! You can hang it on the wall, attaching special mounts to the back, or give it to your loved ones as a souvenir. Happy creativity!
Set the required size of the picture.
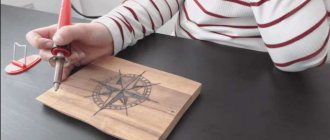
! To obtain a high-quality result of burning using the “point to point” method with a blue laser, you must remember that the optimal size of the pattern is 4 dots (pixels) per 1 mm or, accordingly, 16 pixels per 1 square. mm.
We convert the size of the original photo to the size of the burned pattern. In our case, we set the height of the document we need to 200 mm, while maintaining the proportions, the width of the document turned out to be 146.35 mm. Then, choosing a resolution of 40 pixels per centimeter (= 4 pixels per millimeter) or, the same thing, 102 dots per inch, set the desired document size in pixels (dots) - 800 px by 585 px (200mm x 4 pixels by 146.35 mm x 4 points). Image -> Image size -> ok
We use an iron
You can transfer the drawing using an ordinary iron. True, in this case it is necessary to buy paper with a special coating for inkjet printing, designed for thermal transfer of the image printed on the printer onto light cotton fabric. One such sheet costs 0.5-1 dollar.
On top of the textile you need to place a drawing printed in color, face down. The top of the picture must be ironed with a hot iron (the steaming mode must be turned off). While the paper has not cooled down, it must be quickly removed from the fabric. A bright, richly colored image will remain on the surface of the material.
Advantages and disadvantages
allows you to get a copy in color; ease of implementation.
You will need thermal transfer paper; fabric with a printed picture in color can be washed at a temperature of no more than 40 degrees; Do not use bleach when washing.
The essence of technology
Don’t be intimidated by such buzzwords as sublimation printing technology or graverton, because they are one and the same thing, and therefore less incomprehensible. The technology is based on the principle of sublimation, when a substance, under the influence of high temperature, “jumps” from a gaseous state directly to a solid state, bypassing the wet stage.
Briefly about the main thing
Graverton technology allows you to transfer a design to wood, metal, glass, fabric, and the process itself takes place in a certain order:
- The image is printed on sublimation paper;
- The front side is applied to the object being processed;
- Placed in a heat press for a certain time.
A huge number of things can be subjected to artistic processing - from shoes, dishes, fabrics to corporate symbols, puzzles and all sorts of other unexpected things.
The main disadvantage of graverton technology is the need for special equipment and its high price:
- sublimation printer (starting from 500 thousand rubles and kopecks);
- thermal transfer press (from 9 to 30 thousand rubles).
In this press, a picture sticks to the mugs and is fixed
And since you want to transfer a design to wood at home from time to time, it makes sense to purchase expensive equipment only if you take the matter on a grand scale.
Transfer using decoupage film
Decoupage is becoming a very popular hobby, so many people know how to handle film from it. After printing the desired image on it, also prepare white acrylic paint.
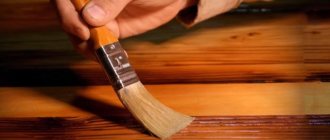
It is necessary to perfectly clean the wood and also give it a smooth surface. Next, we apply pre-slightly diluted paint in two layers. Moreover, the application directions must be perpendicular to each other.
The paint must be allowed to dry. Once this has happened, the dampened decoupage paper (about 30 seconds soaking in room temperature water) is placed on the surface, removing the base and rubbing with a sponge to ensure a tight seal. After waiting for it to dry, you can treat the surface with varnish.
In conclusion
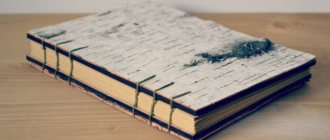
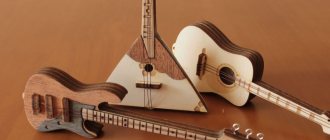
The new possibilities of a wood surface used as a basis for a painting or photograph are unusual and evoke a lot of emotions. Familiar images look a little different than on paper - softer, more mysterious. Branded supplies will help perpetuate your work, which may outlive the paper version.
The video in this article shows an example of transferring an image to wood.
You can ask any questions you have about transferring an image to wood in the comments to this article.