The history of wood burning, or pyrography, dates back hundreds of years. Since its inception, technology has undergone many changes. Artists have been honing their skills for years and applying new technologies.
It is based on drawing a design on a wooden board with a hot tool. Pyrography will be interesting for children, especially boys. This article will help beginners step by step understand the technique of wood burning.
Wood burning for beginners
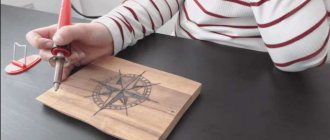
To work, you will need an electric burner with a special loop pen or a soldering iron burner.
The principle of their operation is similar, with the exception of nuances:
- The loop tip heats up quickly and cools down quickly.
- It is very difficult to draw a straight, continuous line with this tip.
- The service life of this type of pen is quite short.
Regardless of the type of burner, you can achieve significant results on any device.
The best materials are:
- Plywood sheet;
- Boards made of wooden beams (cedar, cherry, poplar, aspen). The tree should be smooth, without knots;
- MDF board.
Workpieces coated with paints and varnishes should be avoided - they heat up during operation and their vapors are poisonous.
In order to save material, the workpieces can and should be divided. This can be done in the store or markets where the preparations are purchased or at home yourself. A jigsaw (for plywood) or a hacksaw (for wood) is suitable for this.
Cutting must be done with care so that the edges of the workpiece are not damaged. Next, the wood is processed with sandpaper and cleaned of dust.
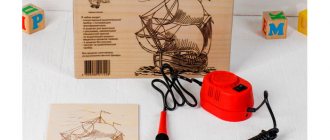
A simple and effective solution would be to buy a ready-made kit, which includes everything you need for the job. You can also assemble the set yourself.
It most often includes:
- Sandpaper for processing the workpiece.
- A simple pencil for sketching (hard, pointed).
- Work table with stand for burner.
- Paints and varnish of your choice.
What can you burn on?
If you want to give someone a gift in the form of kitchen utensils, and even decorated with your own hands, you may need items such as rolling pins, wooden spoons and plates, and cutting boards.
You can burn simple and complex ornaments, various natural motifs, flowers, animals, dedicatory inscriptions enclosed in frames, and so on on them. There are many options, and some of them are shown in the photo below.
Most likely, the recipient of the gift will not use it in everyday life, but your work is guaranteed the most prominent place!
When burning on rolling pins, the work will be a little difficult, because the rolling pin is a voluminous object. Therefore, for convenience, place several pieces of plywood under the hand with the pyrograph, and with the other hand hold the rolling pin by the handle and scroll when the design requires it.
If you want to burn the text and enclose it in a frame so that the frame is even, you can use adhesive tape: stick it on the wood, giving it the shape that you want to give to the bottom edge of the frame, and then burn along the line of the tape as an outline.
Burning on wooden spoons is also quite problematic, so it is best to secure the spoon. Patterns for burning on spoons can be different: flowers, landscapes, ornaments, and words of congratulations. To hang such a spoon on the wall, you need to drill a hole on top and insert a cord. Twine will look beautiful with a wooden spoon.
Wooden spoons are usually easy to find and quite cheap, so the whole value of such a gift is that you had a hand in creating a masterpiece.
You can also easily handle burning on a cutting board. It can be used in everyday life, or can decorate the owner’s kitchen. Beech boards are not the best choice for those who want to burn a design with small details; it is best to burn words, names, etc. on such boards. For small parts, it is best to choose a board made of elm or linden; they are quite simple and pleasant to handle.
As for patterns, it is best to burn flowers, landscapes, fruits and anything that reminds you of the kitchen on wooden boards. You can also burn portraits of animals and congratulatory inscriptions.
You can make a beautiful drawing with a pyrograph with your own hands on any wooden surface; you just need to be patient and have the desire to create beauty. Therefore, remember that everything is in your hands! Happy creativity!
Burning methods
Contour, silhouette and artistic techniques are the most common and in demand in wood burning.
The contour technique is considered the easiest to perform. The drawing is done along straight lines, so even a child can do this work. Examples include inscriptions on boards and shading.
Silhouette technique - the background around the image is completely burned out and shaded, while the image itself remains clean.
Artistic technique involves a symbiosis of the first two options. Such a drawing is worked out in detail, work is done with light and shadow, and perspective. This option is suitable for experienced artists; master classes are held on such work.
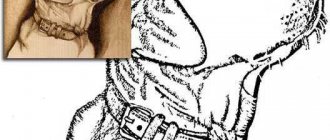
Tiger
Unlike a complex picture, even a small child can burn out animals if you choose the simplest sketch for him. For adult craftsmen with experience, you can find a more complex stencil, with many small strokes. But the image of a tiger on the board is ideal for beginning pyrographers.
To further train a small child, it is better to choose a picture for children with additional elements - trees or other animals. Such designs are often used to decorate cutting boards or act as independent compositions. Gradually, the child will master complex techniques in pyrography, and over time will learn to burn portraits.
Tips for Beginners
- The contours should be drawn in one line, moving the tip slowly.
- The beginning of the line will be smooth if you blow a little on the sting when you start drawing it.
- The fastest way to fill is at the average temperature of the device.
- The tip should be cleaned from time to time to remove carbon deposits.
- You only need to change the tip with pliers.
- Do not leave the device online unattended.
- You need to give the pyrograph a rest, turning it off periodically. This way it will last much longer.
- If the burner malfunctions, you should immediately stop working, wait until it cools down completely, and then take it to a service center for repairing household appliances.
Getting Started
You need to work in a ventilated area using a respirator. The workplace and workpiece must be well lit. To prevent your working arm from getting tired, you can place a soft cushion under the elbow joint.
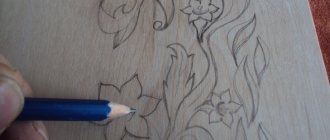
A hard pencil is suitable for drawing a sketch. In case of an error, excess lines are removed with an eraser. You can use carbon paper to make drawing easier.
During burning, the following rules must be observed:
- First, the main lines and contours of the image are burned out, after which detailing and shading are performed.
- It is better to move towards the body, so the arm will get less tired.
- If your drawing has a fill or gradient, the first step is to draw the outlines.
After completing the process, the surface of the image is cleaned with sandpaper (it is better to use fine-grained paper), and the charred areas are removed. The project can be colored with paints. After all the manipulations, the finished painting is varnished and left to dry.
How to apply a drawing
Make sure the board is dry before burning. Place connection points on the pencil-translated drawing and only then draw lines. To obtain a thin line, the electric burner should be moved quickly, and vice versa, if you want to get a thicker line, move the tool pen more slowly.
There is no need to press hard on the electric burner when applying a design. When the line is completed, the pen must be torn off sharply.
First, the outer contour is burned out, then gradually you can move on to the internal details, to the center. It is best to burn in parts, that is, you need to give the newly burned elements the opportunity to cool. So work a little on one area, then leave it and move on to another, and so on until the whole job is completed.
Related article: Paper crocodile craft: origami diagram for children
After burning, the surface should cool slightly, then carefully, so as not to damage the strokes and lines, especially small ones, you need to sand the board with fine sandpaper. You can paint with watercolors or oil paints only when the work has cooled completely. After painting, the work must be waxed, that is, subjected to a wax finish. Thanks to waxing, the design acquires a soft shine and preserves the natural color of the wood and the richness of the colors.
Wood burning for children
Many children love the pyrography process. Most boys achieve noticeable success with due diligence.
It should be remembered that drawing with a burner should be carried out under the supervision of parents. The tip is very hot, which should be warned about in advance.
First you need to decide on a sketch of the future drawing. Let the child decide for himself what he wants to draw. It’s better to start with simple jobs that he can do and won’t tire him out. Children love to draw toys, cars, animals. Based on this, you can choose a drawing from your favorite book or cartoon.
After drawing a sketch of the drawing, you should practice the basic elements of the image with your child so as not to spoil the entire workpiece. This can be done on an unnecessary piece of wood or plywood.
After repeating each element of the pattern several times without errors, you can begin working with the main workpiece.
You need to tell your child that to create a straight line, the burner is installed at an angle to the workpiece, without putting much force on the handle. The color and thickness of the line depends on the speed - the faster you draw, the lighter and thinner it will be.
To make the line uniform, the tip must be moved at a constant speed, without leaving the surface. To draw a dot, the tip should be held vertically.
You need to change the nozzles with pliers. The first time this should be done with the device turned off for the purpose of training.
After completing the main process, you can give your child paints, which will make the image more vivid. The most important thing for parents to remember is that you cannot leave your child unattended, especially if the device is not disconnected from the network.
Wood burning can interest even the most restless children and give them some useful skills. For adults, this process will help them relax after a hard day at work, because it is in moments of creative inspiration that a person rests his soul and body, and his thoughts come into order.
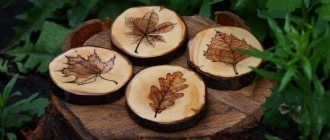
Nature theme
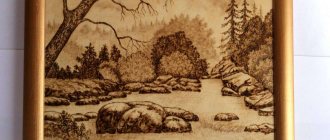
The beauty of nature can inspire any creative person, and pyrograph artists are no exception. Drawing their ideological ideas from the vast naturalistic ocean, they boldly embody them in decorating not only the walls of the room, but also furniture, dishes, and household items. Modern advanced tools allow us to talk about such a direction as miniature pyrography.
This kind of decoration will look great in a country house or in the interior of wooden houses. Adherents of a natural lifestyle and lovers of eco-style are sure to find many interesting and original crafts, both for themselves and for adding additional charm to their home.
With such a gift you can surprise the most demanding beauty connoisseur. In addition, a hobby can become a source of additional income if the hobby develops into a serious occupation.
On the vastness of the World Wide Web, you can create a mini-site offering your products or a page on the famous “Masters Fair”, posting new items there.
Everything will depend on desire, skill, and most importantly, patience in mastering the art of “drawing with fire.”
