A garage or workshop in a private house is a room in which men spend a significant part of their time. Owners try to do most of the work themselves, but this is not always possible without additional equipment. Buying factory tools is expensive, so homemade machines are an excellent alternative.
Purpose and types
Making homemade machines with your own hands is a completely feasible task. They are indispensable in the home workshop and help solve many problems, such as:
- processing of metal blanks, since in everyday life you often have to sharpen or drill something;
- working with wood.
The price of professional tools is high, so homemade machines and other devices made independently are in great demand.
The standard set in the workshop includes:
- carpentry workbench;
- device for sharpening cutting objects;
- device for sharpening drills;
- drilling machines;
- pressing mechanism;
- cutting machine using discs.
Accessories
In addition to active machines, in which electric motors are used to drive the working tool, manually driven mechanisms are used in the home workshop. Interesting or useful homemade products, carpentry tools and hand-made tools will help the craftsman in making parts, assembling components, and repairing various mechanisms.
https://youtube.com/watch?v=ckulUixg2w4
For your information!
On the Internet you can find many diagrams and drawings of homemade machines for processing metal, wood and other finishing materials.
Mini press
A hydraulic press is rarely used in the home, but it has a use in a garage workshop. When repairing a car, there is a need for force to assemble/disassemble components and mechanisms. For one-time work, you can use a vice or a hammer, but these methods are ineffective and the quality of the connection will be low. If you often have to work with dense plantings, you cannot do without a mini-press in the workshop.
The device consists of a load frame and a hydraulic cylinder with an oil pump. As the latter, a hydraulic jack is used, designed for the weight of a truck. The power frame is assembled from metal profiles. It is made integral by welding parts together, or dismountable by fastening components with bolted connections. The frame includes a movable table to change the distance between the jack and the supporting surface so that you can work with units of different sizes.
Crafting table
Whatever the master plans to do in the garage or utility room, he cannot do without a desktop. Its functionality will depend on the type of activity. In a carpentry workshop you need a wooden workbench, assembled from boards 40-60 mm thick and with a large working surface. For welding work, a metal table is made, preferably with a rotating surface. The top plate is made of rolled sheets.
In general, the craftsman will need a stable workbench on which a vice will be attached, and there will be space for installing clamps. As a rule, the table frame is made of metal. To do this, use steel corners with a shelf width of at least 5 cm or square profile pipes measuring 50 x 50 or 60 x 60 mm. The frame is welded, eliminating threaded connections that can come loose due to vibration. The table top is assembled from boards 50 mm thick. The surface is sanded and painted, if necessary covered with thin sheet iron.
For your information!
It is advisable to provide drawers in the table in which you can store hand tools and all sorts of useful little things.
Pipe bender
When working with metal, sometimes you need to give the workpiece a curved shape. Shaped products will be needed in the manufacture of greenhouses, canopies, fences and gates. It is impossible to bend parts by hand - it will not be possible to give the workpiece the correct shape. The required bending radius is obtained using a three-roll mechanism, the basis of which is two support rollers and one central roller. The latter exerts pressure on the pipe, the position of which determines the radius of its bend.
To make a pipe bender, you will need metal plates made of thick sheets, round rolled steel, bearings, rollers, and a pressure mechanism. Manufacturing process:
- Metal plates are placed parallel at a distance of 10 cm from each other. They are fastened together with threaded rods or welding.
- Fixed bearing units are attached to the plates, into which round axles are inserted.
- A pressure mechanism is installed at the base of the structure. It can be screw or hydraulic.
- Bearings with a movable axis are attached to the pressure mechanism. A collar is put on the edge of the latter.
- Shaped rollers are placed on the axes.
You can make many machines and devices for your workshop with your own hands. By supplementing the workplace with a system for removing dust and chips, with bright lighting, the master will preserve his health and protect the process
It doesn’t matter which option is chosen for arrangement, it is worth providing shelves for tools or boxes for equipment. The main thing is that using self-made mechanisms is convenient, easy and safe.
Joiner's machine
Making homemade machines with your own hands begins with sketches of a drawing. The main parts of a homemade carpentry machine are:
- Working surface. It is necessary to stock up on wood, the thickness of which is at least 6 cm. It is better to choose narrow boards, made of oak, hornbeam or beech. To extend their service life, they are pre-treated with drying oil.
- Homemade vice. Product sizes may vary. If desired, several types of clamps can be installed. To create a massive vice, choose wood. For small bench vices, steel blanks are used.
- The basis of a carpentry workbench. Linden or pine are suitable for it. The structure is strengthened by means of longitudinal bars, which significantly increases the stability of the machine.
It is more convenient to work if there are shelves nearby. The best option for their location is directly above the work surface. Shelves are either fixed or retractable.
The optimal linear parameter of a joinery machine is a length not exceeding 1 m. When installing a pair of vices, the length is slightly increased.
According to modifications they are distinguished:
- mobile;
- stationary;
- folding universal machines.
Homemade machines and devices for the home workshop: popular options
A home workshop is far from uncommon in the yard of any zealous owner. When arranging it, there are some features that must be observed. Our review will help you select and make homemade machines and devices for your home workshop, as well as understand the technology of their manufacture. Each owner can independently select the necessary equipment. And if you know the technical features of the structures, then you can arrange the room on your own. When arranging equipment, it is important to plan for sufficient space. It is better if the workshop is equipped in a separate room.
The quality of work and comfortable working conditions depend on the functional arrangement of a home workshop.
Homemade machines and devices for the home workshop
Before selecting a set of homemade machines and accessories for the garage, it is necessary to create optimal working conditions. In this case, the size of the room must be at least 6 square meters. m. You can attach an additional room to the garage or to the house. It is important to decide what types of work you will carry out, as well as make a list of equipment and necessary tools.
A compact workshop can be set up in a garage
It is most convenient to organize storage of some types of tools on the wall. This will save space. It is also convenient to use racks and shelves.
To save useful space, it is worth making universal devices that combine several functions. The table should be equipped with drawers, and also used as a carpentry workbench.
Ergonomic design of the desktop allows you to place the maximum number of items
When choosing homemade machines and devices for your home workshop, you can select different types of mini equipment. For working with metals, the following options are used:
- grinding equipment is used for processing metal surfaces: grinding, polishing and sharpening. Its manufacture requires a minimum number of components and parts. The equipment includes sharpening stones and an electric motor. For the stability of the device, mounting elements are used;
Grinding equipment option
- A milling machine is used to drill holes. In the manufacture of such a lifting mechanism design, a steering rack is used. In addition, you can install an angle milling machine.
Professional version of this design
For wood processing, various homemade tools and do-it-yourself devices are used. The most commonly used types are cutting, turning and grinding. With their help, you can perform all types of work at home. The following equipment is used for wood processing:
- cutting machines. The simplest device is a gas or electric saw. Such units can be disk, belt, or chainsaw sawmills. When making homemade equipment, it is worth considering the diameter of the disk, as well as the width of the cutting part;
Simple cutting equipment
- grinding device. The simplest option is made from a stable table, a vertical grinding shaft and an electric motor. An abrasive belt is used to process the ends of wood blanks.
Grinding device
Related article:
Woodworking machines for the home workshop. Specialized equipment with an electric drive greatly simplifies the processing of wood blanks. But acquiring it involves significant investments. To successfully solve this problem, you should carefully study the materials in this article.
DIY tool shelves: popular designs and manufacturing
It is worth noting the following options for storing tools:
- racks;
- hanging shelves;
- wall structures;
- shelves in the form of shields on which small tools can be mounted.
Unusual shelves for storing tools
You can make a panel shelf for a tool with your own hands like this:
- cut out a shield from plywood and mark the places where the shelves will be installed;
- make shelves with side walls, the length of which should correspond to the length of the shield;
- the shelves are fixed to the panel using self-tapping screws;
- hooks are mounted, which are equipped with a special thread;
- The brackets are being installed on the back side of the shield.
This way you can make a simple panel structure, which will allow you to put your workshop in perfect order.
For your information! Panel shelves are functional. You can attach hooks or special holders to them. An additional lamp can be hung above such a structure. In this case, you can use a small light bulb.
Let's start learning about useful DIY household gadgets from the workbench. This useful unit comes in the following varieties: stationary, mobile and folding.
The diagram shows the main elements of such a workbench
Remember that a do-it-yourself folding workbench drawing should contain the following details:
- a working surface, to create which you will need a board at least 6 cm thick. In this case, hornbeam, beech or oak are used. You can use boards painted with drying oil;
Special drawings will be required to carry out the work.
- a vice structure is mounted on the top cover;
- The supporting legs of the workbench are made of pine and linden. Longitudinal connecting beams are placed between them to ensure stability of the entire structure;
- Shelves for tools are mounted under the workbench.
The diagram shows how to correctly assemble such equipment
You can see how to make a simple workbench in this video:
Technology and drawings of a do-it-yourself carpentry workbench: simple design
To make such a device, you will need drawings with the dimensions of the carpentry workbench.
In this photo you can see how the folding structure is made
Let's look at how to build such a device:
- To make the lid you will need thick boards. The dimensions of the shield should be 0.7 * 2 meters. Long nails are used for fastening;
- the roof is finished using timber;
- depending on the dimensions of the carpentry workbench, vertical supports are used;
- The height of the working surface of do-it-yourself carpentry workshop tools is determined. Markings for the beams are applied on the ground where these elements are buried;
- The workbench cover is being installed. The support bars are attached in pairs. In this case, long self-tapping screws are used.
Homemade design option
You can buy a wooden workbench or make one yourself. Additionally, the structure can be equipped with drawers. So, let's look at the manufacturing technology:
- vertical supports are fixed using horizontal jumpers. They make grooves for connecting fittings. In this case, a chisel and a hammer can be used;
- When the jumpers are installed at the required level, holes are made in the bars on the support. Then the bolt is mounted, after which the elements are tightened;
- horizontal jumpers are installed two pieces on each side. Parts under the countertop will be required for installation above the work surface;
- bolts are used to secure the work surface. Holes for fastening elements are drilled on the tabletop. The bolts are mounted so that the bolts are recessed.
Wood construction drawings
You can easily make a belt sander at home. In this case, you will need an emery cloth and a sanding belt. Its sticker is applied end-to-end. To strengthen the seam, it is necessary to place dense material under the bottom. In this case, you should not use low-quality glue.
Ready frame for the table
The diameter of the tape shaft should be several mm wider in the center than at the edge. To prevent the tape from slipping, it is necessary to wind it with thin rubber. For the manufacture of grinding devices, you can select designs such as planetary, cylindrical grinding and surface grinding.
Technology for making a carpenter's vice for a workbench with your own hands
For workbenches, you often make a vice with your own hands at home. The video allows you to see this process:
To make such a design you will need special studs. To work, you will need a screw pin with a thread. You also need to prepare a couple of boards. One element will be fixed, and the second will move. When manufacturing, it is necessary to use drawings of a vice with your own hands. In each of the boards it is necessary to make holes for pins, which are connected with nails. Then screws and nuts with washers are inserted into them. When constructing a homemade vice with your own hands, you should use instructions and ready-made diagrams.
Carpenter's vice design
Helpful information! If you make the pins movable, you can make workpieces of various sizes.
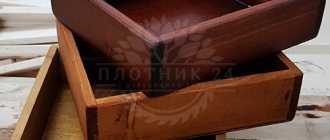
Making a metal bench with your own hands: drawings
If you often work with metals, the best solution would be to create a metal workbench with your own hands. Wood material is not suitable for such purposes, since it will often be damaged when processing metal products.
Universal metal option
It is worth noting the following elements of such a device:
- horizontal jumpers are used to ensure longitudinal rigidity;
- Small rack beams are made from profiled pipes. They are used to assemble the frame part of pipes. In the corner zone there are welded spacers, which are made of steel strips;
- for rack beams, profile pipes with a wall thickness of 3-4 mm are used;
- corner No. 50 is necessary for the racks on which the tools are mounted.
To create high-quality seams, it is necessary to use a carbon dioxide semi-automatic machine, as well as a pulse-type welding machine.
Assembly of a universal device begins with the frame. To do this, long and short beams are welded. To prevent them from twisting together, follow these steps:
- place the elements on a flat surface;
- in areas where connecting points are located, it is required that the beams are joined using spot welding;
- in this case, welds are made on one side of the frame and then on the other.
The diagram shows the frame of the metalworking machine, as well as its full view
After this, the rear beam and vertical posts are mounted. It is important to check how evenly they are located in relation to each other. If there are any deviations, they can be bent using a hammer. When the frame is ready, special corners are attached to it to strengthen the structure. The tabletop is made of wooden boards, which are impregnated with a fire-resistant liquid. A steel sheet is placed on top. A plywood shield is attached to the vertical rack parts. The same material is used for lining the cabinet.
Table 1. Making a metal bench with your own hands
ImageInstallation stages
| A carbon dioxide semi-automatic machine is used for welding the structure. |
| Creating a structure frame. For welding, all parts must be laid out on a flat surface. At first, the joining joints are simply tacked together, and then all the seams are welded. The rear pillars and beam are welded to the frame. |
| After welding all the stiffening elements, the following frame is obtained. |
| Then a reinforcing angle is attached to the frame to secure the tabletop. Before installation, the boards must be treated with a special fire-resistant compound. A sheet of metal is attached to the top. |
| The side walls are finished with plywood panels, and wooden boxes are placed in the right cabinet. To protect the base, the surfaces are coated with various paints and varnishes. First, the primer is distributed, and then a special enamel is used. |
Do-it-yourself knife sharpening device: drawings and nuances
To make a sharpener from a washing machine engine with your own hands, you can take parts from old Soviet appliances. To build a sharpening machine you will need the following parts:
- tube for turning flanges;
- grindstone;
- special nuts;
- steel elements for the construction of protective casings;
- cable cord;
- launching device;
- a block of wood or a metal corner.
Homemade unit for sharpening knives
The flange section must match the dimensions of the bushing. A sharpening stone will also be placed on this element. This part will also have a special thread. In this case, the flange is pressed onto the motor shaft. Fastening is carried out by welding or bolting.
The working winding is fixed to the cable. Moreover, it has a resistance of 12 ohms, which can be calculated using a multimeter. A frame is also made, for which a metal corner is taken.
How to sharpen a drill for metal: do-it-yourself device
You can make a simple metal drill sharpening machine from ordinary tools. An abrasive block is suitable for this.
At home you can use the following equipment:
- You can use an electric sharpener to sharpen the drill. In this case, sharpening is performed from the edge. When using a sharpener, you need to pay attention to the sharpening angle and the fixation of the drill on the axis of rotation. Excess metal should be removed gradually. Finally, the edges are shaped into a cone;
- A grinder is used as a do-it-yourself sharpening machine. For sharpening, the cutting tool is secured in a vice. To do this, the mounting angle is selected, and the disk is mounted.
Types of drill sharpening devices
It is worth considering that the grinder is mounted on a flat surface. In this case, the disk should be located downwards. If the grinding device is not secured securely, it can damage the drill. Sharpening with a grinder can only be done for products with a small diameter. It is not possible to finish using a grinding device. The edge of the shield is used to support the cutting tool.
You can also use a drill attachment, which should be equipped with a grinding disc with sandpaper. To grind elements with a drill, you need to find two flat surfaces.
Drilling machine for home workshop
You can make a drilling machine attachment from a drill with your own hands. The drawings will help you understand the design. For such a design you will need the following elements:
- base or frame;
- rotation device;
- mechanism for ensuring supply;
- stand for fastening the door.
Installation of the machine in the workshop
Here are the main steps in making a homemade drilling machine with your own hands:
- Chipboard is used for racks. In this case, you need to choose a thickness of at least 20 mm;
- To maintain the accuracy of the drill machine, it is necessary to use guides. In this case, you can use steel strips;
- For the pads, steel clamps are used.
To make a drilling machine you will need a rotary tool feed mechanism. The design uses springs and a lever. There are various tools for sharpening drills.
Assembling a drilling machine with your own hands: drawings with dimensions
The design will also require the manufacture of a homemade vice for a drilling machine. The simplest device can be assembled from a drill, without a steering rack. To minimize vibration processes, it is necessary to build a more massive table. The stand and table are connected at right angles. In this case, the drill can be attached using clamps. A vice is mounted on the table surface.
Complex drawing of a drilling machine
Designing a press for a garage with your own hands
The design of a homemade garage press is intended for straightening, pressing, bending sheet materials and for compression. Devices for plumbing work are characterized by a compact and simple design. The forces from such a press can vary between 5-100 tons. For garage work, 10-20 tons is quite enough. To make a similar design, a manual drive is used. The hydraulic device contains two chambers with pistons.
Homemade design
Do-it-yourself press from a jack drawings
You can see how to make a simple device on a special video of a press made from a jack with your own hands:
A simple option is a hydraulic one, which can be constructed from a bottle jack. An important element is the frame, inside of which the jack is placed. The platform is used as a reliable base. The upper surface is used to support the elements being processed. The table should move freely up and down on the frame. In this case, rigid springs are attached to the base on one side, and to the working surface on the other.
Using a jack
Here is a simple assembly diagram:
- the necessary elements are cut out according to the drawings;
- The base is mounted by welding. In this case, the steel structure should resemble the letter P;
- a mobile table is made from a pipe and channel;
- Finally, the springs are fixed.
They will help you make the design of a metal cutting machine with your own hands - drawings. Disc cutting machines are made from a special frame or platform. The machine is equipped with elements that provide strong fixation. A steel disc is used as cutting parts. To cut metal, a wheel coated with an abrasive material is used.
Disc cutting design
The cutting parts are driven by an electric motor. Disc machines are equipped with pendulum, front and bottom components.
You can also watch the video: how to make a cutting machine from an angle grinder with your own hands:
The machine works like this:
- protective covers are made on which the drive belt is mounted;
- the engine is attached;
- a shaft is made on which the drive pulley and cutting disc are fixed;
- a movable upper part of the structure is installed in the pendulum element;
- a shaft is mounted to fix the pendulum;
- a frame is made for mounting the machine;
- the pendulum is fixed to the frame;
- tools are being launched and devices are being set up.
Correctly securing equipment to the table
Using simple recommendations, you can build high-quality equipment yourself. In this case, you can make do with various available materials and tools.
homemyhome.ru
Simple design
A woodworking machine of simple design is made as follows:
- A shield is made from thick boards (0.7×2 m). To connect them, nails are used - they are driven in and bent on the reverse side.
- To prevent tools from rolling down during work, a small border is installed around the perimeter of the working surface. To do this, bars with a cross section of 50 x 50 mm are nailed from the end side.
- For the installation of supports, choose bars with dimensions of 12x12x130 cm. The height of the supports must be adjusted taking into account the requests of the master who will work at the machine. The main condition for this is comfort. It should be taken into account that after installing the cover, the height of the machine will increase by 8-10 cm. Next, you need to make markings on the ground and deepen the bars by 20-35 cm.
- Crossbars are attached to the supports, which are wide slats 20-40 cm from the ground level. Connections are made with wood screws. A pre-prepared wooden shield is installed on top.
You should not fasten the cover with nails; it is better to use self-tapping screws, since driving in the fasteners can damage the lower frame of the structure.
The simplest mousetrap in the world
This name can be assigned to many homemade mousetraps invented by craftsmen. They have one thing in common - humane treatment of animals caught in a trap. The device does not kill the animal, but isolates it. A few examples of how to make a simple mousetrap:
Plastic funnel
Cut a plastic 3 liter bottle in half. The cut neck is turned over and inserted into the bottom of the bottle. Bait (seeds, grain, etc.) is poured onto the bottom.
The trap is placed close to an object that the mouse could climb. A rodent, having fallen into a funnel, can no longer get out of the bottle.
Console
The design is a tilting platform. It is made from a piece of cardboard or plastic. The bar is placed on a plane so that half of it hangs in the air.
The bait is placed on the edge of the console so that the bar is on the verge of balance. The animal, having reached the bait, overturns the bar and falls along with it into the substituted bucket.
Suspension
An empty plastic bottle with bait at the bottom is placed on the edge of the table. A cord is attached to the neck by piercing the plastic with a hook made from a paper clip. The other end of the cord is tied to some support.
The mouse, attracted by the smell of food, enters the container. The bottle tips over under the weight of the rodent and hangs on the cord.
Assembly of a universal machine
The manufacturing technology of a universal machine differs little from the previous one.
Connections are best made using fastening bolts. In addition, a folding universal workbench involves installing drawers in which tools will be stored.
Step-by-step assembly instructions:
- They start by installing the supports and connecting them with horizontal jumpers. Before installation, grooves for bolts, nuts and washers are made on the jumpers using a hammer and chisel.
- After installing the jumpers, through holes are drilled in the required places. Bolts are inserted into them and tightened with nuts.
- Jumpers are installed at the rate of 2 pieces on each side. Additionally, crossbars are made directly under the tabletop, in the center. These will be used for drawers. Install the crossbars in increments equal to the width of the box.
- The work surface is also attached with bolts. Recesses are pre-prepared at the ends of the supports, and through holes are made on the tabletop. When fixing the bolts, the heads are recessed by approximately 1-2 mm.
Vertical tool holders
Every craftsman strives to organize his workplace so that the tools are at arm's length. This is facilitated by vertical holders.
Wrench holder
- A wooden plank is attached to the wall above the workbench. The rail is screwed with screws into dowels installed in advance.
- Small nails are driven into the strip at intervals equal to the width of the wrench handles.
- The keys are hung on the rail.
- Nail heads hold keys horizontally and vertically.
Screwdriver holder
- In a piece of timber 40 x 40 mm, holes are drilled corresponding to the diameters of screwdrivers, at a distance of 30 - 40 mm from each other.
- A piece of timber is nailed to the wall with dowels so that the holes are located vertically.
- Screwdrivers are inserted into the resulting sockets. Now you can quickly get the tool you need without leaving your workplace.
Chisel belt
- The plank is secured to the wall with dowels.
- The belt or belt is nailed to the bar so that unique through pockets are obtained.
- Chisels are lowered into the pockets, through which only steel blades pass. The handles are held in place by a belt.
The device can hold hammers, pliers, pliers and other tools.
Homemade soldering iron stand
When working with a soldering iron, a situation arises when you need to put the tool down. Placing a soldering iron with a hot tip on a tabletop or on any object is always risky. A homemade stand will solve this problem.
An example of making a stand for a soldering iron
- The holder is made of wire in the form of a spiral. To do this, unbend a wire clothes hanger.
- The wire is wound around a cylindrical object with a diameter of 1.5 - 2 cm. The handle of a chisel or other tool will do.
- On one side of the spring there is a free end of the wire.
- The end is bent into a loop with pliers.
- For the base of the stand, take a board 200 x 100 x 20 mm.
- A through hole ø 4 mm is drilled at the base.
- A hole is drilled from the back of the board with a large drill for a countersunk screw head.
- The screw is threaded from bottom to top.
- Place the spring loop on the screw and tighten the nut.
- Circles are cut into the board using a crown to fit the size of a cup for candles or similar products.
- Using a chisel, make a sample of wood in 3 recesses.
- Cups are inserted into the openings, which are filled with solder, tin and a napkin to clean the tip.
- The soldering iron is inserted into the spring.
- A small hole is made in the board for attaching a flexible steel cord from a lamp.
- A clamp is attached to the end of the cord, which is used to secure various parts for soldering.
The design may have a different look - it all depends on the imagination and ingenuity of the author.
How to make a vice
The main element of a homemade machine is a vice. For them, you need to purchase special fasteners - studs, which are easy to find in hardware stores.
The next detail, which is fundamental in the design, is the screw pin. It is with its help that objects in a vice will be clamped or loosened. The minimum diametrical cross-section of the screw is 20 mm, and the length is 15 cm. With these parameters, the machine connector will be 8 cm. The larger the screw, the larger the vice connector.
Clamping is carried out using jaws. One of them is fixed and attached directly to the tabletop, the second is movable. Sponges are made from pine boards. Parameters: 20x18x500 mm. A hole is made in them with a diameter corresponding to the size of the screw rod. Then use a No. 10 drill to make holes for the mounting pins. For ease of work, it is recommended to connect the sponges together with nails and remove them at the end of installation.
An unusual machine made from a washing machine
The master came up with a new machine design based on a washing machine engine, which is more functional than its analogues. Several interesting solutions were applied during the work and in the final design.
For homemade work you will need a profile pipe, a sheet of plywood, a section of water pipe, a bearing, a pin, and pulleys. At first I wanted to install a 420 watt motor, but later replaced it with a 300 watt motor, which is sufficient for this design with pulleys. The frame is in the shape of a parallelepiped. The master decided to install a large diameter grinding disc - 45 cm - to increase the functionality of the machine. This machine has more capabilities.
Products for inventors Link to the store.
DIY electronics in a Chinese store.
A few comments.
Nils Forsberg Maybe I'm a fool, of course, but I don't understand why people use disc sanders, why not a belt sander? On the plate, in different places on the disk, the sandpaper moves at different speeds, which is why it is almost not used near the center, but vice versa at the edge, then again cutting it into a circle means loss of material, a lot of glue is used for gluing, etc. With a belt sander, the speed is the same everywhere, whether in the center or along the edges, it is more economical in terms of sandpaper consumption, in terms of glue consumption, and in terms of wear resistance it is much better because You can glue the tape at least 3 meters or even more. It’s possible that the engine for a tape machine needs a more powerful one, but the benefits are undeniable.
Holmogorets A week ago, great. One note, there is no need to weld the assembly with bearings. Welding current passes through the balls, can spark through them and the service life of the unit is noticeably reduced. At least the return wire should be connected to the pipe itself, and not to the axle. Otherwise - handsome!
Vladimir Looked with pleasure. A lot of witty solutions! I would order the bearing housing from a turner, but then I sawed the pipe, pressed it, welded it and everything was ready! Subscribed to the channel. I hope to learn a lot. And the editing of the video pleased me! I'm tired of people explaining "twice two" for an hour!
Lathe workbench
The main element in a lathe workbench is the bed. The convenience of working on the machine, as well as its stability, depends on it. The part can be made from either wood or metal.
When drawing up a drawing of a workbench, you need to think about the engine option. Most often, its speed is 1500 rpm, and its power is 200-250 W. If you plan to process large objects, then the power should be greater.
Another element of a do-it-yourself turning and copying machine is a manual milling cutter. It is mounted on a plywood platform. The thickness of the plywood is 12 mm with dimensions of 20x50 cm. Holes are made in the base for mounting the cutter and for fasteners. Supports made of bars will also be attached to the router - they will ensure greater stability of the structure.
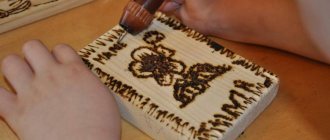
Decorative wood products for home
Homemade wooden items add a natural feel to the interior. What kind of crafts are made from wood cuts - panels, stands, clocks, shelves, rugs, paintings. Even coffee tables
They make vases, candlesticks, fancy figurines, table lamps, sconces, boxes and entire wooden installations from wood.
Children's crafts from tree branches include making a frame for a photograph or painting.
Crafts made from wooden beads also look beautiful. They will become a bright accent in the living room or kitchen.
- Liquid wallpaper. What do they need?
- Nickel-cadmium batteries. What do you need to know about them?
- Bathroom tiles. What is it like?
Home accessories are also made from the bark of pine, chestnut, oak, birch and other trees.
Wood cutting machine
For a do-it-yourself wood lathe, it is better to choose a steel profile with thick walls. To increase strength, it is necessary to install two supports. A frame is installed on them. The connection is made using a groove type. Support platforms are pre-prepared.
Here are a few nuances of a homemade machine:
- To drive, an electric motor is used, which can be removed from old appliances - a pumping station or a washing machine.
- The tailstock requires a drill head with high power ratings.
- For the headstock, a purchased production spindle with 3-4 pins is suitable. With their help, the movement of the workpiece along the rotational axis is ensured.
- The working surface can be a table of any design. The main thing is its stability and the comfort of the master while performing work.
- A pulley connects the headstock to the electric motor.
- To ensure the workbench works, you also need a set of cutters. They are purchased in a store or made with your own hands from tool steel.
Headstock and tailstock
The workpiece being processed is clamped between two devices called the headstock and tailstock. Rotation from the engine is transmitted to the front one, which is why it is a more complex unit.
Structurally, the headstock of a homemade lathe is a metal U-shaped structure, between the side faces of which a shaft and one or more pulleys are mounted on bearings. The body of this unit can be made of thick steel; bolts of sufficient length are suitable for assembling it into a single whole.
An important part of the headstock, as well as the machine as a whole, is the shaft, a spindle with three or four pins designed to fix the workpiece. This shaft is passed through the bearing of one of the cheeks of the U-shaped housing, then pulleys are mounted on it. To fasten them, a key or a means for fixing cylindrical parts is used, the second cheek is put on last, and the structure is securely tightened with bolts.
The tailstock's job is to support the long workpiece while allowing it to rotate freely. You can buy a ready-made part from a factory machine, or you can use a powerful electric drill chuck mounted on a square of suitable length. A shaft with a pointed end is clamped into the cartridge itself.
The headstock and tailstock are installed on the bed. It is important to understand that the axes of rotation of both shafts must completely coincide. Otherwise, breakage of the workpiece, failure of the machine, and possibly injury to the turner are likely.
Manufacturing of cutters
Blanks for the manufacture of cutters must have adequate strength and a hard edge responsible for the thread, and be securely inserted into the clamp.
Suitable for making cutters:
- Small pieces of steel rods corresponding to the dimensions of the parts and having a square cross-section.
- Failed files and rasps that do not have strong chips or cracks.
- Car springs. The workpiece is first given the shape of a square - using welding or autogenous.
To install cutters on a machine, you need a specially modified housing with parts for installation. All elements must be made of high-strength material that can withstand heavy loads.
After the cutter is made, it is sharpened. To increase strength, the cutting part is hardened by heating to the desired temperature and dipping into machine oil. By repeating this process several times, a durable tool is obtained.
Garden sprayer and clamp
It all started with Metamorf
it was necessary to treat the area against ticks, and the old manual sprayer had given up its life. I urgently needed to buy a new one or find a replacement for it. While preparing for processing and thinking about what could be done, a user of our portal came across an unnecessary fire extinguisher lying around the household.
Next, we proceed as follows - carefully unscrew the fire extinguisher, pour out the remaining powder and rinse the cylinder with water. Instead of a bell, we screw in an adapter into which, depending on the need, you can screw in a nipple (for pumping air) or a nozzle (for spraying the mixture).
Metamorf (FORUMHOUSE User):
Using a homemade sprayer is very simple: fill the fire extinguisher halfway with a special spray liquid, then pump it with air, screw on the sprayer and go poison the ticks.
DIY carpentry tools
Let's move on and move on to carpentry fixtures. Those who are engaged in “carpentry” will appreciate the budget wedge - an indispensable device for any carpenter for gluing wooden panels.
QWEsad (FORUMHOUSE User):
One day I needed to glue together a lot of wooden panels. I didn't have any clamps. Therefore, I decided to quickly assemble a clamp from wooden blocks with a cross-section of 5x5 cm and metal plates with welded nuts in “tens”.
In total, the user made 3 of these wedges; this was enough to glue a wooden board measuring 1.5x1.7 m and 18 mm thick. To prevent the bars from sticking to the workpiece, under those places where there is a seam and glue may protrude, you can put a newspaper or shoot polyethylene with a stapler.
In order not to spoil the workpiece, you need to place a gasket under the plate into which the screw rests. The gluing width is adjusted by moving the stop bar.
Homemade woodworking tools are constantly being improved. A more advanced version of the wedge, made entirely of metal, is offered by Alano
. The components and operating principle of the device are clearly demonstrated in the following photographs.
To make such a wedge you need a welding machine.
On FORUMHOUSE you will find other developments and even drawings of homemade devices.