In store windows you can find a large number of jewelry boxes of the most unusual shapes.
Their decor amazes with its beauty, however, despite such “decoration”, the desire to make a jewelry box with your own hands does not disappear among needlewomen.
Making crafts with your own hands is not only a tribute to talent, but also a desire to show skill, to create an original thing that no one else has.
What can you use to make a simple DIY jewelry box?
The box performs two functions:
- You can store various jewelry, jewelry and hair accessories in it.
- It is a stylish element in the interior.
A beautiful jewelry box always attracts the attention of girls, women and even little girls. It’s hard to argue with the fact that women really love this kind of cute little things. Although you can’t say that the box is a necessary thing in a woman’s room, rather an unusual and beautiful box, in addition to being practical, plays an aesthetic role.
A lot of hairpins, rings, bracelets and other jewelry, without which many girls and women cannot imagine their lives, can be carefully stored in a box. You can buy a ready-made jewelry box, but we suggest making it yourself. A handmade box has many advantages:
- Low cost of materials.
- Unique design.
- Handmade, which is always appreciated.
- You can determine the optimal size and shape of the box yourself.
To make a box with your own hands, you don’t need to buy any materials. You can make a beautiful thing from the materials you have at home. For example:
- Paper
- Cardboard
- Old shoe box
- Tetrapack for milk or juice
- Plastic bucket for mayonnaise or other products
- Egg container
If you have beads, buttons, colored paper, leftover fabric, ribbons and other decorative elements, you can decorate the box beautifully. It is not necessary to do everything as in the photo; you can add something of your own when decorating the box. This will make your box unique.
You can make handmade boxes not only for yourself, but also as a gift. This cute little thing will not leave indifferent the majority of women and girls of different ages. You can create handmade boxes to earn extra income. If you like to fantasize, craft, and create something beautiful and aesthetic, then you will like this activity. We have collected many ideas on how to make and decorate a handmade box.
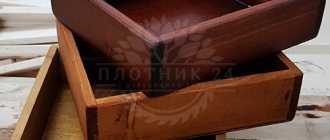
Handmade box
Convenient family calendar
Clothespins in the interior can form a beautiful and effective calendar of family affairs. You will need:
- clamps;
- gouache or acrylic paint;
- brush;
- gel pen or marker;
- twine;
- sandpaper;
- scissors;
- decorative tape.
The manufacturing master class is as follows:
- Paint the sides of the clips with the desired color.
- Write the day of the week or month on each of them.
- Attach them to the rope.
Now you can write down the things you want to do this week on small pieces of paper and attach them to the desired clip.
How to make and decorate a book box with your own hands: ideas, description, photo
The box from the book is an original idea. A book box can be a good hiding place if you want to hide some little things that are not intended for public viewing. In this case, there is no need to decorate the book cover.
If you decorate the cover of the book, you will get a very unusual box. It's easy to do and the process will take a little time. To make such a box, an old book that you don’t mind cutting is suitable.
What to do:
- Open the book to the first page, draw a square or a circle, depending on your desire. Make indents a few centimeters from the edges of the page.
- Using a utility knife, cut out the shape you drew. You can throw away the part that was cut out; it will no longer be useful.
- Then glue all the pages together. There is no need to glue each page, otherwise they will simply become soggy.
- It is enough to glue the pages together in places. The main thing is that in the end they cannot be flipped through.
- Decorate the cover of the book with fabric, paper, beads, newspaper clippings, and other elements.
- The inside of the box can be left as is. You can also cover it with plain paper to hide the yellowness of the book and give the box a more elegant look.
- The inside and outside of the box can be varnished.
- If desired, you can attach a miniature lock to the box, which is sold in hardware stores and handicrafts.
How to make a book box with your own hands
Important: When decorating a book box, like boxes made from other materials, stick to the same style. If this is a retro style, you can decorate the box with clippings from book pages and black and white photographs. If the style is Provence, add pastel colors and openwork ribbons.
Below are design options for a box made from an old book.
Handmade box from a book
How to make a box from a book
Cute box from a book
Car air freshener
The do-it-yourself flavoring is made from the following materials:
- felt balls;
- tucks;
- PVA glue;
- favorite aromatic oils.
Let's start making:
- Glue felt balls to the side.
- Add some scented oil to each one.
Attach a homemade fragrance to the inside of your car.
How and with what to decorate a box with your own hands: ideas, description, photos
Decorating a box is one of the most important and interesting stages in creating a product. You don’t have to make the frame of the box from scratch with your own hands. You could already understand this from the example of many of the boxes described. But you can’t do without decor. All its charm lies in the decoration of the box.
You don't have to be a craft guru to decorate a box. There is also no need to have expensive materials for decoration. You can decorate the box using improvised means. For example, egg shells and paper napkins. Ultimately, it is difficult to even guess what materials were used.
decorate the box with eggshells and paper napkins in the following way:
- First you need to boil the eggs, peel them, and chop the shells.
- Apply paint to the box, when it dries, apply a layer of glue.
- Then, while the glue is still wet, spread the shells evenly.
- When the glue dries, apply one or more layers of paint.
- Napkins with a pattern or pattern are suitable for decoration. Divide the napkins into two layers.
- Lubricate the inside of the napkin generously with glue.
- Carefully place the napkin on the box and straighten the edges.
- Apply another layer of glue on top.
This is such an interesting and unusual box.
Decor of the box with eggshells
Painting the box
Decor box with napkins
Another way to decorate a box on a budget is magazine clippings . A glossy magazine will do. You need to make a lot of tubes from magazine pages. You will also need glue. The photo shows that first you need to glue the tubes to the bottom of the box in a vertical position at a distance of 5 cm. Then you should weave the tubes horizontally. The tubes should fit tightly one to the other. To make the tubes stick better, fix them with glue.
How to decorate a box with magazine cutouts: step 1
How to decorate a box with magazine cutouts: step 2
How to decorate a box with magazine cutouts: step 3
Box decorated with magazine cuttings
Photo holder
You can create original things from ordinary clothespins without much effort. Need to:
- wooden elements-clamps;
- hoop;
- acrylic paint;
- hot glue.
A do-it-yourself stand made of clothespins for your favorite photos is made like this:
- To completely cover the wood with paint, the product should be disassembled.
- Once the paint is dry, reassemble the parts.
- Glue the elements to the hoop with glue.
- You can now attach photos to them.
You can put a vase or indoor flower in the middle.
How to decorate a box using decoupage technique: ideas, design style, photos
Decoupage is a popular direction in decorative and artistic design. You can master this technique from scratch yourself.
We will tell you what the decoupage technique includes.
Decoupage is a decoration technique that involves gluing a picture and then fixing it with varnish. The varnish helps to fix the picture so that it does not deteriorate over time.
In decoupage, as in other design techniques, there are styles. Let's look at what styles there are in the decoupage technique:
- Shabby Chic . The color scheme is dominated by delicate shades, small or medium-sized flowers, and romantic elements.
- Simplicity . In this style, newspaper clippings, magazines, and elements with printed text are used for design.
- Provence . Picture in the spirit of France, flowers, plants. The style uses pink, beige, pastel shades.
- Victorian style . Products are decorated with gilding; paintings and postcards are also used.
- Ethnic style . Pictures with African, Asian ornaments, exotic animals and birds are used.
- Vintage . Products with an “aging” effect, with scuffs.
The decoupage technique can be used on any materials - leather, metal, cardboard, plastic. But decoupage combines with wood better than all other materials.
You can purchase a set for decoupage, which will contain special napkins with drawings. It is not always possible to buy decoupage napkins. You can print ready-made pictures and successfully use them in this technique.
Plain paper, tracing paper or office paper are suitable for this. Print any design you like on a color printer. Now the paper needs to be thinned. This can be done in the following ways:
- Using tape. Apply varnish to the outside of the picture. You can use regular hairspray. When the varnish is dry, apply tape to the inside of the picture. There should be no folds or cracks. Now carefully tear off the strip of tape. Thus, you need to make the picture very thin so that later it can be used using the decoupage technique.
- With the help of water. Apply several layers of varnish to the picture. Each subsequent layer must be applied when the previous one has dried. Then place the picture in a container of water. After a while, take it out and start rolling the inner layer of paper with your fingers. If the paper is not yet sufficiently wet, leave the picture in the water for a while longer.
The next step is to work with the box. It should be painted, you may have to apply several layers of paint. If you want to get the effect of an old box, you need to apply two layers of paint:
- The first layer is dark.
- The second layer is light.
Then the top layer is rubbed down with sandpaper to dark spots. This creates the effect of scuffs on the box.
Decoupage boxes
At the next stage, paste the picture and open the product with varnish. As you can see, at first glance there is nothing complicated about the decoupage technique. Decorating the product will take time, since the varnish takes a long time to dry. It may take you 1-2 evenings to make a beautiful box. Decoupage is a great idea for those who don’t know how to draw, but want to make a box with a beautiful design. This technique is simple and at the same time looks luxurious if done carefully.
Painting the box
Below are options for beautiful boxes using the decoupage technique.
DIY decoupage box
Beautiful handmade box
Vintage style box
Making a beautiful box with your own hands is not as difficult as you might imagine. Now you know that you can make an original decorative box literally from nothing. If you have a well-developed imagination, if you like to create and do handicrafts, you will like this activity. Try to do the work carefully, then your box will look very presentable. We invite you to watch a detailed master class in which you will learn how to decorate a box with an aging effect using the decoupage technique.
Phone stand
A phone stand made from clothespins looks stylish and is functional. It allows you to easily hold your smartphone to take pictures. Take:
- 7 plastic hooks;
- pen or pencil.
The action plan is as follows:
- Attach clothespins to a pencil or pen, one to the other at short distances.
- Place the handle on the table, turn 1 and 5 back, 2 and 6 forward, and the rest should “look” up. It is into their grooves that the phone or tablet is then inserted.
You saw how many new and interesting things come out of an ordinary linen tuck. What creative ideas can you share with readers? Write in the comments.