Wood is an indispensable material for creating various original things that can decorate the interior of any apartment or house. Incredibly beautiful and stylish decorative elements are wooden candlesticks, which are quite easy to make with your own hands. Such candlesticks, even without a lit candle, always look very attractive and will attract glances if placed on an open shelf or coffee table.
wooden candlestick “heart”
Candlestick made from old wooden bracelets
Non-standard offers
Use an ordinary glass, surrounding it with cinnamon sticks, secured with a bright satin ribbon. The result is a designer craft with a fragrant smell. Unusual jars are used, decorated at your own discretion with green branches and braid.
The image of fallen leaves on the glass, literally coming to life before our eyes from the reflections of the fire, is delightful. The piquancy is added by catchy details: handles, bows, hearts.
Blessed base - glasses
The simplest version is to place a wide candle on the leg of an inverted beautiful champagne container, and place a Christmas tree, figurine, or ikebana under the bowl. If you prefer mobility, simply pour beads or kumuki inside, gluing the base to an LED disk trimmed with foil. A composition is created in the recess, including fir branches and fresh flowers. A border with rhinestones and tinsel is attached to the edge.
Step-by-step instructions for making New Year's decor:
- Spruce branches are trimmed to fit a tall glass. Their height should not darken the lamp.
- Having laid them out on the table, they are smeared with glue on one side.
- Then the samples are applied in a circle, cutting off the lower protruding stems.
The result is an openwork convex mesh.
To avoid glass walls cracking from heat, buy small candle products.
A floating candle-tablet in water with rose hips, pine needles, and beads looks very attractive. Such a delicacy will come in handy at a wedding or any other celebration.
Elementary
Perhaps one of the easiest ways to add a little coziness and country house spirit to regular tealights is to find some fairly thick fallen branches in the forest, saw them into pieces about 10 cm high, inside which you can make a recess for the candle. You can find complete instructions here.
Bottle fantasies
There is no end to the ideas on how to make a candle holder from bottles. Glass containers are painted in all sorts of shades, decorated with greenery, and wrapped in twine. Cut samples look great. A cotton thread is dipped in alcohol and wrapped along the line of the intended cut. It is set on fire, monitoring the distribution of the flame along the entire circumference. After immersing the bottle in boiling water for 3 minutes, it is abruptly placed under cold water. The glass will break at the point of impact. The manipulations are repeated several times if necessary.
Instead of a thread, it is not forbidden to use a glass cutter; the algorithm for subsequent actions remains the same.
Note!
- DIY furniture made from pallets (140 photos) - step-by-step master class with diagrams and drawings, design ideas
- DIY coffee table - manufacturing guide with a full description of the steps, choice of materials (120 photo ideas)
- Do-it-yourself laundry basket (130 photo ideas): step-by-step master class for making it yourself, choice of materials, design options
Sandpaper will help smooth out sharp chips. The resulting two parts can be connected by gluing the bottom to the neck part, used separately, covering the neck of a candle or filling the bottom with paraffin. The dark green or brown color of the bottles is especially advantageous. The originality of the masterpiece is given by bright accents.
Split log held together with wire
For this Finnish candle, a sawn log is split into four equal parts. All parts are marked on the outside with a knife so that later all parts of the log can be assembled together with the smallest gaps between them. For each of the resulting parts, cut off the corner that was adjacent to the core in the log. The resulting shavings are used as kindling.
The core of logs is usually drier than the outer fabric, and therefore kindling from it is easier to light. Photo survival.com.ua
Also, for future ventilation, you can cut the lower edges of the log parts at an angle.
All parts of the log are connected in accordance with the marks on them and form a cylindrical structure with a square hole in the middle and triangular gaps at the bottom (if they were cut, of course), which are connected to the central hole.
The central hole formed after removing the core will act as a hearth.
In this position, the log is fastened with wire. A small stick is inserted under the wire and twisted until the wire securely holds all parts of the log together. What it looks like in the end is shown in the photo:
If there were no lower gaps for ventilation, this version of the Finnish candle can be installed on a small groove so that fresh air can freely penetrate from below into the central hole where the fire will burn.
A small fire is lit at the upper end of this candle, the coals of which fall into the hole and gradually ignite the entire structure.
According to some unverified data, such a candle can also be lit from below if wood shavings are loosely placed in the hole so as to provide free passage for air. Be that as it may, this version of the fire-candle remains one of the most inconvenient to light.
To cook food on such a candle, place three or four small identical flat stones under the dishes or place two green sticks in parallel. Sometimes, instead, 3-4 nails are driven into the top end so that they rise above the wood. This is necessary so that the gases released as a result of combustion can freely exit through the upper hole and not interfere with the flow of fresh air to the burning coals. If this is not done, the cookware will block the top hole and the fire may go out.
Wooden coasters
Natural wood brings you closer to nature and has a colorful appearance. Using a drill, recesses are made in a block or stump for installing candles. Large driftwood or fancy logs treated with stain are also used for these purposes.
Original candlesticks are made by hand from tree bark, cutting windows of the desired shape into it. A simple option is to cover the glass with wood chips, gluing them or connecting them with twine.
More complex but original ideas
By adding some essential oils you can create unique scented candles.
If you have the time and skills to create comfort in your apartment, you can delve into the decor. For this, available materials will not be enough. You will need more interesting materials - metal, clay or wood.
Plaster
Pumpkin candlestick made of acrylic paints and plaster
Gypsum Gypsum, like clay, for creating objects with your own hands is a unique material. With its help, any shapes can be filled and different techniques can be used. Instead of once again decorating your interior with figurines sold in stores, you can purchase gypsum mortar and create them yourself.
For this you will need:
- alabaster
- water
- container for mixing the solution
- form for pouring (you can use a plastic cup, for more complex products - special forms)
- additional decorations
Mix the plaster with water thoroughly until it reaches a thick consistency. Then fill the selected mold with the texture, place an unnecessary tablet candle on top. This will create a blank with a predetermined place for placing the candle.
Delicate version made of gypsum base
With gypsum, it is important not to overdo it when mixing. It hardens very quickly.
When the plaster has dried, you can remove the mold by cutting the container. If necessary, level the surface (use putty). Let's move on to the creative part: you can simply paint the frame, glue small parts (for example, make a mosaic), use the decoupage technique, etc.
If desired, you can also use modeling paste - this is an analogue of clay for creative modeling. If you use paste to shape the candle holder, be sure to let it dry for 24 hours.
We create stylish candlesticks from concrete in a similar way: fill a plastic bottle with cement. Let the solution dry, then you can make a cut in the plastic and remove the workpiece. We recommend painting the base using a spray can or brush.
For decoration, you can adapt a broken plate: wrap the entire base in various pieces until it hardens or glue them to an already dried frame.
Wooden
Wood carved deer will withstand tall candles
Wooden Three-dimensional branch, birch bark, dried, twisted roots, gnarled sticks. It's not just the tree that unites them. Every piece of nature can become a beautiful candlestick.
Let's save Santa on Christmas night: instead of a fire in the fireplace, use candles in a beam
Massive candlestick made of timber:
1 Find a thick, voluminous branch in the forest or buy a solid beam. Lay the wooden frame horizontally, attach a tape measure for measurement. Prepare a suitable board size (cut) using a saw or jigsaw.
2 Next, one side side, which is the base, can be leveled and processed if the branch is not held firmly and is wobbly. Sand the cut block - a piece of sandpaper will do this perfectly. You will have to get rid of unnecessary snags and uneven wood.
3 Take a pencil: mark on the other side, cut out a recess with a round drill bit, in which there will be a candle. We coat the timber with stain (don't forget to wear rubber gloves) to get an aged look. Let the first layer dry, then apply the second.
4 Done – this product can decorate your dining table or fireplace. The main advantage is that you can use a block to create a stand for several lights.
To make it look more antique, you can deliberately make dents in one or more places.
Unusual ideas from old roots
Strong, large roots will create the atmosphere of a forest hut
Unusual ideas from old roots Tree roots kept in water for a long time will be an excellent material for an incredible candlestick. They are highly durable, have an interesting color and shape.
Using polymer glue, connect several branches together. Make a metal base on top of some of them. Hemp candles look especially beautiful - they are ideal for a classic interior.
Openwork from bark
Birch, a little carpentry, and you get some lovely wooden bases.
Openwork from bark A beautiful candlestick can be made from the remaining birch bark. It's very easy to make. Schematically mark a small design on the surface (heart, star, circle), cut a hole along the contour through which the light will look out.
All that remains is to insert a tea candle inside. Dry bark can also be wrapped around store-bought glass lamps for a homemade look.
Dry bark and colorful bouquets create an incredibly autumn-spring mood
From cuts
Round cuts can be significantly transformed in skillful hands
From saw cuts An ecological and aesthetic version of a candlestick can be made from a wooden cut or stump. A wonderful accessory for a feast: suitable for serving casual or more elegant tables.
We advise you to purchase ready-made saw cuts that are not chipped and properly dried.
If you are not too lazy to do it yourself, first cut the “pancake” using a saw or jigsaw, be sure to sand the surface, and let the base dry. Use a forstner drill to make cells for the candles: drill a hole of the required diameter. Insert small “pills” into it.
For hemp candles, you can also use the second method:
- use self-tapping screws or nails to make a hole at the top of the cut, using a hammer, leave the fasteners halfway inside
- caps are bitten off with pliers
- hemp candles are screwed on
Sufficiently wide cuts can serve as a stand for kitchen utensils or a full-fledged table for a romantic dinner.
Forged
Ornaments on galvanized lanterns will create the atmosphere of a forest hut
Forged Professional production of forged candlesticks will require master blacksmiths. Interesting curves, fancy patterns, shapes can be created manually. Arm yourself with additional creative metal holder ideas if the job is up to you.
Will be appropriate for Gothic or classical style. From heavy metal you can create both massive figures and elegant designs.
Making from salt dough
A Christmas wreath made from salt dough can look very natural
We make from salted dough The dough can be used not only for cooking, but also for crafts, if it is especially salty. You will need:
- salt dough (mix 500 g flour, 250 g salt, a glass of water)
- gouache paint
- acrylic lacquer
- decor (optional)
You can make any shape. The dough is as easy to use as play dough. When creating the most realistic figures, try to reflect all the details (for example, if it is a coniferous branch, mark each needle, the unevenness of the sticks).
Let the form dry for 4-5 days. Next, color the resulting candlestick as desired.
It will look more natural if you draw chiaroscuro based on the location of the light.
Copper
Very original solution
Copper An exquisite candlestick will be made from copper structures. First cut the pieces of wire to the required length. Use pliers to bend them to create an elegant “snag.”
The last step is to install a long candle on the tip of the wire.
Even simple silver wire will highlight the excellent taste of the apartment owner
Balloon
To mount an exclusive exhibit, construction plaster is diluted with water to the consistency of sour cream. The inflated ball is half wrapped in bandages, lubricating them with the prepared mixture, repeating the layers three times. After drying, the broken rubber bands are removed, and the bottom and walls are painted in different colors, incredibly beautifully reflecting the light.
During the process, the edges of the product can be left smooth or given a broken, torn configuration.
Note!
- Do-it-yourself illuminated mirror - step-by-step master class on how to make it yourself, photos of types of lighting
DIY flower stand - TOP 100 photos of stand options, detailed instructions, diagrams and drawings from the masters
- Do-it-yourself furniture restoration: restoration methods, step-by-step master class, necessary tools and materials
Alternatives from natural materials
Candlesticks can be hung along the garden fence to make cold evenings warmer
If you want to add more nature to your apartment, you can add a special theme - forest or sea.
From leaves
Stunning glowing jars will save you from the autumn blues
From leaves Yellow fallen leaves in a candlestick will help preserve memories of a wonderful autumn:
- completely cover the glass jar with decoupage glue
- Gently apply clean, dried leaves to the surface (you can stir on top)
- in the process, go over each leaf with your finger wrapped in cloth
- secure a jute rope around the neck
From shells
Gold-painted shells will not let you forget about the sea
From shells The easiest way to use shells is to make a full-fledged candle out of them. Choose different shapes of large and medium sized shells. We paint the products in any color (gold, silver, bed and white shades are ideal) using one of the suggested methods:
- Aerosol can
- Acrylic (it is better to take a foam sponge/sponge)
- Thin decorative foil (apply glue to the shell, wrap it in a sheet, remove after 30 minutes)
Next, it remains to install the wick and fill it with a small amount of paraffin.
You can melt the wax of an almost finished candle in a water bath or scrape a little from a whole one. Gradually stir the paraffin until smooth using a wooden spatula.
From the cones
Pine cones can be combined with pine branches, red berries
From cones To create a candlestick, either one whole cone or a collection of them can be used. The second option uses similar techniques that we discussed: we attach different cones and additional decor to the base, leaving room for a candle.
The first one is more interesting - a fairly simple but elegant option. First, scrape off a few flakes from the top with pliers to create a flat surface. Push a metal pin (large needle) inside and place a long candle on it.
The candle can be attached to the pine cone using hot glue, but this design is not strong enough.
Shell varieties
Surely every family has shells brought back from vacation. You can put them to use by first boiling them and removing the remains of shellfish with a brush. Then the halves are varnished for a pleasant shine. Next, you need to melt the wax of the tablet candles and pour it into the seafood, inserting the pulled out wick. Exquisite products look very harmonious, giving the environment a natural flavor.
Familiar banks
A liter, half-liter jar or mayonnaise container is an excellent choice for creativity. The containers are painted, leaving patterned windows, covered with lace, burlap, thick ropes, and dressed up in knitted “clothes.” In the transparent version, the inside is filled with pine needles sprinkled with snow and salt. A candle is placed in a equipped snowdrift. Colorful berries, colored yarn, and cute trinkets will be useful for decoration.
Another variation is to fill the jar with orange circles in a vertical position, separating the candle from the walls with them. This sunny, mouth-watering composition will not leave anyone indifferent with its inimitable appearance and divine fragrance.
When night comes, stylish items bring magic to the room, and photos of hand-made candlesticks are clear proof of this.
Finnish candle options
Finnish candles are divided into types not only depending on the type of final result, but also based on what tool was used to make them.
Based on this classification, it is possible to prepare logs for a candle using:
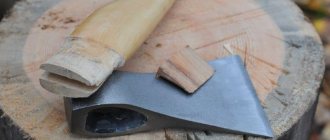
- Axe . It is not advisable for the log to have knots or uneven fibers. Depending on the size, the log needs to be split into 6-8 equal parts. The part of each log that will be placed in the middle needs to be chipped a little so that when all the parts are collected back into the log, a hole will form in the middle. After collecting them back into a single whole at the bottom, the product must be secured with wire. For kindling, you can use wood chips that were previously chopped off or dry grass.
- Wood drill bits . To make a hole in wood for a Finnish candle, it is recommended to use a drill whose diameter is about 3 cm. Make the hole itself in the center of the log no more than 2/3 of its entire height. To obtain a fireplace, you need to drill not only a longitudinal, but also a transverse hole at the bottom of the log.
- Chainsaws . Use a tool to cut the log lengthwise into 6 even pieces. It is not recommended to cut more than 2/3 of the entire height. Not a lot of material is used for kindling, since the gaps formed when sawing are not large. As an additional source of ignition, you can use a little gasoline or a special liquid.
How the log will be prepared and what parameters it is selected will affect the duration of combustion and the degree of heat transfer.
In most cases, the Finnish candle is used by tourists for cooking and drying clothes. It can also be used in nature as a means of heating and lighting. At the same time, such a fire smolders for a long time and also retains heat for a long time. The tourist will be confident that such a fire will not go out under light rain or wind. The size and number of candles are chosen depending on how many people will be in the company outdoors and what are the parameters of one log for making a Scandinavian-type fire candle.
Decoupage
With this technique you can create real miracles, turning everyday objects into works of art. Acrylic dye is applied to the degreased surface with a small sponge.
After final drying, cut out an intricate pattern on a napkin and apply it using regular glue, smoothing out the folds with a brush. The expressive strokes of the design are highlighted with paints and contours; finally, the craft is varnished. Such a lamp will undoubtedly become a colorful interior decoration.
Non-trivial ideas
As you can see, creation comes from the most unexpected things. The list of things you can use to make a candlestick is virtually endless. Take a closer look at the following models based on:
- Orange and lemon zest, apples.
- Eggshell.
- Old filmstrip films.
- Testa.
- Wire bent in a strange way.
- Kitchen ladles.
- Pumpkins.
The fabulous twinkling of lights improves your mood and gives your home comfort. Creating extraordinary things is a very exciting activity that develops imagination. Such creativity will appeal not only to adults, but also to children.
Security measures
Despite the “carefulness” of a taiga candle when burning, as with any other fireplace, safety precautions must be observed when using it.
So, a place for a forest candle is chosen away from dry trees and thickets of dry reeds. This place is cleared of dry leaves and grass, pine needles and cones, in a word, everything that could cause the spread of fire.
It is not recommended to light this type of fire on peat bogs to eliminate any possibility of peat and related forest fires.
When using flammable liquids to light a Finnish candle, the canisters with these liquids must be removed to a safe distance.
To prevent a pre-prepared candle from getting wet from precipitation, it can be placed under the tent awning or covered with a piece of polyethylene, pressing its edges to the ground with stones. If it rains lightly while this fire is burning, the container in which the food is cooked will protect the candle from extinguishing.
From the above, we can conclude that Finnish candles are good for cooking and lighting the area, and in some cases, heating. These fires can be recommended for a group of several people located in a forest area with a shortage of dead wood and the availability of tools for processing it.
Author: Maxim Chechetov