Lately there has been a real boom in blacksmithing. Young people are becoming blacksmiths. The knives and axes made by their hands are real works of art.
Active advertising on social networks, photos of how to make a beautiful ax, fuels not only the desire to own such a thing, but also to try to make it with your own hands.
Nothing is impossible
Looking at the work of blacksmiths, the thought comes to mind that there is nothing difficult in making an ax. But in practice, this turns out to be much more difficult.
In addition to a piece of metal for forging an ax, you need: a forge, an anvil, holes for the eye. Not everyone has such a set of tools. Of course, you can make a forge and punches, but you can also try to make an ax in a different way.
Work process
All work will take place in several stages. Since the Viking ax will be made from an old axe, the essence of the whole process will be the restoration and stylization of the instrument.
cloth
- It is necessary to separate the panel from the handle.
- If there is rust, you need to clean it with a grinder and then remove the scale.
- The blade will have to be treated with a welding machine if it is cracked.
- Give the heel a suitable shape. You can draw the drawing yourself or use a round object that fits in size as a stencil. Trace the template onto the metal and process it with a grinder.
- Then process the resulting cut on a grinding machine.
Making an ax using the metalwork method
Ideas on how to make an ax outside the forge lead to the metalworking method. The ax consists of three parts:
- ax blade
- ax handle
- wedge
If everything is clear with the materials for making an ax and a wedge, then the question of what, and most importantly how, to make a canvas is puzzling. Knowing that the blade consists of a blade and a butt, you understand what is needed to make an ax:
- metal strip for blade
- piece of pipe for butt
Useful tips and tricks
Please note that the ax handle should be made so that its cross-section has a characteristic oval shape. Only by observing this condition will you be able to successfully hold it without straining your hand too much. In this case, blows with an ax will be more accurate and easier. It is recommended to make wood blanks for creating an ax handle in late autumn. It is during this period that the movement of sap is reduced to a minimum (almost stops), which means that the tree becomes, as it were, dehydrated.
Many inexperienced craftsmen neglect drying wood to build an axe. As a result, this ends up with the handle changing in size, and the metal part with the butt on it holds very poorly. It is permissible to use undried material only in special situations, when the handle needs to be built urgently, and this spare part is made as a temporary one.
When making a brand new ax handle yourself, you need to draw up a detailed drawing/template of the future tool. If you have a very convenient old ax in your arsenal, then you can remove all parameters from it. This will make it much easier and more convenient. Do not rush to turn the cutting edge of the tool. First you need to make sure the metal is sufficiently hard. If it turns out to be too soft, then it will need to be additionally hardened under the influence of high temperatures.
It is very important to use a ready-made ax (both homemade and store-bought) correctly. Experienced craftsmen strongly do not recommend trying to cut various metal parts with such a device.
Even if you plan to cut wood, it is better to make sure that there are no solid particles inside that could harm the tool.
It is strongly recommended not to throw the finished tool onto hard surfaces, especially from a great height. It is not recommended to leave the ax in the open air. Precipitation or aggressive sunlight can negatively affect the quality of the wooden part. Keep this tool in a dark and dry place. Only under this condition will the ax serve you for many years.
If the ax handle fits into the eye too easily, this may indicate that during the work the master made a serious mistake somewhere (most likely in the calculations). An incorrectly prepared template often leads to this problem. In such a situation, even one more installed wedge will not change anything
This is why it is so important to take your time to do all the calculations and make the template correctly
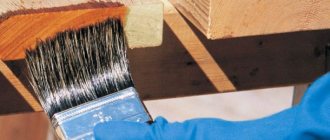
Do not forget to process the wooden ax handle at the end of all work. Please note that processing of this part must be carried out in several approaches. Each new protective layer should be applied only after the previous one has been completely absorbed. This is the only way to reliably protect wood from rotting and destruction. Stock up on enough wood to make an axe. You don’t need to make just one piece - it’s better to build several pieces. This is necessary because during the work some of them may not work out and be rejected. There should always be at least one more blank in stock.
To make an ax handle, you cannot use a wooden block that has a large number of knots. Because of them, noticeable cracks may form on the material. Over time, the branches begin to dry out, and the entire material loses its strength. Making an ax handle yourself is not at all difficult. If you doubt your abilities, are afraid of making a mistake and translating natural material, then it is better to refuse experiments. Buy a ready-made model or contact an experienced craftsman who will make a good tool for you.
To learn how to make an ax handle with your own hands, see the following video.
Blade
The full size drawing will show the amount of material needed. The blade requires a hard metal, such as a car spring.
We transfer the outline of the drawing to the spring and saw off all the excess. We also make descents using a grinder. It is important here not to overheat the metal so that the edge remains hard and holds an edge well.
Assembly of the canvas
The blade and butt are connected by welding. It is important to weld the metal thoroughly so that the ax does not crack during operation.
Then we grind the seam with a grinder, if necessary, boil the shells, and grind again. For additional strength, you can rivet the butt and blade with strips of metal.
Current source
To obtain a pattern and a uniformly processed surface, direct current is used. It must be supplied using a battery or charger. High power is not required - it has been noted that a voltage of up to 5 V and an electric current of up to 700 mA are sufficient.
Connection:
- “plus” - to a metal workpiece;
- “minus” - to electrodes immersed in the solution.
Ordinary cutlery – spoons or forks – can serve as electrodes. The main requirement for them when etching is not to touch the workpiece when current is applied.
The process will be accompanied by increased gas formation, this is a consequence of electrochemical processes. To comply with fire and industrial safety, it is necessary to carry out all work with electric current at least on a balcony that is well ventilated. Better - in the garage or on the street.
A stencil with a future pattern.
Solution
Etching is carried out in a saline solution saturated to the limit. Preparation: add table salt to ordinary water until dissolution stops (even with stirring). It is possible to heat the water to increase solubility.
There are no requirements for containers for preparing the solution. The etching solution must be applied to a non-conductive container. A plastic container is quite suitable - from a bucket to a trimmed 5-liter bottle.
Etching process.
Copper plating process
When replacing table salt with ammonium nitrate (up to 4 tablespoons per 1 liter of water), the same solution is obtained. During etching, it will acquire a rich blue color, in contrast to the dirty color with salt.
The head is prepared in the same way. The only difference is that if you want to get a multi-colored head, you should protect only certain places.
Further:
- The bare wires of the mobile phone charger are connected to the head (minus) and the copper part (plus), which is placed in the solution.
- The part (of any shape) is placed against the wall - without touching the head.
- The etching duration is up to a couple of hours.
- It is not recommended to take out an ax to control the layer.
The result is a smooth copper coating.
Toporische
A good ax requires the presence of a properly made ax handle. To the question - what can an ax handle be made from, there is a simple answer - from hardwood.
The most common wood for making ax handles is birch. But, if you make an ax not only for chopping wood, but for the soul, then you should look for a type of wood with a more expressive texture.
In the stump
These were simple and not very interesting versions of the design of such a necessary tool in the household. Let's figure out how to draw an ax for children. This will be an ax whose tip is lowered into a stump, and in the background you can depict a forest. Let's start with the blade of the metal element. From it we draw a straight line of handles.
Let's adjust the metal part a little. We make all borders smoother and with curves.
We add a few important touches that don’t seem to change anything, but without them the drawing will not be as believable. On the metal in front of the right border we make a curve, bending it into the middle. We add one line at the border of the tip and the part mounted on the handle. We draw the third small line in the very corner.
Along the line indicating the skeleton of the handle we make the volumetric part of the wooden element. Toward the middle of the handle, we narrow the distance between the upper and lower curves, and make the end wider.
Under the ax blade, draw a flattened oval for the top of the stump. We finish drawing the side surface.
We make vertical short curves over the entire surface, imitating the bark of a tree.
We wipe all auxiliary lines with an eraser. We do everything carefully, correcting the erased parts with a pencil. Once again we go through the entire design of the drawing and draw the necessary lines.
Now all that remains is a matter of technique - you need to decorate and draw the background. The ax handle will be yellow. The metal part is black, but various abrasions and small chips need to be painted on it in dark and light colors. We paint the stump in a greenish-brown shade. In the background we draw the borders of tall spruce trees in light green. Behind them are once again other trees, but we make the color even lighter and more diffuse. A little closer we make several Christmas trees with a darker color.
Wood for an ax
An ax handle made of ash, elm, or hornbeam will look very beautiful. It’s just difficult to buy boards made from such types of wood in some regions, especially in the outback. Of course, you can use online trading.
The wood for the ax must be well dried and free of knots. At home, the wooden board is dried at room temperature for six months
The longer the wood dries, the stronger the ax handle will be. According to custom, wooden blanks were dried for years in the attics of houses.
Roughing
Using the template, we outline the outline of the handle on the wood and cut out the blank. Give the handle a more rounded shape. For these purposes, you can use a plane, chisels or a small hatchet.
How to draw a realistic hedgehog with colored pencils
Frame: Deni zeichnet / YouTube
How to draw
Use a light brown pencil to outline the eyes: the part on the right is oval, the part on the left is round. Define the nose. Release a short piece from it. This is the mouth.
Frame: Deni zeichnet / YouTube
Draw two arcs to create a sketch of the ears. Between and below them, make a series of small, narrow triangles. These are needles.
Frame: Deni zeichnet / YouTube
Using short strokes, outline the round head of the animal.
Frame: Deni zeichnet / YouTube
Draw a curved zigzag line above the back of the head.
Frame: Deni zeichnet / YouTube
Draw two paws under the head. The part consists of two strokes, between which there are rounded fingers.
Frame: Deni zeichnet / YouTube
Using strokes, connect the chin with a zigzag line above the head, giving the body an oval shape. Mark the fur on the belly.
Frame: Deni zeichnet / YouTube
Draw the back paw using the same principle as the front paws. Mark the fur on the forehead.
Frame: Deni zeichnet / YouTube
Outline the eyes with black. Make two wide arcs inside them. These are the pupils. Paint the iris brown. It is brighter above than below. To make the shade more intense, apply more pressure than usual. Don't forget to leave some unpainted space for highlights.
Frame: Deni zeichnet / YouTube
Make the insides of the ears bright brown. Use strokes to show the fur on the face.
Frame: Deni zeichnet / YouTube
Using a black pencil, draw triangular needles above the head and on the body. Paint over the nose, leaving some room for highlights. Add a pink tint under the detail. Shade the space next to the eye on the right with brown.
Frame: Deni zeichnet / YouTube
Add black to the inner parts of the ears. Make the shells light brown. Draw several long hairs around the head.
Frame: Deni zeichnet / YouTube
Use a beige pencil to shade the hedgehog's forehead and the area around the eye on the left. Paint the paws pink, outline the toes on the front ones with black.
Frame: Deni zeichnet / YouTube
Highlight the mouth with light brown. Add a pink tint under your eyes.
Frame: Deni zeichnet / YouTube
Using a black pencil, make a series of lines along the body to show the needles. Mark the long hairs on the belly. Outline the toes on the back paw.
Frame: Deni zeichnet / YouTube
Add brown ones between the black spines. Shade the area under the chin.
Frame: Deni zeichnet / YouTube
Paint the bridge of your nose with beige. Add some more brown hair to the belly to make the coat appear denser.
Frame: Deni zeichnet / YouTube
To do all the steps correctly, check the video:
Fit
The next stage in making an ax handle is adjusting the shape and ergonomics. We grind the wood to give it the correct shape and comfortable grip.
A large rasp, as well as a power grinding tool, are perfect for these purposes. The main thing here is not to loosen the place where the ax fits on the ax handle.
Note!
- Why do people consider healing fasting?
- Required distance of the septic tank to the well
Do-it-yourself garden beds: the best arrangement ideas and step-by-step placement instructions (110 photos)
Finishing
The assembled ax is carefully polished with fine sandpaper. The wood can be covered with stain or left as is. The protective layer is applied with oil or varnish.
For greater exclusivity, the ax handle can be decorated with carvings, inlays or wire notches. A pattern etched in a saline solution will look beautiful on the ax blade.
Peculiarities
What kind of wood is an ax handle made from?
The nuances of the process are its simplicity and low requirements in terms of technical training. Galvanizing (the second name) of an ax does not require expensive equipment.
The main stages of the process are:
- Preparing the head for making the pattern: removing dirt and corrosion, cleaning to a metallic shine using a power tool (an angle grinder with petal wheels is enough), degreasing (solvent).
- Application of the desired graphics is carried out using paints and varnishes (from nail polish to regular paint) or stencils and elements cut out of paper and set on glue with strong adhesion.
- An interesting solution is to create several layers of the drawing. The essence of the principle is the same speed of electrochemical processes when protective layers are applied to each other and “eating” the unprotected metal.
- To do this, you need to apply various designs to the metal in 2-3 layers, optimally not with paint, but with paper or self-adhesive film. After etching, each layer will receive its own degree of processing depth.
- Connect the head to a power source and immerse in the solution.
- Current supply and observation.
The process will take from 10-15 to 30-40 minutes, depending on the degree of complexity of the applied pattern and the power of the coating. It is recommended to periodically turn off the current and remove the head.
Once the desired result is achieved, you should rinse the head of the future ax from the solution and remove the remaining protective coating.
After this, all that remains is to further polish and treat with a special paste (for shine and durability).
Forged ax with etching.