09.08.2018
What boy didn’t cut something out of wood as a child?! This skill can come in handy if you decide to make your own cutting board. Of course, in the store you can buy a ready-made factory board for your mother, wife or friend. But for the most part, they are devoid of soul, that unique aura that a thing made with one’s own hands brings into the house. And if it is also decorated with personalized laser engraving - yes, the same one that is made in the famous workshop store Drevoshop - then there is no doubt: any woman will appreciate such a souvenir!
Technology for making a cutting board at home
In every home you can probably find a piece of some kind of board; plywood is suitable, but it is better to use solid wood to make a cutting board. In order for the board to withstand suspended mechanical loads and not crack under the influence of a knife, hard wood species should be used: oak, larch, ash, maple, walnut, cherry. But beech and birch are not very good for these purposes - they very actively absorb moisture even through several layers of varnish.
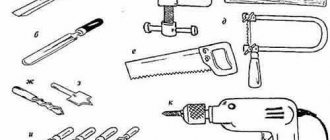
To make a cutting board, you will need a few materials that can easily be found in the pantry of any apartment: a pencil with a ruler, a jigsaw, sandpaper. A sanding machine will be a great help. The stages of work on making a cutting board are clear and logical.
- Draw the desired outline on a piece of wood. It is best to limit yourself to a classic rectangular shape with rounded edges at home. If you decide to make a handle, then you need to make it strictly along the central axis of the board.
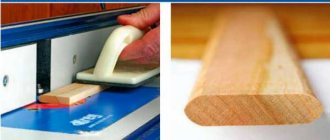
- Using a saw with fine teeth, we cut out the shape along the contour or a couple of millimeters larger - they can be useful for finishing the finished product.
- We round the corners using a curved jigsaw along previously outlined semicircles.
- Now comes the most critical stage of work - careful processing of all surfaces of the board with sandpaper or, if available, with a grinding machine. It is necessary to achieve perfect smoothness on all sides, special attention should be paid to the end faces. The remaining tiny particles of wood can enter the human body, which is not only harmful, but also dangerous.
- We drill a hole in the handle and think about how to decorate the resulting masterpiece!
What you will need
First of all, you need a pyrograph. This is a special wood burner. It can be purchased at craft stores. The pyrograph also comes with a special set for wood burning. This set includes a board (not a cutting board) and a ready-made stencil for burning.
It is very easy to buy a set; today they are distributed in almost all hobby hypermarkets and handicraft stores.
You will also, of course, need a cutting board. It is best to choose a board made of light wood. Linden or birch are perfect. The next thing you need is sandpaper. Acrylic or watercolor paints are also useful to decorate the board with color. Additionally, you will need wax to perform the waxing procedure after finishing painting the finished drawing. Waxing will add richness to the image and preserve the colors of both wood and paint for a long time. You will also need a stencil and a simple pencil to transfer the drawing onto wood.
Related article: Green crochet tunic with pattern
How to decorate a cutting board
Before decorating and using the board, it is necessary to clean it from dust, dry it and treat it with hot vegetable oil, which has a bactericidal effect. Oil will not only allow you to painlessly use the board for cutting any food products, but will also strengthen the wood, increasing the service life of the product.
You can decorate the board in various ways. One of the most fashionable trends recently is the decorative technique of decoupage. Its essence is that cut and painted pieces of paper or napkins are pasted onto the surface of the board, previously coated with a primer, and varnished on top. A board made in compliance with all the rules of decoupage will delight any housewife with its bright appearance and unusual three-dimensional texture.
It is very appropriate to give a cutting board with laser engraving to a loved one. This method of decorating various wooden objects, unique in its range of possibilities, is offered by the Drevoshop store. With the help of engraving, you can not only emboss a name or words of congratulations to the hero of the day, but also apply a complex pattern of various shades. Laser engraving is absolutely harmless to health and is practically not subject to wear. A handmade cutting board decorated with engraving will delight any woman!
During labor lessons at school, the boys had the following topic: “Do-it-yourself cutting board.” The guys made kitchen utensils as best they could and gave them to their mothers on March 8th. The tablets often turned out to be clumsy, but they were lovingly decorated with simple carvings or burnt designs. Now the boys have grown up, and many already want to do something more decent to surprise and please their wife. Read our article on how to make a really good cutting board that won’t dry out after a couple of months of use.
Where to begin
Since this is a DIY cutting board, it has different requirements. The main ones are purity and strength.
In fact, a kitchen board can perform 2 tasks. It is decorative and practical. Some people make laminate boards that serve as decoration. They don't cut anything on them.
I'm more interested in boards as a cooking tool. Therefore, we will make them practical and easy to use.
The cheapest and easiest option is to use plywood. You just need to choose the most reliable and strong sheets.
If you take solid wood, then the design will be even more practical and durable. Inexpensive species are pine and birch. But I advise you to stick to durable and hygienic types of wood. These include oak, acacia, beech, pear, and cherry.
The form can be any. Here you are not limited in anything. But speaking from a practical standpoint, it is best to make boards from oak or birch and other types of rectangular wood.
Basic Rules
The service life of your craft will depend on the quality of the wood you choose. We immediately refuse budgetary, but too soft pine - for the board we need a denser and more moisture-resistant solid that will not warp from constant washing, and will not be afraid of a knife. The best way to cope with this task is:
- Acacia;
- Pear;
- Cherry.
The shape of the board can be very different, as well as the size, but in any case it should be convenient to work with a certain type of product. The method of storing homemade utensils is also worth thinking about right away. And if you, for example, plan to hang it on a hook, then you will need to provide a fairly large hole somewhere on the edge or on the handle.
When making a board with a handle, make sure that its axis exactly coincides with the center line of the main blade. Otherwise, holding a bulky object will be difficult and inconvenient.
Mastering the technique
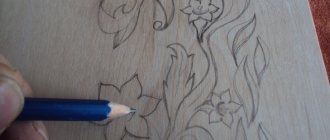
Once the design is traced onto the board, it’s time to start burning. Make sure the board is completely dry. Then heat the burner until the nib turns dark red.
Be careful when working with a hot pyrograph, it is very dangerous! It is better to do everything more slowly, but there will be no consequences.
Burning is best done from the contour to the center. That is, we first outline all the outer edges and only then move on to the inner ones. It is best to burn in separate areas: once you have worked on one, move on to the next, but in another part of the drawing. This will allow the drawing to cool evenly and will not create unnecessary lines or random strokes. When the work is completed, it can be decorated with paints. And then treat it with wax so that the board has a shine.
Related article: Wavy knitting patterns with descriptions and patterns for beginners
Let the owner of the house decide for himself whether to use your gift in everyday life or hang it on the wall or put it on a shelf. In any case, your gift will find a worthy place in the kitchen and in the heart of your friend!
A simple option for beginners
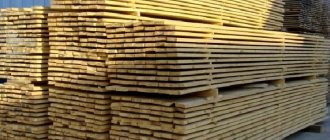
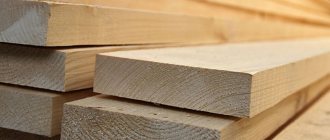
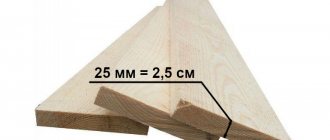
To work, you will need an edged board with a thickness of at least 20 mm. Here it is better not to skimp and choose the best type of wood - Extra or class A, that is, without knots and wormholes. The tools are standard for DIY woodworking: jigsaw, drill, sander, chisel, yew, as well as a pencil and tape measure.
Work order:
- Cut out a template from paper - it is best to draw it on a piece of paper folded in half to achieve precise symmetry.
- Using the pattern, make markings on the prepared solid board.
- Using a jigsaw, cut the workpiece along the contour. If you have a complex sketch that includes arcs of small radius, it is better to cut through these areas using a metal file - it gives a more accurate line.
- The board blank must be thoroughly sanded using wheels of different grain sizes. Be sure to chamfer and sand all corners.
- Treat the finished product with Vaseline oil, allowing it to absorb well and dry, repeating this operation several times. By the way, you shouldn’t chase super-expensive mineral oil “especially for boards.” This is the same liquid that is sold in any pharmacy, just named differently.
- When the oil begins to appear on the surface, it should be removed with a dry rag and the board should be left for a day until completely dry.
Laminated and end boards for experienced
The type-setting boards made from glued lamellas of different colored wood species look gorgeous - they are distinguished by beautiful and even contrasting stripes. To do this, simply alternate light (birch, maple, ash) and dark types of wood (mahogany, beech, bog oak). An even more complex option is when the glued block is cut crosswise and reassembled in a different order. The result is a very impressive “chess”.
But to create such a blank, you need a more serious tool:
- Planing or thicknessing machine;
- Circular saw;
- Panel carpentry clamps or powerful clamps.
All blanks for the end board must be carefully aligned on a circular saw so that they fit tightly together. Otherwise, gaps will appear between the slats, and then neither glue nor clamps will be able to cope with them.
The procedure for making a multi-colored shield:
- Pass light and dark bars through a surface planer to obtain blanks of the same width.
- Place the bars in the template cassette, arranging them the way you like. Turn each one on its side and spread glue over the entire surface. Any moisture-resistant composition for wood, for example, Titebond III Ultimate or Kleyberit-303.2, is suitable for making a kitchen board.
- Return the workpieces to their original position and fit them tightly together. Fix in the clamps for about a day until the glue hardens. It is better to immediately seal the tool with masking tape, so that later you do not have to courageously clean off the tightly stuck compound from it.
- Remove the board from the clamps and clean the surface with a chisel, removing excess glue.
The typesetting board can turn out to be quite massive, and to make it more convenient for the housewife to handle it, it is better to choose blind handles and grooves on the sides using a router.
In principle, the striped shield is already ready, and you can cut a kitchen board out of it using the technology described above. But those who want to move to the next level and make a gorgeous “chess” will continue to work. Here you will need to cut the workpiece across into new bars 25-30 mm thick. Then we assemble another shield from them according to the principle we have already mastered. After drying and repeated sanding with various abrasives, all that remains is to treat the kitchen board with mineral oil.
According to hygiene standards and standards, one board for all products is not enough. Ideally, each type of product should have its own kitchen board. In catering establishments and professionally equipped kitchens, the number of boards reaches 10-12, or even more. In ordinary apartments there should be at least two cutting boards, but the acceptable and safe number of boards in the kitchen is four.
The basic concept of separation is this: foods that we eat raw (vegetables, fruits, bread products) cannot be cut on the same board on which we cut meat and fish. The reason is that meat may contain pathogenic bacteria. When cooking meat, they die and the prepared dish is harmless to humans. But bacteria can live on a board for quite a long time, even if you wash it well. Accordingly, by cutting bread on such a board, you can become infected with a dangerous infection. It is also advisable to separate the board for meat and fish, because a strong fishy smell is not so easy to remove.
In total, it is advisable that in your kitchen arsenal there are separate boards for raw meat, fish, bread and everything else (vegetables, cheese, herbs). At home, it is convenient to use boards of different colors and shapes or carefully label them so as not to confuse the purpose.
Types of cutting boards
Cutting boards are usually divided according to the material they are made of.
The traditional material for kitchen boards is wood
. Wood has a rough texture, food on a wooden surface does not slip, and knives do not become dull so quickly. The quality of wooden boards depends on the type of wood. The cheapest and shortest-lived softwood boards are pine and birch. Boards made of oak, beech, and acacia will last longer. They are more expensive, but practically do not absorb moisture and odors. It is also worth paying attention to whether the board is glued together from fragments or cut from a solid piece of wood. Oddly enough, choose the first option, as it is less susceptible to deformation.
The main disadvantage of wooden cutting boards is considered to be their unhygienic nature and high absorption of odors and moisture, but as mentioned above, it all depends on the type of wood and the quality of workmanship.
After each use, the wooden board should be washed under hot water with a small amount of detergent and left to hang to dry. It is not recommended to wash the board in the dishwasher, as this will quickly deteriorate it.
Unlike wood, glass
It is considered the most hygienic material; it is easy to clean, including in the dishwasher. Special glass is resistant to abrasion, deformation, and is difficult to break. You can even easily pound meat on a glass board. Neither odor nor moisture are naturally absorbed. It is glass models that most often abound in decorative design; various patterns and designs, bright colors make such boards a real decoration of the kitchen space. When choosing a glass cutting board, pay attention to the rubberized legs, which will ensure a tight grip on the table surface. It is desirable that the glass be heat-resistant, then the kitchen board can also be used as a stand for hot frying pans or pots.
Among the disadvantages of glass cutting boards, one can note the unpleasant sound from the contact of a metal knife with glass, as well as the need to catch escaping products from the perfectly smooth surface of the board. When working on such a board, the knives quickly become dull.
Plastic
boards have become increasingly popular lately. They have all the advantages of a glass board, that is, they are durable, resistant to abrasion, do not absorb odors and moisture, are easy to clean, but at the same time, products do not slip on a plastic, slightly rough surface, knives do not fail so quickly and there is no unpleasant sound. In addition, plastic is lighter than wood and glass. But all this applies only to high-quality certified models, the cost of which is sometimes comparable to expensive wooden or designer glass boards. Typically, polyethylene or polypropylene is used for production.
The disadvantage of even expensive and high-quality plastic boards is that they cannot withstand high temperatures, so they should not be used as a hot stand for a long time. We do not recommend buying a cheap board, the chemical composition of which is unknown and there is no information about certification. Such a cutting board quickly becomes covered with cuts, and harmful toxic substances can penetrate into food products.
Still life
It will be easiest for beginning pyrographers and children to master the technique of “drawing with fire” in the still life style. Find a suitable contour pattern for burning on the Internet and get to work. If you choose a vase of flowers as a base, try to immediately filter out designs that have a lot of shaded areas. It is better to burn such images when you get the hang of them.
Still life will be more to the liking of girls than boys. A beautiful drawing with fruits, plants, kitchen utensils or other inanimate objects is by default considered a purely feminine hobby. For boys who are learning to burn, you can choose simple stencils with cars and cartoon characters.
Original cutting boards
The cutting board can be of any shape, but rectangular ones are traditionally used as the most convenient. The standard thickness of the board is from 0.5 to 1 cm, although for cutting meat it is better to take a thicker one 1.5-2 cm, in case you need to chop the meat. It is also better to select the sizes of cutting boards for the products, for example, for bread - a little larger than a standard loaf, and for rolling out the dough you will need a long and wide board.
And now - the fun part!
Modern cutting boards can be very different from generally accepted standards. Despite the apparent simplicity of the board, manufacturers and even famous designers continue to work wonders and modify this kitchen accessory in every possible way, adding new functions and experimenting with shape, color and design. Basically, the most original cutting boards are made of wood, although there are also unusual plastic models. Glass boards are practically not modified in any way, since even without modifications there are a huge variety of decorative design options - from photo printing to stained glass.
Cutting boards for sinks are usually made of plastic. The board has a built-in colander for washing fruits and vegetables. You can also put chopped food there. In most models, the colander is removable, so the cutting board can also be used on the table surface. Many housewives dream of a special hole in the working surface of the table, where they can immediately dump cleaning and waste. This function is fully realized in cutting boards, where there is a hole for cleaning, and containers for chopped products, and the ability to conveniently place a plate where you can throw salad ingredients with a slight movement of the knife. This is perhaps the most useful improvement to a regular cutting board.
The opportunity to use the cutting board as a place to store knives was also not ignored. The kitchen board turns into a drawer, where tools for peeling vegetables or cutting cheese are stored in the corresponding slots.
You already know that the kitchen should have at least two, and preferably four, cutting boards. Obviously, different original models may be present in a single copy, but there are also convenient sets of boards just for different products. They are usually made of plastic, labeled and do not take up much space.
Many manufacturers are moving away from the standard rectangular shape and carving unusual boards from wood in the form of different shapes, animals, and even the outlines of countries and continents!
Other designers are experimenting with patterns on the surface of the board. On plastic ones the image is applied with paint, on wooden ones the burning or carving technique is used. The drawing can be either purely decorative or have very practical purposes, for example, a table of weights or a ruler.
The jigsaw puzzle is also reflected in cutting boards. Indeed, different board sizes are needed for different purposes. For a French baguette, you can assemble a long board from separate parts, and for dough, a wide rectangular one. Plus, the notches in the puzzle boards double as a glass holder!
For slicing baguettes, the French came up with a special board with slots.
Cutting boards can serve as trays during buffets and banquets.
A board with built-in scales is a very useful and convenient invention not only for professional chefs, but also for those who like to cook exactly according to recipes. With such a cutting board, cutting 35 grams of pepper and 216 grams of meat will be very easy.
Glass kitchen cutting boards can also surprise. Imagine the horror of your guests when you cut cheese on a brand new iPad. The built-in LED lighting will only enhance this similarity.
Glass cutting boards can cover the cooking surface. This is very important in case of limited space in the kitchen.
A transformable plastic cutting board will greatly simplify the life of a housewife in the kitchen. The board has the ability to fold along the folds, which is very convenient for pouring chopped products into a plate. You can also wash vegetables, herbs and fruits in it.
The edge of the table can also be used.
Hello everyone, and in today's article we will discuss DIY. I will try to briefly talk about quick techniques for making this essential kitchen cutting attribute. If your old clothes are cracked and in an inappropriate state, then this article is for you.
In order to make a cutting board, we will need the following tools.
— A ruler, preferably with a square. - A simple pencil, soft or hard. — Compass or ruler with ready-made holes. — A saw or, best of all, a jigsaw. — A sanding machine or a set of sandpapers of different grain sizes, from 60 to 220. — A sanding sponge for finishing.
Preparing material for the cutting board.
First you need to prepare the necessary material, we chose wood
. This is a classic type of material, as it is easy to process, does not spoil or dull knives, and is quite durable at the base. There are options for using glass, metal and plastic, but this is possible in the following lessons.
And so we need a simple wooden board, one that can probably be found in any household. If you live in an apartment and you don’t have material on hand, then try going to the nearest construction site. There are always a couple of pieces left after repair and construction work.
Dimensions and design of cutting board.
The following dimensions should be used, the thickness of the product should be 20-40 mm, width 200-300 mm, and length 400-600 mm. After preparing the product, we will draw the future figure. The design will be rectangular with rounded corners. This is the simplest option, but it is the easiest and most ideal. We take a ruler with an angle and check our board for distortions and slopes. On one of the long sides, we select a flat plane along the length, relative to which we will make all other measurements.
Having made an even rectangle, we make a roundness at the edges with a radius of 30-50mm. How to make an even drawing
curved line, for this we use a compass or ruler with ready-made holes, we will remember drawing lessons at school. The angle should not be sharp, but it should not be too rounded either. If you wish, you can draw a more complex blank, for example an oval or other shape.
Cutting and sanding wood.
And so, we have a drawing ready and now we need to cut off all the excess. To do this, we will use a saw with small teeth or a jigsaw with a file for curved cutting. We do not forget about safety measures; we use gloves and safety glasses when working with the tool. Carefully cut out the corners and unnecessary elements according to the pencil drawing.
Our cutting board already looks a little like a beautiful product. But how to make it smoother, without splinters and sawdust. To do this, we need to sand every corner and all sides of our wood. For this I use a sander, but in the absence of such a power tool, you can use simple sandpaper.
To begin with, we take wood sandpaper with a larger grain size, this is 60-80 grit. This is done in order to first remove large and convex places on the wood, especially if it has a complex texture. Afterwards we take 120 and 220k skins. Sand each side carefully, don't rush, and be focused on getting the job done.
In front of us is a sanded wooden cutting board, which I’m not ashamed to show to my wife. But how can we make it more slippery and without small roughnesses? To do this, take an abrasive sanding sponge for wood, which can be found in any hardware store. And just like with the skin, treat the entire surface of the cutting board.
