Having experienced the fashion for modern interiors, many owners of country real estate have reached, as they say, to the roots. Nowadays, the trend has changed - vintage home style is in fashion. Moreover, this is not just plastic overlays “under a log”, but the construction of full-fledged wooden houses, with all the ensuing positive and negative factors.
Let the architects talk about the positive, we will just look at problematic issues: retro wiring in a wooden house.
Those who remember their grandmother’s wooden hut in the village probably saw thick twisted wires that stretched along the ceiling and down the walls to switches and rare sockets.
Moreover, the wires were different from those used today - it was a durable structure made of rubber insulation and thick rag braid. Since there was little furniture in such dwellings, all lines were visible. This partly reduced the risk of damage: everything was under control.
However, with such open lines, it is possible to organize a short circuit just once or twice. It is enough to sharply lean a shovel against the wire (in the hallway), or carelessly wave a metal tool (knife, hammer). Therefore, the Electrical Installation Rules clearly prohibited such organization of power supply, ordering the wires to be hidden in channels or pipes. External installation is possible in principle, but installation without disruption is difficult and expensive, especially with your own hands.
In fact, the organization of energy supply in residential buildings is not subject to total control by supervisory authorities. And technology has come a long way. Therefore, open wiring in retro style is not only possible, but also safe. By trusting professionals, you transfer responsibility for compliance with the rules of the PUE to them. However, this costs a lot of money. By the way, antique wiring, retro switches and sockets also have a high cost.
Partly due to a certain exclusivity, but in fact, due to the use of expensive materials (safety must be ensured without compromising the design), and the lack of mass production. You can only save on wages for a team of electricians. Therefore, more and more often such work is done with one’s own hands.
Interestingly, the trend is widespread not only in country mansions. Retro wiring in apartments is no longer uncommon. Moreover, security requirements in apartment buildings are stricter by default: your neighbors may also pay for your beauty. A fire in a hallway rarely affects only one apartment.
But let's not exaggerate. In fact, retro wiring can be installed just as reliably and safely as traditional cable installation in a concrete wall.
How to properly install retro wiring in a wooden house?
First, let's look at the materials used.
Wire insulation, switches, sockets, cable channels can be made of anything, subject to one of the conditions: the material should not cause a fire. There are two groups for this:
- Non-combustible materials. This means that the product cannot, in principle, ignite when exposed to high temperatures. That is, it will melt, deform, bubble - but will not react with oxygen and will not become a fire generator. Of course, the production of such materials is not cheap. It is clear that there is concrete, glass, and finally steel. But you can’t make an insulating shell out of them. On the contrary, durable and plastic dielectrics are convenient for insulation, but are highly flammable.
- Materials that do not support combustion. This is not such a strict requirement, which somewhat reduces the cost. The operating principle is as follows: if the insulation is exposed to an open flame, it burns along with the fire source. As soon as the flame goes out, the insulation material also stops burning.
For example, the TV case caught fire. The power cable in the immediate vicinity will also burn, but the fire will not spread further along the wire.
In addition, the materials from which the insulation of electrical wiring and the housing of switching equipment (sockets, switches, junction boxes) are made must be resistant to mechanical stress and moisture. And given the demanding clientele, appearance is also not in last place.
A little history
As a matter of fact, such shortcomings once became the reason for the abandonment of open wiring. In addition, those old wires were made of a much higher quality: thick rag braiding and rubber insulation were used.
A small amount of furniture and a minimal set of technical devices made it possible to use open wiring without harm to the life and health of the inhabitants of the house or damage to the structure.
But over time, the danger of using open wires became more and more noticeable, so a clause appeared in the Electrical Installation Rules requiring the removal of wires into special channels or pipes.
Since then, technology has come a long way, so today's wiring is completely safe if you follow the basic rules: don't chew, don't cut, don't break the wires.
But let's return to wires on insulators
Echoing the style of the 1920s to 1940s, the designers developed an entire system where retro wiring is safely placed on ceramic spools, blending perfectly with the log design. Safety is primarily ensured by the use of special materials: the wire for retro wiring is not only beautiful, but also non-flammable. The internal insulation is made of traditional materials that do not support combustion, and the outer (supposedly fabric) braid is made of fiberglass. For normal switching, fireproof boxes are provided, which are hidden discreetly under the ceiling.
True, there are limitations for open wiring. The wire cross-section cannot be higher than 2.5 mm². This somewhat limits the power of end devices. Especially if the operating voltage in the home network is 12 or 24 volts. The current strength increases almost tenfold in comparison with the usual 220 V.
Installation of retro wiring in a wooden house
Installation of retro wiring in a wooden house
Installation of wiring must begin with drawing up a plan, indicating all elements of the network. It is advisable that by this time a plan for the arrangement of furniture and equipment (household appliances) has already been worked out.
Installation is carried out in the following sequence:
- Cable routes are marked. The work is done using a level. The distances between network elements should be minimal. The lines must be laid vertically and horizontally, turns must be made at an angle of 90°.
- Distribution boxes and installation products are installed in accordance with the developed network plan.
- Installation of insulators between distribution boxes and installation products (sockets, switches) is carried out. The distance between insulators should be no more than 800 mm, optimally 450 – 600 mm. The insulators are fastened to the walls using self-tapping screws;
- Wires are installed using installed insulators. The wires should not sag, but be in a state of tension. Touching walls and other structures is prohibited;
- When passing through walls, the wires are laid in a ceramic tube;
- Wires are connected in junction boxes and installation products;
- The connection of cable wires is carried out by pressing, soldering, welding or using special compressing devices;
- Control measurements of the insulation resistance of the installed section of the network are carried out;
- A connection is made to the metering unit (building input) and a test switch is performed.
Insulation resistance is measured with a megger or other special device.
If it is necessary to put an object into operation, these measurements must be performed by an electrical measuring laboratory certified by GosTechNadzor.[/wpmfc_cab_sw]
This is interesting
In modern eco-friendly homes with installed solar panels, low-voltage lighting networks are a reality today. Many owners of such cottages mistakenly believe that 12 volts is safer than 220. From the point of view of electric shock, this is true. But fire safety, on the contrary, is lower. With the same power and a decrease in supply voltage, open retro wiring should withstand not the usual 3–5 Amps, but 40–60. Accordingly, the requirements for an insulated conductor are an order of magnitude higher.
Advantages
- Structurally, retro wiring represents open electrical communications, which are characterized by the placement of conductors and switching network elements on top of enclosing structures. All functional elements of the system are attached to the base surface using insulators of the appropriate type.
The originality of retro wire aesthetics is complemented by a wide selection of its variations. Electrical installation products are available in different colors, among which you can choose the most suitable one to implement the concept of a particular interior.
Open wiring of any type is technically simpler to implement than closed wiring. Installation is carried out without the labor-intensive step of wall slitting; all elements of the chain are mounted in an overhead manner.
However, the efficiency of retro wiring looks rather doubtful due to the high cost of components.
The open arrangement of network elements, in particular distribution boxes, greatly simplifies repairs in the event of problems being identified. Conductors and switching devices are mounted on insulators or insulating pads. This provides a sufficient degree of protection against possible fire. In the production of antique electrical installation equipment, modern materials are used that provide a high degree of safety. During renovation of premises, the risk of accidental damage to wiring installed in an open manner is minimal.
Placement of distribution and switching devices
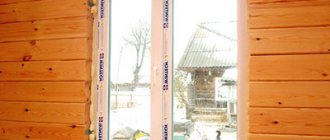
Mounting the usual switches, boxes and sockets on the walls becomes a problem in a house made of round logs. Apart from understandable fire safety restrictions, you can’t screw anything onto a sloping surface.
This issue is solved by installing special substrates made of non-flammable dielectric. Of course, the materials are stylized like wood and fit into a single style.
As a rule, there is no need to level the surface: the podium is screwed directly onto a round log. You don’t have to worry about the strength; this is not drywall, but a screw in wood.
For those who are not satisfied with the gaskets under the switches, there is another solution. The body can be aligned to fit the “seat”. True, the design of the switch itself must ensure fire safety at the point of contact with the tree.
Of course, a modern house built in retro style cannot do without the Internet, telephone and other communication lines. There are switching connectors for them, in the same style as sockets and switches. But the retro Internet cable has not yet been invented. The problem is solved in a complex way: 220 volts on pigtails with an insulator, and we hide the ugly connecting wires in a retro pipe.
Cord braiding
On the circuits for connecting powerful electrical appliances, retro-style external wiring from a decorative cord of our own weaving is used. To save money, you can weave a cord along the entire length of the wiring. It is made by twisting or in the form of a pigtail of three or four wires. This weaving is more convenient with a large number of switches and sockets.
You will need at least 2.5 times more untwisted copper wire in a non-flammable braid. The cord is woven into at least two strands, plus shrinkage. When braiding, the cable length is reduced by up to 30% depending on its thickness. The weaving is made to the desired density. The interior with homemade country style wire looks more impressive.
For retro wiring, RGKM stranded copper wire is ideal. It can withstand high temperatures, up to 180°C, and is suitable for saunas and baths.
When weaving, it is necessary to take into account that glass fiber falls off the cord; these particles are easily blown off with a hairdryer or sucked in with a vacuum cleaner. The colors of this cord are white and gray. The color palette of BPVL wire is more diverse.
Final tips
We examined all the nuances of organizing wiring in retro style. It can be laid in a wooden country house, and a modern stone high-rise building.
The main difference from traditional installation methods is that there is no possibility to roll back and redo everything. If you have installed the cable incorrectly in a concrete wall, we re-drill it, plaster it and glue the wallpaper. This will not work on a wooden wall. Any screw that is screwed in must remain there forever, otherwise the hole will not be covered with anything. Therefore, before starting installation work, it is necessary to carefully plan the installation and mark the wire routes.
Of course, any electrical wiring is organized with a development perspective. That’s why the saying “Measure seven times, cut once!” - in our case it is especially relevant.
Alternative solution
A ready-made twisted cable for electrical wiring in a retro style in a wooden house is relatively expensive. Therefore, in order to reduce the overall cost, some craftsmen weave lines themselves from separate cords with the same textile braid.
An example of a stranded wire in a braided type RKGM Source yandex.net