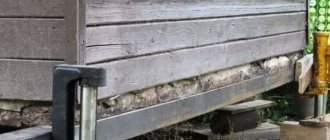
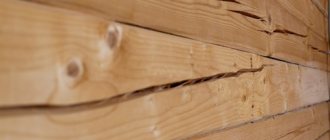
The appearance of cracks is one of the most pressing problems of plank floors. Creaking floorboards, heat leaks, penetration of dust and insects - all these are unpleasant consequences of such defects, and if measures are not taken in a timely manner, the floor will have to be completely replaced. Meanwhile, there are several effective ways to seal the gaps in the floor between the boards and significantly extend the service life of the coating. All of them are quite simple, do not require special skills, and therefore everyone can do them. So, why do gaps form in the floor and how can you fix them?
How to seal gaps in the floor between boards
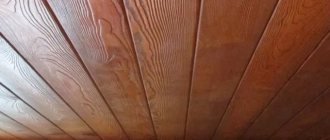
Wood Floor Repair Options
Defects in natural wood coatings, such as cracks, can be eliminated in one of three ways:
1. Removal of the entire floor covering followed by reassembly of floorboards
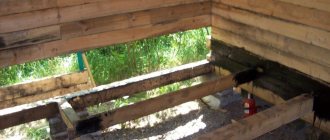
. Such large-scale work is carried out when it is assumed that the sheathing joists on which the boards are attached are damaged. In this case, repairs are carried out using a small crowbar and a hammer with a nail puller. This method is used if sealing cracks in a wooden floor is difficult due to their large size.
In this case, the sequence of actions is as follows:
- since some boards, and possibly even sheathing elements, have become unusable, they need to purchase a replacement - new materials
- The floorboards are carefully sorted, undamaged items are set aside separately. If necessary, they are planed and thereby smooth out their edges, which have dried out a little;
- When the preparatory work is completed, the floor is finished again, fitting the boards tightly and attaching them to the joists.
2. Partial dismantling of the flooring
. It is done if wide cracks have appeared in certain areas of the covering and for this reason the floorboards have begun to creak. The flooring elements are removed and new boards are laid in their place. Usually the second option is used in conjunction with the third, most common.
3. Most often, defects in the floor surface are repaired in a variety of ways.
. The scale of the work to be done depends on what is best to seal the cracks in the floor between the boards.
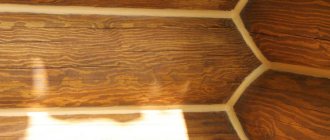
Repairing gaps between walls and floorboards
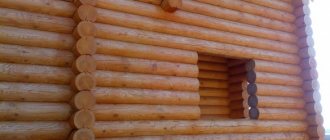
Defects, such as those in the photo, can appear on the floor surface in a variety of places, which affects the technology for eliminating them and the materials used for this. When installing the flooring, small gaps are specially left between the walls and boards to ensure ventilation and in case the floorboards expand during sudden changes in temperature.
Sometimes, over time, they become too wide, and the problem of how to remove cracks in a wooden floor becomes urgent. Repairs can be made using construction foam, to which small pieces of foam are added if necessary.
The work is performed in this order:
- First of all, the baseboards are dismantled;
- the cracks are cleaned of dust and dirt accumulated in them;
- then the flaws are sealed with foam, if necessary, pieces of foam are placed under it;
- when the foam dries, its excess should be cut off with a sharp knife flush with the floorboards;
- It is better when the seams in the wooden floor between the walls and boards are sealed with putty so that dust does not accumulate in the foam structure;
- After the putty has hardened, the baseboards are returned to their place.
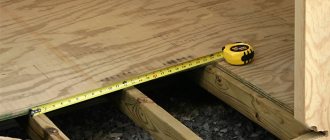
How to eliminate sagging boards
If the boards noticeably “play” when you walk, mistakes were made when laying the wooden floor. The joist pitch was chosen incorrectly or the boards were laid too thin. So the solution is obvious:
- Install additional logs.
- Lay thicker boards.
Changing the boards or laying more logs is drastic, but reliable.
Both options require first disassembling the old floor. This is not always possible. Although, if there is such an opportunity, it is better to do so, but there is also a way without disassembling the floor.
Connect the boards with dowels
To eliminate the deflection of the boards, you can turn the flooring into a single surface. To do this, dowels are inserted into the boards at an angle, which fasten two adjacent boards. Dowels are wooden rods. The hole for them is drilled so that it passes through two boards. The exact angle of inclination depends on the thickness of the flooring, so it is selected according to location. The angle must be chosen so that the layer of wood above/under the dowel is not too thin.
The holes are drilled to a slightly larger diameter than the dowels. Usually - 5 mm more. For example, for a dowel of 8 cm, a drill is taken 8.5 mm. For dowel 10 mm, drill 10.5 mm. Did you understand. Why is the hole bigger? The dowels sit on the glue. If they fit too tightly, they will squeeze it out. The strength of such a connection will be low. And so, the fibers from the glue will swell and intertwine with the fibers of the dowel. When the glue polymerizes (PVA), the connection will become very strong. When you try to break it, the wood nearby bursts, but the connection itself holds.
If the boards are wobbly, first fasten them
You need a very long drill - you have to drill at an angle on not so thin boards. This is difficult to find. As an option, weld a rod of a suitable diameter. Another tip: make a template that will allow you to maintain the desired slope without any problems. It's difficult without him. Especially at the beginning. After several hundred holes, it will be possible to maintain the specified angle without a template.
Then the hole from the inside and the dowel are coated with glue. For the holes, you will need to attach a long spout from a tube to a regular bottle of glue (they sell office supplies PVA). Take a tube about 20 cm long and seal it at the end. Holes are made in the sides. The holes should not be made too large so that when pressed the glue will splatter on the sides. The technique is clear - insert the sprayer into the hole, press on the bottle, the glue gets onto the walls.
This is a wooden floor after the boards have been welded together and the cracks have been sealed.
The dowel soaked in glue is installed in place. Leave it like this until the glue dries. Then the protruding part of the wooden chop is cut off and the cut is sanded. The easiest way to cut it is with a grinder, and sand it with what you have. Use a hand grinder, a plane, or the same grinder or drill at low speeds and with an appropriate attachment.
Repairing cracks with glue and sawdust
All areas of the floor surface can be repaired using an adhesive composition. You can make it using one of the methods described below.
Option one:
- You need to prepare small sawdust: they are placed in a special container and filled with boiling water. The mass is stirred until it becomes homogeneous. The sawdust should swell within 1-2 hours. After the mixture has cooled, it is stirred again.
- Glue is poured into the already prepared sawdust (using PVA or carpentry). The mass is stirred until its consistency becomes viscous and has sufficient adhesion.
- At this stage, the floor is prepared - the cracks need to be cleaned of dirt and dust. If necessary, their upper part is slightly expanded.
- Using a narrow spatula, the adhesive mixture is placed into the cracks and compacted. The composition is leveled on top and its excess is removed.
- After a few days, when the mixture has completely dried, the cracks are sanded with sandpaper and scraped with a special machine.
Option two:
- In this case, sealing cracks in the floor is carried out with a composition whose components are sawdust, glue and cement. You need to take 2 parts of glue (PVA or wood glue), add 15 parts of warm water and mix them until smooth. Then 5 parts of cement are poured into this mass.
- The composition is mixed and set aside for 10 minutes. If it needs to be given a wood shade, then you can add thick oil paint or a special coloring pigment to it.
- The gaps between the floorboards are cleaned and coated with glue, which is included in the repair composition.
- The prepared adhesive mass is slightly heated and the cracks are immediately sealed with a narrow spatula, while trying to make the surface even.
- It takes approximately two weeks for the composition to dry completely. Then the cracks are made perfectly smooth using abrasive products.
This option is used not only to solve the problem of how to fill cracks in a wooden floor, but also to level the floor surface, making it smooth.
Tow
An inexpensive and quick way to solve the problem. Flax tow, often used for plumbing work, is safe and environmentally friendly.
Work order:
- The tow is coated with wood glue and then placed in the cracks.
- Compact it with a knife. Leave to dry.
- Painting the floor.
Sealing cracks with putty
If you don’t want to mix a complex composition or don’t have time for this, you can purchase wood putty at a specialized store and seal the cracks with it. This method is used when surface imperfections are minor. You should know that this material can be filling (up to 5 millimeters) and finishing (up to 1 millimeter). Similar problems arise with laminate flooring. Before you seal the cracks in the laminate, you need to look around completely, and only then choose the optimal method for sealing the cracks in the laminate.
The disadvantage of this method is that the putty begins to crack and crumble over time. For this reason, puttying cracks in a wooden floor is used when the old boards will be covered with plywood flooring.
The composition is applied with a rubber spatula, carefully pressing it into the cracks. After drying, the sealed surfaces are leveled using abrasives.
Repairing cracks with paste and paper
This option is simple and cheap. You will need: paper, paste and a small amount of copper sulfate. The last component is necessary so that small insects do not settle in the adhesive mass in the future.
The step-by-step process is as follows:
- the paper is either cut or torn by hand and then filled with water. It will take time for it to get wet;
- then a paste is prepared from flour, water and starch. You need to bring the water to a boil, and then add other ingredients to it. The mixture must be stirred constantly, ensuring that there are no lumps in it. Then let the composition cool until it becomes warm;
- add copper sulfate to the mixture in a ratio of 1:10;
- The paper pulp is squeezed out, crushed with fingers, placed in a paste and mixed. The result should be a mixture resembling putty with a thick and uniform consistency;
- the preparation of the floor is carried out in the same way as in the previous options - the main thing is that the cracks are clean;
- the mass is spread on the cracks and then compacted into them, leveled and processed with sandpaper. Then the floors are painted.
Sealing cracks with cord
This method has been known for a long time and is used to seal cracks not only between floorboards, but also when repairing walls, when a piece of synthetic cord is selected in accordance with the size of the hole. The use of this option not only solves the problem of how to seal cracks in a wooden floor, but also helps to get rid of creaking floorboards.
The following materials should be prepared: cord (hemp rope), PVA glue (carpentry), sawdust, putty. The rope is completely lubricated with glue and a mixture of sawdust, adhesive and putty is made.
The cord is placed on the crack, laid inside so that it is 2-4 millimeters from the top of the floorboard. This distance is filled with the mixture with a small margin on top, since the putty composition shrinks during the drying process.
Preventive measures
Prevention of cracking of timber begins at the stage of cutting down the tree and continues throughout the life of the material :
- It is recommended to cut down a tree in winter, when it does not absorb moisture from the soil. During this period, the trunk is as dry as possible, the process of industrial drying will proceed faster, and the likelihood of wet material entering the construction site is minimized.
- During the production process, special cuts are created inside the timber, similar to small cracks. Their task is to relieve stress from the material when it is under the pressure of the weight of the entire structure.
- The finished structure is painted and protected from moisture, frost and steam. Precipitation and climatic phenomena will in no way bring destruction.
Eliminating cracks using slats (wedges)
Here you will need thin slats, hewn at an angle in the shape of wedges. These wooden elements should completely cover the cracks and at the same time not push them apart too much.
The work is carried out in stages:
- the cracks are cleaned and their upper edge is slightly expanded;
- According to the size of the flaws, a rail is made with a narrowed lower part. The wooden wedge should fit into the previously cleaned gap without any problems;
- the area of the floor flaw and the lath are thickly coated with glue;
- The wedge is glued into the gap, hammered with a rubber hammer. You can put a board on top and hammer the lath in with a homemade hammer;
- in the case when the wedge does not completely fit into the gap, a small part of it that protrudes above the surface is removed with a plane, provided that the glue is completely dry.
When this option is used to cover up cracks in the floor, the color of the batten being driven in will stand out strongly on the surface being repaired and therefore the wedge is covered with stain or painted with carefully selected paint.
If the floor is covered with a thick layer of paint, which has cracked and peeled off over time near the cracks, a hair dryer will help remove it. You can also use special drill attachments that have a soft iron brush, or use sandpaper attached to a sander.
Construction foam
The use of polyurethane foam will increase the soundproofing properties of the floor covering. It is also used to eliminate joints between the wall and floorboards.
Work order:
- The baseboards are dismantled and the floor is cleared of debris and dust.
- If the cracks between the boards are large, they should first be filled with foam.
- Using a gun, the polyurethane foam is squeezed into the cracks.
- Wait until the composition dries, cut off the part of the foam protruding above the surface.
Since the product is destroyed under the influence of sunlight and other external factors, it is necessary to protect it. To do this, you can apply several layers of paint to the treated surface or putty.
Other options for eliminating cracks
Building materials stores stock modern materials that allow you to qualitatively restore the appearance of the coating.
In addition to the methods described above for repairing wooden flooring, in practice other methods are used to solve problems regarding how to cover up cracks in a wooden floor, quickly and, most importantly, inexpensively:
- Plumbing tow. The material, known to many, consists of flax fibers. It is impregnated with wood glue and compacted into the gaps using available tools. After the glue has completely dried, the cracks are painted in the same tone as the floor surface.
- A mixture of cement and epoxy adhesive is ideal for repairing floor coverings with small cracks. The components of the composition are taken in equal proportions. The mixture is poured into the cracks with the top on, since the mass will then sag. Epoxy glue mixed with cement hardens quite quickly and therefore does not have time to seep under the floor. Places where there were cracks are sanded and painted.
- A homogeneous mass made from small shavings (sawdust), varnish and thick oil paint in a ratio of 4:1:1 is also perfect for eliminating cracks of different sizes. The work can be done in one go, when the flaw in the coating is filled immediately. In some cases, several stages will be required - then layer after layer is applied to the edges of the hole being processed. The second option is used when it is necessary to eliminate a large gap.
- Using sheets of plywood, you can cover an old wood plank floor. This method is used when there are so many gaps between the flooring boards that it takes a lot of time to eliminate them. Sheets of plywood are fixed to the floor surface using self-tapping screws. As a result, all imperfections of the floor surface will become invisible.
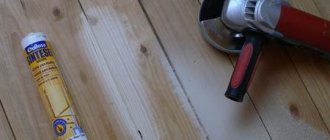
- Seal cracks in wood floors with sealant. This method is convenient because the composition is conveniently packaged and has a syringe-shaped nozzle. This special device helps fill both a wide gap and a fairly narrow one. To do this, the tip is cut to the desired thickness. Sealant can not only eliminate defects, but also creaking floorboards. The contents of the package spread under pressure and thereby fill the entire gap, without any effort. The sealant is a reliable and durable material that will eliminate problems with the flooring for a long period.
A good choice of materials for closing cracks in wooden floors are acrylic and silicone-based sealants. They are designed for working with wood. They are easy to apply and dry quickly.
The advantage of sealants is that they are elastic and the joint will expand and contract as the parameters of the floorboard change. If you apply putty on top of them, the joint will become almost invisible.
When you don’t have the skills to prepare special compounds, but you have the opportunity to purchase finished products for floor repairs, you can choose a sealant.
Sealant
Eliminating cracks with this product is simple and quick - the sealant bottle is equipped with a special nozzle that helps to apply the composition exactly to the problem area.
A good wood sealant should be silicone or acrylic based. Thanks to its liquid consistency, the product fills the entire area of damage without additional stimulation, distributing evenly. The sealant is elastic, so it will adapt to the dimensions of the boards changing from external conditions without cracking.
Colored compounds are available for sale, but if necessary, the joints can be masked using finishing putty.