No matter how trivial it may sound, wood was, is and, for sure, will remain one of the most popular construction and finishing materials. Despite the abundance of high-quality composites and various imitations, natural wood has no equal. But this material requires mandatory protection from external factors. Without treatment with specialized means, both in the interior and on the facade, the tree will quickly lose its presentable appearance, in addition, its operational and technical characteristics will deteriorate. Whereas wood paint or similar protective and decorative coatings will both preserve the original data and extend the service life of the material. In this part of the FORUMHOUSE Academy course we will consider:
What should you protect wood from?
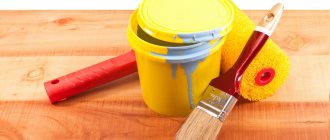
Paints and varnishes for wood
Range of paints and varnishes private label FORUMHOUSE
Features of protective and decorative products based on acrylic dispersion
How to choose the best wood treatment product: cheat sheet
“I will show you paints and stains and even some varnishes...”
Good afternoon Natasha Udovina and the team of the TAIR Creative Studio are with you. I want to tell and show how you can paint wood in different ways. Paint in a broad sense. I will show you paints and stains and even some varnishes. All the techniques that I showed can be combined with each other and select any colors.
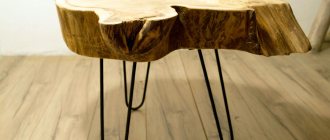
All these methods are applicable on small objects, such as a box, and on furniture. For the next master class, I was planning to decorate such a chest of drawers.
1. Full painting with paint For any type of painting without highlighting the texture of the wood, it is necessary to thoroughly prepare the surface for work. I specifically chose a piece of wood that had a crack in the knot and obvious unevenness. To make the surface smooth, it is necessary to seal the cracks. I use gesso primer; regular putty will also work.
Using a spatula, the composition is rubbed into the depths of the unevenness, and the excess is removed. note
that the aqueous composition may sag a little in deep cracks after drying and re-puttying will be required. After drying, I sand the gesso primer until it is perfectly smooth.
Next, to save paint consumption and facilitate its application, you need to cover the absorbent surface of the wood and gesso with primer, inexpensive paint or varnish. I apply white acrylic primer diluted with water. Next, paint of the selected color is applied with a wide flat brush.
As much as you might want to finish this process quickly, remember that it is better to apply several thin coats to dry rather than one thick coat. This will help avoid obvious brush marks and make the coloring even. In this method, I hide the wood texture as much as possible, but if you want to preserve it, then you need to do without putty and primer.
Should I turn to professionals?
Despite the apparent simplicity of the technology, in order to saturate wood with oil to create a high-quality and long-lasting coating, it is necessary not only to be fluent in the technology of applying oil, but also to know the features of the protective compounds used.
Since our company is the official supplier of the most famous brands of protective oils, all specialists directly involved in the work regularly attend advanced training courses, which guarantees full compliance of the coatings created with all working regulations.
accepts orders for repair or finishing treatment of wooden log houses and outbuildings, including oil painting and final sanding of coatings. You can clarify the details of cooperation and order a visit from a specialist to draw up an accurate work plan by contacting us by e-mail or by phone numbers published in the “Contacts” section.
Calculate the cost of painting and insulating your home right now
Select types of work:
Select materials:
Stain | gradient toning
Stain is the easiest way to tint wood while still keeping the wood grain showing through.
The first stage in staining
- wetting the wood with clean water. After drying, the wood fibers rise and must be sanded off with fine-grained sandpaper.
Second phase
- then the stain is applied either in one layer or in several, depending on how dark the tone you need. I decided to show gradient coloring with three stains, it turns out to be a smooth transition. You need to work quickly with the brush and not let the stain dry out so that a sharp border does not form at the transition point. I decided to deepen the color and applied another layer.
Acrylic paint stain | gradient coloring
Classic store-bought stains most often match the colors of valuable tree species.
But sometimes you want to tint the wood in some non-standard color, and at the same time preserve its texture. In this case, you can make the stain yourself using acrylic paints. I'll do a gradient again just to show off a few colors at once. I take white, Turkish green and manganese blue. I dilute them with water until liquid.
If the paint is thick, like mine, then rub it well so that there are no lumps left. As in the case of ordinary stain, I first wet the board with clean water, and after drying, I sand the raised fibers. Then I wet the surface again with water and apply colors one by one, making smooth transitions between them. Can be applied in one or several layers.
Finally, after drying, I lightly sand the board, exposing the natural color of the wood in places, this also gives an interesting effect. You can create a stain of any color!
Types of wood coatings - how are they chosen, what are they?
Wood is one of the best materials for the construction of private houses, finishing work inside residential premises, and the manufacture of various pieces of furniture and products used in everyday life. Natural wood has a chic appearance, is environmentally friendly, it breathes and retains heat perfectly. The service life of any wooden structures and surfaces directly depends on how well and correctly they are processed with special paints and varnishes. The latter must be selected taking into account:
- Types of wood used. Painting structures made of coniferous wood is done with one composition, and that of deciduous wood with another.
- Possibility of re-processing a wooden product painted with a specific paintwork material.
- Operating conditions of buildings and surfaces made of wood (high humidity, exposure to sunlight, and so on).
- Compatibility of the selected paint with coatings and primers applied previously.
- Methods for preparing products for dyeing.
As you can see, figuring out what to paint wood with is not so easy. Nowadays there are many different types of paints and varnishes on sale. They are divided into three main groups - transparent compositions, dispersion coatings, opaque enamels. The former refers to all kinds of impregnations, protective special glazes and varnishes without color. Transparent paints and varnishes are used to protect wood from ultraviolet radiation and emphasize the natural wood structure.
Transparent paints and varnishes emphasize the naturalness of the wood structure
Dispersion compositions provide increased water and frost resistance, vapor permeability of processed products, as well as preservation of the color of the latter for a long time. The solvent for such paints and varnishes is water, and the binding component is alkyd resins, acrylates or synthetic latexes. The most famous representative of dispersion coatings is acrylic paint. She is extremely popular these days. Opaque enamels are traditional coloring compositions. They are easy to use, have good hydrophobic properties, and guarantee high quality processing.
In everyday life, wood painting is most often done with alkyd, oil and acrylic compounds. We will talk about the features of these paints in more detail.
Ombre colors
Ombre is a type of gradient that does not imply a transition from color to color, but a transition from light to dark or vice versa. By the way, I have a detailed video. The ombre effect is often used in furniture decor, for example, to darken the edges of drawers, or to create a transition on the legs.
First, as in the first case, we do the usual staining. Then, after the paint has dried, we take a darker or, conversely, lighter in tone color and begin to paint the edge. It is very important not to leave a sharp border, so as you approach the center, the paint becomes more and more diluted, and the very bottom edge is simply washed away with clean water.
Depending on how much you want to lighten or darken the edge, you can apply several coats of paint or limit yourself to one or two. I decided to show what the ombre transition from all edges to the center would look like. I get a strictly rectangular gradient shape, but you can make it smoother, for example, round or oval.
Selecting a pre-treatment agent
A separate category consists of impregnations, which are necessary to improve the structure and durability of wooden elements.
Such mixtures include:
- Drying oil. It is applied to protect the base from any harmful influences. It is better to lay several layers to achieve deep penetration. Can be used before oil paints to reduce their consumption.
The oil is ideal for processing wood indoors with temperature changes and high humidity.
- Special antiseptics. Protect from microorganisms and insects, prevent rotting.
Fire-retardant composition for wood Phenilax
Important! Impregnation is carried out carefully and in advance so that the wood has time to absorb the required amount of the composition.
Toning with varnishes
Another way to give wood a noble shade is to use varnishes.
It is important to sand the wood thoroughly before applying. Shellac varnishes are used in woodworking; they give the wood pleasant golden shades. TAIR has two types in its assortment: shellac alcohol and clarified alcohol. The alcohol varnish in the jar looks very dark, almost like bitumen, but in use it is slightly more golden than the lightened varnish. I show them on one board. I really like the result.
But since I started talking about bitumen, I’ll show that too. The use of bitumen varnish is already in the area of aging. I apply varnish along the edges and the wood immediately looks as if it has been burned. I apply bitumen varnish using a sponge. Bitumen varnish can be removed with white spirit, so if you accidentally drop more bitumen than necessary, it can be easily removed from a varnished or painted surface.
You can apply bitumen varnish directly to wood, but it is very actively absorbed into the wood and cannot be wiped off. Also note that bitumen varnish is very glossy and sticky, it is recommended to cover it with shellac varnish on top. Brushes after bitumen and shellac varnish should be washed in solvents.
Necessity
Mold, fungus, moss growth, destruction of the structure by termites, the appearance of cracks with subsequent rotting are the results of aggressive environmental influences. The once beautiful fence collapses before our eyes when a cat jumps on it. A gazebo, a bench begins to warp, the door to the barn begins to delaminate, warp, sag... Wooden surfaces cannot do without external protection.
It is important to take the choice of suitable paint material seriously. Untreated wood deteriorates for many reasons.
Timely painting will protect against humidity, frost, temperature changes, and insects. Anything that destroys the structure of wood spoils its natural appearance.
High-quality painting is necessary for many reasons:
- Prevent absorption and repulsion of moisture from deep layers of wood;
- Repel harmful insects, pathogens, prevent their settlement in porous surfaces;
- Protect from cracking and drying out under the influence of direct sunlight;
- Increase the lifespan of a wooden structure;
- Maintain her appearance.
When choosing paint, we pay attention to the most important point: it must be intended for application to wood! And this important point should be indicated on its packaging.
Multi-layer painting with a rubber spatula
I take the next primed board.
I paint it in a color that will show through from under the others. I have this purple-red one from the Acrylic-Art line. Pay attention when applied in one layer - it has such a delicate pink undertone, and when you apply subsequent layers it darkens to a noble brown! I love using this color in painting!
Then I put the following colors on a rubber spatula, maybe two at a time. I take light cold cobalt green, dark cobalt and manganese blue. It is better to wet the surface first, then the colors will float into each other more smoothly.
As a final chord I add a bright note of lemon color. Since the work is done in the raw, the colors float into each other quite interestingly.
Ideas for painting: photos of interesting options
How beautiful are painted plates, wooden pots and other objects that came to us from the distant past? Undoubtedly, these pre-revolutionary specimens are still valued today. They try to introduce new ideas to decorate the tree. Several of them can be seen in the photo.
A bright blue motif with dot painting will look great in whitewashed kitchens or adobe huts PHOTO: handhobby.ru
Bright handmade options are often offered for exhibitions, competitions or for sale PHOTO: madeheart.com
They try to paint semicircular options for various representatives of fauna: fish, birds PHOTO: maxi-land.ru
Kitchen cutting boards with art are often created as part of a ready-made set (pot, scoops, plates) PHOTO: romantik.pro
Painting is suitable even for used cutting boards PHOTO: sam.mirtesen.ru
Dear readers of our online magazine, ask questions, comment and rate the publication. Perhaps you have your own experience in painting with one of the above techniques, we will be glad to hear about it.
Multi-layer painting with holes. Using a metal scraper.
The next method is simple, but very effective for those who love aging techniques.
The first color is applied to the primed wood. I took gray linen. In this case, you can apply the color in one thick layer and use an old bristle brush, which leaves marks. I lightly dry the paint with a hairdryer, but not completely. I take a metal spatula and start peeling off the paint.
In those places where it has not dried out, it is very well removed in whole layers. The next color is sage. I apply it randomly, making strokes in different directions. I dry it again and peel it off with a spatula. In some places you can apply force and even scratch the soil right up to the wood.
One-step craquelure
I paint the primed wood gold. One-step crackle p
is an imitation of cracks in paint that appear over time due to changes in temperature and humidity. The first color is the one that will remain visible through the cracks; you can come up with many interesting options, make it darker or lighter than the main one, use metallics or mother-of-pearl. After the paint has dried, a thick layer of craquelure varnish is applied to the surface.
I leave it to dry until it is slightly sticky to the touch. I take the red color, because I really love the noble combination of red and gold, and with a wide flat brush I begin to paint the entire board.
Very important!
You can apply paint over craquelure varnish only once, so it is important that the paint immediately has sufficient coverage and a well-spreadable consistency. If you try to apply a second layer of paint, it will simply start to roll off unsightly. Let's paint joint to joint! As you can see, cracks appear immediately. After the paint has dried, the craquelure must be covered with shellac varnish.
Epoxy
Such dyes can be powder, aerosol and two-component. The latter solutions consist of a hardener and resin. For painting wooden products, compositions based on cold-hardening epoxy resin are used. Under standard conditions at room temperature and normal air humidity, they harden within a day after application.
The main advantages of epoxy paints are:
- high strength and durability of the coating;
- waterproof;
- resistance to mechanical stress;
- good adhesion to any surface;
- wide selection of colors and shades.
Epoxy paints are used for painting floors and walls, household appliances, heating radiators, wooden garden figurines, and cars. The cost depends on the type of composition and its technical characteristics.
Two-step craquelure
Two-step craquelure
imitates cracks that appear in the varnish over time. I will show how to create these cracks without covering the wood with paint or primer so that the texture of the wood remains visible. But, of course, such cracks can be created over a painted surface, or over decoupage, or painting, or even painting.
First I apply several layers of shellac varnish. I took the unbleached one because I really liked it in one of the previous methods. Wood is a very absorbent material, so you don’t even need to take into account the first layer of varnish; it will be completely absorbed. After it, it is better to apply another 3-4 layers of shellac varnish with intermediate drying.
Then, as in one-step craquelure, I distribute a thick layer of craquelure varnish over the surface. I leave it to dry for a day. In the morning, these gorgeous cracks appear in the light. If your room is humid or cool, there may be fewer cracks, then you need to warm the surface with warm air from a hairdryer. Craquelure loves dryness and warmth. To show the cracks, I rub oil paint into them. I cover the craquelure with shellac varnish.
Oil compositions are slowly fading into oblivion
Oil-based paints have been used less and less in recent years. Their main producers are domestic companies. Foreign companies practically do not produce such paints. Oil mixtures contain drying oil. This additive makes paints toxic and unpleasant to smell.
The main producers of oil paints are domestic companies
Working with oil compositions is not very convenient. Firstly, they are applied exclusively in cool and completely dry weather. If there is a little rain outside, the painting process will have to be postponed. Secondly, these paints take at least 24 hours to dry. Thirdly, before applying the oil mixture you will have to work hard to prepare the wooden surface. It should be thoroughly cleaned and leveled. If you don't do this, you will end up with a poorly painted surface with streaks, bubbles and other defects.
In addition, it is impossible to apply another type of paintwork to paints with drying oil later (for example, when you need to update the product). If you treat wood with oil paint once, you will have to use it constantly. We advise you to think several times before choosing such compositions.
Boat board | multi-layer painting using a wax candle
I paint everything with thinly diluted brown paint.
After drying, in some places I rub the board with a wax candle. Keep in mind that the paint in these places will come off later! Then I paint one half with the color kraplak, and the other with dark green. The main thing is not to forget and not to start blow-drying, otherwise the wax will start to melt! After the paint has dried, I take a metal scraper and start removing the paint. In areas covered with wax, it can be removed very easily. Next, I take a candle and rub new areas with it.
I try to include both new colors and the color that we tore out from under the second layer. I cover one half with orange, and the other with light cobalt green. I dry it naturally in the same way, then remove the paint with a scraper. I cover some parts again with candle wax.
I paint everything with one color - Persian turquoise from the Acrylic De Luxe line. I dry it and scrape through the paint. This is another way of aging.
Alkyd
Alkyd dyes appeared on the construction market earlier than their acrylic counterparts. When dry, such compositions form a translucent water-repellent film on a wooden product.
The alkyd paint and varnish material dries quickly and does not have time to penetrate deep into the wood, which ultimately leads to a decrease in the durability of the protective coating. The solution is suitable for painting those wooden structures that suffer from moisture. These are door leaves, window frames and thresholds. Alkyd paint has high frost resistance; the coating can withstand temperatures down to -30 degrees.
Alkyd dyes must be applied to a previously prepared, dry surface. If the solution is applied to a wet base, roughness and bubbles will appear on the film. The drying of the layer continues for 8-12 hours.
Using wet paper
This is also one of the methods of multi-layer painting.
I apply thinly diluted ocher as the first layer and dry it with a hairdryer. Next, I take a sheet of paper and tear it into pieces of different shapes and sizes. Try to have complex shapes and not just straight stripes. I wet the paper with water and place the pieces on my piece of wood. The next color is applied with a palette knife. I chose warm gray. You need to apply it so that pieces of paper do not move off during the process. You can safely leave a slight sloppiness in the application, uneven thickness of strokes. While the paint is still fresh, I carefully lift the paper with a palette knife and remove them. And I leave it to dry.
Then I tear up the next batch of pieces of paper, moisten them and place them on the board. I try to ensure that there are different areas under the paper - both gray and ocher. I apply the next color - dark ocher, and remove the paper without waiting for it to dry. Drying the paint. Then all stages are repeated as many times as you want to add colors to your work.
I apply red ocher, and the very last layer is burnt umber. This method differs from others in that each layer has its own small thickness, and it seems as if entire layers of paint were actually falling off the board after numerous stains.
Gold plating
Before gilding with gold leaf, you need to prepare a very flat and smooth surface.
I cover the board with gesso primer. I let it dry completely and then sand it with fine-grit sandpaper. After sanding, it is better to smooth the surface with a piece of natural fabric, such as linen. Levskas has an absorbent surface, so you need to cover it with the first layer. In icon painting techniques, where gilding also requires a smooth surface, shellac varnishes are used for this, and here I also use shellac. After this, if any brush marks remain, you can sand and smooth the surface again. Then I apply another coat of shellac varnish.
If you want to get perfect smoothness, reminiscent of an even gold bar, it is better to use alcohol-based gilding compounds. I use acrylic water-based, it won’t achieve perfect smoothness, but you can get another beautiful effect. After the glue has dried to transparency, you can apply gold leaf. I use the classic one.
Ideally, special wide brushes are used to transfer it to the surface. Then the gold leaf will lie more smoothly and evenly. But I think that the resulting cracks and creases have their own charm. Moreover, you can scratch the gold leaf on top with a metal brush (Although I’m sure many would condemn me for this!). According to technology, classic gold leaf is sealed with alcohol varnishes to avoid oxidation. I use shellac varnish.
Brushed firing and gray wood
Firing with brushing requires a gas burner, metal brushes and compliance with fire safety regulations.
Don't be afraid to burn the wood thoroughly if you're doing it for the first time. Usually, beginners do a very weak firing, achieving a barely brown color. When firing, we burn soft wood fibers so that we can then easily comb them out and reveal the relief texture. To do this, after firing, we moisten the board with water so that dust does not fly in all directions, take metal brushes and comb our wood with pressure. This technique is often called “Barn Board” - this is the attempt to age a board to the state of a board left over from a dismantled old barn. Any means will work here: you can use a nail puller or a hammer to leave deep dents, or use a chisel to mark and widen cracks. An awl or nail is suitable for creating round holes. Using a drill and a drill bit, you can create paths for bark beetles. Use a saw to mark some old cuts.
You can hammer in a couple of nails and oxidize their heads with acid, but I didn’t. A new board will first of all be distinguished by a smooth cut, so for authenticity it’s worth adding some unevenness to it, you can even cut out some pieces..
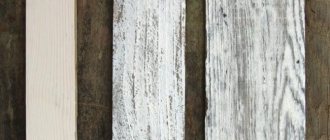
After all these terrible abuses of the board, I take a torch and once again burn through the newly formed cracks and potholes. I comb out the burnt wood again with a wire brush. Next, I sweep away the remaining dust with a brush and take white paint. Over time, the tree loses its color, fades in the sun, and becomes clogged with dust. To imitate such gray wood, you need to patina it. I apply thinly diluted white paint and then immediately wipe it off with a wet cloth. I dry it. The paint melts right away. I apply the next layer.
It is important
not to overdo it with white!
Wash the paint thoroughly after application. The wood should appear slightly dusty. The final step is to lightly sand the wood with sandpaper.
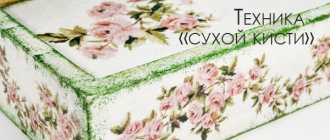
Brushed firing and metallic patina (dry brush)
I have another board with firing and brushing. By combining firing, brushing and dry brushing, you can achieve different visual effects, lightening the texture of the wood or, conversely, darkening it. And I want to show the metallic patina in this example. I paint the board deep black, using velvet black from the Acrylic De Luxe line.
Metallic paints look best and shimmer on dark surfaces. Next, I take Decolor metallic paints and work using the dry brush technique: I put paint on a brush (it is better to use flat, coarse bristles), wipe off the excess on a napkin and begin painting in the direction of the wood grain.
It is important not to overdo it and stop in time. The result is an elegant metallized coating that emphasizes the wood grain.
Why do this at all?
- Wood is, first of all, a living material and, like any living organism, it lives, ages and dies. If you do not care for it and do not treat it in time, then these processes will go much faster, especially for wood that is in the open air and experiences the whole range of negative weather surprises.
- In addition, this living material is fertile ground for the development of various types of mold and mildew; whole hordes of pests enjoy it.
- Based on the colossal experience of human use of wood, modern science has developed many different compositions that not only improve the appearance of the material, but also make it possible to extend the decent life of wood for decades. Moreover, for each type of wood and type of its use they are different.
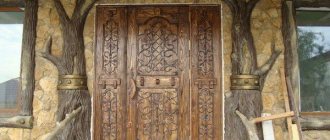
National painting on wood.
Brushing without firing + washing technique
Of course, you can brush wood without firing it, which is exactly what I did before I bought the burner.
This can be done with special drill attachments and hard metal brushes. Or brush by hand, which is what I do. This, of course, is a great way to keep warm when there is no heating) You definitely need to sand the board after brushing so as not to get splinters.
Next I start painting. I apply purple and immediately wash off the unabsorbed paint with a wet rag. I introduce an additional color in some places - ultramarine - and do the same with it.
This technique allows you to delicately highlight the texture of the board. Next, I take green Chameleon paint, apply it to the entire surface, and also wash away the residue, allowing it to remain only in the depths of the pores. After drying, a delicate pearlescent effect is obtained.
Technology
The technological process takes place in stages and includes the following stages:
- Preparing tools.
- Surface treatment.
- Painting.
- Additional processing, if necessary.
The wood processing stage plays a significant role. If this procedure is performed correctly, no problems will arise in future operation.