Preparatory work
Preparation of the base consists of several operations.
All damage is eliminated, and if it is significant, new materials are installed. Require special attention:
- A vapor barrier film laid on top of the ground: if there are holes in it, steam enters the floor structure, promoting the development of mold colonies and rotting fungi.
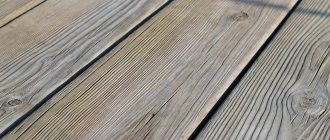
- Wooden elements.
Laying plywood on a wooden floor (with glue) to level the base under the tiles
It is important to remove rotten areas, stripping them down to completely healthy tissue, and treat all lumber with one of the antiseptics:
- hot drying oil;
- sodium fluoride solution (50 – 100 g per 10 l of water);
- copper sulfate;
- any factory-made antiseptic for interior work.
Rotten areas are recognized by their soft structure - a knife or awl can easily penetrate them.
It is necessary to bring the drying oil to the desired temperature carefully: if it overheats, its vapors will ignite. If you lack experience, it is better to apply impregnation without heating.
Gain and Leveling
When the lag pitch is more than 50 cm, intermediate ones are laid between them to prevent sagging of the floor boards. New beams are also treated with impregnations.
The upper edges of the joists must lie in the same plane - then the base will be perfectly flat. During construction, they are placed this way, but due to uneven shrinkage, distortions occur, so alignment is necessary. Protruding beams are trimmed with a plane, sagging beams are placed on supports or thin boards are stuffed onto them, then the thickness is adjusted with a plane.
Installation of boards
The dismantled floorboard, if it is in good condition, is returned to its place. Before this, varnish or paint is removed from it using one of the following methods:
- Heating with a construction hairdryer: a quick and inexpensive option. When air is supplied at a temperature of 200C - 250C, the paint and varnish coating lags behind the wood, swelling with bubbles, so that it can easily be cleaned off with a spatula. This effect is due to a significant difference in the thermal conductivity coefficients of paint and wood. You cannot remove paint from metal and concrete substrates using this method.
- Remover treatment: This is the name given to chemicals intended for removing paint and varnish coatings. Available in the form of a ready-made solution (available in liquid and gel form) and a dry mixture. The paint can be easily removed after treatment, but for large volumes of surfaces, this method is expensive.
- Processing with abrasive tools: the manual method is labor-intensive, the mechanized method (using an angle grinder or a drill with a special attachment) is dusty and requires mastery of the tool.
Finished floor - tiles on wood
If damage is detected (cracks, woodworm passages, rotten areas), the boards are rejected.
The boards are laid on the joists with gaps of 3–4 mm, and between the boards and the walls - 1 cm.
The gaps eliminate the occurrence of stresses when wood expands due to changes in temperature or humidity.
Before installing the flooring, you must make sure that there is a ventilation gap of at least 5–7 mm between it and the insulation.
The boards are secured to the joists with corrosion-resistant nails or self-tapping screws:
- galvanized;
- oxidized (black);
- phosphated.
The board is attached to the outer joists with two hardware, and to the rest - with one.
Irregularities are puttied, then the boards are sanded with a grinder.
Finally, all gaps are filled with polyurethane sealant (spray foam). This elastic composition will transform the flooring from cracked to solid and at the same time allow the boards to expand freely. The gaps are foamed little by little: when curing, the sealant significantly increases in volume. The exposed material is cut off flush with the floor.
Wall decoration
It is also best to lay tiles on the surface of wooden walls after constructing an additional layer in the form of plywood or moisture-resistant drywall. Otherwise, over time, the tile may simply fall off.
If the bathroom is adjacent to the living space, it is advisable to take care of vertical waterproofing. This will protect you from excess moisture.
Laying tiles on the walls of a wooden house
Laying is done on a carefully treated and primed surface. If the space in the room is very limited, instead of using plywood, you can seal the joints and cracks with foam, and level the coating with a small layer of plaster on top
It is also important to use elastic mixtures here.
Laying the tiles begins from the second row of the wall. You need to move forward in small sections. It is recommended to increase the layer of adhesive solution, applying it not only to the walls, but also to the tile itself, this will provide it with additional space for movement. Fix the seams with crosses; on average, their thickness should be 3 mm. Seamless installation in a wooden house is taboo. In such a case, the elements can overlap each other when the volume of the base changes. The first row is laid last, often consisting of threaded elements. Seal the joints with silicone sealant and seal the seams with grout.
Tiling a bathroom or kitchen in a wooden house is not a problem if you know all the intricacies of performing such work. If the rules and regulations are followed, the coating will be securely fixed to the surface and will not deteriorate over time.
Installation of tiles in bathrooms
When work is carried out independently and, moreover, for the first time, it is best not to just look for any information on the Internet or reference books, but to strive to obtain specific information. The best information will be step-by-step instructions for laying tiles in relation to a specific type of surface base.
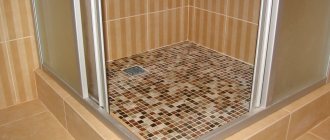
Laying tiles in the bathroom is especially difficult. When renovating such a room, you need to take into account the increased number of pipes on the walls and floor, as well as plumbing equipment (bathtub, shower, etc.). The same is true when renovating a toilet.
Sometimes people do not resort to tiling the back wall so as not to dismantle the toilet. The tiles are replaced with imitation screens. The same technique is used in the bathroom.
To create a beautiful appearance and avoid removing the bathtub itself, it is covered with moisture-resistant gypsum plasterboard, followed by painting or tiling, or special roller screens are installed.
In addition, in order to lay out rows evenly and avoid pressure from the next row on the previous one, plastic crosses are used, which are installed along the lines of vertical and horizontal seams.
Different types of crosses are selected for the floor and walls. For vertical laying of tiles, thinner types are used. The thicker ones go to the floor. The use of such elements helps to create clear geometric lines. In addition, after grouting the seams, the tiles have a truly finished look.
Expert advice
It is not difficult to do the cladding yourself. Expert advice:
- If during finishing it is not possible to lay a whole number of tiles in a row, then the excess is cut off at the corners with a tile cutter, diamond glass cutter or grinder. The fragments that remain can later be laid out in the corners or covered with a shelving unit or cabinet.
- Finishing work needs to be carefully planned, because good facing tiles are expensive. You need to buy material with a reserve of at least 10% of the total quantity for trimming.
- Textured requires docking and adjustment. Its quantity needs to be increased by 15–20% of the total volume.
- If you need to make holes when finishing, it is best to use a crown or a ballerina. Just don't press hard on the fragment. This will help prevent the icing from chipping and keep the edges of the hole smooth.
Even the most expensive facing materials will not be able to ensure the durability and strength of the coating if the base was poorly prepared at the initial stage.
It is necessary to perform a complex of simple works - clean the base from dirt and dust, oil stains and other substances that reduce the adhesion of the glue, eliminate all irregularities and add strength. Then the result will please the apartment owner for a long time.
Preparing the base
Even if the floor is in satisfactory condition, all elements of the system must be carefully inspected. To do this you need:
- dismantle the floor covering;
- replace worn out elements;
- perform horizontal alignment;
- treat the wood with antiseptic mastic in several layers;
- fill in expanded clay;
- Lay the boards with the unpainted side up.
It is important to ensure that the distance between the logs is at least half a meter. A centimeter technological gap is left between the supports and the wall, which is then sealed with damper tape or filled with silicone sealant
Excess holes in the subfloor are puttied, the boards are sanded or scraped.
How to lay plywood on joists
Logs that perform the functions of strengthening and leveling the floor
- We choose logs; they should not be shorter than two meters.
- After settling them in a dry room, we discard those that have gone screw.
- We lay it level in increments of 50-60 cm perpendicular to the direction of lighting, secure it with anchors or dowels. The gap from the wall is 30-40 mm.
- We make a drawing of the sheet flooring.
- We mark on the sheets the places of attachment to the joists.
- According to the marks, we drill holes at a distance of 10-30 cm no larger than the diameter of the self-tapping screw.
- To prevent the wood from splitting, a hole is drilled with a diameter smaller than the self-tapping screw before fastening it to the surface. In the future, we carry out processing as described above.
Laying tiles on a wooden floor - instructions
If you decide to lay tiles on a wooden floor yourself, then in order for them to serve you reliably for a long time, we recommend performing the following operations:
- Using a nail puller, carefully remove the old floorboards. Using wooden supports and a building level, we install the logs strictly horizontally.
- To increase the service life of the new floor, the logs are treated with special antiseptic impregnating compounds that prevent the formation of rot, mold, and damage by wood-destroying bugs.
- After the impregnation has dried, the gaps between the joists in the bathroom are filled with fine expanded clay to their upper level.
- Across the joists, using wood screws, fix rough boards to them. Between them you need to leave a gap of up to one cm.
- If old boards are used as rough flooring, then it is advisable to remove the old paint from them. To do this, use a hair dryer, chemicals, and a mechanical method. The last option is the most popular. A metal brush is inserted into a drill or sanding machine and used to remove old paint from the surface of the boards.
- Boards that have been cleared of old paint or varnish must be treated with a deep-penetrating antiseptic compound. This will significantly increase their service life and protect against the formation and spread of mold and rot.
- Experts recommend laying vapor and waterproofing on top of the rough boards: waxed, parchment, bitumen paper or plastic film. Is it possible to lay tiles without waterproofing? It's possible, but it's better to play it safe.
- A substrate is laid on top of the insulating layer. For which they use sheets of plasterboard or a cement-bonded particle board up to 2 cm thick. It serves as the basis for laying ceramic tiles on a wooden floor. The sheets are securely attached to the rough boards using wood screws with a pitch of approximately 15-20 cm. Considering that the boards will change their size under the influence of moist ambient air, it is necessary to leave a gap of about 10 mm between the substrate and the walls, which is sealed with polyurethane foam.
- Experts recommend covering a laid base made of sheets of plasterboard or plywood with drying oil or latex impregnation. The applied layer should be thick and thick. Until it dries, a reinforcing painting mesh is laid on it. This will create a monolithic surface.
- After the coated surface of the substrate has dried, a metal mesh is placed on it. We fix it to the leveled base surface using self-tapping screws.
- The metal reinforcing mesh is coated with a special mixture consisting of one part water combined with two parts sand and liquid glass.
- The composition is evenly applied over the entire surface of the substrate made of sheets of plasterboard or plywood. After drying, a reliable and even base surface for laying ceramic tiles is obtained.
- Experts recommend placing the tiles in water for 10-20 minutes before laying. It will be saturated with the required amount of moisture, as a result of which less moisture will be drawn out of the solution used to fix the tiles.
- To choose the best option for laying tiles with minimal waste, you can lay them out on the bathroom floor without glue.
- Ceramic tiles are fixed to a wooden floor using cement-based tile adhesive, which can be purchased at various hardware stores in the form of a dry mixture. To prepare a working solution, it is enough to dilute it with water. But it must be remembered that the finished suspension is effective for no more than two hours.
- Tile adhesive working solution is applied to the wooden floor and tiles using a notched trowel.
- Having laid the tile in place, be sure to check its alignment in the plane using a building level.
- It is recommended to immediately remove protruding excess adhesive mixture with a clean rag after laying the tiles.
- Before laying the next tile on a wooden floor, it is necessary to insert plastic crosses between the tiles to ensure that the seams are even.
- A day after finishing laying the tiles on the wooden floor, it is necessary to grout all the seams with a special mixture.
Video instruction
For clarity, watch the video with installation instructions. The stage of direct work with tiles and ceramic tiles is described here in detail; as for the wooden floor, work with it is of a preparatory nature and is described above in this article.
https://youtube.com/watch?v=Ccf5dYZALoc
By following these instructions, you can lay tiles on an old wooden floor without any problems.
Useful article? Add to your bookmarks!
Assembling and fixing the plywood base
All blanks are arranged in a checkerboard pattern so that the plane is as strong as possible; if we are talking about floors, then the logs are laid out as close to each other as possible, as far as the availability of material allows this, at least 30 cm per pair of boards.
The sheets are fixed evenly; for this, professional builders use a water level; it is better to take a tool 1.5 or 2 meters long in order to apply it over the entire plane. The joints are sometimes additionally sealed with sealant or wood glue to ensure the reliability of the erected frame.
Since wood can expand under the influence of temperature and increased humidity, in the bathroom or kitchen it is better to provide gaps between the sheets, as well as in the corners, 3-5 mm will be enough.
Layout options for floor tiles in bathrooms
The classic rule for ceramic flooring is to lay it out from the middle of the room towards the walls. This allows you to finish each row against the wall with a large piece of tile, more than half its width/length.
The bathroom and toilet are initially the smallest rooms in a cottage or apartment. At least 2/3 of the floor area is occupied by a toilet, shower stall and/or bathtub, washing machine and floor cabinets, washbasin pedestals and laundry baskets.
Therefore, special layout schemes are used here:
- on the floor, not the middle between the walls is marked, but between the free wall and the plumbing or household appliance that is permanently standing on the tile;
- Under the bathtub, washing machine and toilet, the cladding is started randomly.
Defects in the geometry of rooms, including bathrooms, are masked by diagonal layout schemes. For example, if the walls are not parallel, it will not be noticeable.
Thus, there are several technologies and construction materials that make it possible to tile a wooden floor and ensure a long service life of the coating. All of them are available for independent implementation in a country house or city apartment.
Which glue to choose
A two-component adhesive is suitable for working with ceramics and wood. The mixture contains polyurethane resin and a hardener, which makes its adhesive parameters an order of magnitude higher than other options. You can use a ready-made store-bought mixture or mix the components yourself using a drill and a special attachment. The polyurethane resin adhesive is suitable for use in just one hour. You can also glue tiles to wood using the following compounds:
- Silicone sealant. Guarantees excellent results, protects the tiles from cracking under minor vibrations and mechanical loads;
- Tile mortar. The gluing will be especially strong if you use plasterboard sheets as a layer between the boards and tiles;
- Acrylic putty. The mixture is applied to the tiles using the dot method, which increases the adhesion of the materials. The composition of the construction paste is similar to liquid nails. You can stick any tile on it;
- PVA glue. Suitable for gluing tiles to timber or thick boards. Thin wood, plywood, chipboard, when in contact with glue, are deformed due to moisture.
Floor covering
First of all, you need to take care of the flooring. Let's take a closer look at how to glue ceramic tiles to a wooden surface. To do this, it is recommended to make an additional screed in addition to the plywood flooring, having previously waterproofed the floor. To close all joints and cracks, but at the same time maintain the possibility of movement of the coating when conditions change, it is recommended to use polyurethane foam; it will serve as a kind of compensator. An additional polymer membrane waterproofing should be spread over the base. The pieces of material are overlapped and secured together with adhesive tape.
After this, you need to pour a small layer of concrete screed. Today on sale you can find special mixtures designed for wooden surfaces, which are elastic even after hardening and do not crack when the base moves. After drying, the concrete is primed.
Stages of tiling a wooden floor with ceramic tiles
Now you can start tiling the floor. The tiles are laid using standard methods. If this is a kitchen, it is recommended to start installation from the farthest visible corner or from the center of the room. In the latter case, you need to divide the surface into 4 parts from the central point and work on each zone separately. After installation is complete, be sure to seal the seams. To do this, you can use resin-based mixtures or latex mastic.
Wet screed
The wet screed method allows you to create a monolithic layer between wood and ceramics. This method of laying tiles ensures that any changes that occur to the wooden floor will not affect the condition of the tiled covering.
But one nuance must be taken into account: a wet screed creates additional thickness that needs to be masked.
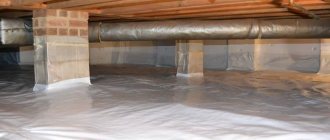
Preparation for installing a screed begins with laying polyethylene with a thickness of 100 microns or more on a wooden covering. The strips are laid overlapping, the joints are taped.
The polyethylene should extend onto the walls, forming a kind of edges 15-20 cm high. Along the perimeter of the room, a damper tape 8-13 cm wide is attached to the perimeter of the room with double-sided tape. It will separate the leveling mixture from the floor and wall.
A reinforcing steel mesh with 10x10 cells is laid on the prepared surface, after which cement mortar or a purchased polymer screed is poured.
Method No. 2
It is effective if the floor is in almost deplorable condition, but inspection still allows us to conclude that installation is possible.
First, you need to dismantle the old coating to get to the concrete. Next comes waterproofing. For this purpose, there are enough special materials on the modern market.
To get a flat floor, you need to use a level and thread to cut a horizontal line around the perimeter of the room. Then we place beacons in increments of about a meter; the distance from the walls should be 10 cm.
The following can be used as beacons:
- Bars. After the solution hardens, they are removed and the space is filled with the mixture.
- Gypsum profiles. They are secured using self-tapping screws.
- Plastering. Mounted on plaster marks.
Recommendation: to mix the screed mortar, use a container with a capacity of up to 15 liters.
If the layer turns out to be too high, most of the space can be covered with expanded clay. It is filled with the mixture and waited for 24 hours. After this, the surface is primed and filled with solution. Alignment is performed by the rule, moving towards the door.
Then you will have to wait 3 days and then knead the self-leveling mixture.
Installation of covering for tiles
After installing and insulating the boardwalk, it is necessary to create a smooth intermediate covering on it, which will absorb the deformation of the underlying layer when its wood swells or shrinks due to changes in humidity and air temperature. There are three ways to create such a layer.
Dry coating installation
This solution is the simplest and most common. It consists of creating an intermediate layer of moisture-resistant plywood, on top of which ceramic tiles can be laid.
There are many ways to install plywood on plank flooring. One of them consists of installing point supports or a joist system on top of the boards, which are covered with sheet material. Another method is to lay an adjustable floor on the deck that has screw supports under the plywood sheets. You can also simply fasten sheets of plywood, OSB or moisture-resistant plasterboard cut into quarters with screws to a flat boardwalk.
At the final stage of installation, the plywood or similar base must be sanded, its joints filled with a sealing compound and coated with a primer.
When laying ceramic tiles on a wooden floor covered with plywood, you should choose a two-component polyurethane adhesive, which creates a strong but elastic substrate under the cladding. This property of the adhesive composition is especially useful for damping weak linear vibrations that wood boards exhibit.
Installation of coating using the wet method
It consists of installing a cement or polymer screed on the waterproofing layer of a wooden floor plank. Unlike a conventional screed for ceramic tiles, this coating has a small thickness due to the need to reduce the load on the floor. It may not support the weight of a standard thickness screed.
Another feature of the “wet” covering for tiles is its complete isolation from the walls of the room, that is, the base is made according to the “floating floor” model, which requires the presence of a deformation gap along the perimeter of the enclosing structures and around utility outlets from the floor.
This design allows for slight movements of the wooden floor elements, but the cladding, located on a monolithic base, will not feel these movements.
The lightweight screed should have a thickness of 30 mm. It is not advisable to reduce it, as this will reduce its reliability. Cement screed is prepared from a mixture of cement, sand and plasticizing additives. The polymer composition includes a two-component polyurethane mixture and liquid glass.
Before pouring any of them over the waterproofing laid on the boardwalk, you need to secure the metal mesh with screws. Subsequent actions are carried out as usual. After leveling, the coating must be left to dry and then treated with a primer to improve its adhesion to the tile adhesive.
Leveling material sticker
This method of installing a base for laying tiles on a wooden floor is the fastest in execution. Its essence consists of gluing moisture-resistant plasterboard sheets to the prepared board flooring.
In this case, an elastic two-component polyurethane adhesive is used. If the rigidity of the coating seems insufficient, you can lay a second layer of gypsum board on top. Layer-by-layer laying of sheets must be carried out so that their seams do not coincide in the vertical direction. It is recommended to fill the joints between them with a sealing compound, and then treat the surface with a primer.
As in all previous cases, the plasterboard base should be made according to the “floating floor” model. The technological gap that remains around the perimeter of the coating after laying the tiles should be filled with elastic sealant and then covered with baseboards.
All of the above methods for arranging a base for tiled cladding are general recommendations, which will certainly require modification in each specific case to resolve technical issues directly on site.
In fact, there are many more options for constructing such coatings.
Tile selection
When choosing tiles, relying only on decorative qualities is not enough; ceramics must meet certain requirements.
- Choose low porosity tiles. Tiles with a large number of pores absorb liquid, which, under conditions of temperature fluctuations, leads to the destruction of ceramics. The best solution in this situation is porcelain stoneware or clinker. Their water absorption is extremely low, they can withstand both severe frost and African heat. Plus, these materials are also very durable. Conventional ceramics with low moisture absorption are marked with the letters “A I” and “BI”. The first letter denotes tiles made by extrusion, the second – those made by pressing.
- If you prefer regular tiles, choose glazed ones. Enameled ceramic tiles are fired twice, while unglazed ones are fired once. Double furnace treatment hardens the material more.
- Bath tiles must have a rough surface. Slippery ceramics in bath conditions are too dangerous for injury. First of all, this point concerns floor tiles, but it is also better to choose wall tiles in secondary rooms taking into account compliance with safety regulations.
Subfloor tiles
If the project includes beam floors, a lining is attached to these supporting structures at a lower level. Insulating materials and insulation are laid on it as needed, then the subfloor is laid.
A budget option is flooring from edged boards, but in order to lay tiles on top of the subfloor, it is better to increase the construction budget and make the subfloor from board materials (plywood, OSB, DSP). The number of seams will be reduced, the stability of the geometry and the overall service life of the structure will increase.
Dry screed
Due to the high humidity of bathrooms, dry screed as a base for laying tiles on a wooden floor is not the best option:
- expanded clay sand is highly hygroscopic, and cannot evaporate accumulated moisture through a waterproof lining (dangerous in case of leakage);
- the structure has a significant weight, and accordingly puts a lot of stress on the wooden floor beams.
However, the practice of operating such structures exists, so you need to know how to properly make it yourself. The technique consists of several operations:
- laying a vapor barrier - film or membrane with an overlap of at least 15 cm, sealing the seams with tape;
- backfilling of expanded clay sand - a layer of 2 - 5 cm to level and ensure thermal insulation of the floor;
- leveling of bulk material - beacons are laid in a single horizontal level, excess sand is cleaned off according to the rule;
- laying gypsum fiber sheets - in two layers with the joints offset by at least 5 cm, fastening the gypsum fiber blocks to each other with glue and using self-tapping screws to the base through and through;
- Laying tiles is done using standard technology.
Making dry screed.
Advice! To correctly lay the flooring, you should take into account the placement of plumbing fixtures, the geometry of the room and the format of the tiles. Either a solid tile or pieces larger than half its size must be adjacent to the walls to ensure a normal bathroom interior.
Here is more information about dry screed: How to make a dry screed.
Gluing with a special mixture
Most leading manufacturers of dry mixes have special compositions of increased elasticity for decorating wooden load-bearing structures with tiles. The most popular products:
- Lacrysil – packaged in red buckets;
- Kreps – modification of Super;
- Litocol – Litoflex K81 or Superflex K77;
- Ceresite – mixture SM-17.
You can lay tiles on two-component mixtures based on polyurethane resins Bona R770, Utsin MK-92, Stauf PUK 440 or Kiilto Slim. They have high adhesion to both the bottom layer of wood and the top layer of ceramic tiles. However, the lifespan of these compositions is short; they should be diluted little by little in order to have time to develop a solution before setting begins.
Advice! It is not recommended to glue tiles to wood with regular tile adhesive, as it is intended exclusively for mineral substrates.
The technology for laying tiles on a subfloor is as follows:
- sealing the seams of plywood, chipboard, fiberboard with putty;
- applying special tile adhesive to the base;
- leveling the pastel with a notched spatula;
- laying tiles using SVP systems or standard crosses.
Typically, solid cladding elements are installed according to the layout diagram. The next day the pieces are trimmed and laid. Then the seams are grouted and the baseboards are installed and attached to the walls.
The flatness and horizontality of the base is leveled with lags. Small defects are hidden with tile adhesive. There is no need to additionally putty the surface of the subfloor. First you need to get rid of creaks and replace beams/joists if necessary.
Unlike most wood-based boards used to make subfloors, OSB is coated with wax. This creates additional costs for the developer - the impregnation will have to be cleaned off with an angle grinder, the adhesion of the base to the tile adhesive artificially increased, and this layer will have to be reinforced with a polymer mesh. Therefore, it is worth choosing DSP/chipboard or plywood.
Why is it undesirable to combine ceramics and wood?
It is recommended to lay the tiles on a strong, solid base. If this is not possible, other options must be considered. Many people wonder whether it is possible to lay tiles on a wooden floor. To do this, the following factors should be taken into account:
- tile is considered a “cold” material, wood, on the contrary, retains heat well, for this reason it is not advisable to cover it with such cladding;
- when installing wood, you should provide it with the ability to “breathe”, then the material will last much longer, and ceramics do not allow air to pass through;
- tiles are rarely laid on a wooden floor, because cladding of this type exceeds natural material in terms of service life, as a result the base will quickly collapse, and along with it the decorative coating will be damaged;
- wood is not static, which makes it an unsuitable option for flooring if you plan to cladding it with ceramic products;
- When wood expands or dries out, the surface of the finishing material is deformed, and first of all, the integrity of the seam joints between the coating elements is damaged.
Pros and cons of using a plywood base
Before you figure out how to lay ceramic tiles on plywood, you need to figure out why they can’t just be laid on a wood floor? The answer is simple: the physical characteristics of wood and ceramic tiles are too different, and such an idea will not lead to anything good.
Laying tiles requires an absolutely motionless base. Otherwise, the tile will collapse or begin to “walk”, and cracks will appear at the seams. Wood changes its geometric dimensions under the influence of temperature and humidity. Therefore, combining these materials requires extensive preparatory work, during which an intermediate layer is formed, leveling out the differences between tiles and wood.
To prepare a high-quality base, you can use various methods and materials. But laying plywood has a number of undeniable advantages:
- This is the fastest way: you don’t have to wait a long time, as, for example, when drying a cement or self-leveling screed.
- When laying plywood on the floor, much less dust and debris is generated than with other methods.
- The weight of the structure being erected is insignificant, so the load on the logs or wooden floors will increase insignificantly.
- The method is quite simple and does not require specific skills or materials. At the same time, it will allow you to obtain a high-quality base with the required characteristics.
Naturally, there are also disadvantages:
- Plywood is incompatible with “warm” floors.
- The quality of waterproofing work will be of great importance, especially in rooms with high humidity. This may result in additional costs.
Grouting joints
After finishing the laying work, the tiles are left for some time (1-2 days) so that the glue fixes the tiling. Then they begin to grout the tile joints. This will require the appropriate tools and materials.
It is recommended to choose special antifungal mixtures. This is a necessity in rooms with high humidity.
Apply the grout carefully with a rubber spatula so that the seams are equally beautiful. After the filler has dried, the tiles should be wiped with a dry cloth to remove any remaining mixture from the tiles.
Do you need a screed?
Before laying, you should check the coating and evaluate how even it is using a level. If there are significant deviations, it is necessary to make a screed before facing.
What alignment methods are there?
Wet screed. Suitable for cases where it is necessary to increase the strength characteristics of the floor. At the same time, a gap is created around the perimeter of the room, taking into account possible deformation. This condition allows the base to move without destroying the installed coating;
- Dry screed method. This method is the most popular because it allows you to create not only a flat, but also a reliable floor with high load-bearing capacity;
- Leveling with gypsum board sheets is considered the easiest option. First of all, carefully examine the condition of the wood floor. Those bars that have rotted should be replaced with new elements. Next, the drywall is installed, the sheets are fixed with polyurethane glue, and the joints are treated with sealant. You should also soak the sheets with a primer mixture.
Floor covering
First of all, take care of the flooring. Let's take a closer look at gluing tiles to a wooden surface. In addition to the plywood flooring, it is recommended to make a screed, having previously waterproofed the floor. To close the joints and cracks, but still allow the flooring to move when conditions change, it is recommended to use polyurethane foam; it will serve as a kind of compensator. Membrane polymer waterproofing is additionally spread over the base. The pieces of material are overlapped and secured together with adhesive tape.
After this, a small layer of concrete screed is poured. Today on sale there are special mixtures intended for wooden surfaces, which are elastic even when frozen and do not crack when the base moves. After drying, the concrete is primed.
Stages of finishing a wooden surface with ceramic tiles
Now let's start tiling the floor. The tiles are laid using standard methods. In the kitchen, it is recommended to start installation from the farthest visible corner or from the middle of the room. In the latter case, divide the surface into 4 parts from the central point and work on each zone separately. After completing installation, be sure to seal the seams with a resin-based mixture or latex mastic.
Preparing for tiling the floor
In order to lay tiles in a wooden house with the highest quality possible, you need to take care of the evenness of the surfaces (see video). The existing floor covering, if installation will be carried out on it, should be as close as possible to the screed. If there are places where it “walks” into them, the coating needs to be additionally fixed. For example, if it is wooden, then fixation is carried out with nails. Next, you need to remove the top layer from the existing coating. This could be paint, varnish or another mixture. Perhaps the most difficult process will be the process of removing the old coating from the paint.
After the top layer is removed from the surface, it is necessary to inspect it for cracks, chips and other defects. If any are present, they must be removed using a primer or sealant. After all of the above work has been completed, you can proceed to preparing all the tools and materials necessary for laying tiles in a wooden house. These include:
Sequence of work
To begin with, the floor in the house must be treated with latex, on which a painting mesh must immediately be placed and leveled (see photo). After the mixture has dried, it must be attached to the surface with self-tapping screws, which will ensure maximum fixation. Next, you need to mix water, sand and molten glass in a ratio of 1:2:2 and treat the entire floor surface with the solution. After the mixture has dried, its horizontalness must be checked using a building level - it must be perfectly level.
The floor needs to be divided into several squares and you can start laying tiles in one of them. The material can be fixed either with tile adhesive or with concrete mortar mixed with a special putty. You need to spread the tiles with the solution one at a time and immediately lay them out on the floor of the wooden house. In this case, the material must be slightly pressed against the surface. The solution or glue that will protrude on the sides must be removed immediately before it hardens. It is necessary to grout the seams between the tiles after the material has been laid out over the entire surface (see photo). Remains of grout can be removed with a slightly damp cloth.
Preparing for wall decoration
Laying tiles on the walls of a wooden house is somewhat more difficult. And all because working with vertical surfaces is always more difficult than with horizontal ones, since objects on them do not stick on their own. First of all, you need to check whether the walls are even. You can use a building level for this. If the height differences are more than 0.5 centimeters, the walls must be leveled, and if less, you can proceed to laying tiles.
You can level the walls using putty, but before doing this, the surfaces must be primed. The mixture is usually applied in a thick layer using a rule and leveled. After the solution has dried, the verticality of the walls is checked again. If there are still deviations, the puttying is repeated again, and if there are no deviations and the surface is perfectly flat, you can proceed to collecting the tools and raw materials necessary for laying the material in a wooden house. Among them:
- ceramic tile;
- wooden slats;
- crosses;
- roulette;
- pencil;
- Master OK;
- damp cloth;
- tile adhesive;
- grout.
Installation stages
First, you need to mark the walls in a wooden house to determine how best to place the finishing material. Next, you need to nail wooden slats to the surface (see photo), which will hold the top and bottom rows of material. Laying must begin from one of the lower corners, inserting crosses between the individual elements. The glue or solution is applied using a trowel, smoothed, after which grooves are made on it, which will make the adhesion of the finishing material to the wall as effective as possible.
This is how the entire tile is laid out on the surface. At the same time, do not forget to remove excess glue. The crosses and slats are removed after the solution has completely dried. Then it is necessary to grout the joints, the excess of which, after drying, can be removed with a damp cloth. As you can see, there is nothing complicated about laying tiles in a wooden building. The main thing is to stock up on the necessary materials, tools and patience.
You need to understand that all things bought in a store will never be unique. Therefore, if you want to get not only functional, but...
Today, stores offer a huge selection of various finishing materials that allow you to bring even the most daring ideas to life. But.
Laying technology
Laying ceramics on a wooden base in a bathroom is no different from working on any other surface. The main condition is that it must be firm and even. Before starting work, door jambs and baseboards must be removed. The technology provides for the following work order:
- The first step is to decide how the tiles will be laid. If the tiles are positioned evenly, perpendicular lines are drawn across the room from the center of the walls.
- The tiles are laid in accordance with the drawn lines. In order to have fewer cut pieces, the lines can be shifted. If you plan to install large objects in the room (bathtub, shower, etc.), then the tiles next to them are laid symmetrically.
- Using a notched trowel, apply the adhesive evenly to small areas (about 1 square meter), and then attach and press the tiles to the floor. Laying is done along one of the lines over the entire surface where the adhesive mass is applied.
Next, the ceramics are placed in the direction from the center of the room to the walls. In this case, you need to focus on the markings made. After the tiles are laid in one half of the bathroom, move on to the second
It is important to lay the tiles at the same level. It happens that you come across tiles of different thicknesses
In this case, you need to reduce the layer of glue. You need to leave a gap between the tiles. To make it the same everywhere, crosses are inserted. After the floor is completely covered, the voids between the walls and the floor are filled. Cut tiles are placed in the gaps. It is necessary to take into account that the angle of the walls is rarely ideal. Therefore, before cutting ceramics, you need to take measurements on different sections of the wall.
After the glue under the tile has completely dried, the surface is treated with a primer.
It is necessary to pay attention to the fact that some types of tiles are treated with it initially. The gaps between the tiles are sealed with grout. This can be done with a scraper with a rubber pad.
Excess solution, before it dries, is removed with a damp sponge. Then the tiled carpet is polished with a dry sponge. As you can see, a wooden base is not a problem at all if you plan to tile the bathroom floors with ceramic tiles. The right choice of materials, the correct calculation of the number of tiles, a little effort, and the floor will look great.
As you can see, a wooden base is not a problem at all if you plan to tile the bathroom floors with ceramic tiles. The right choice of materials, the correct calculation of the number of tiles, a little effort, and the floor will look great. Leave your comments in the form below!
https://youtube.com/watch?v=a9ywS9oxufo
Block house for wall cladding
Block house for wall cladding
Some apartment owners strive to make their homes original and even extravagant in some ways.
So if you are tired of boring solutions, then pay attention to the block house, that is, a board whose cross-section imitates the rounded log known to everyone from village landscapes. Using this material you can achieve a real “rural” interior in your home.
To make the design look even more impressive, it is recommended to resort to a method such as artificial “aging” of the wood. For this, the method most often used is “brushing”, that is, processing the material with a wire brush. During the processing of wood, fibers are removed from it, which creates an interesting relief. After this, the material is painted and, without allowing the paint to dry, it is removed.
When to start finishing work in a wooden house
Before starting repairs, you must make sure that the wood is completely dry and the shrinkage of the house is completed. When finishing an old wooden dwelling, you can begin repairs immediately; a house made of laminated veneer lumber should “shrink” for at least 3 months; dwellings made of rounded logs or timber are best repaired after a year (in a warm climate) or two (if the site is located in the middle zone Russia).
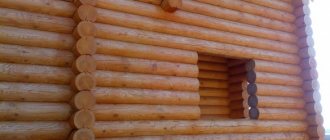
A wooden house made of rounded logs can begin to be finished a year or two after completion of construction. Source plantu.ru
The degree of shrinkage depends on the chosen material: a wooden frame shrinks from 7% to 10%, timber - 3-5%, and rounded log - 5-6%.
Factors influencing the degree of shrinkage of a house
The time required for the wood to dry completely depends on the material of the building, the quality of the felling, and the season in which the material was harvested.
The rate of shrinkage of the finished home is also determined by changes in environmental humidity. For example, frequent precipitation in the cold season significantly slows down the process, and regular heating can speed it up.
Under the influence of changes in the level of humidity in wood, it can dry out or, conversely, swell. The amount of change in the final dimensions of the material depends on the direction of the fibers in the wood. As a rule, side walls shrink more slowly than front walls.