What are the requirements for floors?
We usually expect the following characteristics from a floor in a room:
- strength and durability;
- ease of operation (simple cleaning);
- protection against leaks (especially in wet areas, in apartment buildings);
- thermal insulation and sound insulation;
- a perfectly flat horizontal (or with a planned slope) floor surface;
- aesthetically attractive appearance.
Depending on the purpose of the room, some requirements may become more or less important.
In accordance with SP 29.13330.2011 “Floors. Updated edition”, floors are divided into the following types:
- floors in public and residential buildings;
- floors in industrial and warehouse buildings;
- floors in industrial premises with fire and explosive technological processes;
- floors with a standardized surface heat absorption rate;
- floors that are made on floors and have noise protection requirements;
- floors in poultry, livestock and fur farming premises and buildings;
- floors that are exposed to aggressive liquids (acids, alkalis, oils and others);
- floors in refrigerated rooms;
- floors in sports facilities;
- floors in the premises of medical organizations.
When designing different types of floors, the requirements established for each category, as well as fire safety, sanitary and process design standards must be taken into account. These standards do not apply to the design of removable floors (raised floors), as well as floors located in buildings on permafrost soils.
The choice of floor design is carried out taking into account the following factors:
- operational reliability and durability;
- optimal use of building materials, as well as soil characteristics;
- optimization of labor costs for installation and operation of the floor;
- environmental Safety;
- safety of people when moving on the floor;
- hygienic conditions;
- fire and explosion safety;
- intensity of mechanical impacts on floors.
According to SP 29.13330.2011, the intensity of mechanical impact on floors can be:
- very significant;
- significant;
- moderate;
- weak.
If the floors in the room are exposed to liquids, a distinction is also made between low, medium and high intensity of its impact.
Important!
With medium and high intensity of exposure to liquids on the floor (periodic or constant strong wetting, during which the floor surface becomes damp or wet), slopes are provided on the floors. The magnitude of the slopes can be from 0.5 to 1% for seamless coatings and slab coatings (except for concrete coatings) or 1–2% for concrete coatings of all types.
Requirements for floors are established at the project development stage.
The type of floor covering is assigned depending on the type of room, as well as the intensity of mechanical, liquid and thermal influences.
The choice of the type of interlayer is made depending on the coating material, as well as the type and intensity of impact on the floors. Adhesive compositions must ensure the strength of the connection (adhesion) of the coating and the monolithic base of the floor.
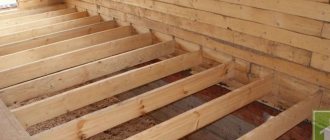
Floor design
A typical floor structure includes several layers:
- underlying layer (for floors on the ground);
- waterproofing;
- screed;
- leveling layer or finishing screed;
- fine coating.
The final floor covering can be made from various types of materials;
- concrete;
- tiles or porcelain stoneware;
- linoleum or PVC tiles;
- bulk polymer materials;
- laminate;
- piece or panel parquet;
- parquet board;
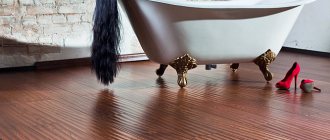
- wooden edged board.
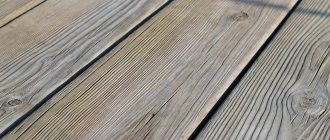
Wooden floors. In what cases are they arranged?
Wooden boards are a traditional solution for flooring in residential buildings, as well as in bedrooms and corridors of boarding schools, rooms in hotels and holiday homes.
Today, despite the widespread availability of flooring materials made from other materials, wood is still popular for use as flooring.
Advantages and disadvantages of wooden floors
Attractive features of a wooden floor are:
- environmental friendliness;
- low thermal conductivity of wood, making wooden floors feel warm;
- pleasant wood texture;
- a microclimate favorable to humans in the room, which ensures the presence of wood in interior decoration;
- a variety of finishing options for a wooden floor, which can be coated with oil or wax, which preserves the texture of the wood, as well as various types of transparent, translucent, matte, glossy paints and varnishes.
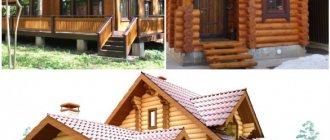
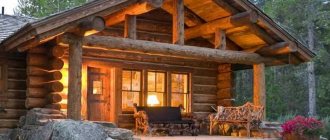
Wooden flooring is an environmentally friendly, aesthetically attractive solution that goes well with any interior design style. Wooden flooring is especially often installed in wooden houses and bathhouses.
Wooden flooring can be made of solid or parquet boards or simple boards.
Wood floors have their disadvantages. These include:
- susceptibility of wooden floors to rot;
- fire hazard;
- low resistance to moisture;
- the ability of wood to change its linear dimensions when the level of humidity in the surrounding air changes (at high humidity, wood swells, at low humidity it dries out, decreasing in size, so gaps and cracks may appear between the boards on wooden floors).
To make a plank floor, durable and moisture-resistant wood is selected, and subsequent processing is also used, for example, in the form of impregnation or the use of paints and varnishes, which increases the strength and durability of the floor. The use of special varnishes, waxes and oils reduces flammability, as well as the susceptibility of the floor to rotting and abrasion, reduces hygroscopicity, and increases sound insulation.
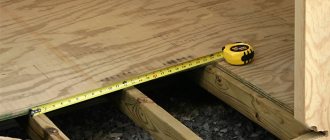
Choosing the size and thickness of the floor board
Wooden floors are afraid of moisture, so waterproofing is required when installing them.
If the concrete screed is made in an insulated version, the finishing coating is laid directly on it; If the screed is not insulated, first make a rough wooden floor, then insulate it and then finish the floor on top. To make a wooden floor, edged boards are used, which fit well and do not require additional mechanical processing.
Important!
It is easier to check the edged board for fungus or other damage
For rough coating, boards of grades B and C made from cheap wood species (spruce or pine, and for rooms with high humidity - from larch) are suitable.
Depending on the load that will affect the subfloor, the thickness of the board is selected in the range from 25 to 35 mm. If a tongue and groove floorboard is used, the gaps during installation will be minimal.
For the finished floor, choose a board with a width of 80 to 135 mm (most often 100–105 mm); the thickness of the floorboards is usually 30, 32 or 35 mm. The length of the floor boards can be 3, 4, 4.5 or 6 m; it is selected depending on the size of the largest room in the building, because it is desirable that the board covers the entire length of the room.
Important!
It is not recommended to use lumber with a thickness of less than 22 mm for the floor, because such a board will begin to sag under load and the floor elements will fail.
User opinions
| Sealant | Review |
| Auster Parquet | Overall I'm pleased with the result. For a reasonable price, the result is a high-quality product that dries well, is flexible, economical in consumption, and easy to paint. The downside is that the color does not exactly match what is indicated on the package, and with large gaps additional sealing is required (for example, with a cord), otherwise the sealant will fail. |
| Neomid Wood Professional | This composition would be much better suited for walls. And the floor quickly cracks, despite the fact that the room is not so accessible. Otherwise, it’s a good sealant, it applies smoothly, and paints very well. |
| Wepost Wood | The only downside is the decent price. Otherwise, only positive impressions. The room has become much warmer, the floor does not creak, the seams do not crack, although they have been treated with sealant for quite some time. And what is important, any annoying small insects have practically stopped appearing. |
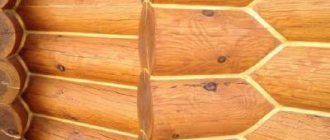
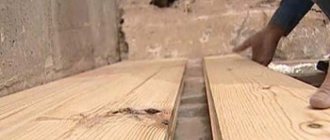
Gaps in wooden floors: why do they appear?
The disadvantages of wooden floors are gaps between the boards and squeaking.
Cold air, drafts, and excess humidity enter the room through the cracks; various debris gets clogged in the cracks; in addition, a floor with large cracks looks untidy and may begin to creak.
Wood has a fibrous and porous structure, which is easily saturated with moisture (when saturated with moisture, wood swells and its linear dimensions increase; when it dries, it dries out and shrinks). Thus, the dimensions of a wooden board “change” when humidity changes, as a result of which the board is deformed and cracks may form.
The appearance of cracks may also be due to a violation of the flooring laying technology:
- According to European standards, work on laying flooring over a screed can be started with a moisture content of the screed of no more than 3.5%; according to Russian standards, the moisture content of a cement-sand screed at the time of starting work should not exceed 5%, however, a number of experts believe that this figure should not exceed 2%. If the coating is laid on a cement-sand screed that has not yet dried completely, then this moisture is absorbed by the wood, and the boards increase in linear dimensions. Later they dry out and their size decreases. This is how cracks are formed.
- Poor-quality, excessively damp plywood, which is used as a base for parquet or boards, or the wrong choice of glue used to secure the planks can also lead to the appearance of cracks in a wooden floor. For example, dispersion compositions contain up to 40% water, and popular adhesives based on complex alcohols also contain a lot of moisture. This is why it is recommended to sand and varnish wood floors only after the glue has completely dried (this process takes 5-7 days depending on the composition of the glue). Solid boards with a width of more than 90 mm should not be fixed with such adhesives at all to avoid warping. For such a board, reactive one-component and two-component compositions that do not contain water and solvents are used.
Important!
Sometimes a wooden floor is varnished in the hope that the wood will not warp, but this does not reduce the likelihood of cracks appearing because water vapor can penetrate into the boards from the base of the floor.
Some types of wood are especially prone to warping. This means that the likelihood of cracks appearing in floor coverings made from them increases significantly with changes in air humidity levels. These species include ash, cherry, pear, beech, and maple.
Oak and tropical wood are less prone to deformation.
How to prevent cracks from appearing
It’s not for nothing that they say: “Forewarned is forearmed.” So in this matter: it is better to follow all the rules for laying the floor, regularly carry out inspections and take the necessary measures.
- Laying is carried out taking into account the correct ratio of the thickness of the boards with the gap between the logs.
- There is a gap between the wall and the floor covering along the entire perimeter of the room.
- The joints of wooden surfaces are covered with damping gaskets as a means of shock absorption and preventing squeaks.
- Wood products must be coated with antifungal and water-repellent solutions.
- In order to prevent moisture from appearing under the floor, it is possible to organize natural ventilation.
Requirements for materials for sealing cracks in wooden floors
Since the floor is subjected to fairly high loads and abrasion, it is necessary to use a material that is resistant to mechanical stress and resistant to abrasion to seal the cracks.
He is also required to:
- resistance to moisture (especially for bathhouse floors);
- high adhesion to wood, which is a porous material;
- elasticity, because the humidity in the room will still change periodically, and the boards will be subject to deformation.
Sometimes a gap in the floor is sealed with non-elastic materials, for example, various putties. As a result, after some time, these materials become covered with cracks, which not only spoils the appearance of the floor, but also reduces its functionality.
Which sealant is suitable for sealing cracks in a wooden floor?
Currently, there is a wide selection of sealants, which are classified according to the type of active component.
Acrylic sealants are often considered when choosing a wood sealing material, but they are not the best choice for wood floors because they are not flexible enough. Over time, the seams will crack.
Silicone sealants are also not suitable for wood floors because wood expands and contracts, while silicone sealants do not contract well. As a result, the seams may swell and become blistered.
average price
The average cost in the Russian Federation for the presented types of sealing is determined by product type, quantitative composition, purpose, and have different packaging by volume. For example, the price of any seal in rubles looks like this:
- Mastic (any type, but depends on volume):
- CJSC RASTRO (St. Petersburg) – 390.
- LLC TPK "MasticIzol" (Moscow) - 320.
- “The latest technologies” (Novosibirsk) – 430.
- Sealants:
- Stayer Master – 100-200 rub.
- TYTAN Professional – from 450 rub.
- BISON - on average from 120 rubles.
- Polyurethane foam:
- Penosil – from 350 rub.
- Soudal – from 350 rub.
- Moment - from 150 rubles.
- Tubular seal for 1 running meter. (the price depends on the diameter, the smaller it is, the cheaper the product):
- VILATERM (Moscow) - 30.
- Plant "Stroydetal" (Moscow) - 35.
- LLC “Unified Center for Waterproofing Materials” (Moscow) – 25.
Market prices for building materials are constantly changing and depend on many economic factors, as well as resource ones. It is most expensive to purchase material in the Moscow Region and St. Petersburg, and cheaper in the central zone of the Russian Federation (Vologda, Bryansk regions).
Adhesive sealant for seams white
CEMMIX Adhesive-sealant for seams is a one-component polyurethane sealant for sealing various seams, junctions of steps and walls, entry of pipes and ventilation systems and rigid-elastic gluing of various materials.
More details
The best choice for sealing cracks in a wooden floor can be considered polyurethane sealants, for example, Cemmix Adhesive-Sealant for Seams. This is a one-component sealant based on hybrid polymers, which has the following characteristics:
- high elasticity;
- ability to recover from deformation;
- good adhesion to wood;
- durability and resistance to mechanical damage;
- waterproof;
- resistance to fungus and mold;
- high resistance to temperature changes, which can be important for a bathhouse floor;
- the ability to provide the elasticity and tightness of the seam required for a wooden floor;
- compensation of linear temperature deformations of the structure in the temperature range from minus 40 to plus 60 ° C;
- suitability for interior work;
- environmental Safety.
Sawdust mixtures
A universal remedy for sealing cracks and crevices in wood is sawdust. There are several options for creating a working solution or shavings.
- Sawdust with glue. Wood shavings are steamed in boiled water for a couple of hours. PVA, epoxy or wood glue is added to the swollen sawdust. The mass should be viscous and viscous.
- Sawdust with cement. To create a solution, mix PVA glue, water, wood shavings and cement in a ratio of 2:15:5:5. Before use, the resulting mixture is heated and left for 5-10 minutes.
- Sawdust with varnish. The shavings are mixed with wood varnish in proportions of 1 to 4. Stir the solution until smooth.
Sawdust mixtures are applied to the defects with a spatula, leveling well. After drying, the surface is sanded.
Adhesive sealant for seams white
CEMMIX Adhesive-sealant for seams is a one-component polyurethane sealant for sealing various seams, junctions of steps and walls, entry of pipes and ventilation systems and rigid-elastic gluing of various materials.
More details
Seams made with Cemmix Seam Adhesive-Sealant can be painted, and the sealant is available in four color options.
Adhesive sealant for seams white
CEMMIX Adhesive-sealant for seams is a one-component polyurethane sealant for sealing various seams, junctions of steps and walls, entry of pipes and ventilation systems and rigid-elastic gluing of various materials.
More details
Then a release cord made of closed-cell polyethylene foam is placed in the gap. This cord performs several functions at once:
- reduces sealant consumption;
- prevents squeaking;
- allows you to maintain the correct ratio of the width and thickness of the seam (for polyurethane sealants it should be 2:1; if it is not maintained, the sealant will polymerize unevenly and may come off on one side).
The diameter of the cord is chosen to be approximately one and a half times larger than the width of the slot (for example, for a slot with a width of 4 mm, a cord with a diameter of 6 mm is selected). The cord is driven into the gap using a spatula, not flush, but to a depth of 2–3 mm, so that there is space left for the sealant.
Using a construction gun, apply sealant in one direction.
After the sealant has been applied along the entire length of the gap, it must be sealed and at the same time the excess material must be removed. To do this, use a spatula, which is passed along the seam. The spatula must be moistened with soapy water and held perpendicular to the floor surface. Before doing this, the surface must be moistened so that the smeared sealant does not stick to the adjacent surfaces on the sides of the seam.
Application technology
To use the sealant correctly, you need to seal the seams in the following sequence:
- First of all, it is necessary to free the joints from accumulated dirt and dust. If this is not done, the seams will be sealed poorly and the adhesion of the sealing mixture to the base will be weakened;
- Next, you should seal the surfaces near the joint with masking tape to avoid severe contamination of the surface;
- At the next stage, you need to open the sealing mixture, and you need to cut off the tip of its packaging at a slight angle;
- This stage is the direct application of the mixture to the joints.
- After application, the joint is leveled using a spatula, and the excess is removed with a spatula and a damp cloth. It must be remembered that it is better to remove excess acrylic mixtures, such as Eurotex, immediately, as they set quickly.
Adhesive sealant for seams white
CEMMIX Adhesive-sealant for seams is a one-component polyurethane sealant for sealing various seams, junctions of steps and walls, entry of pipes and ventilation systems and rigid-elastic gluing of various materials.
More details
To remove small stains of sealant, you need to moisten a sponge in soapy water and first move across the seam to remove excess and seal the sealant again, and then once again walk with this sponge along the seam, finally smoothing it out.
After this, you need to let the sealant polymerize. Initial polymerization occurs within 15 minutes, during which time adjustments can still be made. The final curing of the seam takes about a day, depending on the ambient temperature.
Watch video tip: Sealing seams in floorboards
A beautiful and durable wooden floor can be free from cracks and squeaks. Putties for sealing cracks are an outdated solution. Use Cemmix, a durable and flexible joint adhesive and sealant. It can be purchased not only wholesale and retail, but also online.
You can buy CEMMIX products without leaving your home, with discounts from 5 to 33%!!!!
Buy on Ozon
Buy on Yandex.Market
Buy on Wildberries
Buy at Leroy Merlin
Or you can find the nearest official dealer in your region on our map
← How to choose a sealant for a corrugated roof
Sealant for log house →
Return to list
Comments
Putty made from paste and newspapers
With the advent of modern adhesive solutions, paste is used less and less in repairs, although it copes with the problem of sealing cracks quickly and reliably.
- Shredded newspapers are poured with boiling water and left until completely soaked.
- A dry mixture for the future paste is prepared from a glass of flour and two glasses of starch.
- The resulting mass is poured with water and boiled in a water bath for 20-30 minutes.
- The thickened mixture is added to pre-wrung newspapers, stirring until smooth.
Although the method is considered “old-fashioned”, it allows you to cope with cracks at minimal cost.
News
We are always ready to help
Cemmix has opened a free hotline
to help you with any questions related to construction using concrete additives. Call and ask, our consultants are always ready to help!
Hyperplasticizer
Hyperplasticizers are a new type of plasticizing additives for concrete, ensuring the mobility of the mixture above P5. In addition to plasticity, they increase the water resistance and frost resistance of concrete by 2-3 times.