The 21st century has arrived a long time ago, and wooden houses do not even think of going out of fashion. More precisely, it’s difficult to call it fashion. Rather, common sense, coupled with a subtle sense of taste, because what other natural material so organically combines environmental safety, reliability and home comfort? True, you won’t be able to escape from the interior decoration (read about how to insulate walls with polystyrene foam from the outside). This is an important component of any construction, and people often have a question: what can inexpensively and beautifully cover the inside of the walls with? Moreover, not every material is suitable for use in a wooden house. We have selected 6 excellent options for you that will definitely help you overcome your doubts and achieve optimal interior design.
- Lining;
- Drywall;
- Cork;
- Decorative rock;
- Plastic;
- Ceramic tile;
- Conclusion.
Peculiarities
A house made of timber has a number of characteristics that are not typical for houses made of other materials. Among them there are both positive and negative qualities.
The advantages of wood include:
- The material is environmentally friendly.
- A house built from timber has a very presentable appearance.
- Constructing a building from wood elements takes less time than working with other materials.
- There is no need to spend a lot of time laying an expensive foundation, since the timber will not create large loads.
- Compared to other materials, wood has a lower price.
The following points are considered as nuances that cause difficulties:
- Over time, shrinkage of wooden buildings usually occurs. In its primary stage, it occurs during the first two years from the moment the house is built. Under the weight of the roof, the distance between adjacent beams decreases, resulting in the formation of cracks, as well as a decrease in the ceiling height by a couple of centimeters.
Also, the shrinkage process can be explained by changes in temperature and humidity, but in this case the interior finish most often remains unharmed.
- Wood is also a material that can develop infestations or rot over time. Therefore, you need to carefully process the beams and monitor the humidity level.
When the building is erected, all the internal work to be performed must be carefully planned.
The main procedures for interior arrangement and finishing include:
- Laying communication systems. These include heating, sewerage, electricity, and water supply systems.
- Coating walls with special compounds and antiseptics that protect against fire.
- If desired, you can carry out thermal insulation and waterproofing of the floor and walls.
- Next, the subfloor is laid.
To make the work more organized, it is recommended to prepare in advance a project for the arrangement and finishing of all rooms.
- Partitions and other additional structures are being installed.
- Walls, ceilings and floors must be carefully prepared before decorative finishing.
- After this, the finishing itself is carried out.
The interior decoration of a building made of timber as a whole is a rather labor-intensive process, so it is important to describe in detail all stages of the work, as well as to correctly select the material for finishing various surfaces.
Dry plaster
Peculiarities
Recently, the so-called dry plaster, which involves covering walls and ceilings with plasterboard sheets (GKL), has become very popular.
Advantages.
This finishing method has a number of advantages:
- High speed.
Finishing with plasterboard does not require surface preparation. In addition, the sheet installation process itself is quite fast; - Unlimited thickness
. Drywall can be used in cases where it is impossible to plaster the surface due to limited layer thickness; - Possibility of using frame space to your advantage.
Between the surface of the walls/ceiling and the drywall, you can hide communications or place insulation there;
Versatility. There is moisture-resistant plasterboard designed specifically for finishing bathrooms
Thanks to this, this material can be used to decorate any premises;
Easy to install. Every home craftsman can install drywall with his own hands; the only thing you need to do is follow a certain technology;
No wet work. As a result, the installation process is quite clean;
Vapor permeability. GCRs allow the walls to breathe, which, as I said above, is important if you have a wooden or foam block house.. Disadvantages:
Flaws:
Low strength. Drywall is a less durable finishing option than plaster. Therefore, after finishing, problems may arise when attaching heavy objects to the wall.
True, this problem can be solved in advance by strengthening the frame. To do this, you need to insert a wooden beam into the racks;
Higher cost. Finishing gypsum boards is more expensive than plaster.
What materials are used for finishing?
When finishing a home using the dry method, you first need to decide on the choice of drywall. In addition to standard sheets, there are the following varieties:
We advise you to study - Pistachio color in the interior and its combination with other colors in various rooms
Moisture-resistant gypsum plasterboard. I have already mentioned the purpose of these sheets above. Externally, they differ from standard ones in green;
Fire-resistant gypsum plasterboard. Used in areas with increased fire hazard.
In addition, gypsum plasterboard differs in scope into two types:
- Ceiling.
Thickness is 6-8 mm; - Wall.
Thickness can be 9.5-12.5 mm.
It must be said that installation of drywall can be carried out in two ways:
On the frame. In this case, in addition to the sheets themselves, you will need profiles for the frame and hangers;
On glue. If the surface is relatively smooth, the sheets can be glued with special glue.
Price
:
Front of work inside a timber house
Finishing the floor, walls and ceiling in a log house made of laminated or profiled timber is done by hand in several stages:
- laying communication lines (electrical cable, pipeline, heating system, sewerage, air conditioning);
- impregnation of wood with antiseptic agents to protect against fire, insects, mold and fungi;
- installation of heat and waterproofing material;
- preparing walls, floors and ceilings for finishing;
- installation of interior doors;
- finishing of floors, walls and ceilings.
Without certain skills and the necessary knowledge for renovating premises, it is better to seek help from professionals, especially when it comes to communications. If you are confident in your abilities and do not want to overpay, you can safely do the work yourself. It is advisable to decide on the design and think through every detail of the interior before starting.
This measure will help you have an idea of the future result and calculate the required amount of material intended for these purposes.
What to choose?
If you choose plasterboard for cladding, you will never regret it, since such a versatile material cannot be found anywhere else. If you use clapboard or block house, the frame will be a little lighter than for drywall, but you will still have to create it.
If you are trying to make your house as environmentally friendly as possible and with a pleasant microclimate created by wood, then you should still choose lining, since it is also wood, just in a slightly different form, it will not affect the environmental friendliness in any way. But lining can only be used for covering walls and ceilings, and if it is necessary to make a partition, for example, in a bathroom, then lining will not help here. Also, the lining has a reasonable price, which can vary greatly, everything will depend on the solid wood from which the lining will be made.
If you are willing to spend a little more money on renovations in your apartment, then drywall may be perfect for you. Note that a wooden house shrinks during the year at maximum speed, then it decreases significantly, but shrinkage still occurs. Therefore, you will have to make a reinforced frame for drywall, and lay the sheets themselves in two layers, which can hit your pocket quite hard, but you will be sure that after a few years cracks will not appear on the sheets.
In addition, for structures that will be installed in the bathroom or kitchen, it will be necessary to use moisture-resistant plasterboard. Any type of drywall will need to be primed and puttied, and this will make it much more difficult for air to pass through the walls, so if you want the most favorable climate in the house and the smell of wood in the air, then it is better to avoid using drywall. But over this point, rather than sheathing the walls of a wooden house inside, it is better to think longer, weigh all the pros and cons, since plasterboard, although it is inferior to lining in terms of environmental friendliness and preservation of the natural microclimate, much more products can be built from it.
Selection of materials
In the process of repair and construction work inside the house, craftsmen use a variety of finishing materials.
The most popular and common options include:
- · Linings made of plastic or wood;
- · Panel siding;
- · Coatings made of decorative stones;
- · Block house and drywall.
A successful solution when decorating the interior space of a house would be to combine these materials. Today, thanks to modern technologies and capabilities, there are a great many options; the final result will depend only on your imagination.
Creating a special design using siding
Covering a log house with siding is becoming increasingly widespread due to the variety of design options. In addition, siding has excellent practical properties, low cost and is easy to install. Thanks to this, covering a house with timber siding is very quick and economical.
Covering your kitchen with siding can be done easily with your own hands.
However, to do this, you need not only to know how to sheathe a house, but also to pay attention to a number of features of this material with its quality characteristics. Instructions specially included with any building material can help with this.
In addition, it is worth deciding on the siding itself, which can be of different types:
- PVC vinyl siding,
- siding made from glued lining,
- siding, pressed under high pressure,
- steel siding,
- cement siding.
Vinyl siding is considered the most practical and widespread, which is excellent for the interior cladding of a log house. It must be said that siding is used for such premises as storerooms, balconies and other similar ones.
Direct plating process
- So, first the area of the house is calculated, after which the required amount of required material for cladding is calculated.
- Next, the walls are prepared, damaged boards are removed, replaced with new ones, the walls are leveled and treated with an antifungal agent.
- This is especially important when updating a very old home. It is in this case that it is customary to use siding.
- A sheathing is installed on the prepared walls, to which siding panels are attached using self-tapping screws, leaving small gaps for possible expansion of the material under the influence of temperature fluctuations.
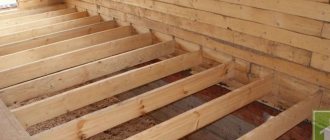
Floor construction
Finishing floors in timber houses begins with the development of the subfloor. In other words, the surface is first treated with a protective impregnation, then insulation is applied to it and a backing is attached, and then the final clean coating is laid down.
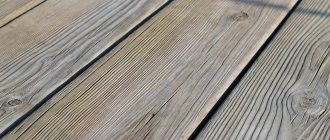
Experienced specialists inside log houses prefer to use universal spruce or pine tongue and groove boards for laying floors.
This is exactly the material that will serve you for at least 20-30 years, will not darken or change for a long time, is not afraid of scratches and is easy to care for.
The darkened color of these wooden coverings can be easily restored, along with all the external beauty and uniqueness of the original palette of shades, by simply sanding the surface and then covering it with a protective composition.
Finishing the floors inside the house in such a situation excludes only the installation of a “warm floor”. Since this system, on the one hand, carries the threat of a fire, and on the other hand, all these processes are impractical, since they are very energy-intensive and costly.
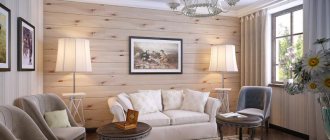
How to choose fabrics?
The appropriate composition, degree of gloss and pattern will be determined by the chosen style. But when choosing the tone in which the upholstery of sofas and headboards, curtains, blankets and towels for the kitchen will be decided, it is worth taking into account the temperature of the prevailing shade of wood in the house.
- Wood with a yellow or orange undertone is best shaded with fabrics in cold colors: blue, blue, purple, mint, shades of gray, especially graphite.
Design: Tatyana Ilyina (Sorokina)
Design: Tatyana Ilyina (Sorokina)
- Timber tinted in cool blue, gray and white shades will balance fabrics in sand, ocher, and honey tones.
Design: Anna Lazareva
Design: Anna Lazareva
- If the color of the timber is difficult to classify as clearly defined warm or cold shades, you can complement the wood with fabrics in the same range, but a tone or two darker, lighter or brighter.
Design: FullHouseDesign
Design: FullHouseDesign
Design: Anna Lazareva
Design: Anna Lazareva
Design: Anna Garmash, Vedran Brkic
Design: Anna Garmash, Vedran Brkic
Wall decoration
Wall decoration in houses made of timber also has a number of its own characteristics, where the main guideline is the material that you intend to use.
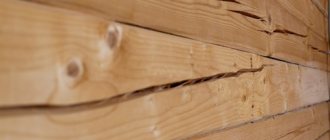
Natural wood
If you decide to decorate the walls of your building with logs, then it is possible to keep the walls unfinished. This is true if the wood from which the walls in the house are built does not have any flaws or other features.
In this case, you only need to treat the material with a composition to protect it, give it the color you want, and also to extend its service life.
Dye
If you have chosen to paint the walls as an interior decoration, then this solution will help you add uniqueness and originality to the interior design of your home, and will also provide an additional level of protection to the material and preserve its natural structure.
It is only important to choose for these purposes paint and varnish materials that contain a minimum amount of harmful and chemical substances.
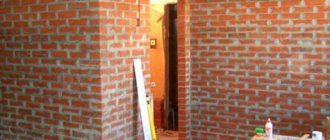
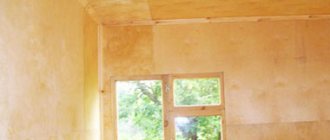
Plaster
Treating the building and internal walls with plaster is a process that can only be performed if more than 1-2 years have passed since the construction of the house. When finishing walls with plaster, it is important to pay due attention to the process of waterproofing the original material from which the entire surface of the walls of the house is made.
Block house and lining
It is possible to start decorating the walls of the house using these materials if the shrinkage of the house is completely completed. For these procedures inside the house, it is imperative to create special frames in the rooms, which quite significantly reduce the total space in the room.
It is worth noting that both of these finishing materials preserve the original patterns of wooden walls and give them a more neat and tidy appearance.
Panels
By choosing panel wall decoration inside a house made of timber, you provide yourself and your family with completely environmentally friendly and hypoallergenic material.
The advantages of panel wall finishing include: ease of processing, complete and easy exposure of the material to installation work, high thermal insulation, complete noise absorption.
Such decoration on the walls can later be easily covered, for example, with wallpaper or fabric.
Drywall
This type of finishing of the walls of a house made of timber can be characterized as almost universal, since after applying putty to it, you can glue wallpaper, lay tiles, leave plaster, and also paint the walls.
It is important to know that the plasterboard sheets themselves are green in color; for rooms with high humidity, you should buy plasterboard that is well resistant to moisture. This is a completely environmentally friendly material; it is installed on a metal or wood base.
Also, this type of finishing protects the sheathing and surrounding walls from cracks and damage on their surface, and it is convenient to place an insulating layer on it. Drywall is also easily affected if wiring, plumbing or other types of communications are laid under it.
Ceiling finishing
Processing the ceiling in houses made of timber is an optional work that depends on the owners themselves and their preferences and has its own characteristics. An unlined ceiling fits into any style and interior design, into any ideological composition for home decoration.
If another 5-7 years have not passed since the construction of the house and the beginning of its shrinkage, then a beautiful stretch ceiling or plasterboard can be an excellent solution for finishing the ceiling.
These materials will close the ceiling hole, and will not deform at all or interfere with the natural process of shrinkage of the entire house. Once the reassignment of stress in the ceiling supports due to this process is completed, its finishing can be carried out using conventional methods (plaster, etc.).
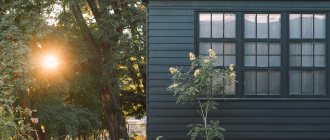
Interior decoration of a wooden house: when to start
covering the bedroom walls with profiled timber
As experts advise, after completing the construction of a wooden house, you cannot immediately begin finishing. It is necessary to take a technological pause for the structure to shrink, depending on the material of the house. If laminated timber is used for construction, then it is enough to wait a month. When using other types of wood, the time frame may drag on for years.
the color of the wall panels matches the lining on the ceiling
The value is influenced by many factors. To determine the shrinkage time, it is necessary to consider:
- Humidity of raw materials.
- Climatic zone of construction.
- What time of year was the construction completed?
When to start finishing work? The question is not easy. During the first year, the drying process is most active, so it is not advisable to begin work on interior decoration. At this time, high-quality tightness of the joints is achieved by performing additional caulking work.
wood is an environmentally friendly and versatile material for interior decoration
The need for sealing is caused by the shrinkage process of the house. If you rush, the finish will warp and fall off. In order to eliminate negative consequences, achieve tightness of the seams between the logs and then not have to redo the work again, the start of work must be slightly delayed. In order not to redo everything, it is better to wait.
Caulking of joints is carried out in two cycles. The first - a month after the completion of the installation of the house, the second - 7 - 8 months after the first cycle. Jute or tow, and in rare cases moss, are used as insulation materials. Work begins from the lower crown; caulking is done both from the outside and from the inside, in order to avoid distortion of the house.
due to the light ceiling, walls and laminate, the room visually increases
After caulking, the log house will rise by about 7–8 cm. After some time, under its own weight, it will sag again, compacting the insulation. Tow carefully covers crevices and seals joints. The process must be performed very efficiently; the warmth and comfort in the house and comfortable living conditions in the winter depend on this.
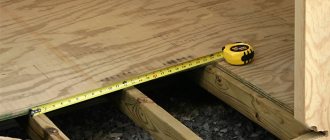
The beginning of finishing work is determined by the end of the shrinkage of the log house. In order to find out whether the shrinkage process has ended, periodic measurements of the height of the walls are made. When the value does not change over several months and remains constant, it is concluded that the shrinkage has ended. From this moment you can begin finishing work.
Installation of windows and doors
At the stage of installing doors and windows in houses made of timber, you should carefully consider the entire process and strictly follow the recommendations. Since this process in buildings of this format differs from similar installations in buildings of other materials.
All this is again connected with the natural process of shrinkage of the material, which must be taken into account during design work and during the construction process.
Window installation
Installing a window in a house made of timber will also have many features and nuances. For example, when installing a small window, the height of which does not exceed 3-4 logs, the shrinkage of the house can be ignored.
If the height of the window ranges from 8 to 10 logs, then for installation you will need to use a special casing frame. Also, the method of manufacturing a window frame will depend on the material used for the windows that will be installed in the house (plastic, wood).
Door installation
The installation of doors and door openings in houses made of timber occurs in a similar way to installations in buildings made from other materials; in addition, casing frames should be used in the process.
The final process of installing doors and windows in a timber house should be carried out after complete completion of construction work. The choice of windows and doors themselves is at the discretion of the owner of the house.
Insulation of walls inside and outside the house - differences
Wall insulation is carried out both inside and outside .
If it is necessary to insulate walls, then, as a rule, one insulation option is chosen: either from the inside of the load-bearing wall or from the outside.
It is also possible to insulate a wall on both sides, but this is not always necessary : insulation options are chosen based on climatic conditions, construction features, and individual preferences.
Indoor insulation is installed on the inside of the building.
The disadvantages of this option are the following:
- the free space of the room decreases;
- the likelihood of dew point formation inside the wall or between the insulation and the wall.
Internal insulation of the walls of a house is good because:
- weather conditions will not affect the work schedule;
- If the building has cladding, it is possible to preserve it unchanged.
IMPORTANT!
When installing internal insulation, it is necessary to install a reliable vapor barrier inside the building.
Insulation of external walls is carried out from the outside of the building. With this type of thermal insulation, the usable area of the structure is preserved; there is no need to install a vapor barrier layer . However, if the cladding of the building has already been completed, it must be dismantled.
External insulation
What types of finishes are there?
Depending on the purpose of interior decoration, various technologies and materials can be used. The following main types of such events can be distinguished:
Coatings that preserve the appearance of the timber are designed to protect wood from moisture and other external influences.
In this direction, methods such as varnishing and impregnation of wood with special compounds, incl. providing wood tinting, i.e. enhancing its textured appeal.
The interior decoration of the house with imitation timber (photo 4) completely covers the surface of the log house, but forms a new surface that imitates wood in appearance. The main methods of imitation: the use of lining, block houses and wood siding.
Such coatings are good for covering old timber or creating the desired interior. In addition, with their help, additional thermal insulation of the house is provided.
Coatings that completely change the appearance of a wooden surface are used when it is necessary to mask a defective wooden surface or the need for additional thermal insulation. The main methods: plastering, painting (photo 5), finishing with plasterboard, artificial stone.
These technologies completely hide the timber, and the interior does not use a style associated with wooden elements.
An important advantage is the formation of a perfectly flat surface and the ability to decorate in any style. In addition, dense coatings make it possible to provide distribution of various communications and lighting, and enhance thermal insulation.
Specificity of wooden buildings
In general, the interior decoration of a residential building means a number of measures to create the interior, external covering of the floor, walls, ceiling, arrangement of door and window openings, and organization of communication systems.
An example of interior decoration of a wooden house
Houses made from wooden beams have a number of characteristic features related to the properties of wood. The main features include the following factors: significant shrinkage within 4-7 years after completion of construction work and high sensitivity to moisture, which causes a change in all properties of the material and destroys the wood.
House made of timber
These factors largely depend on the type of timber used. When building a house, as a rule, profiled or laminated timber is used. Profiled products can have different degrees of drying, which determines the degree of shrinkage. The height changes both as it dries and due to the compaction of the gap between the layers. As a result, shrinkage can reach 2.5-4 cm.
Glued laminated timber for house construction
Glued laminated timber is much more expensive than its profiled counterpart, but its shrinkage is minimal. As for the problem of moisture resistance, this is a property of the wood itself, and to increase resistance, external protection against moisture penetration is necessary.
Profiled timber for house construction
What other nuances should be noted? First of all, the purpose of the decoration is essential: furnishing a new home or renovating a room that has existed for many years. In the first case, it must be taken into account that wood is usually used in construction because of its attractive appearance: special texture, naturalness, environmental friendliness, originality.
Interior decoration of a timber house
Taking into account these important properties, it should be noted that veneering new timber will remove all the attractiveness of the timber. For a new house, it is more typical to finish it while preserving the external attractiveness of the wood, but ensuring its protection from moisture and taking into account shrinkage phenomena.
Interior decoration of a house made of profiled timber
After using the house for a long time, the timber may lose its attractiveness, become deformed and damaged.
When renovating an old room, it is more rational to use coatings that completely cover the damaged surface and create a completely new interior.
Interior decoration of a house made of round logs in a modern style
The choice of type of interior finishing largely depends on the type and quality of the building timber. Thus, the interior decoration of a house made of laminated veneer lumber (photo 3) should take into account the high quality of the product used. Such timber has an almost perfectly flat surface, emphasized texture, fairly high resistance to moisture, and its shrinkage is insignificant and is completely completed after 10-12 months. Such timber should not be covered with dense coatings, but, on the contrary, it is necessary to emphasize the texture.
Updating the interior of a timber house
It’s another matter when regular or profiled timber is used without special drying. In addition, in order to save money, products are often used that have various surface defects and slight deformation, which leads to the formation of uneven gaps. Under these conditions, interior finishing is required that can hide defects.
The natural beauty of the timber is emphasized
Application of various compositions
For the interior decoration of a wooden house, several types of compositions are used: varnishes, paints, mastics, oils. They can be transparent, tinting and impregnating, but all have the main purpose - protecting wood from moisture and rotting.
For interior work, glossy, matte and semi-gloss varnish compositions are used. The most commonly used materials are water-based, which eliminates strong odors, although it somewhat lengthens the drying time. If quick drying is necessary, you can use nitro varnishes, which require careful ventilation after completion of work.
The glossy variety is intended for hallways, living rooms, and common areas. The matte option is more suitable for bedrooms, especially children's bedrooms.
Paints are used to create an opaque coating and are often combined with the application of plaster. The main advantage is the ability to provide any color scheme in accordance with the chosen interior. Acrylic paints and enamels are widely used.
Wax mastic can be transparent or in various shades to emphasize the wood texture. It reliably protects the timber from moisture and preserves the natural pattern of the structure for a long time.
This material has an increased cost, but it does not form a surface film, which provides a breathing effect for the wood.
Impregnation with an oil composition protects the wood from rotting and provides a golden hue while maintaining the texture. Natural oils are used: linseed oil or so-called Danish oil obtained by cold pressing.
Seal cracks in walls and insulate
In wooden beams dried using the appropriate technology, cracks form that need to be sealed.
Means for sealing cracks are:
- sealants and other synthetic products : resins, mastics, mounting foams. Synthetic sealants should not have an acrylic substance. Silicone seals must have a high level of frost resistance. The mixtures are placed deeply into the gap, and after drying the area is leveled. Polyurethane foam is used in places where facing work will subsequently be carried out;
- wood shavings mixed with wood glue . Used at any stage of finishing, as well as during additional inspection. The prepared mixture is poured into the previously cleaned crack of dust, then, after complete drying, the area is processed by grinding. The method is advisable to use for small cracks;
- decorative mixtures for sealing;
- fibrous materials - caulk (moss, wool, tow). Pre-cleaned cracks, impregnated with antiseptics and solutions that prevent the formation of mold, mildew, and dampness, are clogged with caulk.
NOTE!
Insulation at the joints of timber is done with sealants, mixtures or adhesive shavings . If the wall is made of logs, then the joints should be sealed only with fibrous materials.
Wood requires constant care and timely sealing of cracks that may appear over time. Regular inspection of the wood will help prevent gaps from growing, which can reduce the insulation properties of the walls.
Sealing tow
Sealing with sealant
How to imitate wood
In some cases, it is necessary to completely cover a wall of timber and create a space between the wall and the covering (manufacturing thermal insulation, laying communications, ventilation, etc.), while you want to preserve the appearance of the tree. For this purpose, various technologies for simulating a log house are used.
One of the most common options is clapboard cladding (photo 4). At its core, lining is wooden slats of different widths and lengths. Before installing them, a lathing and wooden beams are installed on the wall, in the cells of which heat and vapor barrier and waterproofing are placed. Communications and electrical wiring are being installed.
The lining strips are fastened on top of the sheathing with screws. The planks can be placed both horizontally and vertically. After completion of the work, the coating is impregnated and varnished.
Wet method
Peculiarities
The wet method involves plastering the walls and ceiling. This finishing option is the most traditional. Despite the fact that many new technologies have appeared recently, plaster has not lost its relevance.
Advantages:
- Cheap
. Materials for plastering walls are inexpensive; - Strength.
Plaster forms a durable surface. This allows you to attach heavy objects and furniture to the walls; - Easy to apply.
The plastering process is generally quite simple; - Versatility.
Plaster can be used in any room, as well as for finishing balconies, terraces, etc.; - Durability.
High-quality plaster can last for decades.
Flaws:
- Labor intensity.
The plastering process requires significant labor; - Involves wet work.
Plastering is a dirty job; - Take a lot of time
. The process of applying plaster is quite lengthy; - The need for surface preparation
. Before you start finishing in this way, you need to prepare the surface - remove the old coating, clean it from dirt and prime it. It also takes energy and time; - Limited thickness
. Plaster cannot be applied in a layer thicker than 6-7 cm.
Wet finishing inside a house is usually done using plaster mixtures. Depending on the type of composition, they are divided into the following types:
- Cement
. Suitable for rooms with high humidity levels, can also be used for balconies and loggias; - Plaster
. Used for interior spaces. It must be said that the peculiarity of these mixtures is their ability to “breathe”.
Calcareous. They also have good vapor permeability and, in addition, prevent the appearance of mold on the walls. Keep in mind that lime mixtures are both gypsum and cement based;
Of course, you can make the plaster mixture yourself, however, its quality will be noticeably lower than the finished mixture.
Price.
Below are prices for some mixtures from well-known manufacturers:
Please note that prices are current as of Spring 2022.
Fundamental differences between finishing a house made of timber and stone
To be confident in the success of using this or that type of coating, you need to understand how the mechanics of behavior of a wooden house differ from brick and frame ones. Wood is an extremely unstable material; it tends to expand and contract with changes in humidity and temperature. Therefore, the finishing system must normally perceive mechanical vibrations of the base.
Another feature of a timber frame is its ability to allow water vapor and cold air to pass through.
The presence of any coating does not fully smooth out these shortcomings, so the log house must be well caulked, and ideally, sealed with liquid seams. To prevent the formation of condensation under the curtain wall, a blind vapor barrier with a two-sided air gap should be used.
The third and most important nuance is that finishing cannot be carried out immediately after assembling the log house. Depending on the number of floors, type and quality of materials, time is required for shrinkage and residual deformation. For glued laminated timber this period is up to six months, for solid timber it is about 10–15 months, and a house made of rounded logs can take several years to shrink.
It must be remembered that after the first and second caulking, the log house should also settle almost to its original size.
Vapor barrier and waterproofing of walls
When insulating walls internally, it is necessary to install a vapor barrier and waterproofing layer.
Vapor barrier materials can be:
- polypropylene films;
- foamed polymer films;
- foil films;
- diffusion membranes.
The vapor barrier layer is produced taking into account the specifics of its installation:
- The film should be attached to the sheathing using an overlapping stapler, and the joining points should be taped;
- the lathing on which the vapor barrier is attached should be no more than 5 cm;
- The vapor barrier layer is laid using a continuous contour method around the entire perimeter.
Installation of vapor barrier
A waterproofing layer, which protects against moisture coming from outside, is laid on the wall. Laying nuances:
- the waterproofing film is attached to the sheathing, leaving space for ventilation;
- a profile is attached to the film;
- Insulation is laid between the profile, and then a vapor barrier layer.
Wall waterproofing
The most popular waterproofing material is roofing felt. Vapor barriers and waterproofing must be installed to prevent condensation and ensure dryness of the wall pie. Now let's look at ways to insulate walls from the inside.
Electrical and communications
There are no difficulties with horizontal laying of heating and water supply pipes in a wooden house. They are placed as close to the floor as possible, if desired, hidden under a false box trimmed with wood-like panels.
It is only important to correctly arrange the passages through the walls; as a rule, for this, cells are cut out during the assembly of the log house, then the cavities are filled with soundproofing material.
The situation with wiring is much more complicated. The low current is easily hidden in the channel plinth, but power networks are not allowed to be hidden inside flammable materials. One option is to lay the wiring openly, using wires without overall insulation, twisted into a braid and stretched over ceramic plugs. This solution is quite interesting from an aesthetic point of view and at the same time completely safe.
Hidden wiring in a log house is also possible, but its planning is carried out at the stage of assembling the house. In each beam it is necessary to drill coaxial vertical channels into which, after laying the final crown, steel pipes will be inserted, inside which the cable will be passed.
The main wiring is carried out inside the ceilings, and the cable must be encased in a non-flammable hard shell.
Do not be deceived by the experience of foreign builders who lay cables inside frame and wooden walls without any additional protection. Abroad, different mains voltage parameters apply; special types of cable are used that are not available for the domestic market; in addition, the distribution board must be equipped with fire protection devices.
Tools
During all the work carried out in a wooden house, you will need the most important tool - a screwdriver. You will use it to install both the frame and the cladding layer. In a wooden house you do not need to use a drill or hammer drill, and this greatly simplifies the task of sheathing. If you don’t need to cover the entire room, and you, for example, are thinking about how to cover the ceiling in a wooden house, then it will be even easier for you, since you won’t have to buy insulation, although you can also insulate the ceiling. In addition to a screwdriver, we will need a few more tools for work, the list of which you can expand, but the most necessary ones are described here:
- Laser level, ruler, tape measure;
- Putty, spatula;
- Corners, screws;
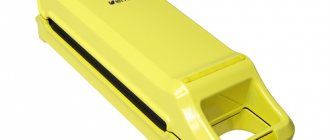
- Notcher, drywall knife, metal scissors.
Tips and tricks
To ensure that the process of finishing the interior of a wooden house goes without complications, it is better to listen to the recommendations of specialists:
- When laying wood floors, wedge technology can be used to achieve the best joint between the floorboards.
- To prevent condensation from forming on a wooden surface during a suspended ceiling, a waterproofing layer of a polymer membrane should be built into the suspended ceiling.
- Please note that home furniture made from timber should be made from natural raw materials, otherwise the design concept may be violated.
- You can use special sealants between the joints of the logs. Such sealing agents have a special structure and can even act not only as a functional, but also a decorative element.
If you do not have much experience in finishing work, then invite specialists to finish a wooden house, since some work really requires professional skills.
Corrugated sheet
Initially, corrugated sheeting was used as a material for finishing non-residential premises. Along with the improvement of its characteristics, it moved into the category of finishing materials used for cladding residential buildings made of wood. The use of corrugated board finishing can significantly increase the life of the building, and the varied design of the material gives it a magnificent appearance.
There are several options for corrugated sheets, differing in their thickness and wave size. For finishing the facades of the house, material marked C10 is used. Its strength and light weight allow the material to be installed in a vertical position, which is very convenient during installation. You should know that in order to use all the positive qualities of corrugated sheeting, it is usually used together with insulating soundproofing material as the top finishing layer.
An important factor for the popularity of corrugated sheeting when finishing buildings was its affordable cost (the material belongs to the middle price category), as well as ease of installation. Buyers are also attracted by the variety of colors, the range of materials offered, and its quality.
We recommend studying - Get in the mood for a loft: how to create a loft mood in an ordinary apartment
Using inexpensive materials, an old house takes on an original look.
Beautiful examples
There are many ready-made solutions on how best to decorate the rooms of a wooden house. The most successful and interesting are the following options:
- Decorative stone is often present on individual elements of a wooden house, focusing attention on their importance in a particular room. Such coatings are often used on walls near the fireplace or dining areas.
- The floor surface can be made of artificially aged boards. This detail will successfully complement some interior styles.
- Wicker furniture looks unusual in the interior of a timber house. It looks original, but does not overload the decor.
- Often in houses made of timber, wooden beams are used to decorate the ceilings.
- Using all the recommendations and nuances outlined above, you can create the perfect interior in every room of a wooden house.
Insulation of walls from the inside in a private house using mineral wool
Before insulating the walls from the inside, it is necessary to secure the sheathing.
Mineral wool is a material that has good thermal insulation properties, is easy to install and durable.
It is necessary to lay mineral wool slabs between the sheathing boards in such a way that no gaps are formed.
Besides:
- mineral wool is secured with nails and dowels (fungi);
- lay the material from bottom to top;
- The edges of the mineral wool are slightly pressed for a tighter fit.
IMPORTANT!
Mineral wool should be laid in an even layer : without creases and waves; if the installation is multi-layered, the joints should not overlap or form cracks.
After the insulation is securely fastened, a vapor barrier layer is laid on it.
Insulation with mineral wool