Articles
All photos from the article
Nowadays, beautiful doors are quite expensive, however, you can make them yourself from plywood, and thereby save money. The only thing is that you should first familiarize yourself with all the nuances of this work. Therefore, next we will look in detail at how to make a door out of plywood with your own hands.
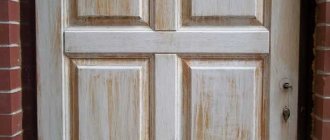
Plywood door
Making a door
Project
The process of making a door is not as complicated as it might seem at first glance. The most important thing is to prepare the project correctly. It will serve as a kind of instruction for further work and will prevent errors during work. The only thing is that you first need to decide on the type of construction.
Most often, plywood doors are made of two types:
| Construction type | Peculiarities |
| Panel | They are a frame structure, which is sheathed on both sides with plywood. As a rule, insulation or stiffeners are located between two sheets. |
This type of door can be used in cases where good noise and heat insulation is required.
Frame door design
Having decided on the type of construction, you should measure the door frame and indicate the size of the future product. After this, you need to draw its main details on paper and indicate their dimensions.
Note! The size of the doors should be slightly smaller than the size of the frame, otherwise they will not close well.
Tools and materials
When choosing plywood, first of all, you should pay attention to its brand. If you plan to manufacture an external door, you need to purchase material with increased moisture resistance, for example, FSF brand. True, its price is quite high, so for the manufacture of interior doors you can use cheaper FK plywood.
If you plan to open the product with transparent varnish, you should also pay attention to the type of sheets. It is desirable that they correspond to the first or, in extreme cases, second grade.
Plywood sheets FSF
In addition to plywood, you need to prepare wooden planks 100-150 mm wide. The thickness of all materials is selected taking into account the fact that the total thickness of the product should be 35-40 mm. To make a frame structure, you will also need insulation, which can be mineral wool or expanded polystyrene.
Advice! You can increase the moisture resistance of plywood yourself by impregnating the sheets with PVA glue, drying oil or other protective compound.
As for the tools, you will need the following set for work:
- jigsaw or regular hacksaw;
- electric drill;
- screwdriver or screwdriver;
- tape measure and pencil;
- sandpaper;
- wood glue;
- varnish or paint.
In addition, it is advisable to have a router that will allow you to make tenons and grooves for connecting frame parts, as well as a socket for the lock.
Option for connecting bars to a wooden floor using tongue and groove
Making a frame door
After preparing the project, you can proceed directly to the manufacture of the product. First of all, let's look at how a frame door is made.
So, the instructions for its manufacture are as follows:
- First of all, the frame is made, which is a frame with several jumpers. There are several ways to connect the frame strips. The most reliable is through tenons and grooves using wood glue. You can also use metal corners and screws;
- the locations of the locks should be reinforced with additional bars;
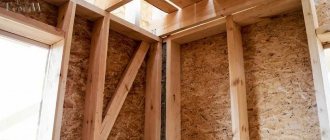
Door frame with insulation
- Next, you need to cut a sheet of plywood to the size of the door leaf and secure it with self-tapping screws to the frame. In this case, the caps must be recessed below the level of the sheet;
- then you need to lay heat-insulating material into the space in the frame and cover the second side of the door with plywood;
- The next step is to mortise the lock. To do this, you need to mill out a socket for it and drill holes for the handles;
- At the end of the work finishing is done. The product must be sanded, the screw heads and other defects must be filled, and then the surface must be varnished.
This completes the process of manufacturing the frame structure. It must be said that the product can be decorated at your discretion in different ways, for example, by gluing false panels or a wooden figure cut out with a jigsaw. You can also apply a design with a router or come up with your own version of decoration.
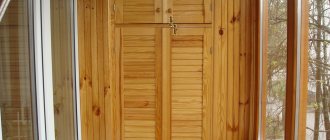
Single layer plywood door
Making a single-layer door
A do-it-yourself single-layer interior door from plywood is made in the following sequence:
- work should begin by preparing a sheet of plywood according to the size of the door. It is advisable to use a fairly thick sheet, at least 1 cm;
- Then, along the perimeter of the sheet, strips are attached, which can also be made from plywood. To fix them, use self-tapping screws and wood glue. It is also necessary to secure the lintels like a paneled door. To connect the planks to each other, you can use a tongue/groove or furniture tongues;
- Next, you need to attach the strips on the back side of the door in exactly the same way;
The photo shows the finished door leaf
- then you should mill out the space for the lock and the holes for the handles;
- to give the structure a complete and attractive appearance, the transition from the planks to the plywood should be decorated with profiled glazing beads;
- Now the product needs to be sanded and puttied. If you plan to open the door with varnish, then putty should be used to match the color of the wood;
- To complete the work, you need to open the product with varnish or paint.
Advice! To give the structure a certain color, but at the same time preserve the texture of the wood, it should be treated with stain before opening the varnish.
Here, in fact, are all the most optimal ways to make a plywood door yourself.
Required materials and tools
Installation of sliding plywood doors begins with preparatory work. You need to stock up on the necessary materials and tools so that nothing later distracts you from your work. To create a simple door you will need the following materials:
- Beams in the amount of 5 pieces, length 3 m and cross section 45 x 20 mm.
- Waterproof plywood, coniferous varieties are suitable. The dimensions of the sheet depend on the size of the door leaf.
- Insulation or filler. For a regular interior door, you can choose an inexpensive option that does not have noise and heat insulation properties. But even in interior structures, inexpensive mineral wool or expanded polystyrene can be used as insulation.
- PVA construction adhesive
- Rail
- Profile to be used as guides
- Rollers
- Wood putty
- Acrylic sealant for wood
The tools you need to prepare are:
- Circular saw, hand or electric
- Jigsaw
- Sandpaper
- Spatulas of different sizes
- Screwdriver
- Electric drill
- Fraser
- Ruler
- Pencil
- Masking tape
- Tassels
If you are planning decorative surface treatment, then a milling machine and a miter box will be useful to you.
Conclusion
Making plywood wooden doors is beneficial from an economic point of view, and in addition, doing something yourself is always interesting. However, for this you need to stock up on time and patience, since the work must be done carefully and slowly. Only in this case the product will turn out beautiful and durable.
The video in this article contains some additional information on the topic discussed. If after reading the material you have any questions, you can ask them in the comments, and we will be happy to answer them.
Read also: Cd4060be application in charging a screwdriver
Making paneled doors is a complex task that requires special skills. But simpler doors can easily be made with your own hands by a person who knows how to hold a hammer and saw in his hands. It’s unlikely that a work of art will work out, but a good quality product will.
Even the simplest wooden doors look very good
Sliding
The sliding door opening mechanism has the following advantages over standard swing structures:
- Doesn't take up extra space
- Do not accidentally open when there is a draft
- They do not slam shut on their own, which is important in families with small children
Plywood sheets are also lightweight, so the load on the walls is minimal.
General principles
When making doors yourself, the first thing you do is measure the doorway: you need to make a door frame. In most cases, it has the shape of the letter “P”: two vertical posts are installed and one horizontal one is installed at the top - the lintel or crossbar.
The strip, which is attached below, is rarely used today, but there are special-purpose rooms in which a threshold is required. For example, in the steam room of a Russian bath. A threshold is needed here to prevent steam from escaping.
Having previously assembled the door frame on the floor, you can decide on the dimensions of the future door: they should be a couple of centimeters smaller than the frame you made. After you make the door leaf, cut in the hinges. Doors made of wood are heavy, and it is very difficult to carry them and try on the hinges. Therefore, it is more convenient to do everything on the floor. Mark the fastenings for the hinges, make a recess to the required depth, install them on the jamb and on the door leaf.
Schematically, the door installation technology looks exactly like this
Then you install the box in the opening, secure it, and only then hang the doors. Here's a general outline of how the process works. Now let’s learn more about how to make doors with your own hands.
Advice from professionals
- If the doorway is smooth, then the canvas can be measured strictly according to size. When opening with a curvature, take the canvas with a margin so that it covers all deviations.
- Sliding doors are hung after renovation, that is, the walls must be covered with wallpaper, and the opening itself must be plastered or painted.
- When installing the decorative beam, place it so that it covers the rollers. The design will look more beautiful and neat.
Thus, even a non-professional builder can make and install a sliding door with his own hands. The main thing is the ability to work with the tool, strict adherence to instructions and the desire to make a truly high-quality product.
An example of sliding door installation can be seen in the video.
Making a door frame
According to the rules, the door frame pillars must be hidden in the floor and rest on the joists. But today, wooden floors are not made everywhere in our country, and therefore more often they are simply rested on the finished floor. But by the time the door is installed, the floor must be ready, only the baseboards have not been nailed down.
We assume that the floor and doorway are ready. Decide what type of box you will install: “U”-shaped or with a lower jumper. Draw a diagram, measure the opening, and plot the measurement results on the image.
When installing the door frame and hanging the door leaf, it is important to align everything evenly: both the posts and the leaf
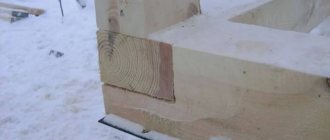
For brick, concrete or other similar walls, the dimensions of the box should be a couple of centimeters smaller than the opening: a gap is needed for mounting elements and foam. For walls made of timber or logs, they generally make a frame or casing - bars installed around the perimeter with a small gap, which will compensate for the shrinkage of the building, and at the same time fasten the logs or beams that have become loose after cutting out the opening. This, of course, requires additional materials and work, but this is the only way to guarantee that the doors will not jam.
As a result of measurements, the height of the two side bars - racks - may differ slightly. It's not scary. It is important that they are vertical, and the horizontal top bar - the lintel - is strictly horizontal.
The door frame is made from one board with a molded groove or a composite one - from several boards glued together. The width of the groove should match the thickness of the door leaf or be a couple of millimeters larger.
To make the box, use planks with a solid or prefabricated protrusion against which the doors will rest.
If you have a woodworking machine on your farm, you do everything yourself. No - you buy it in a carpentry shop, hardware store, etc. You will need two strips for the side posts and one or two (depending on the type of box) for the horizontal jumpers.
The bars from which the jambs are made can be simple, or they can have a shaped (profile) front part. You can install a rubber or silicone seal at the end of the protrusion against which the door leaf rests. To do this, make a shallow cut into it using a special roller (or a regular screwdriver) and install an elastic band. These seals are much more effective and durable than foam rubber ones, they come in different colors and shapes, and are sold in hardware stores.
The planks are polished on three sides to perfection. The fourth will be leaning against the wall; it does not need to be processed.
The shape of the door frame slats may vary
Assembly order
Saw off the top jumper to the required width. Now you need to make grooves in it into which the racks will fit. To do this, you need to remove the protrusion to the width of the block. It sounds confusing, but if you look at the photo, everything will become clearer.
Measure the width of the counter, mark this distance on the ceiling, and draw a straight line. Make a cut to the depth of the tenon (with a hand saw). Now use chisels to remove excess. Having smoothed it with sandpaper, make two holes for the screws: this is how they will be fastened to the posts.
Do the same on the other side. Just don’t start sawing without measuring the second post: the joinery may differ by a couple of millimeters, and this can lead to the appearance of cracks. First you measure, then you mark, and only then you cut and work with a chisel.
If the structure has a threshold, it is processed in exactly the same way.
Now all that remains is to adjust the height of the side strips. From the total height of the doorway, subtract the thickness of the transverse strips (upper and, if any, lower) and the distance for the mounting foam (1-2 cm). Get the height of the racks. You saw them off and assemble the whole structure together. The door frame was assembled with your own hands. Let's start making the door leaf.
The procedure for making the lintel of a door frame
Types of products
You can make any door from sheets of plywood, you just need to decide on the type of future structure. Depending on the installation location, a single-layer or frame plywood structure can be made.
Single-layer options are very easy to manufacture. They consist of one thick sheet of plywood at least 1 cm thick, upholstered with planks along the contour on both sides.
Such products are called paneled and, as a rule, are installed on doorways in the apartment.
They transmit sound, do not retain heat and are not resistant to mechanical damage.
Frame structures using plywood are stronger and more durable, have a relatively high level of sound insulation, and if necessary, the product can be manufactured with a high-quality insulation layer to preserve heat in the room.
The manufacturing process for frame options differs from single-layer ones. First, a frame is assembled from slats, which is sheathed with plywood on both sides. Due to the additional stiffening ribs, the frames are more durable, which allows them to be installed at the entrance to an apartment or to a building in a private house.
Based on the type of structure, you need to measure the doorway and prepare a drawing. It should be taken into account that the size should be slightly smaller than the door frame.
The finished door leaf requires finishing - painting or varnishing. If desired, you can purchase laminated plywood, which is covered with a special protective film.
Wooden doors to a bathhouse or country house
Doors made of wood can have a complex design. Beginners should not immediately take on such work: they need to learn from simple things. Doors to a bathhouse, a summer house, etc. are ideal in this regard. They rarely come in complex designs. The main thing here is reliability and functionality. Attractiveness is also important, but even simple DIY steam room doors are a result you can be proud of. If they are well processed, they look very decent: the material is beautiful, it does not need any decorations. It is important to properly process and varnish.
Materials
Good commercial wood is used for the manufacture of joinery, without knots or with a minimum number of them. If there are knots, they should not be black. You also need dry wood with a moisture content of no more than 12-15%. Ideally, take chamber-drying boards - they will definitely not be damaged. Also look at their geometry: “propellers” and “waves” do not suit us. The boards must be level.
Read also: How to solder a copper kettle
Thickness - from 25 mm to 50 mm. Depending on the purpose and design of the door. Before use, their surface is brought to a perfectly smooth state - with grinding machines or manually using sandpaper, attached for convenience to a small block.
A simple option made from planed boards
The simplest wooden interior door can be made from one row of boards 30-40 mm thick, fastened together with transverse strips. Planed and sanded boards are stacked close to one another. There should be no gaps, the match is perfect.
The dimensions of the door leaf should be 4 mm smaller in width and length of the manufactured door frame. Only in this case will it be possible to close them without problems.
To avoid drafts, the boards can be made with profiled edges: make a tenon half the thickness or saw the edges at 45 o. This option is more labor-intensive, but the room will be warm.
The edges of the door boards can be made curly
According to the rules, grooves are cut out in the boards for transverse strips - dowels. The dowels are driven into this groove, fastening the boards together. Having a special wood saw - a reward - is easy to do:
- Make two cuts at 45 o. To prevent the saw from slipping, the angle was kept even; a block with the same angle was nailed to the edge. By sliding the saw along it, you will make an even cut at the desired angle.
- On the other side, at a distance of 30 mm, make a similar cut in the other direction.
- Use a chisel to select wood between them. The result is a trapezoidal groove into which a key of the same format is driven. For greater reliability, you can use wood glue. It is better not to use PVA glue. Moreover, for the doors to the steam room: it will not withstand such temperatures. For steam rooms and wet rooms, glue is chosen with a high moisture resistance class (from D3 and above).
As a result, you will get doors to the steam room, assembled with your own hands, without nails.
You can make wooden doors without nails
You can assemble a similar door easier: by screwing the transverse and oblique strips 25-30 mm thick onto self-tapping screws. If you are installing it in a steam room, it is advisable to recess the caps into the wood, or screw them in from the side of the washing and changing rooms. So, when you touch the door, you will not get burned by the heated metal.
Entrance door made of two rows of boards
If the doors are made from two rows of boards, and insulation is laid between them, you will get a good entrance door or an excellent heat-saving option for a steam room. But then the steam room will need good ventilation - with such a device, air does not pass through the doors.
The first row is assembled in exactly the same way as in the previous version: the boards are tightly fitted to one another and fastened with transverse strips.
Doors made of two rows of boards are already entrance doors
Another row will be laid on top, and the gap can be filled with heat insulation. It is selected depending on the installation location: for the front door it is important that if moisture gets in, the insulation does not lose its properties and is not afraid of freezing. A good option is polystyrene foam; polystyrene foam is cheaper. Mineral wool is not suitable - they are afraid of moisture, unless they are protected with a layer of moisture insulation. Then they will keep warm well.
Having laid the heat insulator, it is pressed with a second layer of boards, which are attached to the transverse planks with self-tapping screws. If you have a door without nails on one side, you can turn this side towards the street: this way you won’t have to worry about unsightly dark streaks coming from the caps during use.
The final stage of manufacturing a wooden entrance door is finishing around the perimeter. In principle, it was possible to fill (screw with self-tapping screws) slats onto the first layer. This is a more correct option. But you can, having assembled both layers, attach thin - 5-7 mm - strips around the perimeter from the ends, covering the insides.
The very last thing: cut in the hinges and install the handles. Then you can install the doors in the doorway. How to do this, read the article “Installing door frames with your own hands”
The final stage is finishing the doorway. This is, firstly, the installation of door trims - if the width of the door frame is not enough, and platbands, which give a finished look.
See the video for one of the options for such a door.
Features of wood of various species
When producing wooden doors, you need to know the advantages and disadvantages of the material. The final result depends on this. The main difference between wood is its hardness. Soft woods are easy to work with, but are less resistant to moisture. This material is suitable for interior doors. It is difficult to process hard wood with hand tools, but the material is more resistant to moisture. This wood is suitable for making entrance doors.
When talking about wood species, it is worth considering the resin content of the material. Larch takes first place in this regard. A product made from it will withstand dampness for a long time. Resin protects against rotting.
The following requirements apply to choosing a board:
- minimum number of knots;
- wood moisture content no more than 15%;
- perfect evenness.
For outbuildings, used material taken from the dismantling of old buildings is suitable. It is better to make beautiful doors to the house from a new board.
Hardwood
- Birch is quite hard and difficult to process, but has an attractive texture.
- Beech is characterized by increased strength, but deforms when humidity changes.
- Alder is soft and rots quickly in high humidity.
- Oak is hard, tends to split, but is resistant to dampness and beautiful.
- Walnut has an interesting texture, is easy to process, and is not afraid of moisture and mechanical stress.
- Maple is moderately hard, can be processed well, and has moderate resistance to moisture.
For the manufacture of wooden entrance doors, oak or beech is most often used.
Conifers
- pine is considered the most popular . Soft wood is easy to process, but does not withstand moisture well. The material is best used in the manufacture of wooden interior doors.
- Larch is characterized by a beautiful texture and high resin content. Solid wood perfectly resists moisture, which makes it possible to use the board for assembling entrance doors.
- is knotty, lighter and softer than pine, and slightly inferior in strength.
Plywood doors
You can make good interior doors with your own hands from blocks and plywood. There may be several options.
Single layer
This design is suitable for installation in some utility room where sound and heat insulation is not important. This is a frame made of wooden blocks with several transverse strips, onto which a plywood sheet of suitable size is stuffed.
Plywood can be any kind, but 1-2 grades are required for good appearance. It does not contain (class 1) or almost no (class 2) knots on the front surface. This material comes in different thicknesses: from 3 mm to 21 mm. There is moisture-resistant plywood - it can be used in wet rooms, there is laminated - in this case there is no need for finishing: it is covered with PVC film and has a look similar to wood.
There are many types of plywood and as a construction or finishing material it is very convenient
When choosing plywood for residential premises or baths, you need to pay attention not to safety: in its manufacture, glue is used that contains formaldehyde. The content of formaldehyde is controlled, depending on its quantity and intensity of its release into the atmosphere, and an emission class is assigned: from 0 (almost none) to 5. Plywood with emission class 0 and 1 is allowed even for the manufacture of children's furniture. Therefore, it is also suitable for doors to the bathhouse.
Multilayer
The design is similar, only there can be two or three layers. Heat/sound insulation can be laid between them. As a result, similar doors can be installed in a steam room. You will only need to take moisture-resistant plywood. It can then be tinted with stain and covered with heat-resistant varnish (if you want, of course) or soaked in drying oil or wax.
Read also: Scheme of a powerful converter 12 220 volts 3000 W
Multi-layer plywood doors are easy to make with your own hands
You can fasten plywood using small nails or self-tapping screws. You will have to drill holes for the screws: then you will be guaranteed that the top layer will not be damaged.
Decor
Decorating a homemade wooden door begins with sanding. Next, the treatment is carried out with an antiseptic that protects the wood from dampness and pests. After drying, the surface of the door is covered with two layers of primer or putty. The final layer is paint or varnish.
If you have a professional tool, as well as certain skills, the canvas is decorated with carvings, stencils are cut out, and even a mosaic is made.
How to insulate?
If the owner was able to make repairs in the apartment with his own hands and assemble the door structure, then insulating it would be a matter of a couple of minutes.
Basically, only the entrance doors or those products that open onto the balcony need to be insulated. Although insulation is a simple process, it contains several stages:
- installation of insulation materials around the perimeter of the door frame;
- sealing the gaps between the frame and the door leaf itself;
- if necessary, sealing fittings, locks and other elements;
- insulation of the door structure, including the leaf.
For insulation you will need:
- material for insulation (foam rubber, synthetic winterizer, etc.);
- sealing/sealing material;
- upholstery material for the door leaf (eco-leather or polycarbonate, wood panels);
- screwdriver;
- polyurethane foam;
- measuring instruments and scissors;
- construction stapler.
Before you start work, you need to decide on the materials for insulation and sealing and their quantity, therefore the door structure must first be examined in detail for the presence of gaps, and the door leaf for the upholstery material must be measured. Only after this can you begin installing the seal. It is attached either to adhesive tape or to staples, and the second option is much more reliable. The next step is upholstering the door leaf; this can be done both on the front side of the door and on the back. The owner determines the color and type of fastening independently.
If we are talking about insulating a metal door, then the progress of work will be slightly different. Such doors can be easily insulated from the inside using polystyrene foam and other synthetic materials. The canvas is attached in any way between the partitions of the main frame, then the metal base is welded back and you get a warm entrance door with additional noise and heat insulation.
How to make a window frame with your own hands?
You don't have to be a carpenter to make your own frame. This requires a few tools and a little time, as well as wood.
This way you can glaze a small house.
First you need to purchase only dry wood. The beams are perfect; you can take the laminated version of the beams. You can take boards with a section of 5*15 cm. A beam of 5*5 cm is suitable.
Also some materials: metal square, wood glue, glass for glazing.
It would not hurt to make a drawing, and also have a saw, chisel, and hammer on hand.
Here is a drawing of the window
You need to make a groove in a 5*15 cm board, the board should look like an G letter in profile.
Next you need to prepare the boards according to the exact dimensions of the window. Then we assemble the frame groove into groove. It is best to strengthen the corners of the frame - coat it with glue and insert spikes. You need to keep the frame angle at 90 degrees.
You can put metal squares in the corners; they can be purchased at a special store.
Next you should make the same frame, only with a smaller cross-section. This is a moving part that opens with glass.
It turns out that before this the box is made, after the frame.
In this case, the gap between the moving part and the frame should be only 0.1-0.2 cm.
After all the elements are made, assemble the window using hinges.
The wooden frame is very capricious. We installed good wooden frames in our house in the village. Every year they were removed and processed. But time spares no one. These frames began to rot, but lasted exactly 10 years.
Now we want to replace them with plastic ones.
If you want a minimum of frame maintenance and maximum durability, then it is better to make your choice in favor of plastic or aluminum frames.
the author of the question chose this answer as the best
My grandfather, an experienced carpenter, left me some knowledge and tools. When I was a teenager I showed how to make, for example, a stool from scratch. From “scratch” this starts from a round pine log and without the use of power tools. Using this experience, I will show you how to make a window frame, as they say, “on your knees,” using improvised tools.
We prepare pine bars, in this case they turned out to have a cross-section of 40 x 40 mm. and a quarter for mounting glass 10 x 10 mm;
We file along the marked lines so that the pencil remains on the wood and is not sawed off (otherwise, due to the thickness of the saw blade, the knot will not be tight).
Use a chisel to cut out the inside of the eyelet. The falling out pieces of material will be used to make dowels.
If the tenon does not fit into the eye, grind it a little with a rasp. For convenience, it is better to mark each corner with a pencil.
We assemble the entire product and, after checking the diagonal, drill holes for the dowels.
At the end, each corner is smeared with glue in a disassembled position and assembled on dowels.
This is a small frame for a bathhouse, but large products are assembled using approximately the same principle. Only on the middle elements the quarter for glass is selected from both sides.
Here is the minimum tool needed to make wooden products with your own hands.
Good luck in construction!
To make the frame you will need 50x50 mm timber, 50x150 mm boards, glass, wood glue, and metal window squares. Tools: electric planer, saw, hammer, chisels.
Take only well-dried timber and planed boards. First, make a box the size of the window opening from a board. The board is cut to size into four parts and joined together using a straight groove and a straight tenon and a small amount of glue or dovetail. Grooves are made on the vertical parts of the frame, and tenons are cut out on the horizontal ones. The connection points should be at an angle of 90 degrees. To strengthen the box, you need to stuff metal corners at the ends at the corners.
The frame itself is made from 50x50 mm timber in the same sequence as the box. Provide a gap between the box and the frame in
2 mm so that the frame can be opened and closed without problems in the future. Plan the beam well with an electric planer, cut the prepared profile into blanks, and cut out the tenon joint. Connect the parts, avoid the slightest errors, connect only at right angles.
The “lazy frame” is made as follows: we take two beams, one is 2 times smaller than the other, and knock them together:
We mark the resulting structure according to the size of the window and cut four blanks at 45 degrees along the cut so that when put together, we get a frame with an area equal to the window opening:
At the corners we fasten them together with self-tapping screws. We install the resulting frame in the window opening and insert glass into it. We strengthen the glass with glazing beads or timber, and if necessary, cover the cracks.
If you need to make a frame of two or more glasses, then simply adjust the distance inside the outer ring of the beam - with the inner beams, not forgetting the thickness of the glass.
add to favorites link thank
Paneled
The peculiarity of such doors is that they are assembled from separate boards or bars, and the middle is filled with thinner versions, glass or plywood. The manufacturing technology of a paneled door involves performing the following operations:
- First of all, you need to cut blanks for the frame from boards or timber. This design consists of a rectangular canvas, inside of which there are only partitions, and everything else is filled with other components.
- When the workpieces are ready, they are also carefully polished and leveled. Such operations should only be performed with dry wood in a dry and warm room. In another case, the tree may gain moisture and then change shape.
Next, grooves are cut out on each board. Please note that some elements have a tenon, while others have depressions. This allows you to form a tongue-and-groove connection. In a similar way, a rectangular frame is formed from boards
It is important here to carefully adjust all the elements. At this stage it is also important to cut out the slots for the lock. After the frame is made, its interior is filled with thinner boards or glass
To do this, grooves for these elements are formed on the support boards using a milling cutter and they are also carefully adjusted. If glass is used, then you need to cut it to the size of the internal opening. It is fixed using wooden glazing beads made from the same wood. The procedure is completed by assembling the entire canvas and gluing it together. Special glue is also used for this. The boards are also tightened together in a special vice. When the mixture has dried, the canvas is sanded and glass is installed (if necessary), and then the entire surface is varnished.
Paneled doors are complex structures that require a lot of manual work. It is not always possible to make such a product the first time, since this requires skill and experience in working with various types of wood. These types of door leaves are often used as interior interior elements.
Another option for wooden doors is panel products. These are the cheapest and simplest designs. To obtain such a product, a wooden frame is knocked down from timber. After this, its inside is filled with paper or thin slats of wood. Externally, all this is sheathed with MDF or chipboard sheets.
Paneled
The peculiarity of such doors is that they are assembled from separate boards or bars, and the middle is filled with thinner versions, glass or plywood. The manufacturing technology of a paneled door involves performing the following operations:
- First of all, you need to cut blanks for the frame from boards or timber. This design consists of a rectangular canvas, inside of which there are only partitions, and everything else is filled with other components.
- When the workpieces are ready, they are also carefully polished and leveled. Such operations should only be performed with dry wood in a dry and warm room. In another case, the tree may gain moisture and then change shape.
Next, grooves are cut out on each board. Please note that some elements have a tenon, while others have depressions. This allows you to form a tongue-and-groove connection. In a similar way, a rectangular frame is formed from boards
It is important here to carefully adjust all the elements. At this stage it is also important to cut out the slots for the lock. After the frame is made, its interior is filled with thinner boards or glass
To do this, grooves for these elements are formed on the support boards using a milling cutter and they are also carefully adjusted. If glass is used, then you need to cut it to the size of the internal opening. It is fixed using wooden glazing beads made from the same wood. The procedure is completed by assembling the entire canvas and gluing it together. Special glue is also used for this. The boards are also tightened together in a special vice. When the mixture has dried, the canvas is sanded and glass is installed (if necessary), and then the entire surface is varnished.
We make a single-layer product - subtleties for craftsmen
Interior plywood doors are made according to a simple design. It is given below:
- Take a sheet of plywood 1–1.2 cm thick. Cut it according to the parameters of the door.
- Attach the slats around the perimeter of the sheet using wood glue or wood screws. Instead of slats, it is allowed to use planks that are made of plywood.
- Make jumpers on one side of the structure. You add additional slats to the door leaf to increase the strength of the door, and fasten them with furniture tongues or using a tongue-and-groove connection. Do the same with the second side of the single-layer product.
- Use a router (if you don’t have one, use a chisel) to make holes for installing door hardware (handle and lock).
- It is advisable to smooth out the transitions from planks to plywood by installing putties (profiled). Then the appearance of the product will be much more attractive.
- You sand the finished door, putty it, paint it in the desired color or varnish it.
As you can see, everything is quite simple. A dedicated home craftsman can handle this type of work in just a few hours (maximum per day). You will have to suffer longer with a frame door. But the reliability of the finished product will be much higher.
Installation
First, install the box using polyurethane foam. After hardening, begin installing the canvas. For wooden structures, it is better to choose removable hinges. They can withstand heavy weight and are easy to install. Such hinges are suitable for a barn door, entrance or interior structure.
Adjustment
If the door cannot be closed due to the frame being skewed, you should remove the panel and check the joints of the beams. An angle of 90° must be maintained. If necessary, the box is corrected. When hinges become the cause, the attachment point is deepened or completely changed. The last option is suitable when there is no way to correct the current location of the loops.