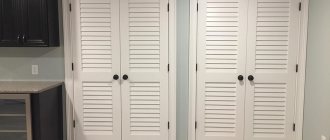
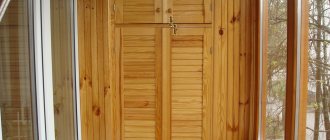
Not only the door leaves, but also the frame gradually wears out. Dents, cracks, peeling film, various indelible stains or abrasions - everyone has to deal with this. Installing a new block structure requires time and significant expenses, plus a number of inconveniences associated with dismantling/installation. Restoring doors of any type allows you to update them, extend their service life, and change the design option. The main thing is to know how to do it correctly.
Preparation
Whatever method you choose to update an old interior door, you will need to carry out a number of preparatory work. Usually old painted specimens are going to be decorated. Painting is usually amateurish, so there are more than enough unevenness, sagging and other minor defects. They all need to be leveled.
Remove the door leaf from the hinges and lay it on a flat surface. You can - on a trestle or a table. We take wood putty (even if they are made of chipboard or plywood) and cover all the holes, chips and depressions with it. After drying, we move on to the next stage - sanding.
We buy wood putty
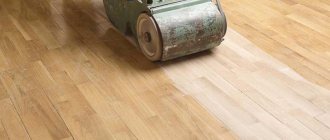
We take sandpaper with coarse and fine grains. We process to achieve a smooth surface. If you work manually, it takes a lot of time and effort. With a hand sander, work moves faster. If painting is planned next, we try to achieve as smooth a surface as possible. If you plan to decorate with wallpaper, fabric, self-adhesive film, you don’t have to bring it to perfection, but it should still be exactly right.
Hand sanding takes a long time
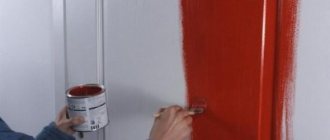
Next, remove the dust and wash off the residue with water and diluted dishwashing detergent. Dry it. Further actions depend on the selected update method. If you are going to glue fabric or wallpaper of any kind, you can prime the surface (with thinly diluted glue or a special primer). After the primer has dried, you can glue the selected type of decor or apply paint. By the way, if you are going to paint the doors, you need to select the same type of paint that was there before, otherwise you will have to remove everything to a clean base, and this is very difficult.
Updating the opening and slopes
The doorway may also have an old, unpresentable appearance; after updating the door, it will inevitably have to be brought to the appropriate appearance. First, you need to treat the support guides: for example, paint them in the color of the canvas or apply stain or varnish. If they are very worn, you will have to install plasterboard structures on them and only then paint them.
To install the platbands, special clamps are used; they can also be attached with self-tapping screws. MDF strips are usually used for finishing slopes. It is allowed to use drywall, which is fixed with glue or perforated corners.
A more labor-intensive process is plastering slopes or installing perlite platbands, which are expensive, but give the most durable results. The restoration of the slopes and opening must be given close attention, otherwise the repair of the door itself will be incomplete.
Renew old doors with wallpaper
The easiest and most affordable way to make old doors attractive is to use wallpaper. They do not necessarily have to be the same color as the walls, although this option is not excluded. First, prepare the canvas as described above, and then you can start finishing.
The procedure for wallpapering doors is as follows:
- dilute wallpaper glue according to the instructions on the pack;
- apply to the door leaf;
- glue the wallpaper, carefully taking care to remove bubbles (using a rubber roller or plastic spatula);
- We trim the edges using a wallpaper knife and a flat metal strip (it’s fashionable to use a large spatula);
- We wait for the wallpaper to dry.
Covering old doors with wallpaper is a good way to turn old ones into new ones.
Then you can continue decorating on top of the wallpaper or leave it as is. Below are some options on how you can update old doors using different types of wallpaper.
Photo wallpaper
Modern photo printing allows you to transfer three-dimensional images onto paper. It will turn out very beautiful. Moreover, you can print any image of your choice. In general, any. Photo printing is usually done by advertising agencies, sometimes by printing houses. Contact them, explaining what you need (have a flash drive with the selected design and the exact dimensions of the canvas on which you want to print the image). Having received the required image, we glue it on the door according to the method. described above.
Only three door options with photo wallpaper
Wallpaper with moldings
If you stick foam or polyurethane moldings and rosettes onto plain wallpaper, the style will completely change. This type of door is suitable for classic interiors or rooms; using a colorful background and a different form of moldings (with curves) can be decorated in Provence style.
The work is no different from the sequence described above. We take the prepared doors with a leveled surface, spread them with glue, and glue the wallpaper.
Renewing old doors with wallpaper
By leveling the panels with a rubber roller it is not difficult to achieve good results, but a certain number of small air bubbles remain. To remove them, take a special plastic spatula (any hardware store has them), and use it to finally remove the air from the center to the edges. Also, use this spatula to smooth the wallpaper joint, if there is one. It is quite possible to achieve that the joint will not be visible.
We expel the remaining air, after drying we glue decorative elements on the door
Trim the edges of the wallpaper with a wallpaper knife. This must be done before the wallpaper is softened by the glue, otherwise later it may “stretch” behind the blade and tear. Leave to dry. After 12 hours or a day - depending on the temperature and humidity in the room - you can continue decorating the old door.
Carefully apply the markings with a simple pencil. When everything is drawn, use a tape measure to measure the required length of the pieces of molding. We cut it off and file the edges at an angle of 45°. We take a suitable glue (PVA is possible) and carefully smear the back surface of the cut elements, glue them according to the markings, and leave them to dry.
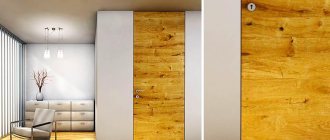
Stylish new doors from old ones
Using the same principle, you can update old doors so that the style will be different. Several examples in the photo gallery.
You need to be able to play with contrasts
The edges of the wallpaper strips are trimmed with self-adhesive cord. It comes in silver or gold
Beautiful wallpaper with a matching pattern is the secret to the attractiveness of this door decor
These doors were first painted and then decorative elements were glued on
Nobody said that the entire surface of the door leaf should be covered with wallpaper.
Classic insert lines
Moldings were glued onto the painted doors, which were then painted with “gold” paint.
When is restoration necessary?
A wooden structure, for all its charm, may not be liked by the owner, or significant defects may be found on its surface. In such situations, there is no need to purchase a new door, because wood can be easily restored. At the same time, it is quite possible to cope on your own.
Cases when restoration of interior wooden doors is required:
- chips, cracks, scratches are noticeable on the surface, the integrity of the coating is compromised;
- Unsightly spots stand out against the background of the finish;
- the panel area has cracks;
- the surface has darkened;
- the appearance is lost due to damaged cladding;
- if glass and mirror inserts and other decorative elements are damaged;
- and finally, in the case when you just want change.
If interior or entrance doors have a complex design with decorative carvings or other elements, then it is better to contact professional wooden door repair specialists who will carry out the work efficiently and quickly. Otherwise, you can update it yourself using our tips.
Designer decoration of old doors
If you are interested in designer items, you can try turning it into an art object. The good news is that you don’t need to prepare it: the unevenness and sagging will be hidden under the design.
What kind of doors were there and how they can be made
The decorating process begins with the making of papier-mâché. Take egg trays, sprinkle them with water, knead them with your fist, trying to level the surface. They will tear during the process, this is normal and even good - we need small pieces. These almost flat fragments are glued onto the surface in any order using liquid nails or using a glue gun.
Creating decorative elements for the door
Next, we glue any junk with an interesting structure, unusual or regular shape. In our case, we found an old knitted string bag. It was cut into small pieces and also glued.
We glue decor on old doors
The items used are lids, rings, a small perfume bottle, a small non-working computer mouse, the remains of a mosaic, whatever comes to hand. You will need a lot of trash, you can collect it ahead of time.
The process of decorating an old door is in full swing
When most of the surface is “decorated”, take acrylic silver paint in cans (you need 2 pieces) and paint the decor well. When choosing paint, it is better to take an expensive one, in particular German, so that it does not crumble later.
Forging effect, an interesting option
Preparatory work
Their sequence is unchanged, regardless of what material the door is made of. What tools and devices will be needed will become clear during the initial inspection of the structure and analysis of existing defects. Then you can determine how to restore a wooden door. For metal analogues, all basic measures are identical, although the choice of restoration options is somewhat limited.
- A place is determined where it will be convenient to work on the door. The base must be strong and level so that the canvas does not “play” during work (the floor, an oversized countertop, a workbench - it is not difficult to determine an acceptable option).
- The sash is dismantled and laid on the prepared surface.
- All fittings are removed - hinges, handles, decorative trims, locks, inserts and the like.
- The canvas is washed thoroughly. The composition of the solution, the devices necessary for operation are selected based on the type of door to be restored - plastic, paneled, solid wood, and so on.
Decorating doors using decoupage technique
Romantic or “cheerful” door designs can be made using decoupage. To work you will need:
- napkins with a suitable pattern;
- PVA glue (about 200 ml);
- natural bristle brush;
- acrylic lacquer.
We prepare the canvas as described earlier. We prime and paint it in a suitable color. After the paint has dried, we begin decorating. Take a pack of napkins you like and separate the top layer, which has a pattern.
Separate the top layer of napkins with a pattern and tear them lengthwise into two parts
We tear napkins with a pattern lengthwise into three strips. We tear it, not cut it. We want a slightly uneven edge. Two strips on one side have a smooth edge; we put them to one side. We tear the middle part into squares. The best option is if they are 3-4 cm on a side.
Tearing napkins
Take glue, a brush, and a small container. In it we mix PVA with water in equal proportions.
We dilute the glue with water
Next, we start decorating the door with our own hands. We take a strip with a smooth edge and apply it to the area to be decorated (in this case, it is the center of the door leaf). We dip the brush in glue and begin to smooth the fragment in different directions. Wrinkles will form, but this is just a good thing - the finish will be more textured, so there is no particular need to even them out. When wet, napkins are very delicate and elastic, remember this when working and act carefully.
Carefully work with a brush dipped in PVA
Gradually we make a frame with one smooth edge. The second one comes out carelessly torn.
Making a frame on the door from napkins
Next, fill the middle with squares. The technique is the same.
Filling the middle of the “frame”
DIY door decor is almost finished
When the entire surface is filled, leave it for a day - wait until the PVA dries. Next, take acrylic varnish and cover our decor with a soft brush. To prevent it from smelling, we use a water-based varnish. It's a little more expensive, but it doesn't give you a headache.
This is what happens after the varnish dries
The beauty of decoupage is that we get beautiful things at minimal cost.
Video description
How to disassemble the paneled fabric, watch the video:
- grooves and tenons are cleaned of old glue and putty, the remains are sucked out with a vacuum cleaner;
- if necessary, remove paint and polish each part - it’s easier to do this separately than on the whole canvas;
- insert the panels into place, lubricating all locking joints with wood glue;
- the assembled canvas is compressed with clamps and left until the glue dries;
- insert dowels into the holes.
Assembly of paneled fabric Source mdveri56.rf
Decorating a door with self-adhesive film
Perhaps the easiest way is to update old doors using self-adhesive. All you need:
- the film itself,
- a spray bottle containing soap and water;
- plastic spatula or soft cloth;
- sharp knife (can be wallpaper).
This film is available in different versions - there is a plain matte or glossy one, there is a plain one with holographic patterns, a wood effect, there are even special ones for covering doors with photo printing applied.
Part of the range of self-adhesive films
Regardless of the type of film, it is glued in the same way. In this case, we decided to update the old doors using a photo printing option. One point: before gluing, remove handles, latches and other door fittings.
For the decor to be of high quality, the surface of the door must be clean, even and smooth. If you processed it with a sander before, try gluing a small piece of film. If it sticks well, everything is fine. If it “doesn’t stick,” you’ll have to prime the doors and then paint or varnish them to create a smooth surface.
Take a spray bottle and evenly wet the surface of the door.
Spray the doors
We shave the film, remove the protective layer from one of the corners, and also spray it. So, by wetting, we separate the protective paper from the top along the entire width of the film.
Separate the paper backing on the upper corner and moisten the film with water
You should get a strip 15-20 cm wide. Do not remove any more so that the film does not stick to the canvas. We apply the peeled part to the upper edge of the door leaf (or the area to be decorated), it quickly sticks. Try to apply it evenly right away, but the position can be corrected - that’s why we wet the surface so that the film could be moved. If you pull it, it moves little by little.
Apply the film to the upper edge of the door leaf and smooth it, removing air
After making sure that the canvas lies flat, take a plastic spatula (for wallpaper) and smooth the surface with it, moving from the center to the edges. The goal is to remove all the air. Since the surface is wet, this is not difficult - the water displaces the air.
Everything else is simple. We pull down the protective paper, peel off the strip, glue it and so on - to the very bottom of the door. If you glued the top part for a long time, the bottom part may dry out, so periodically check whether the doors are dry and spray again if necessary.
Cut off the excess
After all the film has been glued, use a sharp knife to cut off the excess along the edges. All that remains after this is to install the fittings.
This is how you can update old doors using film with photo printing
Possible defects
Restoration begins after determining the extent and type of damage. The defects of wooden doors of different designs may differ; to eliminate them, a suitable method is selected:
- Deformation of a multilayer door leaf. A curved product is almost impossible to close, or large gaps remain due to a loose fit to the frame. The defect is common for products made from several layers of wood. The reason is a violation of gluing technology, poor-quality material or intense exposure to moisture. Minor curvature is compensated by adjusting the frame. In case of severe bending, replace the top layer of sheathing to relieve stress.
- Peeling of covering sheets from the frame. The defect occurs as a result of the manufacturer using low-quality glue or when the recommended operating conditions are violated. It can be restored by re-gluing and then keeping the product under pressure. However, the solid frame and covering sheets react differently to moisture and temperature changes. When peeling, the decorative coating often cracks or breaks in pieces. Small cracks are hidden with putty. If the peeled sheet cannot be restored, it is replaced.
- Loosening of the glued door frame. The result of the defect is loose closure, as well as the formation of cracks. It can be assumed that the product itself is bent. To make the right decision, both structural elements are inspected. If the problem is in the box, it is strengthened by removing the trim.
- Door leaf skewed. Diagnosis begins with inspection of the loops. If the door is too loose, it may not close. If a misalignment is detected, which is often found on a frame where the elements are connected by a notch, leveling is done using wedges. Grooves are cut out in the corners of the structure and filled with glue. Wedges sharpened at an angle of 10° are driven in with a hammer until the frame is completely level.
- A slight increase in the gaps between the leaf and the door frame is likewise a defect. Heat escapes from the house through a loosely fitting sash, reducing the quality of sound insulation. The problem with small gaps is solved by gluing seals.
Door decor with stencils
Old doors can be updated using printed drawings. It’s just a pity that not everyone has artistic talent. But in this case, the problem is solved with the help of stencils. You can draw them yourself, or you can find an image you like, print it on thick paper, cut out the design with a sharp knife, leaving jumpers in places. Now the stencil is ready.
The disadvantage of a paper stencil is that it doesn’t last long. If you need a “long-lasting” one, you need to transfer it to a transparent thick film. The technology for cutting out stencils for door decoration is shown in more detail in the video.
The drawing can be anything. Both geometric and floral, stylized images of animals, birds, and cartoon characters are popular.
Here are some options for small stencils
But they can also cover the entire area of the door leaf. It all depends on the style of the room and your desires.
You can update old doors using stencils
Repeating geometric pattern is also cute
Interesting effect
Using the same technique, you can decorate doors with glass. Many older doors have a regular glass insert. In order not to spend money on patterned ones, you can apply the pattern yourself.
Stencil on door glass
Video description
If you are wondering whether it is possible to restore interior doors that are over a hundred years old, watch this video:
Restoring cracked panel doors
If the panels dangle in the grooves of the main planks, the canvas will have to be disassembled and reassembled and glued.
The panels are held in place by a tongue and groove joint lubricated with glue, and are sometimes tightened with dowels or self-tapping screws, the caps of which are closed with wooden plugs. To restore the integrity of the door, you need to do the following:
- The removed canvas is placed on the edge, the plugs are removed and the screws are unscrewed;
- separate the frame elements and inserts;
How to make new doors out of old doors - photo ideas
One of the options for photo wallpaper on the door
Drawings with holographic effect
The colors can be “cheerful”
The combination of thin and thick stripes gives a voluminous effect
An option for those who know how to draw - painting on the door
You can use a map instead of wallpaper
Volume illusion
Two-color rhombuses - doors that are not boring Option for decorating doors for a classic interior