Methods for gluing solid wood lengthwise
1.1. Types of tenon joints
Very often, when making various wood products, it is necessary to connect different parts by gluing.
The use of a tenon joint gives the product the necessary strength. The tenon joint consists of two parts - the tenon and the eye socket. A tenon is a protrusion that is located at the end of one of the parts being connected. The spike is inserted into the eye or socket of another part being connected. You can find single (Fig. 1), double (Fig. 1) and multiple spines (Fig. 1). Spikes are divided into solid and inserted. A single tenon is a tenon that forms a single whole with the part. The insert tenon is made separately from the part. In addition to the above, there are several more solid tenon joints: dovetail (Fig. 1), toothed joint (Fig. 1).
In addition to increasing the strength of the product, the tenon joint can be used to increase the useful yield. The figure shows a furniture panel with and without knots.
The furniture panel without knots has a better appearance compared to the previous one.
Rice. 1 Types of spikes: a - single; b - double; c - round; g - one-sided dovetail; d - multiple; , e, g - “dovetail”; z - toothed.
As you know, there are various types of structural defects in wood that can significantly worsen the appearance of the product. These include knots, cracks, wane, etc. (Fig. 2). These defects are cut out (Fig. 3), the tenon joint is milled (Fig. 4), and the remaining parts of the bars are spliced along the length. A jagged tenon in some way visually worsens the appearance, so such parts are used for painting (Fig. 5).
Gluing short lengths of solid wood lumber together increases yield. End gluing is characterized by low strength (less than 10% of the strength of natural wood) and is therefore not used. Miter gluing (Fig. 6) is a fairly strong connection. However, this requires a long tenon length and, as a consequence, increased material consumption. Gluing with a jagged tenon (Fig. 6) is most preferable, as it provides 50–60% of the strength of solid wood.
Rice. 2 Defects of wood structure in lumber
Rice. 3 Defect removal scheme
Rice. 4 Toothed joint
Rice. 5 Gluing along the length
Rice. 6 Types of toothed tenon joints: a - miter gluing; b - gluing onto a toothed tenon.
1.2. Tooth tenon connection parameters
Horizontal tenons are used in connections that do not require high strength properties, vertical tenons are used in structural connections.
A gear connection is characterized by pitch, length and amount of bluntness (Fig. 7).
The gap is necessary to remove excess glue. The length of the tenon is selected depending on the purpose (cladding, platband - 5 mm; flooring - 30 mm).
Rice. 7 Tooth tenon parameters
The type of glue used for gluing is selected depending on the purpose. Polyvinyl acetate, urea-formaldehyde and casein adhesives are used in the manufacture of products used indoors; phenol-formaldehyde - for products used outdoors.
The formation of a tenon is carried out in two stages: leveling the surface (finish trimming) and milling the tenon on milling or tenoning machines. On the opposite side of the block, the pitch of the gear connection should be shifted by half a step.
1.3. Longitudinal gluing technology
Gluing the workpieces along the length is carried out in the following sequence. First, longitudinal cutting is carried out on multi-rip machines. Then transverse cutting into multiple blanks with removal of defective areas (Fig. 8).
Milling cutters are used to mill a toothed tenon (Fig. 9).
Rice. 8 Sawing out defective areas
Rice. 9 Cutter for milling a toothed tenon
Rice. 10 Glue rollers
Glue can be applied by brush, dipping or comb glue rollers (Fig. 10). Glue consumption is up to 400 g/m2.
The best way is to glue bars of infinite length and then cut them to the required size (see Fig. 11).
Assembly and pressing is carried out using pneumatic or hydraulic clamps (see Fig. 12). Horizontal pressure ensures tight contact of the gear joint. And vertical pressure is created to prevent the workpiece from bending.
The duration of pressing with squeezing out excess glue is 2 s. Curing of the adhesive occurs outside the installation. The strength and reliability of self-jamming are sufficient for cutting immediately after gluing. Bonding strength is characterized by the tensile strength under static bending.
Rice. 11 Scheme of splicing bars and then cutting them to the required size
Rice. 12 Weight for gluing onto a serrated tenon
Types of splicing and extension
There are many varieties of connections of the presented type. The most common method is wedge-shaped tenon joints. In this case, a large bonding area is formed. This ensures tight compression. The tenon joint is characterized by ease of marking and creation. In this case, wood processing can be done using a machine.
What carpentry tenon joints do you know? There are many varieties of them. When splicing with ends and a half, you can create various parts that are not subject to significant loads, for example, plinths, panel trim. In this case, an oblique cut is made at an angle of 45º. In this case, a miter box is used to achieve precision cutting.
If the part will be subject to load, the cutting must be sharper. It's called an oblique mustache. In this case, there is a wide spike along the entire length. This allows you to create a strong connection. It is even used for curved parts at bending points.
If the parts are subject to transverse compression, a direct overhead cut of half a tree is made. Often the overlay is additionally fixed using two dowels. To prevent the overlay from moving, the ends are cut at an angle. The combination of parts is stronger using a straight tenon with shoulders.
If the parts are subject to tension, they are spliced using a dovetail tenon. But such parts require support from below.
If the parts are almost flat, you can make a double dovetail tenon. But this is a rather complicated technique, so it is used quite rarely.
If parts have a bottom support, they also experience pressure from above and tension. In this case, a double dovetail connection would be the best option.
What tenon joints would be acceptable if the parts are supported at the bottom and are subject to forces that move them in opposite directions? Often in such cases, splicing with a round tenon is used.
Manufacturing technology of furniture panels
2.1. Scheme of the technological process of manufacturing furniture panels from solid wood
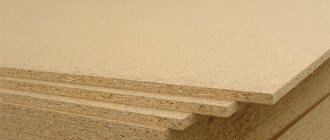
The furniture panel is glued together from planed wooden bars (slats) with a width of 10 to 50 mm. In the manufacture of furniture panels, coniferous and deciduous wood is used. Furniture panels are used in the manufacture of joinery and construction products, interior parts, but most often in furniture production.
A diagram of the technological process for manufacturing furniture panels from solid wood is presented in Figure 13.
Rice. 13 Scheme of the technological process of manufacturing furniture panels
For gluing furniture panels, bars (lamellas) are used, from which defects have been removed and spliced along the length. Glue is applied to the surface manually (Fig. 14) or using glue rollers.
Rice. 14 Applying glue manually
Rice. 15 Fan clamp with mechanical clamp
Rice. 16 Weights with hydraulic clamping
Rice. 17 Single-deck hydraulic press for gluing furniture panels
For gluing, clamps can be used, in which the bars with applied glue are clamped mechanically. To increase productivity, they are made fan-shaped (see Fig. 15). When gluing boards, clamps (presses) with hydraulic clamping can also be used (Fig. 16). The bars glued together in weims can be offset relative to each other, which will require leveling the surface of the boards in thicknessing machines.
Panels glued in one-story hydraulic presses do not have this drawback (Fig. 17).
The surface of the boards is more even, and in this case processing in thicknessing machines is not required. To reduce the duration of gluing, the press plates are heated. When making furniture panels, the following rules must be observed.
- To prevent warping, the glued bars should be assembled “staggered” (in adjacent bars the direction of the fibers should not coincide).
- The width of the bars should be a multiple of two or three thicknesses = (2–3).
- The time period from applying the glue to the surface to gluing should not exceed 5 minutes.
- To prevent the appearance of gaps between them, the side surfaces of the slats must be strictly perpendicular to the surface.
- The glued bars should not be warped and it is advisable to glue them together immediately after planing.
- Wood moisture content should be 8 ± 2%.
- Glue consumption 180–220 g/m2. After gluing the boards, technological exposure in dense piles should be provided for 5–24 hours.
- In the upper panels of the packs, the upper layers may dry out after gluing. To prevent warping of the top panels, the entire stack must be covered with polyethylene.
- Panels longer than 2 m are subject to warping to a greater extent than short ones, and they are also more difficult to process. Therefore, it is better to glue workpieces that are not large in size.
2.2. Format cutting and sanding of furniture panels
After gluing, the furniture panels are trimmed according to format (Fig. 18) on format-edging machines. To prevent the formation of chips on the surface of the board, trimmers must be installed in edgers (Fig. 19).
The finished slabs have significant variations in thickness. In addition, there may be some defects on the surface of the boards - dents, dirt, etc. Therefore, after gluing and curing the boards, their surface is sanded on wide-belt grinding machines. Processing is carried out using sanding belts of different grain sizes in two stages (Fig. 20).
First, approximately 70% of the allowance is removed (calibrated) using sanding belts of a coarser grain size, then the remaining allowance is removed using belts of a finer grain size (Fig. 21). At the first stage of grinding, domestic sanding belts with a grit number of 40-50 are used, imported - 36-40. At the second stage of grinding, belts with a domestic grit number of 16–25 are used, while for tailors they use 80–100. The general allowance for grinding is 1–2 mm.
The slabs are sorted depending on the number and types of wood structure defects on the surface (Fig. 22) and surface treatment defects. The quality of gluing is assessed by the strength when chipped along the adhesive layer (at least 4 MPa).
They also control the deviation limit of the dimensions of different diagonal lengths, roughness, and warping. The quality indicators of furniture panels are regulated by the requirements of the customer or regulatory documents. Store the slabs in dry, heated rooms.
Rice. 18 Format-edging machine for cutting edges according to format
Rice. 19 Use of trimmers when trimming panels
Rice. 20 Wide sanding belts for surface treatment of furniture panels
Rice. 21 Scheme of two-stage processing of furniture panels in grinding machines
Rice. 22 Furniture panel
Rally
When considering carpentry joints of wood parts, it is worth noting such a variety as joining. It is used for joining narrow parts. This allows you to obtain a workpiece of greater width. In rare cases, this technique is used to increase thickness.
The front sides are veneered. They are covered with wood, which belongs to the category of valuable species. Cohesion involves the following types of connections:
- Into a smooth fugue. In this case, an adhesive composition is used. The edges of the parts are firmly welded to each other. Then they are glued together. Next, the workpiece is placed in special equipment. These can be presses, workbenches or squeezes. In this case, screws, wedges and other fasteners are often used. The adhesive composition dries under pressure. It is squeezed out along the joint line.
- Dowels and spikes. Holes or sockets are made in the edges of high-quality jointed parts. Rectangular spikes or round protrusions (dowels) are inserted into them. In this case, the spikes should have a thickness of no more than 1/3 of the thickness of the parts.
- Into the tongue. A groove is selected in the middle of one of the edges. This is a tongue and groove, which should be no more than 1/3 of the thickness of the part. A ridge is made in the opposite edge, the configuration of which corresponds to the groove. Such connections can be rectangular or trapezoidal.
- At a quarter. In the edges, choose material up to half the thickness of the workpiece. Longitudinal recesses are made of the same size. They are called quarters.
- On the rail. It differs from a tongue and groove joint in the shape of the grooves. They additionally select a rail.
- On dowels. The grooves are chosen in the form of grooves tapering upward and along the length. They have a trapezoidal shape and a depth of 1/3 of the thickness of the part. Keys that have a beveled edge are driven into the grooves. It corresponds to the type of groove. This connection prevents the shields from warping.
- To the tip. A block is glued to the end edge of the shield. In this case, the shape of the tongue-and-groove can be rectangular, triangular or another profile. This connection is used for ends that are difficult to finish.
Glued timber structures
3.1. Advantages of laminated timber structures
Glued laminated wood structures are used in the manufacture of structures and products for construction purposes.
Due to its lightness, excellent aesthetic and thermal properties, high strength and fire resistance, laminated wood is increasingly used in construction and reconstruction projects. With its use, it is possible to create coverings for buildings for various purposes with spans of up to 100 m. Rich experience in using this material allows it to be used in the construction of residential, industrial or public buildings of any complexity.
Despite the fact that laminated wood structures are a fairly new material, they can be easily used not only in low-rise housing construction, but also in such socially significant facilities as sports complexes, water parks, shopping centers, and bridges. Naturally, projects must comply with all existing building codes and requirements. If there are any deviations, then the project may provide for compensatory measures (coating structures with protective impregnations) or the development of special technical conditions.
For the manufacture of laminated timber structures, coniferous and deciduous wood is used. The type of wood is determined by the purpose and operating conditions of the structures. For the manufacture of load-bearing structures, mainly softwood lumber (pine, spruce, larch) of at least grade II according to GOST 1713% 2007 is used. For the manufacture of non-load-bearing structures, mainly softwood lumber (pine, spruce, larch) of at least grade III according to GOST 1713-2007 is used.
The safety and durability of laminated wood structures to a certain extent depend on the type and brand of glue used, its operational and technological properties. The main performance properties of adhesives used in the production of laminated wood include the strength of the adhesive joint, i.e. its ability to maintain strength over a given service life of the product; elasticity of the adhesive connection; water resistance as the ability of an adhesive joint to maintain strength after prolonged or intense exposure to water on products; frost resistance, biostability, temperature and fire resistance, i.e. the ability of the adhesive to maintain strength when exposed to high temperatures and open fire. Adhesive systems are characterized by a variety of resin compositions with different properties, hardeners and fillers used, and methods of applying the adhesive.
When choosing means and methods for protecting wooden laminated structures, the main attention should be paid to protecting them from alternating wetting and drying. If the requirements for structural prevention are observed, the probability of failure of massive cross-section wooden laminated structures in buildings as a result of biodestruction is so insignificant that, as a rule, it is not necessary to subject them to bioprotective treatment.
According to the functional purpose of products for processing laminated wood structures, they can be divided into four main groups:
- decorative;
- moisture-proof;
- bioprotective;
- fire retardant.
In practice, we often encounter the need to carry out complex and combined processing of laminated wood. For example, if during operation it is possible that the wood may become moistened, which can lead to the appearance of fungi, then it is necessary to provide protection for laminated wood structures not only from biodegradation, but also from moisture.
In some cases, in addition to biomoisture protection treatment, fire protection of laminated wood structures is required for fire safety requirements. To protect the ends of massive glued elements from moisture and delamination during operation in conditions of high or variable humidity, waterproofing mastic compositions are used.
The use of laminated wood as a structural material is facilitated by a number of its properties:
- low dead weight with high strength;
- high factory readiness of structures;
- manufacturability of products of various sizes and shapes; ease of assembly and processing of structures on the construction site;
- replenishment of the raw material base.
In civil engineering, laminated timber structures are attractive due to their ability to create a variety of structural schemes, including spatial ones.
An important difference between laminated wood structures and reinforced concrete and metal ones is the ease of manufacturing individual products. In civil buildings such as gyms, indoor markets, arenas, pavilions, the use of laminated wood structures reduces the weight of the coating by 4–5 times, the labor intensity of installation by up to 20%, and steel consumption by up to 50%.
The advantage of laminated wood structures is the ability to create structures of almost any size and shape. However, the design and manufacture of original structures is advisable only for individual buildings and structures, including those unique in size or technical solution. In other cases, standardized structures and their elements that are more accessible for mass production should be used.
3.2. Technological process for manufacturing laminated timber structures
The technological process diagram for manufacturing laminated timber structures is shown in Table 1.
We will consider the technological process of manufacturing laminated veneer lumber for load-bearing structures using the example of the Nizhny Novgorod Woodworking Plant DOK-78 enterprise.
Table 1. Scheme of the technological process for manufacturing laminated timber structures
| № p/p | Operation | Image | |||
| 1. | Drying lumber to a moisture content of 8-12% | ||||
| 2. | Preparing base surfaces for splicing | ||||
| 3. | Cutting out defective areas | ||||
| 4. | Length splicing | ||||
| 5. | Milling the lamellas before gluing along the width | ||||
| 6. | Width gluing | ||||
| 7. | Milling a mini-tenon at the ends and gluing panel blanks along the length | ||||
| 8. | Milling workpieces to obtain precise geometric shapes | ||||
| 9. | Applying glue to the surface | ||||
| 10. | Gluing straight timber | ||||
| 11. | Gluing curved beams | ||||
| 12. | Final machining to obtain precise geometric shape | ||||
| 13. | Final machining of curved timber on a specialized four-sided planer in order to obtain an accurate geometric shape |
The technological process for the production of laminated veneer lumber begins in a warehouse, where softwood timber is sorted, after which edged lumber is produced on a sawmill (Fig. 23).
Next, the lumber is dried in drying chambers with automatic control programming, heating, ventilation and humidification functions (Fig. 24).
Rice. 23 Production of edged lumber
A four-sided longitudinal milling machine processes the sides of the lamellas to give the correct geometric dimensions and expose defects (see Fig. 25). Smooth workpieces of the required dimensions of rectangular cross-section with a straight edge come out of the machine.
Rice. 24 Dryer with bags of lumber
Rice. 25 Four-sided planer
The automatic cross-cutting machine of the optimization line cuts out defects marked by the operator in automatic mode. Defects are marked with fluorescent chalk, which is recognized by a camera located on the saw. If there are cracks at the ends of the boards, they are automatically cut out without prior marking. The waste is discarded, and the quality blanks are sent to the lengthwise splicing line onto a toothed tenon.
On the splicing line, a toothed tenon is first milled at the ends of the workpiece, and then glue is applied to them and the workpieces are pressed into a board or beam of infinite length, which is then cut to the required dimensions. After this, a technological holding period is carried out to harden the glue for up to 8 hours, depending on the type of glue.
A four-sided longitudinal milling machine plans lamellas from the upper and lower surfaces of the part.
The glue-applying machine (Fig. 26) applies glue to the surface of the part, after which the workpieces are fed into the press for gluing (Fig. 27).
Rice. 26 Applying glue to the surface of the part
Rice. 27 Press for gluing laminated timber structures
Pressing mode:
- room temperature, °C 16;
- glue temperature, °C 18 ± 1;
- glue viability, hours 2–4;
- glue consumption, g/m2 250–350;
- open time (from applying glue to assembly), min 10;
- closed holding time (from assembly to pressing), min 30;
- pressure, MPa 3–5;
- pressing time, hours 8–10;
- holding time after pressing, h 8. Transportation of glued workpieces is carried out by a workshop crane.
The beam milling machine performs two- or four-sided processing of straight or bent beams with or without chamfer. Currently, machines with working widths from 400 to 2600 mm are used for these purposes. When producing only straight beams, a roller conveyor must be located before and after the machine; for straight and bent beams, a movable trolley is required, since the planer itself is installed on a turntable and rotates depending on the radius of the beam. Laying the part in front of the machine and removing it after processing is carried out using a crane, and for small products - using a stacker.
Finishing equipment includes a beam trimming machine and a machining center. Numerous hand tools are also required, used to form various mortises, drilling and milling necessary for building structures.
With the help of a pusher, the beam is sent by a roller conveyor to a cross-cutting machine, where first an incision is made, and then the beam is cut to lengths in accordance with a given program.
The packaging operation is necessary to protect the beams from contamination and moisture during transportation. Typically, the products are wrapped in film (sections from 6 × 12 to 16 × 36 cm and a length of 12–18 m are considered standard) and then placed in a temporary storage warehouse.
To protect against moisture and destruction of the adhesive layer, epoxy putty is applied to the end surfaces of the structure at the workplace.
Putty application mode:
- air temperature, °C 18–20;
- relative humidity, % 65–75;
- putty consumption, kg/m2 1.9.
The next operation in the production of glued structures is finishing, which is carried out in the finishing areas. The structures are placed in bags and, using a crane, transferred to transport carts and removed from the workshop for further processing. Trimmings, shavings, and sawdust are removed using pneumatic transport.
Application of glue
Carpentry joints are often made using glue. This is a common technique that is used in the production of furniture and other products. If you connect wood using only glue, you get a completely strong joint. Modern compositions have high strength after hardening. This result can only be achieved if the parts have been correctly fitted and connected correctly.
This method is used not only for panel connection to a smooth reveal. The technique allows you to glue plywood onto the frame and perform cladding. Also, when gluing several thin pieces together, a thick part is obtained.
Glued laminated timber technology
4.1. Application area of laminated timber
The production of construction parts from laminated veneer lumber significantly improves the strength and performance characteristics of products. Beams made of laminated veneer lumber are used in the construction of floors, roofs and ceilings (Fig. 28). Walls are also made from laminated veneer lumber (Fig. 29).
Rice. 28 The use of laminated wood beams in wooden house construction
Rice. 29 House walls made of laminated veneer lumber
Glued laminated timber is used in the manufacture of wooden windows (Fig. 30).
Rice. 30 The use of laminated veneer lumber in the manufacture of windows
Adjacency
The carpentry connection can be made using an abutment. This is a type of corner joint.
In this case, the end of one bar is adjacent to the middle of another part. This connection is made halfway across the tree (overlay). The tenon can be oblique or straight, semi-secret or through. In some cases, the connection is made on dowels.
Joiner's tenon joint (tenon and groove)
When creating any structure, fastening methods are always developed that can ensure reliability, the possibility of long-term operation and a neat appearance. To solve these problems, so-called tenon joints are used in wooden products. The basic principle of fastening two parts is to create spikes in one part and grooves (eyes) in the other into which they are inserted. Using carpentry tools, both parts are processed with precise adherence to geometric dimensions. This ensures reliable grip, especially if plywood is used as the material. After this, the product can be used without the use of additional fastening elements. However, to increase reliability, wood glue or additional fasteners are used.
Socket-spike connection
Tenon joint elements.
Tenon joints are well known to every craftsman. As a result of using this method, there is a guarantee that the parts will receive the most rigid and durable adhesion. Carrying out the steps here requires attentiveness and a little experience. That is why beginning craftsmen do not resort to this method so often.
To fasten wood in this way, one element is equipped with a tenon, the other with a groove. It’s great when the parts of wood being fastened are of equal thickness. If this is not the case, then it is recommended to make a groove (or socket) on the thickened part. To facilitate the process of screwing in screws, drilling is done in advance. Take into account that the holes made must have a diameter of 2/3 of the circumference of the screw. The depth of the holes is made slightly smaller (about 0.5 cm) than the length of the screw.
The wood on both components must have the same degree of moisture. This fact should not be discounted, since as the tree shrinks, the tenon may become smaller in size, which will negatively affect the strength of the fastening.
Half-tree connection
The use of this method requires a highly qualified specialist.
In each part of the tree, a selection is made that corresponds to the width of the parts being fastened. The depth is equal to half of their thickness. Any sampling angle can be provided, but such that it coincides on each workpiece.
Only if all the rules are followed, a tight connection of the elements with each other will be guaranteed.
To fasten parts in this way, glue is first used, and then nails or screws.
If necessary, the connection is made partially: the end of one wood element is cut off, and a sample is made on the other. Each of the tenons is cut at 45 degrees.
So you have looked at the main ways to connect wooden elements. Choose the one that is acceptable and get to work.