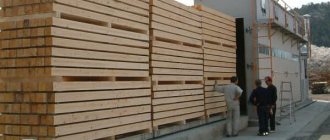
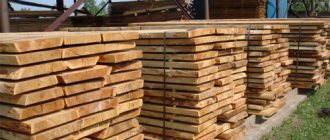
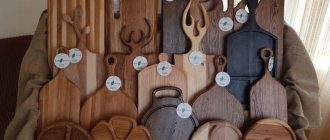
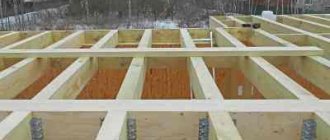
Any lumber is obtained by longitudinal sawing of a log. The result is bars, slats, and boards of various thicknesses necessary for construction and repair. Only dry lumber is used in construction. They have higher quality indicators. To dry wood at home, you can equip a special do-it-yourself lumber dryer. The construction process of this structure will take a lot of time. But as a result, the home master will always be provided with high-quality materials for performing various works.
The quality of the timber depends on how dry the wood is. The moisture content of the timber should be 12%.
The importance of drying
compact drying chamber
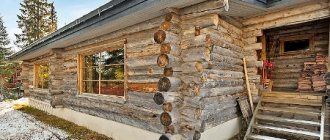
Since ancient times, wood that was cut down several years ago was used in the manufacture of wood products. Furniture made from damp or improperly dried boards will warp or dry out and crack. When drying, the material shrinks, raw wooden beams will begin to move over time, and cracks the width of a palm will appear in the walls of the log house. Mold grows in damp wood. But overdried boards are also bad - the material begins to absorb moisture and swells.
Drying is carried out with hot air or steam, the process is long and expensive, but it gives the wood additional strength, prevents changes in shape and size, and the lumber is stored longer.
Why dry wood?
Since ancient times, wood has been used by artisans only in a dry state, when it was left in the sun for a few minutes after felling.
It is very important that excess moisture from the wood completely evaporates. Especially in the production of wooden furniture
If the workpieces were wet, over time the furniture will dry out, begin to bend and deteriorate.
At the same time, the natural level of moisture in the wood must be maintained, otherwise, under the influence of the external environment, it will begin to absorb moisture and swell. If wood pieces are dried in the kiln too quickly, intermittent moisture zones may appear in the wood structure. Because of this, the finished product may crack. Very often the shape of long boards changes; they can bend and take the shape of an arc.
To eliminate risks, the workpieces must be thoroughly dried so that the excess water is evenly removed from all layers.
There are several types of drying chambers, most of which operate on steam or hot air. A high-quality drying chamber allows you to obtain a high-quality wood product that retains its original qualities for a long time and is not subject to deformation or exposure to the external environment.
You need to understand that it will not be possible to extract all the moisture from lumber, but this is not necessary. There are two types of wood moisture:
- Free - contained in the interfiber cavities, it is easy to get rid of during drying. Getting rid of this moisture ensures that the lumber retains its shape during storage.
- Bound is moisture contained in wood cells. Each type of wood has its own humidity level and it is difficult to get rid of it. Under natural conditions, getting rid of bound moisture can take several years.
The normal moisture range for dry wood is considered to be between 6 and 18%.
Drying modes
Wood shrinkage
There are several modes of drying lumber. In self-made chambers, the temperature increases in stages, removing moisture from the raw materials. Drying technology is selected taking into account:
- wood species;
- dimensions of lumber;
- final and starting humidity;
- dryer features;
- raw material quality categories.
The drying process can be high temperature or low temperature. In the second case, primary processing is carried out at a temperature not reaching 100 degrees.
Low temperature regimes are divided into categories:
- soft - during the drying process, lumber retains all its properties, strength and color do not change;
- normal - color changes slightly, strength decreases slightly;
- forced - when chipping and splitting, brittleness is possible, the color darkens.
The change in ambient temperature at low temperature occurs in three stages. The transition to the next stage is possible when the wood reaches the specified moisture content.
High-temperature treatment is carried out in two stages. The second stage occurs when the moisture content of the raw material decreases to 20%. This technology is used when preparing wood for the construction of secondary structures, allowing for color changes and a decrease in strength.
Types of drying chambers
drying chamber diagram
Drying of wood on an industrial scale is carried out in special chambers. Moisture is removed from the lumber by heated air and carried outside. The device carries out a full wood drying cycle. The room can be:
- prefabricated metal;
- constructed from building materials.
The latter are installed directly in carpentry shops or as free-standing buildings. The walls are made of reinforced concrete or brick. At large enterprises, several cameras are installed, combined into a module with a common control system and communications connections. Air circulates in the dryer horizontally or vertically-transversely. Wood can be transported to industrial dryers on rails on carts or laid out using forklifts.
Heat sources in the dryer:
- hot steam;
- smoke;
- radiant heat from special devices;
- heated shelves;
- electric current that passes well through wet logs;
- high frequency electromagnetic field.
The camera is equipped with basic and additional equipment. The main consists of systems:
- supply and exhaust ventilation;
- heat supply;
- hydration.
Additional equipment includes insulation of walls and doors, trolleys for laying material, psychometric equipment, and electric drive.
Industrial dryers are controlled automatically, small homemade dryers are controlled manually. Humidity is regulated by supply and exhaust ventilation and humidifiers. To measure the humidity in a room, a moisture meter is installed that collects data simultaneously in several places.
The following energy sources can be used to heat air: electricity, wood processing waste, liquid and solid fuel.
Optional equipment
As additional equipment, you can install automation in the drying chamber. Its properties:
Gas dryer diagram.
- the system is able to work with chambers of different sizes and with different heat sources;
- is relatively cheap;
- does not require special knowledge to maintain it;
- is easy to install;
- measures temperature and humidity in the chamber;
- provides fully automatic or semi-automatic operation of the drying chamber;
- automatically controls the operation of valves, dampers and fans.
To operate the system, it is enough to set the thickness and type of lumber and the desired final moisture content. The system helps dry various types of wood: pine, spruce, oak, birch, beech, linden, ash, maple, alder, hornbeam, poplar, aspen, sycamore. Every 2 hours, the automation takes readings of humidity and temperature and makes the necessary adjustments to the operation of all air heating and ventilation systems. The approximate cost of such a system ranges from $400-450.
Building a dryer with your own hands is quite troublesome and expensive.
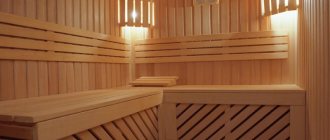
But the result covers all costs. This is especially important for those who make wooden products such as furniture and wood carvings. Dry wood costs several times more than raw wood. In addition, in your own dryer you can achieve a certain moisture content of the workpieces. Everything can be done independently if you have a strong desire and the availability of a suitable place.
Types of dryers
According to the method of air movement, chambers are divided into:
- with natural;
- with forced air exchange.
Chambers with natural air exchange are low-performing and the process in them cannot be controlled. Therefore, they are used less and less.
According to the principle of action, the following are distinguished:
- convective;
- condensation dryers.
Convection dryer
Condensation dryer
In convection chambers, the wood is blown with streams of hot air, and heat is transferred by convection. They can be deep tunnel or chamber. Logs are loaded into tunnel chambers from one end and unloaded from the other, moving through the chamber, the material is gradually dried. The cycle duration ranges from 4 to 12 hours. Such cameras are installed in large sawmills. Chamber dryers are more compact; a single microclimate is maintained throughout the entire volume. Allows you to prepare any type of wood to the required condition. Therefore, most industrial dryers are chamber type.
Using condensation drying technology, moisture released from the material is deposited on coolers, accumulates in containers and is drained outside. The efficiency of such a device is very high, but the process is long and accompanied by high heat losses. The technology is good for preparing hard lumber in small batches. The price of equipment and the cost of condensation drying are lower than convective drying.
Step-by-step manufacturing instructions
Making a homemade lumber dryer at home is quite difficult. For these purposes, you should use a ready-made chamber assembly drawing, or when assembling, rely on the instructions of the factory drying chamber. For production, you should use only high-quality materials and equipment, preferably new, old only after careful inspection and the necessary maintenance.
To make the simplest drying chamber, you should prepare the following materials:
- aluminum profile;
- sheet metal;
- insulating material and waterproofing film;
- sawdust;
- heat construction gun or boiler for drying.
The entire manufacturing process can be divided into the following stages:
- Site selection. It is better to place the dryer indoors or at least under a canopy. Placing it outdoors has a number of disadvantages: the frame of the dryer can corrode, the level of heat loss increases and the drying process becomes more complicated due to high air humidity. Placing the camera indoors requires compliance with fire safety rules; it is better when the work space is separate from the living space, does not have flammable elements, has several exits and ventilated windows.
- Laying the foundation. The foundation can be made of any type; if the floor in the room is flat and well concreted, you can install the camera directly on it. The foundation can be built from concrete or metal profiles, or pipes.
- Installation of the frame. An aluminum profile is best suited for these purposes, but other materials are also suitable. Depending on the choice of material, the frame is assembled using bolts and nuts or welding. The shape of the frame is selected individually; the easiest way is to make the chamber in the shape of a parallelepiped.
- Frame covering. The pre-installed frame is sheathed with sheets of steel or aluminum.
- Installation of insulation. Mineral wool is excellent for these purposes; an insulation thickness of 10-15 cm is sufficient.
- Bottom coating. The bottom must be covered with waterproofing film and covered with sawdust.
- Installation of stacks. Supports are installed on the walls of the housing so that the stacks rise above the bottom. Lumber is stacked in such a way that there is free space between the boards for hot air to pass through.
- Installation of the heating element. For this, a construction gun is best suited, which runs on electricity, heats the air and creates its circulation.
- Installation of electrical equipment. First of all, you should install an electric thermometer to monitor the air temperature, as well as a humidity sensor.
By following the manufacturing scheme, having high-quality materials and equipment, you can easily obtain a high-quality drying chamber that will serve the owner for many years.
Setting up a homemade dryer
solar wood drying chamber
In order to make a dryer with your own hands, you can do without drawings. It is necessary to provide:
- camera room;
- insulation;
- heat source;
- fan.
The area of a dryer built by yourself usually does not exceed 9 square meters. meters. In a square-shaped room it is easier to ensure optimal movement of warm air. It is desirable that one wall of the chamber be made of concrete slabs, the others made of wood. All walls are insulated from the inside in two layers: polystyrene foam and foil board. An excellent and free insulation material is wood shavings. And the foil can be replaced with penofol, which perfectly reflects heat.
You can build a separate drying room with your own hands from aluminum; such a structure will last a long time. The frame is made of profile, it is sheathed with sheet metal, which is insulated from the outside. The thickness of the insulation is at least 15 cm. The floor is covered with roofing felt, and a thick layer of shavings is poured on top as thermal insulation.
Care must be taken to thoroughly seal the front door!
The heat emitter can be made in the form of pipes or heating radiators. The water temperature should be 65-95 degrees. It is heated by an electric boiler, wood stove, or gas boiler. For a small chamber, even a two-burner electric stove is sufficient. If the stove is located directly in the room, you need to line it with bricks. The brick will accumulate heat and gradually radiate it into the dryer. It’s easy to equip a convection chamber with your own hands by installing a fan heater as a heat source.
When setting up a dryer for your home woodworking workshop with your own hands, it is important to follow fire safety measures. There should always be a fire extinguisher near the building.
Constant circulation of warm water, which is provided by the pump, is important. To ensure that heat is evenly distributed throughout the room, a fan is installed. The workroom is equipped with a wet and dry thermometer.
To make it easier to load the board into the chamber, you can use a trolley on rails. And to increase the usable area, shelving is built on the walls.
The step-by-step instructions are as follows:
- We are building the foundation.
- We are building the frame.
- We cover the frame with sheets of metal.
- Installation of thermal insulation.
- Cover the floor with film and sawdust.
- Installation of supports from bars.
- Installation of heaters and fans.
The design of a homemade chamber for drying lumber in the video:
DIY board dryer using wood - Metals, equipment, instructions
Drying is a mandatory stage in preparing wood before processing. To prevent logs from becoming deformed, they are dried under certain conditions, which are created in drying chambers. For your home workshop, you can make a wood dryer with your own hands.
Board dryer: creating and using a drying chamber
All photos from the article
A do-it-yourself board dryer is made if there is a need to process a large volume of unprepared wood. Of course, you can immediately purchase blanks with optimal humidity, but in this case the costs of purchasing the material will be very high. So the construction of a special device can be quite effective from an economic point of view.
In our article we will tell you. How to dry wood, and we will give recommendations on how to independently arrange a drying chamber.
To use dry wood, you don’t have to spend money on buying it - you can bring the humidity back to normal on your own