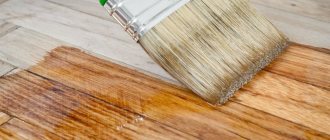
It is no secret that even with ideal processing of raw wood, over time its surface becomes fleecy, making finishing difficult.
When drying boards, the properties of the material should be taken into account.
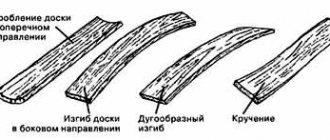
Such boards are difficult to sand, and the paint and varnish become cracked and crumble.
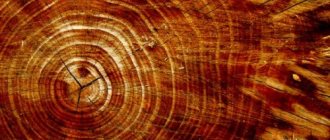
Such defects are a consequence of uneven drying of the layers. The peculiarity of drying is that the top layer of material always dries faster and at the same time decreases in volume compared to the inner layers. You should know that in winter the wood of a growing tree has minimal moisture content, and in spring this indicator is maximum.
In this regard, if you decide to harvest wood, do it in the optimal period, with almost complete absence of juices. This way the boards will warp and crack less. The more the wood dries out, the more numerous and deep the cracks are. If the wood is soft, the boards will dry out less. In addition, the degree of wood shrinkage is taken into account. Here, different tree species have their own characteristics.
Atmospheric drying of boards.
There are three groups in total. Low-drying species include willow, spruce, cedar, pine, and poplar. The middle group includes linden, oak, elm, aspen, and ash. Severely declining species include birch, larch, apple and maple.
When drying boards at home, you should take into account the properties of the wood, this will help you choose the right material. How to dry boards correctly so that cracks do not occur and the quality of the material is not lost?
Wood drying methods
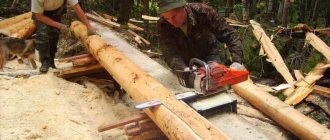
Every carpenter, both amateur and professional, is always concerned about the issue of drying boards. Any wood is saturated with moisture. It is important to remove this moisture in such a way that this noble material does not warp. Harvesting is done in late autumn or even in winter. In this case, there will be little moisture in the boards, and the master will only need to dry them properly. There are many ways, and first of all, drying boards depends on the conditions in which it is supposed to be carried out. Of course, the drying process at home will differ from the technologies used on an industrial scale.
Infrared drying of wood.
But individually you can get excellent results. If you decide to dry the wood directly while standing, then similar actions can be carried out from the beginning of spring and throughout the summer. Having chosen a tree, you should remove a fairly wide ring of bark closer to the roots. Thus, water stops flowing into the crown, and the tree gradually dries out. This drying method is facilitated by the presence of foliage, as it literally draws moisture from the trunk. When the tree dries, it can be felled and sawed into naturally dried boards.
There is another similar method. In this case, the tree is cut down, the trunk is cleared of two-thirds of the bark, and the branches and leaves are left. For two weeks, the foliage pumps out moisture like a powerful pump. It would take months to remove it from boards outdoors.
Air drying wood
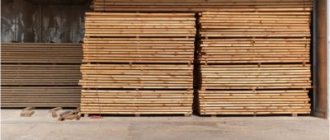
At home, the best option for drying boards is to simply dry the wood in the open air. The boards should be under a canopy, protected from sunlight and precipitation. You should prepare a level base under the canopy; for this you need to use logs, bars, rails, thick pipes, etc. Boards are laid across them. It is important that the distance separating the boards from the bottom layer of soil should not be less than 30 cm. There is usually damp soil under the stack, so it is best to cover it with suitable material, such as roofing felt. In addition, it is quite possible to use straw and hay.
Air drying of wood.
The base beams must be positioned so that the surface of the pipes or bars has one plane. You don't have to worry about keeping the base of the stack strictly horizontal. It is more important to ensure their uniform plane so that deformation does not occur under the influence of load. Having planned drying using this method, you should know that the boards will dry quite slowly, for at least several months.
In the summer, drying of the boards goes faster. The ends of the boards should be coated with a lime solution of a creamy consistency and a little wood glue should be added. You can also use oil, drying oil, or any paint to process the ends. Cover the stack from the sides from blowing and slanting rain. Thanks to such safety measures, you will protect the material from cracking, which occurs during rapid drying. We must not forget about the spacers; they are placed between the layers of boards, the distance is 1 m from each other. The location of the outer gaskets should be flush with the ends.
Drying boards on a cement floor
Concrete is capable of absorbing moisture, and the method of drying boards directly on a cement floor is based on this property. In this case, the raw boards are laid out on a cement floor, which must be dry and clean. It is important that the boards should be turned over several times during the day so that the planes alternately adhere to the cement surface. If you are a craftsman who knows the mechanical properties and structure of wood, then using an axe, chisels, saw and other tools you can direct the drying process at your discretion.
Cement absorbs moisture from the wood, which helps dry the boards.
When starting to dry boards at home, it is important to always take into account that this action is carried out outdoors and in the absence of direct sunlight. In this environment, the material is dried to a moisture content of approximately 25%. At home, the drying room should be ventilated and at the same time free from drafts. The presence of any heating devices in the room where the boards are laid to dry is unacceptable. Also, if you place the boards near metal, they may darken.
If the boards are small and there are not many of them, some people even place them in the apartment to dry. In this case, a balcony or loggia will not be suitable, although many people leave the boards in such a place. It is best to put them on the mezzanine. The boards intended for drying are stacked in stacks; they should not be dense; arrange them with slats or bars. You should always take into account that freshly sawn boards quickly darken upon contact and rotting begins.
How to dry timber
This time we will talk about how to dry timber. Everyone knows that when constructing various types of wooden buildings, dried wood is usually used. After all, it is not worth laying raw wood, which may later bend, crack or even rot. I'm not even talking about various insects. So how can you deprive timber of moisture? So that there are no cracks and the humidity level is at the right level? After all, only proper drying will improve the mechanical qualities of wood and prevent its warping, rotting and cracking. As we understand, drying the timber will increase the strength and durability of the entire building. Note that moisture can be free or bound. Free moisture evaporates quite easily, while bound moisture evaporates quite slowly. Moisture first actively leaves the outer layers. This phenomenon is a source of considerable tension. This leads to stretching of the surface and the appearance of cracks. As we understand, the timber simply needs to be dried, otherwise its quality will be seriously questioned due to moisture.
Wood is divided into the following categories according to its shrinkage coefficient:
- low-drying – pine, spruce, fir, white poplar, cedar
- medium-drying - beech, oak, aspen, elm, black poplar, ash, small-leaved linden
- highly drying - hornbeam, Norway maple, birch, larch.
The moisture content of wood is determined by the ratio of the mass of water in the wood to the mass of the dryest wood.
How to dry boards quickly
Drying wood using waste.
Sometimes it is necessary to dry the boards in a short time. How can you quickly obtain dried wood? There is a method that carvers have been using since ancient times, and it has not lost its relevance today. For this purpose, a fresh board is wrapped in paper; from 5 to 15 layers are required. After this, you need to additionally wrap it in cellophane and make holes in it.
The board prepared in this way should be placed on a warm radiator, or on a windowsill. During the drying process, moisture is absorbed by the paper, so it needs to be changed several times a day. In this case, the board is periodically turned over. If the board is 3 cm thick, then you will need to dry it for no more than 4 days. If the workpiece is larger, more time is needed, but the process also goes quite quickly. The disadvantage of this method is that the board warps, but this shortcoming can be corrected by simply working with a plane.
Rules and recommendations
Before drying the material, it is recommended to remember the following rules:
- Oak wood dries out easily. This means that when the humidity drops below 7%, the product will begin to crack, both inside and out.
- The longest time will be required to dry fresh wood with a moisture content of 25%.
- If you start drying immediately by raising the temperature above 50 degrees, the internal capillaries of the wood will begin to collapse and the product inside will become covered with cracks. This will not affect the appearance, but the fragility increases by 75%.
- High-quality drying is carried out only by maintaining uniform temperature and humidity.
How to properly dry oak is planned, since the final percentage of moisture depends on the tasks and purpose of use of the product. The tasks of drying oak can be considered in the table:
| Task | Permissible final percentage of humidity,% |
| Drying without changing linear dimensions | 30 |
| Transportation | 20–22 |
| Operation and production of furniture elements | 6–12 |
Complete drying is used only in the manufacture of furniture or small interior design elements. For medium and large sized lumber, processing for transportation and storage is sufficient.
Drying freshly purchased lumber
Forced drying of wood.
Often, summer residents who have bought fresh, rather expensive lumber, handle it very recklessly. Therefore, it seems that the boards were purchased only to turn them into rotten places. Fresh boards turn black very quickly if they are not dried according to all the rules. The main thing is that no special knowledge or tools are required here. All you need is fresh air and a little attention. Thanks to natural drying, excellent dry lumber can be obtained. At the same time, you should be prepared for the fact that sometimes you have to wait a year or even more. To get dry boards on time, construction should be planned in advance, since any work with dry boards is a pleasure for a professional, and even beginners can handle it quite easily.
Raw material always causes a lot of problems, and subsequently you have to redo a significant part of the work. It is important to correctly choose the place where you will store the boards; the quality of drying largely depends on this. What are the most favorable places for drying boards in your summer cottage? Of course, all those that are protected by a canopy are better, since in this case there is no need to install additional shelter. Also, don't make the stack too wide, no more than 1 meter. Any height is allowed.
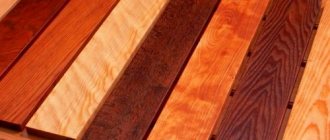
Features of drying various types of wood
Each type of wood requires its own approach to drying the boards. Let's look at the features of drying pine, birch, larch, fir and fruit tree blanks.
- Birch is a capricious wood; to avoid deformation, it is necessary to cover the ends and cross sections of the boards with paint or PVA glue. Otherwise, these places will dry out faster than the rest of the board. In addition, cracks may appear on birch due to drafts, so it is necessary to dry it in a ventilated room, but without sudden air currents.
- Pine dries more easily and irreversible changes do not appear in it as often. Therefore, it is often laid out in stacks on the street under a canopy, sometimes turning the boards over to avoid rotting in places where they come into contact with each other.
- Cedar is usually dried in a special chamber, since it is necessary to maintain a temperature of 25 degrees and a humidity of 18%. But some craftsmen organize this process on a site under a canopy. In addition, like birch, cedar sections are coated with paint, glue or lime to reduce the likelihood of cracks. True, defects form less frequently on cedar, since it is a harder wood.
- It is also recommended to dry larch in a chamber under the same parameters as cedar boards. Drying outside is possible, but it will take a long time. In a special dryer, larch becomes ready in five days.
- Drying fir is only possible in industrial conditions, since before the main process begins, all boards must be doused with steam. Next, the boards are subjected to heat treatment in a special chamber, and the drying process begins.
- You rarely see boards made from fruit trees, but craftsmen sometimes have to dry wood blanks after scheduled felling of cherries or pears in winter (when there is less moisture in the tree). According to reviews on the Internet, mezzanines or the back shelves of the garage, where it is relatively dry, are suitable for this. However, the tree needs to lie there for at least a year. It all depends on the thickness of the workpieces and the air humidity in the room.
Drying various woods
Each type of wood has certain properties. Therefore, each material requires its own special approach.
Article on the topic: How to properly make lighting in the garage
Birch
To dry the birch, all cross sections and ends need to be coated with special paint or PVA glue, this will help avoid deformation of the board. In order to avoid cracks on the surface of the boards, there must be good ventilation, but without temperature changes.
Pine
It needs to be laid out in stacks under a canopy; the boards should be turned over periodically to prevent mold from appearing.
This wood is dried only in special rooms, with an air temperature of 25C and a relative humidity of 18C. At the same time, the cuts need to be coated with glue or lime, this will ensure the safety of the boards from cracks.
Larch
Such boards need to be dried only in special chambers, since under normal storage conditions, drying will take a long time. In special chambers, it needs to be dried for 5 days.
Fir
This material is dried only under special production conditions; the boards are doused with steam and then dried at a certain temperature.
Tree trunks such as cherry or pear need to be dried in a dry place, preferably on shelves under the ceiling, the drying period is more than a year. Trees that were cut down in winter are suitable for construction purposes.
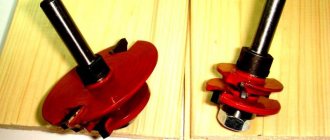
Strengths of kiln-drying boards
- additional selection before drying; very bad boards will not be put into the dryer
- at the planing stage there is another selection. As a result, the grade “A-C” is obtained (a little third, mostly first and second)
- after chamber drying, the board does not require antiseptic treatment. This saves time and money.
- when it gets caught in the rain, it picks up less moisture, dries faster, and there is less risk of fungus
Planed dry boards have one big disadvantage - their cost. And the second small one - under the guise of dry, they can sell you wet.
Method 2. Buy and dry
Buy a board with natural humidity in February, March. Place it correctly on the site, and around May, when it dries, begin construction.
How to dry properly
Like this.
At the sawmill, you collect scraps and lay each layer with a gap on all sides. The ends must be painted with moisture-proof oil paint so that it remains intact and there are fewer “sabers” and “helicopters”.
Look for GOST 19041-85 and GOST 3808.1-80 - how to store and dry the board correctly, how much it dries and in how long.
It's better to make a canopy. It will come in handy later during construction. When there is precipitation, there will be a place to cut, process and dry the next batch. The canopy must have walls. Maybe not everything, but it should protect from the sun. You can simply use unedged boards with slots. At the same time it will be purged.
If you don’t want to make a canopy, screw the bars to the staple and make a parody of a pitched roof. Cover the used one with corrugated board or slate from Avito.
The stack is surrounded by a frame made of boards and then wedges are driven into the spacer under the top boards of the frame. In this state, you don’t have to be afraid that the top boards, which are lying without load, will screw into place.
The sun should not hit the boards. You cannot cover it with film. It will bloom.
Valuable experience of self-builder Sergei:
I bought the first batch of timber in February and stacked it frozen. Aligned by level. As soon as the temperatures became positive, I painted the ends. Take any oil paint or drying oil with chalk (I don’t remember exactly), the point is to slow down the release of moisture through the end. It didn't help for unknown reasons. The edges are cracked. Cracks up to 30cm, but not many fully opened. The boards, especially the upper, unloaded rows, moved and twisted.
Taking into account all the previous mistakes, I laid the second batch of boards in October 2022 on a level base made of wooden railway sleepers. For a 6-meter board, 4 sleepers are quite enough. I laid cheap roofing felt under the sleepers. The stacks were made in the open air. I laid out the boards so that their width, taking into account the vertical gaps, was covered by a sheet (or two) of slate. I ended up with 11 boards wide, approximately 2800mm including spacers. The lining is a 50x50 block, then it will go through a thicknesser to the sheathing.
There are approximately 18 boards in height + bars between them - it turns out to be 1800mm. We place the bars exactly on top of each other. On the top of the stack, 2 or 3 boards are placed lengthwise on the narrow side of 50mm and something like a Mauerlat is formed. On these boards, across the stack we place bars (the same 50x50mm). We fasten all this together with steel corners and self-tapping screws. We place slate on top of these bars so that it lays in waves on the bars. We load the slate with bricks so that it does not get blown up by the wind.
The most important thing is that I sequentially, layer by layer, pierced the top 4 rows of boards in the stack with 100mm smooth nails to the underlying bars, 2 nails each, slightly diagonally. The nails then come out quite easily, but the boards in the stack do not warp and they are all perfectly straight now.
Do I need to antisepticize the board?
If opportunities allow, then yes. If you cover it with an antiseptic, you will definitely avoid the risk of mold.
It is especially important when you buy “fresh sawn” with a moisture content of 30-40%.
How to antiseptic?
The process itself is long and tedious. Choose a method for yourself in practice:
- Roller and brush.
- Electric spray gun or compressor and sprayer. There is an opinion that applying from the remote control is the worst way. When wood is wet it hardly absorbs it.
- Dig in the ground or build something like a bathtub out of boards, lay down banner fabric and pour in antiseptic. Pass each board through it.
- Movilnik. Unscrew the red can, put on a hose, which is lowered into a 5-liter bottle of antiseptic.
What to antisepticize with?
Choose what you can afford.
They praise the antiseptic XM-11. It, like any antiseptic, is toxic when applied. Moreover, the first class of danger due to sodium bichromate.
But after treatment, the wood is safe, since toxic 6-valent chromium transforms into a 3-valent state during a chemical reaction with wood cellulose. After drying, if you do not lick the boards, in theory, nothing harmful will be released.
How to protect lumber from thieves
The staple is usually pinned together with metal tape. They buy a can of bright paint and paint it in stripes across the board. The neighbors definitely won’t snatch away the tagged one, and disassembling and driving far away is also high risk.
Features of the choice of materials
Fresh wood can be compared to a sponge that is saturated with moisture. Natural moisture in wood can be external or internal. The purpose of drying wood is to completely get rid of internal moisture.
Drying wood at home is a long and complex process, but necessary. Damp boards quickly turn black and rot, their surface becomes fleecy and difficult to process. Once in a drier environment, the wood begins to dry out unevenly. This is the reason why the boards crack and deform, gradually losing volume, which is why the structures shrink.
Dry wood is much easier to process, it is much stronger and more reliable. Proper drying is the key to high quality wood materials and, as a result, the strength of finished products. Also, the quality of wood directly depends on the choice of primary material.
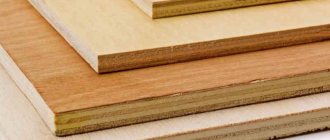
The fact is that different types of wood have different percentages of volume loss during drying, which is important to take into account when calculating the amount of building materials. Also, some species are more susceptible to cracking, for example, larch, birch or linden.
Plus, the details of the drying process depend on the initial amount of moisture in the wood. Trees have the least moisture in winter, when they shed their leaves, and most in spring. It follows that it is better to harvest and dry wood in the autumn-winter period.
Atmospheric drying and drying in liquid media
Diagram of overall dimensions of the drying chamber.
Atmospheric drying is a popular method for producing dry wood. It can be performed at home and does not require artificial energy sources.
The effectiveness of this method is determined by several factors, for example, air humidity, season and air temperature. In addition, a large room is required to accommodate drying equipment. The wood is often dried under cover or in a well-ventilated area.
The boards are placed in stacks with small intervals. To reduce the risk of deformation, place something heavy on top. In warm, dry weather, you can obtain lumber with a moisture content of 12-40%. If necessary, the humidity can be increased to a lower percentage by drying the workpieces in a heated room.
Drying in liquid media is used as a pre-treatment before impregnation with antiseptic agents. Hydrophobic substances (sulfur, paraffins or liquid metals) or mineral salts dissolved in water are used as a liquid agent. The duration of the process is limited by the rate of heat distribution in a piece of wood and the power of the drying unit. The liquid is heated to boiling point and lumber is dipped into it. The temperature must be maintained at the same level until free moisture is completely removed from the material. Typically the drying process lasts up to 20 hours.
So, the average duration of drying under natural conditions is from 1 day to several months, chamber drying is from 1 hour to several days. Of course, this is not the entire list of methods for drying lumber. There are also radiation, induction methods, drying in an electric field or at low temperatures.
Drying on the garage roof
For drying a tree such as pine, a garage roof is quite suitable; by laying the boards in the correct position, you need to provide them with access to air; pine dries up to 12% during the season. Before this, you need to sleep the roof with sawdust, put supports, and timber across it, only now we lay the boards.
- in this case, the stack of boards must lie exactly perpendicular to the gusts of wind;
- in a stack, the board should be 0.5 m high and 1.2 m wide;
- Now on top of the laid stack, you need to build a fabric canopy if the summer is not rainy, but a metal canopy when it rains often.
Drying boards inside the garage
You can dry the boards by laying them on the floor and placing a fan; for this you need a concrete floor. It absorbs moisture well, laying out the boards, they need to be turned over periodically, and the fan should be running constantly.
Article on the topic: Car repair in a garage as a business
Drying boards with infrared radiation. Thanks to this method, the boards can be dried for several days. To do this, you will need an infrared dryer or separate small heaters. Infrared cassettes are placed into a stack of boards, through three boards folded together. The last layer is covered with a board, and polystyrene insulation is reinforced at the bottom and top of the stack.
Technology
Not every person can use high-quality, expensive equipment for drying wood for their own needs. When drying a large volume of wood at home, you should remember several important points:
- choice of location;
- method of laying the material;
- installation of supports, fasteners;
- protection from precipitation.
Logs for drying or other lumber should be placed in open areas, for example on a personal plot or the flat roof of a small building, that is, in places with good lighting. You need to spread roofing material on the surface where materials are stored, then fill it with sawdust.
The correct placement of raw materials for drying should be based on the direction of air flow. The stack must be laid across, and not along, the movement of the wind (meaning its main direction). The optimal width of the stack is 80 cm. A distance of at least 30 cm must be maintained from the soil surface to the bottom board. This gap is necessary for good ventilation of the lumber.
The main purpose of installing support structures is considered to be the need to raise the lowest workpieces.
Article on the topic: How to issue a deed of gift for a garage in Ukraine
It is best to make the base in the form of square wells. Two such wells are laid out on the sides of the stack. They are connected to each other by a support gasket. A distance of 1.5 m is left between the side supports, while the upper part of the spacers should be in the same horizontal plane. The stack is tightened using a rubber band, which can be made from a car inner tube.
When drying in natural conditions, wood may suffer from precipitation, but there is no need to completely cover the boards.
To protect the wood, several wooden guides are laid on the top pads and roofing material (iron, corrugated sheeting) is spread to form a slope to drain moisture. The roof is additionally secured with rope to prevent the wind from blowing it away. An air gap of 8 cm is left between the metal and wood.
When drying lumber in air, the moisture content of the workpiece is reduced to 20%. Immediately after finishing the work, the ends of the workpiece with cracks must be cut off and the product brought to the required size. The material that will be used for interior decoration of residential buildings is placed in a heated room for drying.
The old way
There are many types of drying wood in industrial conditions, but evaporation technology was developed in ancient times. Our ancestors boiled the wood for several hours in salt water with the addition of small pine sawdust, then took it out and dried it in a cool place for three weeks.
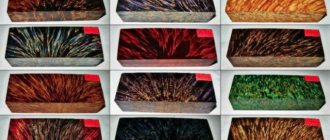
As a result of such processing, the workpiece retained its original structure, did not crack, and became flexible and elastic. During the evaporation process, excess moisture is released from the wood structure, the surface of the product acquires a beautiful chocolate color and a clear fiber pattern.
Modern users can lower the moisture level of a piece of wood by placing it in the oven, but in the old days, waxing was a popular method. In this case, the raw materials were placed in a paraffin solution, the temperature of which was at 40°, and left in the liquid for several hours.
Article on the topic: How to weld hinges on a garage door
As a result of this treatment, the surface of the wood acquired a beautiful texture and did not warp during use. After removal from the paraffin solution, the wood was kept for several more days in a dry, ventilated room.
The waxing method was used to process the dishes. After removing the wooden cups or other household items from the solution, all that remained was to varnish or cover them with patterns. The finished products acquired additional strength and did not crack.
To improve water resistance, the dishes were dried in a solution of linseed oil. In this case, the workpiece was placed in liquid and steamed over low heat for 5 hours. Despite its age, this method is also popular among modern tableware makers.