When there are many types of ready-made lining made of plastic and wood on sale, does it make sense to manufacture panels yourself? The fact is that if there is a large number of inexpensive straight boards, then setting up your own production will be justified. All you need is a milling machine and cutters for the lining.
Moreover, it is not at all necessary to buy a machine; you can rent it daily along with the cutters. If you want to constantly do this kind of work, then it will be cheaper to purchase equipment.
And, do not forget that the lining is not sold from all types of wood, but if you have any high-quality boards, you can make original slats from them, which are definitely not in the store.
Grooved board: scope and manufacturing features
Planed tongue-and-groove boards are a common building material, since wood is an environmentally friendly, strong and at the same time durable material. In addition, the presence of a tongue and groove simplifies the installation process. Below we will take a closer look at the features of tongue and groove boards and areas of its use, and also consider what to look for when choosing and how to make it yourself.
Advantages and disadvantages of the material
Improved with the help of modern technologies, tongue-and-groove floorboards have many advantages over conventional edged ones:
- The locking connection provides uniform load distribution, tight fit and absence of gaps between the boards, higher thermal insulation and noise absorption. The floor looks like a single seamless fabric and does not need to be sanded;
- The service life of the sheet pile is several decades. The renovation will get boring, but it will still look just as great. In this case, you can sand the surface and give it a different tone using stain or colored varnish;
- Standard sizes make it easy to replace a separate plank or combine different types of wood into an original ensemble;
- the smooth front side of the material looks luxurious immediately after purchase, it does not require additional sanding, it can be coated with varnish or protective compounds without the risk of raising the pile, it is pleasant and safe to walk on barefoot;
- The absolute environmental safety of this natural material and the glue-free connection allow it to be used in children's rooms and bedrooms. The antistatic effect does not attract dust to the floor surface and makes cleaning easier;
- Thanks to the presence of tongues and grooves on the back side of the product, the floor is more resistant to moisture, does not warp, does not dry out, and does not creak. Bottom ventilation prevents the development of fungus and mold;
- ease of installation allows even a novice specialist to lay the finished floor, which significantly reduces the cost of repairs;
- The variety of wood species, processing methods and various decorative effects provides ample opportunities for decorating the interior and giving the house a unique style.
Most often, tongue-and-groove boards are laid on reinforced joists
A smooth and beautiful wooden floor must be complemented with a skirting board to get a finished look to the room. You can read about how to attach a plinth to the floor in the material:.
Grooved boards have disadvantages, like any natural material:
- low resistance to water; if constantly wet, the material can swell and rot. To solve this problem, wood is impregnated with antiseptics and also coated with protective oils, waxes, and varnishes;
- the high cost of the material is due to its naturalness, the quality of the raw materials and the complexity of the processing technology;
- Fire danger is reduced by impregnation with fire retardants, which prevent the wood from igniting.
Techniques. What can you do when working with a router?
Using a hand router, you can cut out parts and products of various configurations - shelves, racks, railings and other parts. This tool is indispensable when used at home. For example, when restoring old furniture. Once you gain experience, it is quite possible to do the following things:
- Treat flat and shaped surfaces, facades.
- Cut out various recesses: imitation of panels, grooves, ridges. Perform end processing of wood.
- Punch holes.
- Apply various inscriptions - engrave.
- Insert door hardware – locks and hinges.
- You can make a complex connection - a spike. Ensure reliable joining of wooden parts.
List of necessary tools and devices for working with a router:
- Milling cutter
- Jigsaw
- Electric drill with drills
- Templates for cutting parts
- File
- Protective clothing
The depth to which it is planned to go deep is adjusted by setting the distance between the pin and the washer near the electric motor. A straight guide is used to maintain the distance from the edge of the workpiece.
How to make a circle with a router
Milling of various round holes is done with templates. They are performed using an adjustable rod compass, which is a metal rod. There is a height-adjustable center at one end, the other end is fixed in the holes in the base for the rip fence.
To work you need:
- Unscrew the stop screw.
- Ensure that the length of the compass rod is adjusted to the desired radius.
When milling external arcs, you should monitor the distance from the center to the inner cutting edge of the cutter, and for internal arcs - from the center to the outer edge. It is possible to secure the leg of the compass to the material by directly sticking the leg of the compass into the material if this part is to be thrown away as scrap. Otherwise, you can place a piece of plywood by gluing it with double-sided tape.
Processing metals with a manual milling machine
Processing metal (stainless steel or aluminum) with a milling cutter is not the best idea, since, unlike a metal processing machine, it does not have a gearbox or gearbox. However, in the absence of a professional tool, the device is suitable for one-time work. A manual milling cutter, due to its design and functions, allows processing in two planes: vertical and horizontal. When working, you should correctly determine the direction of movement of the tool.
Joinery joints using a hand router
Various connections that serve to strengthen structures, from furniture to building elements, are made using wood cutting tools. Some of the joints that can be made with a router are dovetails, tongue-and-groove joints, tongue and groove joints, and others. This can be achieved using various special cutters.
Processing edges with a manual router
There are two ways to remove the edge: with or without a template. It is better for an inexperienced carpenter to use a template. To process the edges of the board, you will need 2 cutters - with bearings at the beginning and end of the cutting part.
How to make a hole with a milling cutter
On the working site, it is necessary to mark the axis around which the cutter will move. Mark the radius from the cutter located further, make a hole and install the axis.
How to make a tongue and groove board with a hand router
To perform this work, you need high-quality material - dry, without visible damage. The board is secured to the table with clamps and marked with a pencil. A quarter groove is selected in the edge, quarters are selected on both sides in the opposite edge, forming a tenon. This completes the work.
How to mill a radius
To start working, you need to insert the cutter into the boring head. The boring head allows you to adjust the radius of the recess by moving it to the sides. The depth of the recess is adjusted by moving the milling table. The chamfers are removed with a cutter.
How to make precise cutting of chipboard using a hand router
When processing parts with a milling cutter, a margin of about 5 mm is made on each side. The router provides an ideal cutting surface after processing. Guaranteed to be free from chips and cracks.
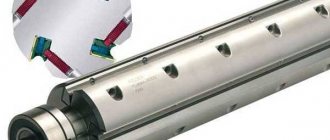
Types of wood cutters
In most cases, not all cutters will be needed, but only slotted ones. But others can also be useful for applying decorative notches. When purchasing a wood cutter for making lining, you need to consider the diameter of the shank. To do this, you should find out what collets are equipped with your existing manual router or machine. The most common cutters with shank diameters are 6.8 and 12 mm.
If the unit of measurement is inches, then there are only two options - ½ and ¼ inches.
Inch cutters and regular cutters (with shanks measured in mm) are not interchangeable. That is, they cannot be inserted into a “millimeter” collet, although it seems that the difference is only tenths of a millimeter.
According to the design features of the cutters there are:
- Monolithic - cutting edges and shank are one piece. This is the cheapest and most common type. When the working edges become dull, the cutters are thrown away.
- With replaceable cutting edges, the double-sided knives are removable and can be flipped to the other side.
- Prefabricated - cutting elements are welded (soldered) to the main rod.
- For soft woods, high-speed alloys are used, designated by the letters HM.
- If the surface being treated is hard, then carbide steels - HSS - are used.
- Slotted straight cutters - with their help you can get a rectangular groove; the working part of the cutter itself has the form of a cylinder with cutting lower edges.
- Grooved fillets are similar to straight grooved ones with a rounded working edge, resulting in the shape of the groove in the form of the letter “U”.
- Groove fillet V-shaped - the tool is used to produce various V-shaped grooves; they differ in the size of the groove and the size of the angles.
- Groove structural - after milling, the groove has the shape of the letter “T”, turned upside down. Or “dovetail” - a groove in the form of an isosceles trapezoid that tapers towards the top.
- Groove shaped - needed for creating figured carvings, working with edges; the groove resembles a funnel and other symmetrical elements.
- Edge machines - differ in that they are designed for processing ends and edges; often the design includes a bearing for working according to a template.
- Edge straight lines - needed to obtain a right angle between the upper plane of the workpiece and the end part.
- Edge molding - to obtain a semicircular edge in the form of a wave, and of different shapes (depending on which part of the cutting plane is used), double cutters may have adjustment of the gaps between the cutter blades.
- Seam edges - allow you to choose a rectangular groove, a quarter on a flat or curved workpiece. The processing depth is adjusted using the position of the router or the diameter of the thrust bearing.
- Edge conical - needed for creating various kinds of decorative chamfers, for working with edges before joining them with other products, and so on.
- Edge fillets - with their help, semicircular grooves are obtained. To ensure that there are no distortions during operation, 2 bearings are provided in the design of the tool.
- Curved edge cutters (multi-profile) - to create complex-profile side edges, the length of such cutters is longer than conventional cutters; a powerful cutter is required for normal operation.
- Edge semi-rod - needed to obtain a semicircular protrusion at the end.
- Combination cutters are used to create tenon joints between several boards, both for corner and panel structures.
Most of all, the work will require tongue-and-groove cutters for lining. It is with the help of this tool that a tongue-and-groove system is created to connect the panels during assembly. They come in a set of two pieces. And for work you no longer have to calculate the dimensions of the groove and tenon.
There are varieties of tongue-and-groove regular paired cutters and those that are designed specifically for creating lining panels. The latter are distinguished by the fact that they allow you to simultaneously grind a groove/lock and round the edges on the front side. Using ordinary cutters, you can make flat panels from boards, for example, for a garage, where decorative chamfers are not needed.
Combined frame sets are kits; the blades can be positioned on the main axis, depending on what kind of work is supposed to be done. They contain: one or more thrust bearings, a lock washer and a clamping nut.
Figurine - needed for decorative processing of edges when creating panels. Since there is a bearing, both straight and semicircular surfaces can be processed. The diameter of the working edge of such tools is quite large, so powerful electrical equipment is needed to operate.
There are horizontal, horizontal double-sided and vertical.
Techniques. What can you do when working with a router?
Using a hand router, you can cut out parts and products of various configurations - shelves, racks, railings and other parts. This tool is indispensable when used at home. For example, when restoring old furniture. Once you gain experience, it is quite possible to do the following things:
- Treat flat and shaped surfaces, facades.
- Cut out various recesses: imitation of panels, grooves, ridges. Perform end processing of wood.
- Punch holes.
- Apply various inscriptions - engrave.
- Insert door hardware – locks and hinges.
- You can make a complex connection - a spike. Ensure reliable joining of wooden parts.
List of necessary tools and devices for working with a router:
- Milling cutter
- Jigsaw
- Electric drill with drills
- Templates for cutting parts
- File
- Protective clothing
The depth to which it is planned to go deep is adjusted by setting the distance between the pin and the washer near the electric motor. A straight guide is used to maintain the distance from the edge of the workpiece.
Note! Some models additionally include a circular guide, which is used for milling circles with large radii. For circles with a radius of less than 25 cm, technological holes are made in the base of the tool for the centering pin, into which it will be inserted at a certain distance. Cutting grooves can be done using an angle stop.
General information
Tools and accessories
A vertical router, unlike a standard drill, has a flat base, namely a sole on which it will stand and move along the table or part being processed. The body will be fixed and begin to move vertically along the guides. In order to make a homemade router based on a drill, you need to make a stand and attach an electric drill to it.
If you wish, you can replace the plywood with laminate or chipboard of the same thickness. A cutter made from an electric drill will be much more convenient for work if the sole, that is, the base, is made of organic glass with a thickness of 1 to 1.2 cm. In this case, the work area will be clearly visible, as well as the markings on the board. Metal clamps and fittings should be used as simple as for water pipes.
The size should be selected according to the diameter of the drill body, just above the chuck. Secure the wood router with screws 0.5 cm in diameter and 2 cm in length. Self-tapping screws of this size are very often used to make crafts from wood. They can be used to attach brackets, shelves and hooks. Often, after repairs, screws remain, and they can be replaced with self-tapping screws, the diameter of which is 0.55 cm and the length is 1.8 and 2.2 cm.
In order to make a wood milling machine from an electric drill, you need the following:
- Wrench.
- Electric drill.
- Drills 0.4 and 0.8 cm.
- Spade or core drill.
- Electric jigsaw.
- Screwdriver.
As a rule, in a home workshop or garage you can easily find all the necessary tools, and a screwdriver can be replaced with a Phillips screwdriver, a jigsaw with a hand hacksaw for wood.
Milling design based on a conventional drill
Considering the power and speed, you can only make a light cutter from an electric drill. For high-quality processing of wood and boards, the working tool must be fixed on the table and the workpiece must be moved. The design with the top arrangement of tools will make it possible to make parts with complex configurations. Each home craftsman comes up with his own design, and they all differ in fastenings, as well as the placement of the electric drill.
The subtleties of working with a router at home
Having examined the technology that is used in production, we will understand the intricacies of making lining with a router at home.
At the initial stage, you need to stock up on boards planed on a circular saw and jointer (you can immediately buy ready-sawn material or make the necessary blanks yourself). All subsequent operations are performed with rigid fixation of the cutting tool and lumber.
All actions can be reduced to the following sequence:
- Setting the workpiece pressure. It is important to adjust the position of the board close to the stopper and securely fix it with clamps on the inside.
- Height adjustment of the cutter. It is important to clearly stabilize both cutters at the same height, otherwise the manufactured lining will be unusable.
- Wood panel processing. The workpiece is guided along the cutting element, forming a groove along one side of the board, and then, replacing the cutter, a tenon.
Making lining with a hand router is not difficult if you stock up on special tools and strictly follow the suggested recommendations.
How to make a tenon pick-up device
When forming tenons on wooden workpieces with a manual router, it is not fixed in any way in space and is brought to the workpiece manually. That is why it is very important that when using a power tool, the workpiece is in a device that can ensure not only its reliable fixation, but also the accuracy of the spikes formed on its surface.
The design of the simplest device that is able to cope with such tasks is:
- several fixed guides (lower, upper, side);
- movable bar, due to which you can adjust the sampling length.
Device No. 1 – for removing the tenon
Such a device is manufactured, the dimensions of the components are selected individually, in the following sequence:
- Along the edges of the plywood sheet, vertical side elements of equal height are fixed, with cutouts made in the central part.
- Guides are installed on the side elements along which the sole of the hand router will move.
- To limit the movement of a hand router along the upper guides, the side strips should be fixed to them.
- On a sheet of plywood, which plays the role of the base of the device, it is necessary to install a movable element, with the help of which the amount of overhang of the edge of the workpiece will be adjusted. For fixation, you can use a regular thumbscrew or any other suitable fastener.
When manufacturing a device of the proposed design, the following points must be taken into account:
- The height of the upper guides should correspond to the sum of the thickness of the workpiece and the small gap required to install the locking wedge.
- The cutouts in the side vertical elements are made of such a width that it takes into account the length of the tenon being formed.
Additional functions and equipment
Models of classic routers can be equipped with additional functions:
- smooth start. The engine picks up speed gradually, without a peak in energy consumption at startup.
- manual speed control. The function is rarely in demand; milling cutters generally operate at maximum speed.
- electronic system for maintaining speed under load. A useful feature: the higher the load, the greater the current supplied to the motor. But it cannot fully compensate for the loss of speed when there is simply not enough engine power.
- pipe for connecting a vacuum cleaner. Not available on all models. In practice, it is inconvenient to use. The vacuum cleaner makes extra noise, the adapter interferes with the movement of the tool, and the bag quickly becomes clogged with shavings.
- illumination of the working area. Can be useful in poor lighting. But the progress of work is controlled by the density of pressure on the workpiece and the finished profile, for which there is no need to look into the working area of the cutter.
Additional equipment included with the router:
- parallel stop. A necessary device when working with a milling cutter without a bearing, when processing workpieces with one flat side. It looks like a bar on two rods and plates, which are inserted into the platform eyes and fixed with thumbscrews at the required distance.
- compass. A device for sampling through holes or surface circles (arcs, semicircles). Inserted into platform eyes on one rod. The tip of the compass is installed in the center of the hole.
- replaceable collets. To allow installation of collets with different shank thicknesses, the kit may include different collets, from 6 to 12 mm.
- All kits must include keys for the collet.
Some models are sold with the full set of the above, others with selective ones.
After watching the video, you can familiarize yourself with the nuances of choosing a manual wood router.
An ordinary router can handle edges easily. To select grooves and tenons, holes for tongue and groove, additional marking will be required.
In general, a router is a universal tool that helps you perform simple and complex carpentry work and produce various, including expensive, unique products.
How to choose a groove with a router?
The solution to the problem depends on where the grooves are located and what size they are. Here are some recommendations for home craftsmen:
- The use of open grooves involves securing it to the tabletop and guiding the workpiece along the cutter.
- Accuracy is determined by the height of the cutter and the location of the bar.
- It is recommended to use wood waste for trial operations. This allows you to avoid mistakes.
- Sampling is carried out in stages, with several passes being carried out.
The main thing is to get rid of wood waste in a timely manner after completing each stage. Then the instrument will definitely not suffer from overheating. When doing the work, it is easiest to use a template cut out of plywood. They pass through it with the cutter itself, with the bearing installed.
What technical characteristics must be taken into account when choosing a router?
Which router is better to choose for home use? When purchasing, you need to pay attention to certain indicators. Experts give advice to initially study the power, spindle speed, stroke and additional capabilities of the device, and then choose the appropriate one
Power
The equipment is divided into:
- light type - with a weight of 2 to 3 kg and a power of up to 750 W;
- medium - with a mass from 3 to 5 kg, intensity from 750 to 1500 W;
- heavy - up to 6 kg in weight, with a capacity of 1500 to 2300 W.
The duration of continuous operation and the permissible length and diameter of the cutter for installation depend on the indicator. When purchasing for regular use, buy equipment with an indicator of at least 1500 W.
Standard Features
Spindle speed
The quality of surface treatment depends on this technical characteristic; a small number of revolutions is used for plastic and procedures with high precision. There are three main types of device:
- slow - gives from 10 to 20 thousand revolutions per minute;
- average - 20-30 thousand units;
- fast - over 35 thousand.
Cutting stroke
Important parameters include depth, which shows the functionality of the device. Household appliances deepen from 0.2 to 0.5 cm, professional ones - from 0.7 to 0.8 cm. The indicator depends on the working stroke.
Additional functions
The list of secondary functionality is presented:
- constant electronics - helps maintain the number of revolutions at a constant level, required when the equipment is under increased load;
- soft start - allows for a gradual start with increasing speed, which is necessary to increase the life of the tool;
- overload protection - automatically turns on when the device heats up, can turn off the power or report a problem through an indicator.
The device can be equipped with protection against accidental startup. It looks like a button on the case; without pressing it, voltage is not supplied.
Key for blocking switching on
Necessary materials
To make a wooden door with your own hands you will need the following materials:
- dry tongue and groove board;
- self-tapping screws;
- wood glue.
During the purchase, the thickness of the boards is selected taking into account the installation location of the door leaf. For an interior door, 25 mm thick wood is sufficient. For the front door, use a 50 mm thick board. After purchasing, it is advisable to dry the wooden blanks by laying them on a flat surface using pads.
Additionally, a mortise lock, hinges, handles, and a viewing peephole are purchased for the wooden entrance door. For an interior door, it is enough to take hinges and a handle with a latch.
A tongue and groove board is a flooring option made of wood and has a special, very convenient installation mechanism. It is this mechanism that makes tongue-and-groove flooring so popular, because even an inexperienced craftsman can handle the flooring process. Let's consider this mechanism in more detail.
A tongue and groove board has a special protrusion on one side of the board, it is called tongue and groove (recess) on the other side, this system allows you to install the floor like a construction set, without using other methods of strengthening (glue, nails, etc.). The tongue-and-groove board floor will be laid tightly, all boards will fit tightly together, leaving no gaps or cracks.
In addition, the lower part of the tongue and groove board is also equipped with grooves; they are needed there so that air can flow between the board and the base of the floor. This way the floor covering will be ventilated, this will protect it from dampness, mold, rot and fungus.
The tongue and groove board has a flat and smooth face. If you purchase ready-made boards, then such boards, as a rule, no longer require additional processing and sanding.
Grooved board - advantages and disadvantages
how a tongue and groove board and what distinguishes it from other types of floor coverings. Now let's study in more detail the advantages and disadvantages of this coating.
First of all, let's list the advantages. The tongue and groove board has quite a few of them.
Advantages of using tongue and groove boards:
- environmentally friendly floor covering. The tongue and groove board is made of natural wood and therefore is absolutely safe for human health.
— tongue-and-groove boards have high sound-proofing and heat-insulating qualities. This property makes it very suitable for use in both apartment buildings and private houses.
- ease of installation. To lay a tongue-and-groove floor, you don’t need to hire a team of professionals; you can simply lay it yourself, armed with free time and video instructions from the Internet.
- aesthetic appearance. A floor made of tongue and groove boards looks very beautiful due to the fact that the joints between the boards are practically invisible and the effect of a solid floor covering is created.
- long service life. The tongue-and-groove board is wear-resistant. If installed correctly, the floor will not bother you with unevenness, squeaks and other troubles.
Disadvantages of using tongue and groove boards:
- one of the main disadvantages is the high cost
— a tongue and groove board, if it is made from low-quality raw materials, is prone to warping.
Making a tongue-and-groove board with your own hands
Indeed, those tongue-and-groove board options that hardware stores offer are quite expensive. The high price of such a board is mainly due to the complexity of the technological process of its manufacture. For tongue and groove, special equipment is used, which fits one board to another with pinpoint precision. This is what determines how tightly the boards are held together when laying the floor.
How to make floorboards at home, technology and expert advice
Back
Today, the building materials market is bursting with an abundance of flooring products in a wide price range. However, consumers prefer natural materials, so they often choose boards for flooring. This is not surprising, because such material is characterized by a lot of advantages:
- Good thermal insulation. The material itself retains heat perfectly, and if the floorboard is also laid on a heat insulator, then such a house will be warm even in frosty weather.
- Good strength characteristics. True, this parameter directly depends on the type of wood used for manufacturing.
- Long service life.
- Low price. Unlike many materials, floorboards are really inexpensive.
- Ecological cleanliness. I think that no one doubts the naturalness of such material. Wood has been used for many centuries to make flooring in the house, and during this time the material has never shown itself to be negative.
However, there are no ideal materials, and wood is no exception. Among the disadvantages it is worth highlighting:
- Low sound insulation properties. The floorboard has a low level of sound insulation, but this deficiency can be corrected if soundproofing underlays are provided when laying the floor.
- It is not recommended to lay lumber in rooms with high humidity.
- Poor abrasion resistance.
- Lumber is susceptible to damage by fungi, and rodents and insects love it.
- Fire hazard.
Floor boards
Production
The production of floorboards is on a grand scale, because the popularity and demand for this material is growing every year. To produce high-quality flooring material, different types of wood are used. At the production stage, logs undergo several stages of processing; knots, branches, and mechanical damage are removed from them.
A large log is cut crosswise and then processed. After this, the blanks are sent to the workshop, where they are cut into individual boards. Of course, the technological process is wider and more complex; we are talking only in general terms about the production of floor coverings.
Lumber shop
Attention! For the manufacture of flooring, it is better to use coniferous wood; this option is attractive both in terms of price and quality. Although it is permissible to use maple or birch wood.
As already mentioned, not every type of wood is suitable for making floorboards. The most valuable species are larch and oak. But linden and poplar are generally not used for this purpose, because they do not have sufficient strength.
Aspen and pine are suitable for floorboards, but these species are not used so often. Although pine produces high-class products.
After the boards are processed, they are sent to the sawmill, then they are fed to a special four-sided machine for the production of floorboards, after which the finished product is again processed and dried.
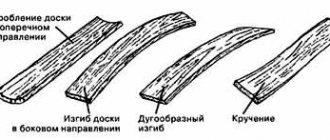
Wood for lumber productionWood defects
DIY floor boards
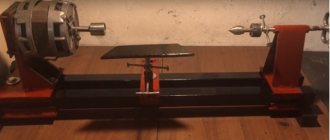
Prices are rising rapidly, and people are looking for different ways to save money, so craftsmen are making floorboards at home. However, in order to produce the material, you need to have a special manufacturing machine; in no case can you save on it, because the service life of the entire floor structure depends on the quality of the final product. Now we will tell you how to make a floorboard with your own hands, and what you will need for this.
DIY lumber
Before you start home production, you need to purchase a log, preferably rounded or timber. The prepared material will need to be dissolved on the machine so that several blanks are obtained, which will then turn into floor boards. The thickness of one such workpiece must be at least 20 mm.
Material thickness table
So, the material is prepared, but before cutting, it needs to be marked in order to determine the required thickness of the future flooring material.
After such cutting, the workpieces are dried under natural conditions until the wood moisture level is less than 50%. After this, the wood needs to be cut, for this purpose special cutters for floor boards are used. Cut to the desired width and length.
Floorboards are made no more than 2.5 m in length, but their width should be from 150 mm to 200.
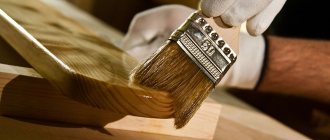
The manufactured workpieces are leveled and processed. For the first operation, you can use a plane, and for processing - abrasives. If defects are noted on the surface, they must be eliminated using special means, and then the area must be sanded. At the last stage, the boards are varnished, of course, if necessary. If you need to make a tongue-and-groove board, then you will need to mill the edge; for this work, a cutter is used for processing the floorboard.
Milling cutters
Note that when making floor lumber yourself, the amount of waste can be up to 30%, however, what cannot be used in its pure form can subsequently be used for other purposes.
Adviсe
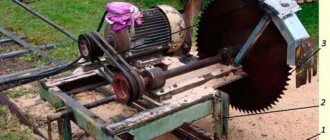
- If you decide to make floorboards yourself, but you do not have a three-sided machine on which to cut lumber, in this case you can use a circular saw.
Circular Saw
- Considering that the natural drying time of lumber reaches up to six months, when purchasing wood, ask the seller about the moisture content of the material; if it is much higher than the norm, then it is better to look for another option.
- If the wood offered to you has a lot of knots and other defects, then it is better to refuse such a purchase. The fact is that in a factory it will not be a problem to process such wood, but at home with such lumber there will be great difficulties.
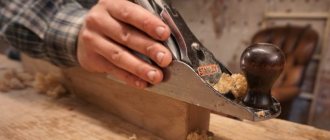
Do-it-yourself lining. We use a circular saw and router
Master class from the YouTube channel “ AlfFisher ”.
Prepared edged boards are passed through a thickness planer before processing with a circular saw. If there is no such machine, then it will be replaced by an electric plane, which is fixed between two bars. The distance between the bars is set according to the width of the lining.
After the slats are calibrated for thickness, the circular saw is set up. To set up a circular saw, make a template according to the following dimensions:
- spike - 4 x 10 mm;
- groove - 5 x 10 mm.
A cut is made with a circular saw set up according to the template, and the front part of the workpiece is marked with a red line. It is inconvenient to hold a 6-meter-long board when cutting, so they use clamps mounted to the size of the material.
A circular saw is used to cut out a ridge and groove on the workpiece.
When working with a circular saw, adjustments are constantly made using a template.
The quality of the resulting cladding material is checked based on the results of joining two blanks. On the front side, the tenon should fit completely into the groove, and on the back side of the joined slats there should be a gap of up to 1 mm.
To prevent the rail from warping when humidity changes, compensation grooves are cut. For a narrow board, one groove is enough.
Workpiece with compensation grooves.
On the front side, remove the edges at an angle.
The slats assembled into a shield have a reliable key, so the sheathed surfaces are not afraid of mechanical stress and look very attractive.
How does a hand router work?
The device of a manual wood router is quite simple. The device has a housing in which key components and elements are located. The most important of them is the driving force - the motor. A holder protrudes directly from the body - collets will be inserted into it. These are special adapters into which you can insert and fix cutters of different diameters.
Separately, it is worth mentioning the platform, which is usually made of metal. It can be attached separately to the body with rods. The lower part has a sliding plate made of smooth material - this will help the tool move smoothly from point to point. An important parameter is the stability of the platform. It is better if it is made of cast (for expensive models) or stamped (for budget options) material. This will ensure a better fit to the surface. The lower part of the platform is covered with a plastic cover, often removable, for easy replacement.
There are buttons on the body to turn it on and off. It’s good if they have a blocking button for company. When working, it is comfortable to use a parallel fence.
For a manual router, use the following settings:
- depth of work (steps from 1 to 10 mm);
- regulation of the number of revolutions (that is, the speed of rotation of the cutter).
All parts and assemblies require appropriate care. In a newly purchased product, this role is played by factory lubricant. However, in the future, this responsibility will be assigned to the user himself: it will be necessary to clean the dust and manually lubricate the moving parts.
A little about the price
Budgetary and resp. The most popular are tongue-and-groove boards made of softwood, but anyone who has ever wondered about purchasing them has probably noticed a decent price range among different manufacturers on the market.
At the same time, a high-quality board from one manufacturer can be offered to the consumer at a price lower than a low-quality board from a competitor. Needless to say, it is very tempting to use this fact to your advantage? In this short article we will not only indicate the required sizes, but also try to figure out where you can save money.
How to choose and what to focus on
To make the right choice, you need to decide on the type of router. Technical parameters affect performance, accuracy and ease of use. Power, for simple operations at home, 400 to 750 W of power will be sufficient. If you plan to use the tool in a small home workshop, you should choose models from 800 to 1250 W. And finally, more powerful devices consuming up to 2000 W are suitable for professional work. Rotation speed, the ability to work with materials of different hardness depends on this parameter. The lower the speed, the softer the material being processed should be. The number of revolutions per minute can range from 7 to 30 thousand. Sole, high quality devices have a molded sole. It is the basis to which guide parts, rods and adjustment units are attached. The base must be protected in the form of a plastic lining, which prevents damage to the surfaces being treated. The rod mechanism must operate smoothly and effortlessly. The productivity and accuracy of processing depends on the quality of the mechanism parts. Collet chuck, lightweight models are designed for the use of small and medium-sized cutters with a shank up to 8 mm. Powerful and heavy milling cutters can work with large-diameter equipment, which means thick shanks up to 12 mm. The cutter stroke and milling depth for domestic models is within 50 mm. For a professional tool, this figure can be 70 – 80 mm.
In addition to the main characteristics, you should also consider the possibility of adjusting the rotation speed. The adjustment can be stepped or smooth. A good tool has a speed switch located so that it cannot be accidentally touched.
Don't chase high power levels. The more powerful the tool, the heavier it will be and it will be difficult to perform delicate work.
An important indicator is the presence of a smooth start and stability of engine speed under load. The duration of continuous operation affects productivity.
When choosing any tool, including a hand router, preference should be given to well-known manufacturers
When choosing not too expensive models for household needs, you should pay attention to manufacturers such as Interskol or Makita. Professionals usually prefer DeWalt, Bosch, Festool, Black&Decker