Regardless of the quality of wood processing, over time its surface may become rough, which will make the finishing process more difficult. The master faces quite a big problem when sanding such boards. And the varnish soon after application cracks and begins to crumble.
Wood roughness most often occurs due to improper drying. Such defects are a consequence of uneven drying of the layers. The fact is that the upper layers, when dry, become smaller in volume than the inner ones. And surface deformation occurs.
It should be remembered that in winter the moisture content of wood is minimal, while in spring it reaches its maximum. Therefore, try to prepare the boards at the optimal time so that the wood contains as little juice as possible. This way, you can minimize the possibility of the boards becoming warped and cracked. The number of cracks and their depth directly depends on the strength of wood drying. Soft wood dries out the least.
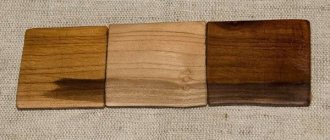
Each tree has its own degree of shrinkage. Depending on this, tree species can be divided into three groups: low-drying, moderately drying and highly drying species. The first are poplar, willow, cedar, spruce, and pine. The second group consists of aspen, linden, oak, elm, and ash. And the third includes apple tree, birch, maple and larch. This must be kept in mind when choosing wood. After all, the degree of shrinkage is one of the most important factors for successful construction.
How can you dry wood?
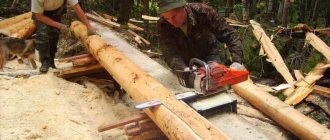
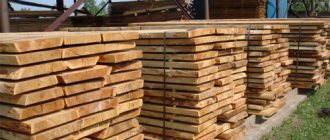
When approaching the matter directly, the question immediately arises about how to remove moisture from wood. To prevent the boards from warping, it is important, first of all, to choose the right time of year. Autumn or winter is most suitable for this. It is at this time that the largest number of blanks falls. This is due to the small amount of moisture in the trees, and, therefore, the high quality of the prepared boards. Thanks to this, you won't have to do most of the work. Just dry the boards a little. But as? There are several easy-to-use options, the decision to use which will depend on the conditions under which the workpieces are produced.
Advantages of atmospheric drying
Of course, at first natural drying was used only in sawmills and wood processing enterprises. However, nothing prevents you from doing this procedure at your summer cottage, for example. Of course, subject to the availability of labor, certain skills and tools. Today this is one of the most popular ways to dry lumber before starting construction. Mainly due to low cost, relatively simple technology and good performance.
Low cost
This is an obvious advantage compared to any industrial drying technology that uses expensive vacuum or heating equipment. No electricity is required here at all - the reduction in the moisture content of coniferous wood occurs entirely at the expense of natural resources (plus the environmental friendliness of the method). Organizing the site will also not require significant costs. If you are on a budget, atmospheric drying is the best option.
Ease of process organization
The drying result depends on the correct preparation of the area, but in the case of atmospheric drying it is difficult to make a mistake. All you need to do is select a storage area, build a so-called foundation and lay lumber on it. Afterwards, it is advisable to equip the roof to protect it from precipitation and sunlight. Since these structures are temporary, the construction technology is relatively simple. At least compared to other drying methods.
Efficiency
If all standards and recommendations are followed, you receive high-quality dried material for construction. Atmospheric drying is effective, that is, it minimizes the risk of cracking, warping, and reducing the strength of wood. And if you dried wood of first-class species, for example, Siberian larch, the result will exceed all expectations. Lumber will last for decades without any special care. Although treatment with an antiseptic and protective oils will not hurt in any case.
How can you dry boards quickly?
There are also times when you need to quickly dry the boards. Is there such a way? Yes, sure. Wrap the board in 5-15 layers of paper, one layer of cellophane and make holes in the latter.
After this, place the board on a warm radiator. A window sill is perfect for an apartment. Considering that the paper absorbs all the moisture, change it several times during the day. And turn the board over. With a thickness of 3 cm, 4 days will be enough for drying.
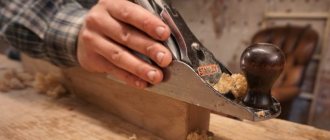
The main disadvantage of this method is that the board warps. But you can easily fix the situation with a plane.
Shrinkage problems
The dimensions of the material during drying can change in different ways. After improper drying, an edged board can turn into a completely unusable material. For example, if you dry it too quickly, the natural shrinkage process is disrupted and the board becomes deformed.
Such defects can often be eliminated with a plane, or in difficult cases by exposing the material to steam and repeated drying. Here are the most common cases of curvature:
- warping of the board in the transverse direction;
- bending the board in the lateral direction;
- arcuate bend;
- torsion.
Typical shrinkage deformations
Shrinkage promotes the formation of cracks. In small materials (boards, timber) there are fewer cracks, but such lumber is more susceptible to warping. To reduce the likelihood of cracks forming in logs and beams, longitudinal cuts are made along the entire length of the material. This allows you to reduce the internal tension of the wood.
What to do with freshly purchased lumber?
Many, having bought obviously expensive lumber, treat it too carelessly. Therefore, this material gradually rots and becomes unnecessary to the buyer. Without proper drying, freshly purchased boards quickly turn black. It is worth noting that there is nothing complicated in the process of removing moisture from lumber. You can easily get by with natural drying in the open air. And thus get great boards. However, this process can last a year, and in some cases it drags on for a longer time. Therefore, plan your construction in advance and you will be able to enjoy the process while avoiding troubles at work.
Materials and tools
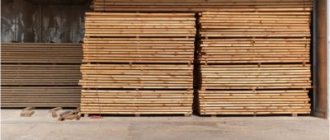
For high-quality drying of wood at home, it is arranged under a canopy in a well-ventilated place. Under the influence of atmospheric phenomena, moisture evaporates, and the remainder, which is equal to the humidity of the environment, is distributed evenly throughout the structure.
But this material cannot be called fully dried. Usually the percentage of moisture is higher than permissible because it does not fall below the air humidity. This is especially noticeable in regions with high humidity levels - for example, coastal regions.
For high-quality drying of lumber you will need:
- iron sheets, roofing felt;
- paper;
- beams, pipes;
- glue, paint;
- polyethylene film.
The main disadvantages of self-drying:
- duration in time;
- risk of wood warping;
- the difficulty of bringing humidity levels to 6 - 8%.
Homemade drying chamber
Industrial versions of drying chambers are very expensive, so carpenters often make homemade chambers, which, firstly, are easy to install, and secondly, drying them yourself gives confidence in the quality of the material.
An example of a homemade drying chamber was taken from the YouTube channel stolyar te.
A separate room will be equipped for the drying chamber.
Extension for a homemade drying chamber
This dryer is designed for 3.5 m3 of lumber. This is the optimal and affordable volume of wood for a home workshop. The wood is dried separately by species: ash, oak, cherry, maple.
Drying chamber loaded with boards
The frame of the dryer is welded from a corner, then the boards are fixed and the profile sheets are screwed with metal screws. The design has two doors for convenient loading of lumber. The walls of the drying chamber are covered with two layers of mineral wool, then a hydro-vapor barrier and another layer of mineral wool with foil. This coating breaks easily, but holds the temperature well in winter and summer.
Inside the dryer, the boards are laid in one level through identical crossbars.
Boards laid across crossbars
Two fans with motors up to 0.9 kW are installed in the upper part of the chamber. Their power is enough to blow hot air over a stack of 3.5 m3.
Fan for blowing
Along the wall there is a metal gander with holes that increase into the depth of the chamber. Hot air from the stove is driven through the gander.
Gander with holes
A humidity sensor is placed next to the fan.
Placement of the humidity sensor
A homemade boiler is made of 4 mm steel. It is three-circuit and has two inputs and two outputs.
Boiler for drying chamber
To blow air through the boiler, a double-circuit motor is installed on the wall.
Dual circuit motor
One pipe from the double-circuit pump goes down the boiler. The air flow goes outside through a six-meter coil inside the boiler, and then through a gander with holes is distributed inside the chamber over a stack of boards.
Formation of air flow in the gander
The second pipe from the double-circuit pump goes into the upper part of the boiler. Heated air is supplied through the corrugation to the wall inside the chamber.
Formation of air flow in the corrugation
Moisture collected after drying lumber must be removed from the drying chamber. For this purpose, two bathroom fans are installed, operating for exhaust.
Exhaust fan
The fans turn on automatically from a special humidity sensor. It is set to the desired humidity level.
After starting the drying chamber, on the first and second days there is a maximum release of moisture from the wood. The circulating hot air becomes humid and is drawn out through the fan. Instead, dry air comes from the boiler.
The drying process takes place at 50-55 degrees. For control, two indicators of temperature sensors are displayed.
Temperature sensor indicator
They use 2 sensors, since 2 fans are running. The readings on the sensor indicators should be the same. If one fan stops, this will be reflected in the indicator. The temperature inside the dryer is kept constant.
To dry a 30 mm board, 12 days are enough. If you dry a 50 mm board, it will take 14 days.
The ends of the lumber are painted over during drying to prevent cracks. 6-7 cm of useful material is lost on cracks.
Cracks at the ends of dry boards
The dried board is kept for up to two months to stabilize. The drying process is dependent on the weather. In hot and cold weather, the air is dry and the board dries quickly. In rainy weather, drying of lumber slows down.
Video about a homemade drying chamber:
Choosing dry wood for carpentry is the key to long service life of the finished product. Every carpenter should not ignore this important technological process.
Using materials from YouTube channels: Carpentry, Koval's Strokes, mtmwood, stolyar te.
More articles from the Technology section:
Category Useful tips
Join groups and Odnoklassniki
Is modernization needed?
It is irrational to start re-equipment with the purchase of equipment. Old drying chambers built from bricks, blocks, panels and other building materials, as a rule, require major repairs of enclosing structures (walls, ceilings, doors). If this is not done, then further re-equipment will be a waste of money. Significant heat losses will again lead to increased energy consumption, and therefore will not reduce the cost of drying lumber. There is only one way out - to do repairs or reconstruction (depending on the condition).