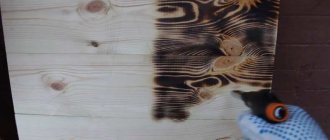
How to dry wood cuts
Let me start with the fact that my husband and I bought our first apartment in our lives and began to gradually inhabit it.
I am very inspired by eco-design, but we live in a large metropolis, so I wanted to add a piece of nature to the new interior. The first thing that needed to be done for a more or less comfortable stay was to equip the kitchen. After scrolling through a lot of beautiful pictures, I really wanted to make a panel from wood cuts for the wall above the dining table. I read a bunch of sites on how to dry wood at home, since no one uses fresh saw cuts - they crack badly and can become moldy. To be honest, there is very little information on the Internet on this matter, it is poorly verified, scarce and contradictory. Search data for your request:
Wait for the search to complete in all databases. Upon completion, a link will appear to access the found materials.
Go to search results >>>
WATCH THE VIDEO ON THE TOPIC: Drying birch cuts in the microwave. // Drying birch cuts in the microwave.
How to dry wood correctly
Any chisels in sets and individually from foreign auctions and stores. Delivery guarantee. Welcome, Guest. Please login or register. Did not receive your activation email? Submit this topic Print. What should be done to prevent wood from cracking during drying? Andrey, you hit the nail on the head. The most pressing issue for any carver. Guys, let's develop it. The very first thing is to block the pores on the ends of the wood, on the cross sections, so that they do not dry out faster than the main part.
When drying, the tree decreases in size, and the difference in drying causes tension in the wood, and as a result, cracks. This can be done by smearing the ends with paint or glue. I use PVA. In addition, you need to avoid drafts, since the breeze removes moisture only from the side that blows.
The best drying temperature is slightly above room temperature. And constantly turn the wood over so that it dries as evenly as possible. It is also important not only to avoid cracks, but also rotting, the appearance of fungus, larvae, etc. To do this, the tree must be cleaned of bark, dirt, and rot that appears on the surface must be cut off.
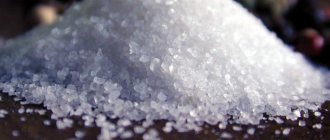
Dry in a dry place. Away from wet and dirty surfaces such as dirt floors or damp concrete walls. You can also treat the wood before drying with alum to remove rot, fungi and larvae. I would like to ask Alexander Balter how he dries alder, I’m so tormented with this tree - I can’t find the temperature, or it will sprout with a fungus or ferment, I was surprised the first time, it smells like decent mash and foam comes out of the ends.
At least they drank it on the boards before drying. I read somewhere that you can put it on the battery by first wrapping it in newspaper and securing the whole thing with tape, while rotating the tree and replacing it as necessary. In principle it is possible. In this case, newspaper is needed so that the moisture comes out more evenly. I'm not too sure about the tape, just put it in the bag.
And change the newspaper more often. So that you don’t have time to get damp. Don't forget to process the ends. Yes, but in the bag, condensation will form from the battery. Anatoly A. Andrey, always leave a reserve in the workpiece for cracks. Andr, IMHO – the battery is too much. It is enough to put it somewhere in a corner of the house and change the newspaper every other day, and tie the bag tightly.
This is how I dry pieces of boards if I need them very urgently. And you know, from completely raw ones, with almost dripping juice, normal material is obtained. Dry and without cracks. Leonid, my alder tree was cut down in the winter and dried in the stumps, although in the village, all year round in a panel house. Nothing was rotten, on the contrary, it was even dried out in my opinion. But they cut down my aspen tree in the summer, cut it down onto boards and threw them in a heap in the open air.. How I cleaned these boards later, dear mother.
So they were covered either with mold or something else. Such a specific smell, similar to medicine and clearly with a hallucinogenic effect.
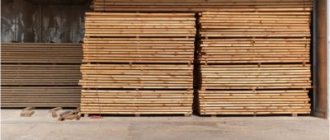
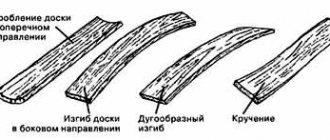
At one time, I carried out all sorts of experiments on drying boards and settled on batch assembly and drying on the “edge” or “upright”. He placed the blanks on the gaskets with his feet, then twisted the outer gaskets with wire and placed them on the edge. This method prevents the boards from curling into a “propeller and groove” and allows moisture to escape more evenly.
It is advisable to periodically change the boards. Drilling also helped, if I noticed that a crack had appeared, then I drilled a hole along its path, but here you need to take into account that the invisible part of the crack can already go far. I drilled both the ends and the side parts, where the threads are small or there are none at all according to design. We need to experiment. It is better to harvest wood closer to autumn, when sap flow decreases; you must also keep in mind that in the butt part the humidity is higher than in the middle of the trunk.
You can leave bark rings at the ends, sometimes it helps. The ideal place for drying is the attic of the house. There were no cases of mold or blooming. In general, I rummaged through old records and found this information. Natural drying in the open air requires 1 year for every 25 mm of thickness. So, until free moisture comes out of the wood, it is not advisable to cover the ends with paint. It is better to wait until it dries, and when the first cracks appear, file about a cm from the ends, and coat with paint, glue or wax.
The moisture content of wood can be determined by sawing off a piece, weighing it, placing it in a heated oven, it doesn’t matter that it breaks, the main thing is that it dries, weigh it again, the difference in percentage between the first weighing and the second will be the moisture content of the source material. Try making a polyhedron from a round blank. I dried birch logs like this.
Chipped or hewn dry better. Quote: Doctor Lecturer from November 19, At home, summer sawn boards were drying in the corner, bleeding with juice. About a month. October Mon. SMF 2. SimplePortal 2. How long did it take for the boards to dry this way? I mean at home, in the corner.
Drying wood using newspapers and straw
These methods are used when small pieces of wood need to be dried. When using newspapers, the wooden blank is wrapped in dry newspapers and then placed in a plastic bag. The bag is wrapped tightly and placed in a warm place - the warmer the better. When the newspaper in the bag becomes wet, open the bag, remove the wet newspaper from the workpiece and replace it with dry one.
Depending on the initial moisture content of the wood, this process may take 3-4 weeks. Over time, the intervals between newspaper changes will increase as there is less moisture in the workpiece. In this case, to speed up the drying process, you can increase the thickness of the newspaper layer, but remember that too rapid loss of moisture will lead to cracks.
Drying wood with dry straw uses the same principle as drying with newspaper. Only in this case, the wooden blanks are dried not in a warm place, but under a canopy, covered with a thick layer of dry straw. Straw, like newspapers, takes moisture from the tree, but, unlike newspapers, there is no need to change it every day, it dries itself. If straw is not at hand, dry shavings or sawdust can be replaced with no less success.
How to correctly make a cut (pancake) from a tree
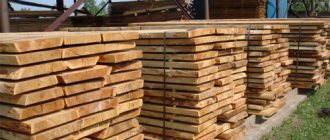
Wooden slabs are wide vertical cuts of a tree trunk, similar to large slabs or horizontal parts of logs that have undergone special processing. They are made from hard wood, mainly oak or poplar. They are used for the production of original furniture products or as separate, independent parts of the interior of the room. With their help, product design projects are created that are unlike any other. And a room with such furniture looks creative, elegant and unique. The use of wooden slabs is very widespread.
How to quickly dry a slab?
In specialized conditions, vacuum and infrared lamps are used for drying, placing the slabs in chambers. The time it takes to dry completely will depend on the type of wood and the thickness of the slab
, its length and initial humidity level.
Interesting materials:
How to pay using PayPal? How to pump water out of a heating system? How to roll back the system on Mac os? How to roll back the system without a restore point? How to roll back the point system? How is the economic efficiency of the system assessed? How to reinstall the system without losing data? How to convert from binary to hexadecimal? How to reboot Ubuntu system? How to clean system 32?
How to dry wood
This tree species can figuratively be called universal, since logs and finished lumber from birch are dried in the same way as any other wood, which we will discuss in detail in this article. Before you start drying birch, it is important to block the pores at the ends of the workpieces and on their cross sections. Wood processors cover the ends and cuts using paint or glue, in particular PVA. If these actions are neglected, the ends and cross sections of birch blanks will dry out quite quickly than the main parts of the blanks. When a birch dries, it shrinks unevenly, decreases in size in some places more and more quickly, and in other places practically does not change its basic dimensions. As a result of this unfavorable uneven drying of the wood, a certain tension is formed in it, which, so to speak, is released and breaks the fibers of the material, forming cracks.
How to prepare wood for carving.When copying site materials, please indicate the source https://struzhki.ru/
You can find a lot of information in books and on the Internet about how to dry logs and boards. Like boards, they need to be stacked so that the wood is ventilated and dried evenly somewhere in the attic of a country house. Just like you need to remove the bark from logs, leaving strips at the ends so that the workpiece does not crack, and fill the ends with paint, glue and God knows what, for the same purpose. But all this is of little interest to the novice urban carver. Logs and boards cannot be hidden under a computer desk, and they cannot be stacked on top of a washing machine.
Let's talk about small pieces of wood. Where to get it and how to dry it.
1. Tell all your friends that now a piece of valuable or not very valuable wood will be a good gift for you. And very soon oak chairs (outdated), birch logs (for some reason brought from the dacha), mahogany boards lying around, and many other different and interesting things will flow to your door.
2. While walking past trash cans, take a couple of appraising glances at large items neatly placed in the trash. You can see there pieces of wood that are very tasty for the carver. Something like: tables made of mahogany, solid wooden doors of antique cabinets from some exotic, flower stands, beautifully carved from birch. Grab it and drag it home without embarrassment. It's for your business.
3. Some small cataclysm (hurricane, or meteor shower) may turn out to be real luck, and you will see housing and communal services workers sawing a huge linden tree into logs. Try to negotiate with them, they are happy to give this “junk” even for free.
4. Talk to your grandmother, or not your own, but just any old lady who comes to hand. And offer to rid her of old (unnecessary) trees in the garden. You cut it down - and the payment for the work is this very “waste”. With this “Timurov’s” help you can become the owner of logs: apple trees, pears, plums, thorns, sea buckthorn, etc.
5. Now about drying. There was only one apartment method that I liked. It's simple, but requires patience. Take a piece of wood and wrap it in newspaper. Then you put it in a bag and tie it until it is “cosmic tight” so that the piece of wood begins to actively sweat into the newspaper. The newspaper will need to be changed after 1 or 2 days over a period of time (many parameters on which the duration of such drying depends). When you feel that the newspaper becomes much less wet over the same period of time, you can change it less often. And so on until the newspaper remains completely dry. A very important point, the bag must always be tied very tightly, otherwise the air penetrating into the bag will dry out the newspaper, and thereby mislead you about the moisture content of the workpiece.
Discuss this blog article
Author:
Popkova Ekaterina
Drying end-cut wood at home
By Turbo4x4, October 9, in Technologies. There are several ways to dry wood, but as a rule these methods are industrial - if you have a log and it’s five to seven years old, then there won’t be any problems - I covered the butt with paint and forgot. But what about boards and blanks that I cut in the forest not in the spring, of course - When is the maximum amount of sap in wood in the fall? At the moment I need two axes with a natural bend in degrees per mm of the product. Can you imagine this crookedness? And with great difficulty, naturally, I found such a crook. Birch, perfectly clean when cut - like butter.
Features of drying fruit wood
Fruit wood is a valuable material that can be used for construction, but is more often used for decoration, making decorative items and tools, as it has a beautiful texture.
To ensure that the finished item is not just beautiful, but also durable, special attention is paid to the processing of the material. There are features of drying fruit wood that must be taken into account so that the treated surface does not subsequently have defects.
When fruit tree wood is properly dried, it is very durable, does not crack, and is easy to process, cut, saw, polish and sand.
Why do wooden products crack and how to deal with it?
The use of artificial materials in the production of any product will never be a worthy and complete replacement for such natural raw materials as wood. And the point here is not only the elusive charm caused by its special smell and natural texture, but also the fact that with proper care, an object made of wood can last for many years, completely eliminating the feeling of that fakeness that plastic has.
Today literally everything is made from wood, from country houses, furniture and musical instruments to tiny crafts. For example, wooden stools brought from Asia are in particular demand. They can be beautifully detailed and skillfully finished, but often with their purchase a person becomes acquainted with a very common wood defect - the rapid formation of cracks.
Why does wood crack? Stools made from solid and laminated solid wood are repeatedly subjected to this, since in the first case the correctness of the technological process during drying and storage is often violated, and in the second, the use of low-quality glue leads to cracking. In addition, cracks may appear due to the natural aging of wood, or simply due to the climate in Russia compared to Indonesia or Thailand. When purchasing, it is important to pay attention to the fact that the stool has a uniform color without any stains. Color is the first indicator of the quality, age and condition of wood, which is almost impossible to disguise.
What causes wood cracking?
Due to the presence of the above-described disadvantage, the main performance indicators of wood are significantly reduced. Resistance to stress decreases and mold growth and rotting are quite obviously observed. In this case, the unprotected layers of wood face the negative environmental factors.
How to deal with wood cracking?
To minimize cracks as much as possible, you should try to keep the stool as far as possible from heat sources (heating appliances, fireplace) and closely monitor air humidity, because the higher the humidity, the higher the risk of further cracking of the product. Next, it is worth adequately assessing the size of the cracks, trying in advance to identify them at the initial stage. If the cracks are not wide and shallow, then you can either sand them with sandpaper and saturate the product with linseed oil, which is an environmentally friendly water-repellent, or use a special wood putty. It is reasonable to fill larger cracks with an arbogypsum composition (a mixture of sawdust and gypsum at a ratio of 5:1) or with a composition of sawdust and wood glue in a ratio of 5:1. Before you start processing, you should tilt the stool horizontally so that the solutions do not spread. Craftsmen familiar with carpentry can make an insert from the same type of wood.
Remember that wood is actually an excellent material for construction and manufacturing of various products. A trunk that has grown without deviations from the norm, proper storage of wood and its subsequent processing will naturally delay cracking, but natural material cannot be ideal forever and, having served its purpose, it will quite obviously “fade.”
P/S If you don’t have the opportunity or desire to do the restoration yourself, you can contact us, see details
How to dry apple wood
Apple wood is the most common material among all types of fruit tree wood. This is due to the wide distribution of the plant itself.
Before drying apple tree wood , you need to create the right conditions and select a temperature regime that will ensure the preservation of the structure. After processing, the core should acquire a red-brown tint and yellow-pink sapwood, the rays of the core should be inconspicuous.
Apple tree wood is highly drying, heavy, hard, has average resistance to biological damage, and is also of average density. The shrinkage rate is even higher than that of hardwood.
All this suggests that apple tree wood needs to be dried in a special mode to avoid warping and cracking.
Drying recommended by professionals proceeds according to the following scheme:
- lumber is stacked in a place protected from weather influences;
- atmospheric drying is carried out until a certain humidity level is reached (20-25%);
- moisture-heat treatment and soft drying are carried out;
- Final drying is carried out at temperatures up to 60 degrees to a humidity of 12%.
When the process is carried out correctly, it takes 25-30 days, which takes a lot of time. But forcing the drying of apple wood leads to a decrease in quality.
Drying the collected raw materials
Here are the inflorescences collected. It's time to dry them thoroughly and prepare them for storage. It’s so nice to brew aromatic and healthy linden tea on winter evenings and enjoy its taste! And thanks to the benefits of the plant, you can prevent the likelihood of diseases and colds. At the same time, linden does not cause allergies even in small children. This means that it can be widely used to treat children and prevent diseases in them.
After collecting the raw materials, we proceed to drying them. To do this, choose a shady place, perhaps in a small draft. A ventilated shed or a place under a canopy is perfect. This is where excellent air circulation and the absence of dampness and high humidity are ensured.
The inflorescences are laid out in an even layer on paper or a clean wooden surface. You can use thick cardboard or cutting boards. The flowers should lie in one layer. This will allow the raw materials to dry better. The inflorescences should be turned over periodically. This way they will dry evenly and on all sides.
Having decided to prepare linden flowers, having figured out how to collect and dry them, you can store the harvested useful raw materials for storage. Properly chosen conditions will allow you to preserve the beneficial qualities of the inflorescences for a long time.
How to dry pear wood
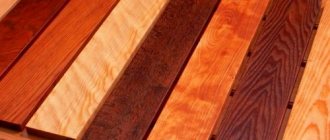
The pear is the third most common fruit tree after the apple tree. When properly dried, pear wood has a soft texture; vessels, rays and annual rings are faintly visible at the cut site. The shade is very pleasant, it can vary from pink to brown, from yellow to red, which depends on the age of the cut tree and how the item was used, whether it was in direct sunlight.
If pear wood is dried correctly, it has a high density, but at the same time remains flexible and can be easily painted, sanded, and polished. The pear dries out greatly and easily releases moisture, despite the fact that when freshly cut it has a humidity of 90-100%.
The process of drying pear wood should be carried out according to the following scheme:
- steaming at 110 degrees until lightening (the optimal color is uniform pinkish-brown) and reaching 130% humidity;
- drying at a temperature of 70 degrees to a humidity of 30-35%;
- drying at a temperature of 50 degrees to a humidity of 22%;
- moisture-heat treatment and drying at a temperature of 30 degrees until a humidity of 9% is achieved.
Drying pear wood ideally takes 20-25 days, after which processing can begin. This material is most in demand for the manufacture of:
- living room furniture;
- bedroom furniture;
- boxes and decorative items;
- imitation ebony.
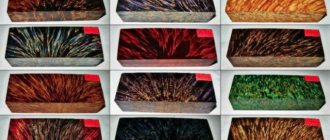
What kind of wood is light?
Forest wood is usually light-colored. Moreover, in some species the entire mass of wood is painted in one color (alder, birch, hornbeam), while in others the central part has a darker color (oak, larch, pine). The dark part of the trunk is called the core, and the light, peripheral part is called sapwood.
Interesting materials:
When can you eat milk mushrooms after pickling? When should I take Imodium before or after meals? When are peonies available in stores? Who eats the hawk? Who does omul eat? Who absolutely should not eat persimmons? Who absolutely should not eat tomatoes? Who shouldn't eat legumes? Who shouldn't eat beans? Who shouldn't eat beans?
How to dry cherries
Cherry and cherry wood are popular for their special pink hue. In some countries, in Germany in particular, these trees are specially bred for timber. In Russia, industrial breeding is carried out in the Krasnodar region.
A special difference between cherries and sweet cherries is their pinkish-brown tint, which becomes deeper and more saturated the older the tree, and the red color shows through well. The structure of the wood is uniform, the fibers are straight, and the annual rings are clearly visible. Craftsmen especially value cherry because when polished, even without the use of special compounds, it acquires a characteristic glossy shine.
Proper drying of cherry and cherry fruit wood makes it possible to obtain a material that can be easily processed, cut, and becomes resistant to rotting.
Since sweet cherry wood is low-drying and practically does not warp, the drying process is quite simple:
- stacking;
- drying under diffused sunlight for up to 12 days;
- steaming;
- soft drying at 40 degrees;
- the second drying phase at a temperature of 70 degrees for up to 15 days;
- moisture-heat treatment and drying to a humidity of 8-10%.
Drying cherries usually takes about 30 days. This is exactly what is needed to get really high-quality wood from which you can make:
- parquet;
- souvenirs;
- sliced veneer;
- exclusive furniture;
- musical instruments (pianos, grand pianos);
- smoking pipes;
- small-sized dishes.
How to collect linden
To maximize the benefit from the collected raw materials, you need to know how to collect linden. The recommendations below will help you avoid mistakes and get raw materials rich in nutrients.
Gathering places
Since the main purpose of linden flowers is to obtain maximum benefits from them, you should choose the right places for collection. To understand how to properly collect linden, let’s familiarize ourselves with the rules for choosing places from where it is best to collect the flowers of this plant.
Preference should be given to the following places:
- forest;
- field;
- groves;
- single trees and their groups.
The main condition is that all places must be located away from the roadway, railways, factories and industrial enterprises. After all, this is where the air is most polluted. This means that linden flowers will contain a lot of harmful substances. And this can negatively affect your health. After all, our goal is to benefit from the collected flowers. Therefore, knowing how to collect linden for tea and choosing the “right” places for this, you can enjoy the aromatic drink and saturate the body with useful substances.
Drying of other fruit species
In addition to apple, pear and cherry, wood is widely used:
Features of drying fruit wood are related to the structure, density, humidity, and resistance to biological agents. In any case, the conditions are individual for each breed, and a competent drying process takes from 20 to 40 days.
Although industrial drying is optimal to obtain an ideal result, it is also possible at home if the features of the process are studied, you have a professional moisture meter and good dryers are selected.
Source: blog.flexyheat.ru
Storage
Properly collecting linden and drying its inflorescences is only half the battle. After all, the prepared raw materials must also be stored correctly!
To ensure that linden flowers delight you with their delicate aroma and benefits in tea, follow the following storage conditions:
- place dried flowers in well-ventilated, dry areas;
- the storage container should not absorb moisture or retain it;
- It is better to store linden flowers in not too large volumes. This will prevent possible damage to raw materials;
- It is better to choose a storage room without excessive lighting and exposure to sunlight.
Ideally suited for storing dried linden flowers are a ventilated attic, dark rooms, places with ventilation such as drawers, lockable shelves. In cardboard boxes and paper bags, linden flowers will retain their quality for a long time.
So, by correctly collecting linden flowers and preparing them, you don’t have to worry about the coming of winter. After all, we always have aromatic and very healthy linden tea on hand. It will warm you up in the cold and protect the body from colds and infections.