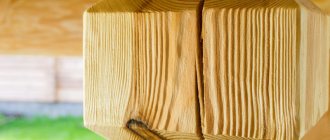
Features of vacuum drying of wood
A similar technique is used for processing wood obtained from deciduous and coniferous species. These plants have a large fiber cross-section. Heat treatment is carried out in large chambers.
There are several advantages of this effect. These include:
- Increased speed of processing wood base. In this way, it is possible to reduce the costs of production processes;
- The reduced pressure prevents the formation of cracks, bends and any defects;
- The tightness of the processes prevents the growth and reproduction of pathogenic microflora;
- Simple operation of equipment with drying chambers allows you to control the technological process remotely. In this way, it is possible to independently control the drying speed and drying time;
- Safety. The process of processing lumber in large drying chambers does not harm the environment.
Do not forget about the disadvantages of such a procedure. They are as follows:
- Big costs. For uninterrupted operation of the equipment, large amounts of electrical energy will be required, the cost of which may pleasantly surprise you;
- High cost of construction. On average, the price of vacuum wood dryers varies from 370,000 rubles to 1,000,000 rubles;
- Minimum chamber volume. When using this drying method, it is not possible to process a large amount of lumber at one time.
There are several operating modes of this device. They include:
- Soft. It is used for processing materials in order to preserve the strength and physical properties of wood;
- Normal. Heat treatment allows you to change the color of the fibers of the array, as well as change its wear resistance criteria;
- Forced. The color of the lumber becomes dark and the internal contents become brittle.
Experts recommend taking into account the type of wood, the size of the elements, the level of humidity and the properties of the vacuum dryer.
If the internal contents of the array have a humidity level of more than 25%, then drying must be carried out at a temperature of no higher than 110 degrees.
Thanks to vacuum drying, it is possible to achieve the following humidity indicators. These include:
- Wet fibers. Their humidity level is more than 55%;
- Air-dry. In this case, the percentage of moisture inside the fibers is 10-25%;
- Room - dry. When measuring humidity levels, a coefficient of no higher than 12% is observed;
- Absolutely dry. No moisture is observed in these lumber.
Moisture can be determined by the weight of lumber and the condition of its chips. When calculating these indicators, it is recommended to take into account the coefficient of residual stress of the boards and indicators of humidity changes.
Drying methods
At the moment of technology development, there are three main methods of vacuum drying. The first two methods have already been discussed - direct drying and press-vacuum preparation of the material. But there is also a method of steam treatment in a vacuum chamber. Its relevance is due to the possibility of eliminating heating plates from the chamber design, since hot steam covers the entire space, without requiring special direction of flows to individual sections of the workpiece. This approach provides many advantages that steam heating methods of wood drying provide. Drying chambers, for example, allow loading not only by labor-intensive manual methods, but also by using forklifts.
How wood is dried
Vacuum drying of wood is carried out in 3 stages.
These include:
- Elementary. Surface processing of lumber is carried out here. Drying is carried out by heating without using a vacuum. The temperature inside the chamber is selected individually, taking into account the type of wood and its thickness;
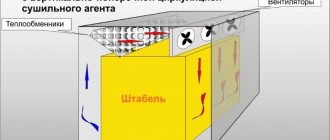
- Drying. A special pump is used here, which allows you to quickly remove air masses from a closed space. Thanks to this, it is possible to evenly distribute moisture inside the wood fibers. The vacuum pump prevents deformation and cracking of the internal contents. Excess liquid quickly evaporates or is removed through special channels;
- Conditioning. In this case, the boards begin to cool evenly. In this way they manage to convey strength and endurance. The conditioning stages reduce the risk of deformation. After cooling, the lumber is carefully removed from the vacuum container.
You can monitor the performance of the device using special sensors and a control panel on the equipment body. In this way, it is possible to maintain the performance characteristics of the boards.
It is first recommended to correctly set the pressure level, which will affect the condition of wooden products. For example, to dry oak whose thickness exceeds 30 mm, select a temperature of at least 85 degrees.
The pressure volume should be no more than 520 kg per 1 sq. m. Lumber from this wood will be dried for 30 days.
Dryer inside the house
A small number of boards can be dried inside the house or cottage. The dryer is arranged like this:
Drying wood at home.
- You need to choose a room that has a fireplace or stove. Electric fireplaces and stoves can be used.
- The room is separated from the rest of the house by partitions. Tightly closing doors are installed. A window may be needed for ventilation. All cracks must be sealed, since extraneous air flows and drafts negatively affect the quality of the dried material. It is also recommended to insulate the walls. On top of the insulation, they can be lined with brick, which well maintains heat from the stove and from electric heating devices. Fans are installed to force the circulation of warm air.
- Raw lumber is stacked on specially made durable metal shelves.
Related article: How to wallpaper a closet, simple decorating methods
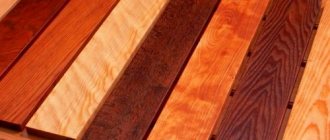
Before drying, you need to check the moisture level of the material. This is done using a moisture meter. High humidity causes early deterioration of buildings and the appearance of mold and mildew. Overdried wood becomes deformed due to moisture absorption and swelling. Wood is usually dried to a moisture level of about 8-12%. To prevent it from cracking, experts recommend treating the ends of the boards with a mixture of drying oil and sifted chalk. The consistency of the mixture resembles thick sour cream.
Lumber can be dried either with or without bark. You just need to remember that birch, aspen, poplar and beech in the bark can be affected by rot. In general, the drying process can last up to 2 weeks. During this time, temperature changes in the dryer should not be allowed. There should be a fire extinguisher in the dryer room. This is required by safety regulations.
What is the drying chamber for?
Modern drying chambers for lumber are made in the form of a complex installation, the task of which is aimed at uniformly listening to wooden materials after they are immersed. It is possible to achieve reduced pressure and the desired temperature inside the container.
Such equipment helps reduce the level of heat loss during the processing of boards and the coloring of the internal contents. Modern drying chamber designs have a hydraulic press.
These parts help maintain the shape of the lumber during heat treatment. The presence of a press allows you to reduce the level of deformation of wooden blanks and get rid of serious defects.
The drying chamber device is equipped with an automated mechanism. Thus, working with such equipment is quite simple. The design of the product includes the following elements:
- Automated control system. Thanks to this mechanism, it is possible to set the necessary mode for proper vacuum drying;
- Automated display. The menu of this design displays temperature and humidity levels;
- Light points. Thanks to them, it is possible to avoid incorrect operation of the device, as well as warn about the end of work.
The performance characteristics of the model depend on its manufacturer. The presence of additional options allows you to expand the functionality of the design.
Setting up a homemade dryer
solar wood drying chamber
In order to make a dryer with your own hands, you can do without drawings. It is necessary to provide:
- camera room;
- insulation;
- heat source;
- fan.
The area of a dryer built by yourself usually does not exceed 9 square meters. meters. In a square-shaped room it is easier to ensure optimal movement of warm air. It is desirable that one wall of the chamber be made of concrete slabs, the others made of wood. All walls are insulated from the inside in two layers: polystyrene foam and foil board. An excellent and free insulation material is wood shavings. And the foil can be replaced with penofol, which perfectly reflects heat.
You can build a separate drying room with your own hands from aluminum; such a structure will last a long time. The frame is made of profile, it is sheathed with sheet metal, which is insulated from the outside. The thickness of the insulation is at least 15 cm. The floor is covered with roofing felt, and a thick layer of shavings is poured on top as thermal insulation.
Care must be taken to thoroughly seal the front door!
The heat emitter can be made in the form of pipes or heating radiators. The water temperature should be 65-95 degrees. It is heated by an electric boiler, wood stove, or gas boiler. For a small chamber, even a two-burner electric stove is sufficient. If the stove is located directly in the room, you need to line it with bricks. The brick will accumulate heat and gradually radiate it into the dryer. It’s easy to equip a convection chamber with your own hands by installing a fan heater as a heat source.
When setting up a dryer for your home woodworking workshop with your own hands, it is important to follow fire safety measures. There should always be a fire extinguisher near the building.
Constant circulation of warm water, which is provided by the pump, is important. To ensure that heat is evenly distributed throughout the room, a fan is installed. The workroom is equipped with a wet and dry thermometer.
To make it easier to load the board into the chamber, you can use a trolley on rails. And to increase the usable area, shelving is built on the walls.
The step-by-step instructions are as follows:
- We are building the foundation.
- We are building the frame.
- We cover the frame with sheets of metal.
- Installation of thermal insulation.
- Cover the floor with film and sawdust.
- Installation of supports from bars.
- Installation of heaters and fans.
The design of a homemade chamber for drying lumber in the video:
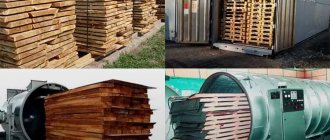
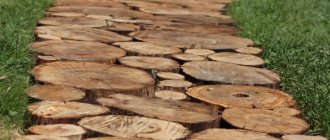
Photo of vacuum drying of wood
Do-it-yourself drying
To make your own dryer using affordable means, you will first need a separate room. In size it can correspond to a small utility room or utility room. It is advisable to make the structure from brick or concrete, and insulate and insulate the internal surfaces with layers of foam plastic coated with foil. The result will be, although not a vacuum, a sealed dryer for boards. How to make thermal elements? To do this, several convectors or radiators should be provided - their number will be determined by the structural capabilities of the room and the requirements for the drying itself. Heating equipment will provide the evaporation effect. For greater efficiency, the thermal function can be supplemented with fans.
Mini dryer for wood – All about timber and woodworking
If you have a large volume of unprepared wood that needs to be dried soon, you need to get a special dryer to carry out the initial processing of the material.
This is a mandatory procedure during construction and finishing work, since if the material is damp, problems will arise with its installation, and other construction defects will appear in the future.
You will learn how to make a board dryer with your own hands from this article.
A little theory
Before you start making such a structure, you need to find out why you need to dry the wood. From the name it is clear that the design is designed to get rid of excess moisture from wood, however, you need to dwell on some theoretical points.
Wood moisture content
Wood moisture is divided into two groups:
- Free, that is, located in cell cavities and intercellular space. This moisture group is determined by the conditions in which a particular tree grew, as well as by how the cut wood was stored. During drying, such moisture evaporates quite quickly.
- Bound or structural moisture is the name given to the liquid that is part of the cell walls of a tree. The amount of structural moisture depends on the type of wood - this means that the length of drying can vary: trees, depending on the type, can get rid of bound liquid for several months or several years.
Important! Typically, wood is saturated with moisture by no more than 30%. Rocks with a high moisture content are called “gray” and are usually not used in construction.
Why is drying needed?
Before you make a wood drying chamber with your own hands, you need to decide what it is needed for. Let's do a little analysis and answer this question:
- When moisture is removed naturally, the configuration of the wood fibers changes, which is why the dimensions of the board are reduced.
- At the same time, the board loses excess moisture unevenly, which is why deformation occurs on completely different planes and at different speeds.
- Due to uneven “drying” inside the workpiece, so-called stress lines are formed, giving rise to cracks.
Important! Usually the board cracks along the grain, starting from the end. This happens because in these places the connections between the longitudinal fibers are somewhat weaker.
- Another problem is the transverse deformation of the board - the part takes on a completely unusual shape, bending like an arc or a “propeller”. This is due to the fact that the fibers dry unevenly and at different times, therefore their length decreases, also differing from each other.
Important! From the above facts it is clear that wood with a high moisture content may become unusable during poor drying. You can avoid this problem by preparing the raw materials and drying them on a homemade wood dryer.
Three drying modes
When you use drying chambers, you significantly save the time required to prepare the material for work. Moreover, you can control the drying modes by controlling the performance properties of the wood. At this point in time, there are three modes of wood dehydration:
- Soft. A special feature of this mode is the gradual increase in temperature in the chamber - due to this property, not only the pristine quality of the wood is preserved, but also its natural color. This drying method takes the longest.
- Standard. In this mode, the wood retains its original strength, while the shade of the material changes slightly.
- Forced. This mode is used if you need to dehydrate raw materials as quickly as possible, however, the quality of the lumber is significantly reduced. It is also worth noting that after applying this regime, the wood may darken and acquire a characteristic odor.
We make a drying chamber
So, we figured out what this structure is for. Now you can start making a wood dryer with your own hands.
Selection of premises
The first step is to wisely choose the room where the lumber will be dried. To do this, you need to follow these tips:
- The area of the room should be based on the dimensions of the boards that require processing.
- The ceiling height should be 2-2.5 meters.
- The width of the room is selected by the user, however, it is worth considering that you need to leave room for a person to pass through.
- The windows in the room must be covered with bricks.
- The doors must be such that raw materials can be loaded into them without any problems.
- There should be a window or a small vent for ventilation.
Important! If you choose a large room, it is better to make a partition for thermal insulation.
Construction of a dryer
Usually a garage or barn is chosen as a place for a dryer, but sometimes it’s not even possible to use them. For this reason, it is important to know how to make a wood dryer with your own hands, using the drawings:
- Lay the foundation for the entire structure. Since the mass of the structure will be low, the foundation does not have to be deep.
- After the concrete has dried, you need to assemble a frame from a galvanized steel profile (you can replace it with an aluminum frame). Connect the frame parts using bolts and special brackets.
Important! An aluminum frame differs in its high price from a steel one, however, it has many advantages. For example, it is much more stable and is not afraid of corrosion.
- Sheathe the walls and roof with steel sheets, fixed to the frame using special self-tapping screws. In order for the effect to be as effective as possible, you need to perform double sheathing, laying between two sheets a layer of mineral wool insulation with a thickness of approximately 150 mm.
- Lay the waterproofing membrane on the floor, then cover it with sawdust.
- Install doors. They should close as tightly as possible.
- Build ventilation ducts or vents so that air can circulate freely.
- When the work is completed, check the tightness of the room. If necessary, correct any errors made.
- Equip an infrared wood dryer with your own hands. This point should be given due attention.
Equipment
Construction equipment instructions may vary. This is due to the fact that the camera equipment and material budget are different for each user.
Let's look at the general layout of the room equipment:
- Make a support on which the stack of boards will be placed in the future. To do this, you need to fix wooden structures on the floor, which allow you to raise the material approximately 20 cm above the ground. This is necessary for the circulation of air flow from below.
- Can be used as supports for wall racks. To do this, you need to fix metal brackets on the load-bearing surfaces, which are designed for stacking stacks along the walls of the chamber.
- Install the heating device. Its role can be played by a stove, a heat fan, a fireplace, a heat gun and other structures - the choice depends on your desires and preferences. First of all, you need to pay attention to the power of the device - it is calculated from the volume of loaded lumber.
- Install drying fans for boards yourself. The devices will provide movement of thermal air. Of course, you can get by with a regular hood, but then the drying time of the raw materials increases several times, which means energy costs will increase.
- Arrange fans and air heaters so that the heated air passes across the air flow. This will reduce the aerodynamic system drag, which will make the dryer work more efficiently.
Important! Since you will need a lot of electricity, it is recommended to install a separate power cable for the structure. In addition, all the materials you use must be connected to the distribution panel via an RCD with the required power parameters. This is necessary in order to protect yourself from a possible fire.