Lining is a modern, versatile, environmentally friendly, inexpensive and easy to install and maintain material. Most owners use this material to decorate various surfaces of their households. But few people know that it is possible to make doors from lining and such a panel looks good, is simple to make and lasts a long time. The versatility of the material allows you to create truly unique canvases.
Characteristics and properties of lining
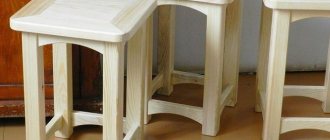
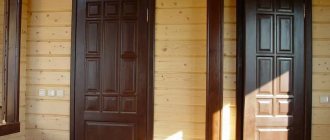
A clapboard door can be made from leftover wood.
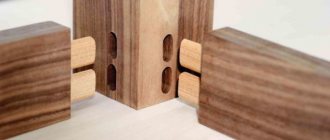
Natural material is thin-thick cladding boards that are made from whole natural raw materials or using leftovers from wood processing. The elements are joined using a tongue-and-groove joint.
MDF lining is a facing material that belongs to the group of environmentally friendly coatings. Pressed panels made from small chips are considered as an alternative to natural boards or plastic strips. The adhesive in the mass is legin, a natural component of wood, and phenol and epoxy resins are not used.
The difference between artificial and natural boards:
- have less weight;
- easier to install;
- a greater variety of colors, textures, and options for simulating not only wood, but also stone.
Wooden and synthetic linings are produced in the form of profiles, which differ in locks and cross-sectional shape. The basic profile is the Standard trapezoidal section, in which the edges are cut at 30°. On the reverse side there are grooves to compensate for changes in the size of the part.
Natural lining is treated with an antiseptic against fungus
. There are varieties:
- Calm;
- Europrofile;
- Eurolining;
- American.
The properties of the lining are suitable for covering doors. Resistance to fungus and rot depends on the breed, but all material is treated with antiseptics. Resistance to fire is provided by modifiers in the composition of MDF plates and fire-resistant impregnation of natural wood. All materials are easy to paint, so the door can be designed to suit different interior styles.
Development
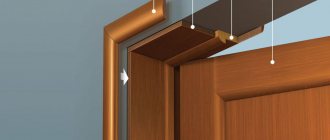
The door frame was made from planed boards with a section of 100x20 mm. The size of the door is calculated based on the size of the cabinet, in other words, the distance that needs to be covered. Please note that the width of the wardrobe door must be less than the width of the cabinet section (the smallest, if they are different), otherwise you will not get full access to some sections (i.e. you will not open one hundred percent) under any circumstances. door position. The shutters in the closed position should overlap each other so that there are no gaps.
The lining is cut to the appropriate length and painted as described in the article about installing lining. Because the sliding door must be rigid in relation to various deformations in the plane of the door, the linings must be glued one to another (see sketch).
I glued it with PVA glue.
At the top and bottom, the lining is attached to crossbars made of planed boards with a cross-section of 100x20 mm installed horizontally on the front side of the door. The board must also be previously primed and painted using the same technology as the lining.
The lining is attached to the crossbars with screws of such length that they are quite long to securely fix the connection, but do not go through. The screw is screwed from the wrong side with the tip towards the front side, through a hole in the lining, threaded into the crossbar. A hole is drilled in the clapboard for the screw, because trying to screw a screw into the clapboard can lead to cracking. In any case, the screw should fall freely into the hole in the lining, only then will it firmly press it against the crossbar.
Vertical crossbars made of planed boards have a purely decorative role. They are not important for the strength and reliability of the door, but they give a finished look and simplify the installation of brushes that prevent dust from entering the cabinet.
Such a door can be installed using the usual installation parts for sliding doors.
So, I managed to make cabinet doors with my own hands .
And what about the wardrobe itself? How to design and make it.
Rules for choosing material for the door leaf
Making lining on a machine
Before production begins, the wood is selected and unsuitable raw materials are rejected. The selected round timber is fed to the sawmill, where it is cut into individual edged boards, from which the lining is made. They manufacture products in accordance with GOST 8242-1988, and also use European standards DIN 68-126-86. The quality of the material is checked before being sent for sale, and as a result the product is assigned a grade.
Select the material for door cladding according to the following characteristics:
- the humidity of natural wood should not exceed 8 – 12%;
- determine the number of knots and their condition (living, non-living, fallen, staggering), for living ones the color of the color matters;
- find areas affected by the fungus in the form of blue areas;
- check the compliance of the geometry and dimensional parameters of the board, as well as the degree of curvature;
- identify wormholes and cracks;
- determine the direction (tangential, radial) in which the cut was made.
Drying is done during production in heating chambers or an innovative infrared method is used. The correct geometry of the board is obtained on planing machines, where the product is processed simultaneously from four sides. Here the lumber receives a groove and tenon from different sides for perfect joining during installation.
Classic material is produced in 1, 2, 3 grades. The elite types Extra, Elite and others are distinguished by manual screening.
How to choose lumber for sheathing
The choice of lining for finishing a door is not limited to determining the grade, species and shape of the lamella. There are a few more important points.
- Drying degree. The moisture content of lumber should not exceed 12%. It is advisable that it drys under natural conditions. This takes several months, so forced drying is also used. This is also an acceptable option. Damp wood cannot be used. After assembly, it will continue to release moisture and will inevitably become deformed.
- Appearance. It is advisable to inspect the slats before purchasing. An unscrupulous seller may try to sell low-quality products under the guise of high-quality ones. There should be no defects or chips on the planks. Pale blue or greenish spots are not acceptable. This is a sign of developing fungal diseases.
- Quality of locking connections. Experts recommend always checking this circumstance. To do this, you need to take two plates from the pack at random and try to click the lock. The grooves must fit together accurately, without irregularities or difficulties. If you have problems when trying to click the connection, it is better to look for another lumber.
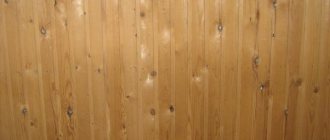
It is advisable to buy material treated with special compounds. It is more expensive, but the factory processing is worth it. It is carried out in special cells where special conditions are created. They cannot be repeated at home. Therefore, treatment with the most expensive compounds will not give the same result as factory treatment. The photo below shows the material processed in the factory.
Instagram leinosmarket
Instagram lesark.ru
- Doors and partitions
How to insulate a metal entrance door for the winter in an apartment or private house
Required elements and materials
Options for lining layout for making a door leaf
Before starting work, mark the surface of the door leaf, for which you will need a tape measure, a pencil and a square.
Tool list:
- building level for determining the verticality of elements or horizontality in a complex pattern;
- rubber hammer, pliers;
- electric drill, screwdriver;
- circular saw, jigsaw or wood saw.
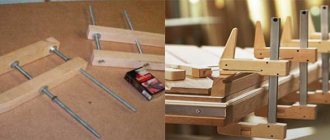
The materials you will need are jagged clamps of different sizes to fasten the boards, for example, if the sheathing is mounted on a metal sheet. The elements are fixed to the wood with screws, and fastened to the metal with self-tapping screws. It is preferable to take clamps made of galvanized or stainless steel.
You will need an antiseptic and impregnation for fire resistance. This treatment is done independently before cladding, since the material is often sold for sale in its raw form. Only MDF lining, in which modifiers are present in the raw material, can be processed.
If the door is insulated on one or both sides, pieces of insulation will be required. Such material can be polystyrene foam, extruded polystyrene foam, mineral wool, stone wool, glass wool, and foam rubber are used. To install the insulating layer, you will need a lathing made of wooden battens with a cross-section of 20 x 40 mm. It is attached to wood with screws, and for a steel surface, metal screws with fine threads are used.
The rail is leveled using wedges or spacers. You can make the elements yourself or purchase ready-made ones with a corrugated surface in the store.
Povagonke.ru
Organizing a balcony space is a complex process that pursues several goals at the same time. You need to get rid of chaotically located household items and things on several square meters and maintain the aesthetics of a small room. A lining cabinet is the optimal solution for storing things that are rarely used (garden tools, spare parts for a car, etc.). It can be corner or located parallel to one of the walls.
A closet on the balcony will allow you to avoid cluttering the space with unnecessary things
To make a convenient and neat cabinet, you should choose oak, linden or ash. These are hardwoods that have little wood glue, and therefore a minimum of released resin.
As for the class of material, it all depends on how much money you are willing to invest to build a cabinet.
The higher the class, the better and more solid the structure will look. And you need to remember that class “C” cannot be used for these purposes categorically, it is designed for technical premises.
It is possible to calculate how much material will be required only after the design has been determined.
For example, if the cabinet will fit into a niche in the corner of the balcony, then material will only be needed for the doors. This is despite the fact that the back wall should be made of laminated chipboard, as it is more moisture resistant.
If the structure is free-standing, then the required amount of materials can be calculated by adding up the total area. Necessary:
- Multiply by 2 depth.
- Multiply by 2 width.
- Sum up the previously obtained amounts. This is how we calculate the area of the floor and ceiling of the cabinet.
- Multiply the height by 4 and get the total area of the walls.
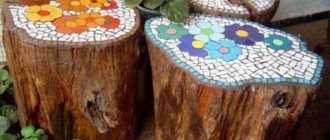
Interesting ready-made options:
Video - we make shelves and doors ourselves:
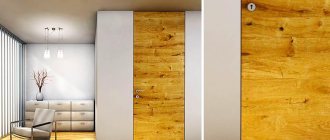
Making a door from clapboard with your own hands
Frame for a door made of clapboard
Before installation, the cladding board must lie in the room for about a day so that the material adapts to the microclimate in terms of humidity and temperature. Slats only from the store often burst and crack during installation. For a complex pattern of lining, you need to make a drawing on the surface of the canvas.
Step-by-step procedure for covering a wooden door leaf:
- The canvas is removed from the awnings and its surface is cleaned.
- The hinges and handles are unscrewed from the sash, and the locks are removed;
- The filling of the lining begins from the side of the lock, so the first section is measured.
- The slats are cut into pieces depending on the chosen pattern; sometimes the boards are placed not only vertically and horizontally, but also a stripe is used in a combination or at an angle.
- The first part is placed along the edge, the position is checked with a level and a square, and secured with finishing nails; such hardware is the least noticeable.
- Subsequent elements are joined tenon into groove and fixed in a similar way, the ends are sanded.
The finished surface is coated with varnish, and after hardening, the fittings are fixed in place. If you have to sheathe a steel door, the procedure is similar.
Decorating a door with clapboard on iron:
- Remove the fittings and clean the surface.
- Before installing the strips, clamps are attached to the surface, they are placed on the screws using a screwdriver.
- The slats are fixed to small holders with screws or self-tapping screws.
When insulating, the insulator is cut into pieces and inserted between the slats. It is glued to the surface of the canvas, because in a vertical position the pieces can settle over time.
Initial stage of work
To find out the required amount of material, you first need to decide on the dimensions of the future door. To do this, measure the opening where it should be installed. This is done using a tape measure or metal ruler. Typically, the height of standard structures is two meters with a width of up to 90 cm.
But to reduce heat loss, you can move away from these figures and make a structure with dimensions, for example, 180 X 80 cm. It all depends on the size of the opening. You may need to make a small window in the door so you can see into the room from the outside.
Such structures are not sold in construction stores, so you will have to make them yourself. If the frame in the opening is in good condition, then it can be used to hang the door. If it is not there, then you will need to install it. To do this you will need a 100 x 100 mm beam, construction nails and a hammer. After installing the door frame, you will need to take the dimensions of the resulting opening and make a door according to them.
Door surface treatment tips
To hide the heads of the nails, use a metal finisher.
After installing the lamellas, problems arise that can be avoided if you know the intricacies of installation. Sometimes grooves appear between the elements after the boards dry out. During installation, you need to place the lining as tightly as possible, using a rubber mallet for this. The boards are placed with the tenon up and the groove down with the lamellas arranged horizontally.
Tips for processing door panels with clapboard:
- Before installation, they are treated with a special chemical preparation so that mold does not form on the surface of the cladding. The last board is placed at the awnings, so the longitudinal section of the lamella, which is not always even, will be less visible.
- The lining comes in different widths, which must be taken into account when calculating. You need to measure the length of the canvas and its width, count the number of strips so that the material does not remain and there is enough for the covering. If you have to choose slats of a different width in the store, they will recalculate along the way.
- Sometimes nail heads spoil the overall appearance of the canvas. To solve the problem, buy a hammer in the store - the tool will help hide the nails. It is not advisable to push the cap inside by more than 3 mm.
When cutting strips to the desired size, branching fibers spoil the painting and are difficult to remove with sandpaper. Use a hacksaw with fine teeth, for example, for metal, or put a corresponding file on a jigsaw. The inner layer of sheathing at the joints is coated with PVA. The glue will harden, and when it gets colder, it will prevent condensation in the cracks, and the lining will not be deformed.
You can trim the sash using clapboard ornaments; American is more suitable for this. Such a board can be installed overlapping and is suitable for unusual decor, for example, diagonally. You can use old plywood as a backing
Where to begin
Wardrobe with shelves in the balcony niche.
Often, balconies have niches for installing cabinets (example in the photo), but before you begin installing a modernized pantry, you should know:
- Glazing the balcony will preserve the attractiveness of the wooden finish for a long time, protect it from dampness and direct moisture;
- Installation should begin with repairing the floor, if not the entire balcony, then certainly the part where the bottom of the cabinet will be located;
- Elimination of all cracks and cracks, as well as additional insulation of walls and floors will protect against drafts and sudden changes in temperature conditions.
Such simple introductory instructions help preserve the wood paneling so that it will delight you with its natural beauty for many years.
Painting a clapboard door
The lining is coated with a layer of varnish to preserve the structure of the wood.
High-quality lining is usually not painted, but covered with a layer of varnish several times. Varnishing shows the texture of the design. If the wood is too light, use stain to reveal the wood.
Painting is carried out in the following cases:
- peeling of the old layer;
- tarnishing of lamellas;
- ingress of fat, oil, dye, the appearance of fungus and mold;
- interior renovation.
Painting is required if it is necessary to level the surface, repair chips, fallen knots, or large cracks. Use Senezh Neo or Frost to whiten darkened areas on the slats. Degrease the surface with acetone solvents. Roughness is smoothed out with sandpaper.
Use wood putty, press it into cracks, places where knots have fallen out, and after drying, sand it. The putty areas are then primed and painted.