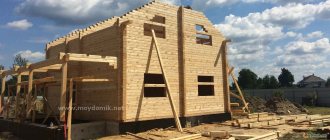
You can find a lot of building materials on the market, but producing laminated veneer lumber with your own hands on a non-industrial scale more profitable and easier. In addition, if you make it yourself, you can make glued material in the size you need and in small quantities. Compliance with all requirements during production allows us to obtain laminated insulated timber that is not inferior to industrial timber or superior to it in a number of ways:
- three times warmer than a log;
- to warm a house made of this material, you will need almost three times less energy;
- stronger than other wooden building materials due to the lintels;
- the appearance of cracks on the surface is excluded;
- there is no need to finish the walls - laminated veneer lumber looks good;
- shrinkage of the house will be only 1%.
Types of insulated laminated veneer lumber
The advantage of this material is that it combines the features of wood and artificial materials . Its texture, good thermal insulation and durability are equal or even superior to the properties of other building materials.
Insulated timber comes in several types, differing in material and design. A popular insulation material is ecowool. This is a cheap material that retains heat well. But its main disadvantage is that it can easily be damaged by rodents. Also, laying ecowool requires a special tool, which increases construction time.
A more convenient and popular insulation is polyurethane foam; it is easily installed in glued building materials.
Flooring device on wooden beams
Installing wooden floor beams allows you to solve the following problems:
- achieve the required strength and rigidity of the floor;
- ensure that sound insulation and heat transfer resistance correspond to the level necessary for energy saving;
- maintain compliance with established standards for vapor and air permeability indicators.
- Floor beams made of timber. Most often, rectangular beams are chosen for the manufacture of beams. The height of the beam should be in the range of 140-240 mm, and the thickness 50-160 mm. In this case, the rule is followed: the thickness of the beam is at least 1/24 of its length. Professionals note that greater strength is inherent in a wooden beam with an aspect ratio of 7:5.
- Floor beams made of logs. Economically more profitable solution. The log has high resistance to loads, but also low resistance to bending. The log is only suitable for use if it has been kept in dry conditions for at least one year.
- Floor beams made of planks. The use of boards leads to a reduction in the amount of lumber consumed for the flooring device. But it is worth noting that in this case the fire resistance of the ceiling, durability and sound insulation are reduced. Typically, the board is used in the construction of attic floors. To strengthen the boards, you can use the technique of splicing two boards together along their length. Then the total cross-section will correspond to the load level. This design can withstand a load 2 times greater than timber or two boards laid close to each other. In this case, fastening is carried out with self-tapping screws or nails, fixed in a checkerboard pattern in 20 cm increments.
We invite you to familiarize yourself with: The best models of electric stoves for baths and saunas
We recommend! Detailed description of wooden floor beams - types, types, calculation of beams for bending, strength and load.
Foam timber
Polyurethane foam has a number of advantages. Thanks to its low thermal conductivity, the house retains heat longer . It occupies all the space inside the frame. Thanks to this, cold air practically does not penetrate into the premises, that is, there are practically no cold bridges.
But in order to properly use insulated timber during construction, you need to organize good internal ventilation of the walls, because it has low vapor permeability. For this reason, glued material can quickly lose its properties.
Advantages of I-beams
I-beams are a type of wooden floors. During the manufacturing process, they acquire a T-shape on both sides. That is why this beam got its name I-beam. In order to make such a building material at home, it is necessary to use laminated veneer lumber. Due to its size, this beam has very light weight and excellent strength characteristics. I-beams are the optimal material for the construction of low-rise structures.
Such wooden floors ensure the lightness of the entire structure. In addition, they will help save quite a significant amount of money and precious time.
Almost all people who have used floors of this type note the visible advantages of such beams:
- eliminating the audibility effect that is usually inherent in wooden floors;
- there is practically no deformation, which is inevitable over time;
- thanks to the dimensions, which are clearly fixed, extremely convenient to use;
- has a high degree of strength;
- perfect for completely different surfaces, such as ceilings, floors or walls;
- very reasonable price;
- There are almost completely no various reactions to water, therefore, such an overlap does not rot;
- this material has low mass;
- high degree of wear resistance;
- reduced wood consumption;
- when applied, additional costs are almost completely minimized.
And these are not all the characteristic features that can be emphasized by reading the reviews of a large number of people.
Many people who decide to build a structure from wooden floors prefer to purchase materials produced in a factory. But few people know how this process occurs. Initially, a milling machine is used in production; with its help, the necessary trench is made, as well as grinding.
After this, the product is sent for OSB cutting, this allows you to most accurately cut parts with the required parameters. The next step is gluing the resulting parts. Finally, a specialized press is used. Agree, if you wish, you can complete this process yourself without much difficulty.
It is quite possible to make this building material yourself. To do this you need to prepare:
- special timber;
- roulette;
- a good circular saw;
- high-quality wood glue;
- oriented strand board or OSB;
- channel;
- clamps;
- sandpaper.
In addition, if you decide to make such a beam on your own, then it is important to strictly follow all the stages and sequences of performing this work:
- Carefully select the required bars and perform the calculation. It is important to take a fairly large beam, thanks to this you can ensure the reliability and strength of the structure being built.
- Next, you need to cut out the upper and lower parts from these bars, provide them with a special groove that will run through the center of the product.
- To make these wooden floors, it is best to use a powerful circular saw; this will allow you to complete the work with the highest quality and efficiency.
- Properly set the desired depth of the groove, most often it is ten percent of the total length of the oriented strand board; if you follow this simple rule, then it is possible to achieve ideal fixation.
- It is extremely important that the furrow does not have any serious defects, this will significantly save time and avoid difficulties in the future.
- Cut the beams and also sand them.
- Apply special glue to the trench, then immerse the slab in it.
- Clearly fix the stiffener.
- After the 8th point, start pressing the I-beam.
- Pressing usually occurs using a special press, but you can also use a channel. This procedure will help to compress the resulting beam well.
- Leave the resulting wooden beam for some time for the glue to dry completely.
We suggest you read: How to calculate the angle of a roof
It takes approximately half an hour to complete this work, but if you are making a large number of wooden I-beams, then over time the whole process will take no more than 10-15 minutes.
An I-beam, like a wooden floor, has a considerable number of advantages over other materials; in addition, each person can save money and easily make it themselves, which significantly reduces material costs for construction.
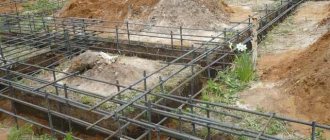
Floors between floors, basements or attics are structurally arranged according to two schemes - a beamless floor (based on the use of a monolithic slab), and a beam floor (wooden floor beams are used). They make ceilings to separate interfloor spaces, as well as to separate rooms from the basement and attic. Beams can be made from various materials, such as wood, cast-in-situ reinforced concrete or metal purlins.
Flooring device on wooden beams
Construction of insulated profiled timber
Insulated laminated veneer lumber can be single-chamber or packaged. The single-chamber one copes with heavy loads without problems - even taking on the entire weight of the house, it does not deform. It consists of two boards, which are fastened together with jumpers so as to obtain the desired width of the product. The resulting frame is filled with polyurethane foam. Afterwards, an internal ventilation system for the walls is installed so that the glued layer can “breathe.”
Glued laminated timber with insulation is strong and has good thermal insulation, which is why it is in demand in the building materials market.
Packaged laminated veneer lumber has one difference from single-chamber laminated timber. Inside it has not only horizontal jumpers, but also longitudinal ones. Thanks to this design, “honeycombs” appear in it, into which polyurethane foam is added. This type of building material is also called insulated double timber construction.
The use of polyurethane foam in laminated timber makes it possible to avoid special preparation of the wood from inside the structure. The main thing is to make sure that the sides that will be glued together are dry and clean, then the fit will be tight, which will make the glued building material durable.
Do-it-yourself I-beams made of wood
Frame construction technology is one of the most popular in the construction market today.
In order to build a structure using this method, it is necessary to pay special attention to the quality of materials that will be used in the future. I-beams are mainly used for these purposes. Floors are one of the elements of a house being built, which greatly influences the strength of the building. Depending on the material, they can be made of wood or reinforced concrete (monolithic, prefabricated, precast-monolithic). For the manufacture of a structural element in private low-rise construction, wooden blocks, boards or logs are often chosen, since the construction of wooden floors is less labor-intensive during installation and can be performed without special skills.
Manufacturing technology of insulated laminated timber
To manufacture it, you need carpentry equipment, suitable materials, knowledge and adherence to technological processes, and attention to the production process.
- Insulated timber begins to be produced by sawing. The log is sawn and lamellas are selected - boards that will become the base. The accuracy of the dimensions of the boards is important.
- After sawing, the lamellas are selected according to their length. Each board must be inspected and the quality of the wood assessed. They are then sorted by type.
- Afterwards, the boards are sent to dry. Recommended humidity – 8−12%. The better the boards are dried, the less the glued material will shrink after construction.
- When the slats are dry, they need to be planed. Once the boards have reached their final shape, they are sorted again. There is a strength standard that must be met.
- There may be areas in the tree that need to be removed. You need to look for cracks, knots, rough edges and slopes on the boards. If such a defect is found, the board must be trimmed and marked.
- The sizes of the lamellas may differ, so you need to adjust them to a single standard. In order for the lamellas to have identical ends, they need to be milled.
- After milling, the boards are sent for trimming so that the lamellas are the same length.
- The most important part of the work is gluing. For this, a special press and glue are used, and polyurethane foam is placed between the wood. The press not only helps to reliably fasten boards together, but also to produce products with different cross-sections.
- The final touch - the glued building material remains to be planed, milled and sanded.
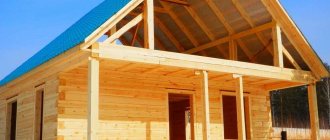
A house built from such material no longer needs to be insulated and there is no need to devote time to interior and exterior wall decoration if the wood is impregnated with special solutions during the production process.
Bonding and crimping
For gluing, use any available wood glue; for timber intended for indoor use, it is better to choose environmentally friendly glue. The operation is performed at room temperature, in a ventilated area. Glue consumption is up to 10 liters per cubic meter of finished timber.
The lamellas are laid in a previously determined order, the glue is applied with a brush or roller, the thickness of the adhesive layer is up to 2 mm. The assembled structure is fastened with screw carpentry clamps located at intervals of 400-450 mm. It is recommended to place gaskets made of multilayer plywood measuring 12x12 mm under the clamp stops.
The time for complete curing of the glue is determined according to the passport data of the composition. After the gluing process is completed, glue deposits are removed on a planing machine, “steps” are eliminated, and the timber is given the specified dimensions. For finishing, use sandpaper or a sander.
Drying workpieces
Naturally damp wood contains physically and chemically bound moisture. Its gradual natural removal causes wood deformation, cracks and a decrease in volume.
For this lumber, only dry wood is used - 10-11%. To achieve such a low moisture content in solid wood, it is chamber dried. In special boxes under high temperature and pressure. There are also chambers with centrifugation, so water is removed from the lamellas even faster, and the remaining moisture is distributed evenly throughout the array.
But even now it is impossible to assemble beams from individual parts. Before gluing the workpieces, they are made smooth, this allows the lamellas to adhere to each other during further gluing. Not a single unevenness or roughness will go unnoticed, and modern precision automated equipment will bring the workpieces to the desired condition.
Installation of wooden floor beams
1. Calculation of the cross-section (diameter) of a wooden floor beam taking into account the requirements of SNiP 2.01.07-85 “Loads and impacts”.
Calculated indicator of the maximum permissible load per 1.m2. is:
- for basement and interfloor ceilings - no more than 210 kg;
- for the attic - no more than 105 kg.
In more detail, the section is calculated taking into account the distance between the beams (see the table of sections of floor beams).
Table of cross-sections of floor beams
When calculating the length of the beam, it is important to remember that wood is prone to bending.
How to glue wood correctly?
Carpentry adhesives are applied in a thin, even layer to both surfaces to be joined. The only exception is the technology of gluing wood with polyurethane glue: in this case, the material is applied to one of the surfaces, and the second is moistened (slightly moistened with water). Applying the compound in excess does not improve the quality of gluing in any way, but only leads to wasted material consumption and smearing of surfaces with squeezed out excess (by the way, this adds headaches at the finishing stage).
When gluing a tenon-groove joint, only the cheeks of the tenon and the walls of the groove are lubricated with glue. This gluing method provides the most reliable connection: the joint is glued “tightly”, not inferior in strength to the surrounding wood. Applying the compound to hangers does not improve the quality of gluing; all you get in this case is just excess bleed through and a waste of time, which is especially valuable in complex multi-component assembly.
Useful videos
Characteristics and features of the material, tips and recommendations from a specialist, watch: Watch all the stages of laminated veneer lumber production - from sawing timber and drying blanks to cutting corner joints and coating with protective compounds: In the video below - the advantages and disadvantages of houses made of laminated veneer lumber, assembly features: Essential The advantages of laminated veneer lumber make it a popular and effective building material for the construction of durable buildings. The high price is paid off by the beautiful appearance of the building on the outside, and the comfortable and cozy atmosphere inside.
Imitation as a decorative finishing option
Quite often, to create a certain style or interior atmosphere in the interior of a house, imitation timber is used with your own hands. This approach makes it possible to achieve an almost complete visual analogy with real timber and has a number of advantages:
- Imitation can be performed on a surface made of any material;
- Wood consumption is significantly reduced, and, accordingly, financial costs and time for implementation;
- Such finishing can be done after the construction of the house at any time, both inside and outside.
It is quite easy to make a set of decorative elements for such an imitation at home. To do this, you will need a pre-calculated volume of boards with a thickness of at least 50 mm, as well as an electric plane and a sander.
The manufacturing process will be as follows:
- Using a plane, you need to smoothly round the edges of one of the sides of the board, giving it the rounded shape that a beam has;
- Then, using a sander, you should sand everything thoroughly, removing all the blemishes and marks from the plane.
A board processed in this way can very realistically imitate not only timber, beams and ceiling beams. To achieve complete similarity, in the corners where the planes of the walls meet, the boards must be shifted relative to each other by half their width, simulating cutting the corner of a log house.
If desired, such a “timber” can be tinted to resemble valuable wood species, further enhancing the imitation effect.
Adviсe
If you need to make small workpieces, for example, for repairing some furniture, a wall shelf, a drawer, a kitchen countertop, when it is not possible to make grooves or quarters, then you can glue it onto a smooth truck. And here you may need a set with center markers. This is a relatively inexpensive thing, but a very good assistant.
If your task is to assemble several dozen boards so that the panel looks like a single whole, then you should not use wide blanks for this. Because wide pieces can become deformed when the humidity of the environment changes and this will be very noticeable.
Note: The finished laminated veneer lumber will not deform if everything is done correctly. But maybe. This can be avoided by changing the direction of the annual rings on the bars across the entire width. If, of course, you take a straight board without a flaw, then the process will be much easier.
Gluing must be done so that the joints along the length are almost invisible.
When preparing the workpieces, you need to carefully align the workpieces to a ninety-degree angle. The edges should be smooth and crisp. In order to level the workpieces, you can use a plane or a circular saw.
Formation of cracks
Time inevitably ages any wood material. If, during the production of wood, the timber has been prepared in accordance with technological standards of drying, gluing and other treatments, then the process of crack formation will be minimal.
In addition, it is important to consider the color property. The darker the walls, the more intense the cracks will appear, especially on the south side of the house.
Content
When building a private house, when you construct an interfloor ceiling using wooden beams with your own hands, the success of the project largely depends on the correct choice of building material. The beams, which support the entire structure, not only bear their own weight - they are pressed by the mass of the flooring and are affected by operational loads.
Flooring in the house
For such purposes, it is recommended to choose coniferous or larch wood, since such material has better strength compared to deciduous wood. Bars, boards or logs must be dry - humidity not exceeding 14% is allowed. Typically, lumber acquires such moisture content within a year when the correct storage conditions are created.
Wood moisture measurement
Beams should not have a large number of knots; it is advisable to reject timber that has pronounced cross-grain or curling - the fibers should be located along the beam or board. It is good if the lumber has been treated with an antiseptic and a composition that increases the fire resistance of the wood.
Depending on where wooden floors are used, it is necessary to select bars or boards according to the cross-sectional dimensions, on which the reliability of the structure depends. If an interfloor platform is being built, then the same requirements are imposed on the section, but when an attic is being built, the thickness of the beams may be less. When selecting material, you can be guided by tables that make it possible to calculate the cross-section of the boards, logs or timber used.
Calculation of the beam cross-section depending on the span length with an approximate load of 350-400 kg/m²
Calculation of log diameter depending on the span length with a load of 400 kg/m²
Although you can avoid increasing the load on the floors if you do not plan to place a large amount of furniture or other interior items in the room. In this case, another table will help, helping to select the cross-section of beams, taking into account the load on the floor covering in the room.
Selection of beam cross-section depending on the load and span width
Having chosen the material correctly, we begin to install the interfloor flooring. A properly made wooden floor in a house ensures the strength of the entire frame of the building, and for this it is necessary to accurately measure the length of the beams and accurately position them.
From the material selected according to the cross-section, beams with an exact size are prepared, including the “margin” distance, which will play the role of supporting the structure on the load-bearing walls. For support, it is necessary to use at least 10 cm of timber, and at least 2/3 of the wall thickness is usually used as a supporting platform.
The length of the span in which the ceiling is laid should not be more than 6 m for safety. The ideal distance to be covered should be 4-5 m. When preparing a house project, the designer tries to arrange the load-bearing wooden structures so that the beams are parallel to the smaller side of the room or buildings.
When calculating the step with which prepared bars or boards are laid, it is necessary to use the data reflected in SNiP 2.01.07-85. According to this document, you need to be guided by the following values of the permissible total load:
- for interfloor ceilings, including basements 350-400 kg/m²;
- for an unloaded attic space 130-150 kg/m²;
- for the used attic space up to 250 kg/m².
Calculation of the distribution step of bars or boards
To correctly distribute the slabs, you can use a table for calculating the pitch, which allows you to make the ceiling of the second floor on wooden beams sufficiently strong.
Distribution of beams under the floor
The beams must be carefully distributed, positioning them strictly horizontally and parallel to each other. The spacing of the bars or boards should be the same over the entire area.
The permissible deflection of the flooring should not exceed 1/350 of the length of the beam, that is, for 3.5 m of the length of the beam, the deflection should not be more than 10 mm. If the span is large, and the cross-section is not enough to create the necessary strength, you can install vertical columns and build additional load-bearing walls. When installing additional columns or load-bearing walls, special perforated fasteners are used.
In places where the bed comes into contact with load-bearing elements, it is necessary to lay insulating materials, which, for example, include damper tape. You can use several layers of roofing felt or sheet rubber, which will also serve as waterproofing.
Perforated beam support
Often they began to use special brackets made of perforated metal, thanks to which the installation of beams can be carried out end-to-end with a load-bearing wall, and the joints of crossbars and short bars can be assembled. For example, it becomes clear how to make a second floor ceiling with an opening for a flight of stairs or a passage for a chimney.
We suggest you read: How to properly install light in a bathhouse with your own hands
This connection has certain advantages:
- The T-shaped unit is reliable;
- installation is done quickly and without cutting out a seat in the timber, which preserves the strength of the structure;
- there is no need to create a cavity in the wall to support the beam, which does not violate the thermal insulation properties of the wall;
- it becomes possible to use beams of shorter length than the width of the opening being closed.
Installation option with supports
Next, they attach the flooring with the necessary layers of insulation to the installed layers. The number of layers of insulation and the type of materials used depend on the type of floor.
Types of floors and their arrangement
Houses have a basement and attic space, and often have an attic. The type of overlap depends on this, for which different requirements are imposed in different cases.
There is the following division of load-bearing vaults by type:
- An interfloor ceiling that does not require good insulation, since it separates residential areas. The main requirement is good sound insulation.
- Attic, separating living quarters from the attic. Depending on whether the attic (attic) is heated or there is no heating in the room under the roof, the flooring is made of the necessary insulating material. But a vapor barrier layer is required to prevent the formation of condensation.
- Basement or basement, serving as the boundary between the basement. Here, thermal insulation comes first, cutting off the cold coming from below.
Attic floor made of I-beams
Depending on the requirements for the flooring, layers of insulation, vapor barrier or soundproofing materials of a certain thickness are added.
Wooden floor installation
If the vault is mounted to stone walls, it is necessary to wrap the ends of the beams with roofing material or treat them with resin, providing waterproofing. The opening in the wall, which is used as a support for the beams that support the wooden floors between floors in a brick house, is created in such a size that there is a gap for ventilation. This will avoid the formation of condensation and preserve the wood from destruction longer.
Procedure for DIY installation:
- During the construction of a house, not forgetting how to install floor beams, niches with a depth of 15 cm to 20 cm are installed in the walls at the required height. It is especially convenient to create niches when building walls made of double silicate brick.
- Before installation, the ends of the beams are cut at an angle of 60°-70° to improve its ventilation after installation, and additional treatment is carried out with special compounds.
Making a Beam End Cut
- The ends are lightly treated with waterproofing, without touching the ends to ensure that moisture escapes from the wood. If necessary, treat the beams with an antiseptic and an agent that increases fire resistance.
- Place beams or boards in niches in such a way that a gap of about 5 cm is maintained between their ends and the wall for ventilation.
- Every third or fourth beam is fixed to the wall with an anchor bolt.
- The existing gap between the wall and the timber is filled with a sealant.
- Next, 50x50 or 40x40 bars are sewn perpendicular to the slabs, creating a lathing for attaching wooden panels or lightweight concrete panels.
- From below, boards, panels or sheet plasterboard can be nailed to the beams.
- When constructing a wooden floor between floors, the required insulating layer is placed on wooden panels. In the case of an attic, they can use loose insulation such as expanded clay. You can use the option when a clay-sand layer is poured, on top of which a layer of sand or slag is distributed.
- Logs are attached on top of the insulation in increments of 50-70 cm.
- Planed boards are nailed to the joists.
- As an alternative to joists and planed boards, you can make a concrete screed with reinforced mesh.
- The final finishing of the flooring and ceiling is carried out.
How to make the ceiling between floors in the house depends on what material the building is built from. There are also certain nuances in the construction of a building with wooden walls.
Do-it-yourself installation of timber beams is carried out according to peculiar beacons - initially the outer beams are mounted, focusing on which the intermediate ones are then attached. When fixing the outer beams, take into account that they should be located no closer than 5 cm to the nearest wall. Using this gap, a layer of insulation is placed.
Niches for support do not need to be prepared in advance - the necessary recesses are cut out in the constructed walls using an electric or chainsaw.
Niches for ceilings in wooden walls
Step-by-step installation of flooring in a wooden house:
- Before installation, the ends of the leg are trimmed at an angle of 60°-70° to improve its ventilation after installation, and additional treatment is carried out with special compounds.
- Having treated the ends of the bars with bitumen and wrapped them in roofing felt, they are placed in niches. Starting laying from the outer beams, continue laying the intermediate beams, checking the horizontal position with a level.
- During the installation process, every third or fourth beam is attached to the wall using anchor bolts or other fasteners, such as staples.
- Then, 50x50 or 40x40 bars are fixed perpendicular to the beams, preparing the lathing for mounting wooden panels.
- Subfloors are sewn on top, for which unplaned boards or wooden panels are used.
- When installing floors, sheet material or light boards are nailed from below.
- An insulating layer is fixed to the subfloor, which in each case performs a specific task. If you are installing a 1st floor ceiling on a house, it is necessary to lay a thermal insulation layer to protect against cold from the basement. And when laying the floor on the 2nd floor, it is enough to ensure good sound insulation.
- Logs are sewn on top of the insulation, to which planed boards of the finished floor are then attached. Instead of boards, you can use OSB board.
- The final top layer can be linoleum, ceramic tiles, laminate or parquet.
Tags: timber, hand, your own, plywood
« Previous entry